


Rustic Hanging Industrial Chain Shelf
Every once in a while it's fun to take on an uncomplicated project. When we were gifted a piece of 30 year old redwood board, we realized it would make the perfect industrial shelf for Steph's bedroom.
Take a look at the video to see how it came together or read on for a tutorial. If you need further information, please click the link to our website post. There you will find links to the materials and tools used.
Want to see our latest projects? Sign-up for our weekly newsletter here!
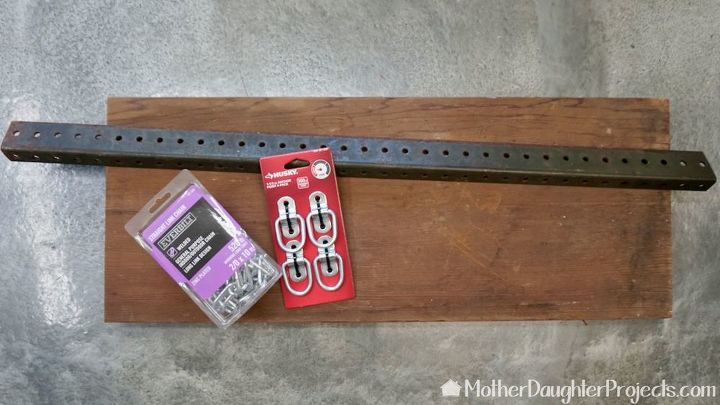
This is the 30 year old piece of redwood that was gifted to us. It was the perfect width for the shelf and only needed a little trimming off the ends. The angle iron was a curbside find, but it can be purchased. It comes in various styles and lengths. We bought chain, anchor points, and screws and anchors.
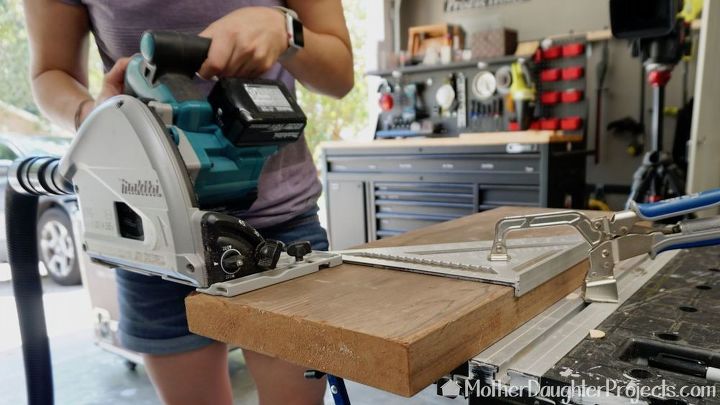
The first step was to trim the board to size. If you are purchasing a board, you can have it cut to size in the store, but if you have a circular saw, you can do this step yourself. The carpenter's square is being held in place with a clamp and is being used to keep the cut line straight.
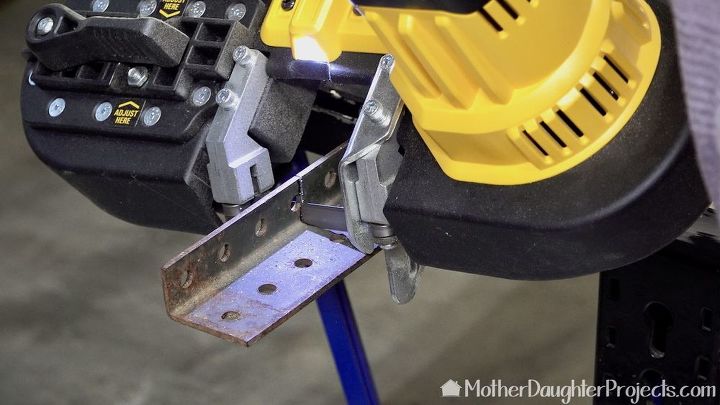
We marked where the angle iron needed to be cut and cut it with a portable band saw. There are many tools that can cut metal with.
If you don't have a way to cut metal, you can buy angle iron in a standard size to fit the board you are using. You may just have to adjust the length of your shelf to fit the standard size of the angle iron.
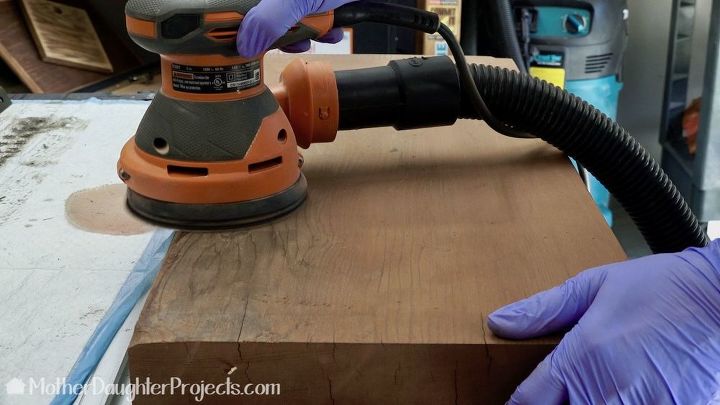
For a piece of wood that was as old as this one, it was in really good condition. We gave it a light sand. You could sand this by hand if you don't have a power sander.
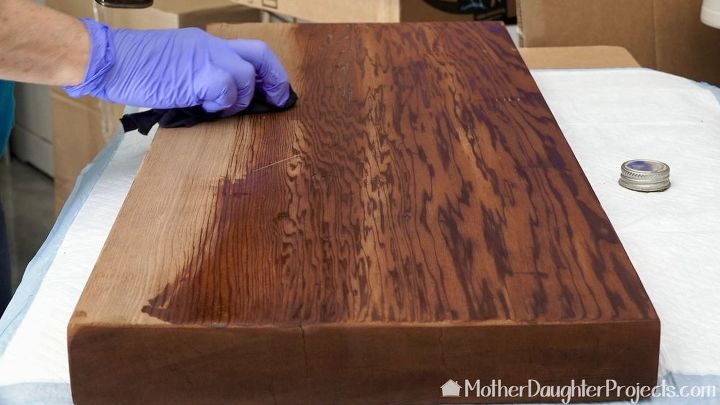
We finished the sanded board with a coat of Danish oil to bring out the natural color and grain.
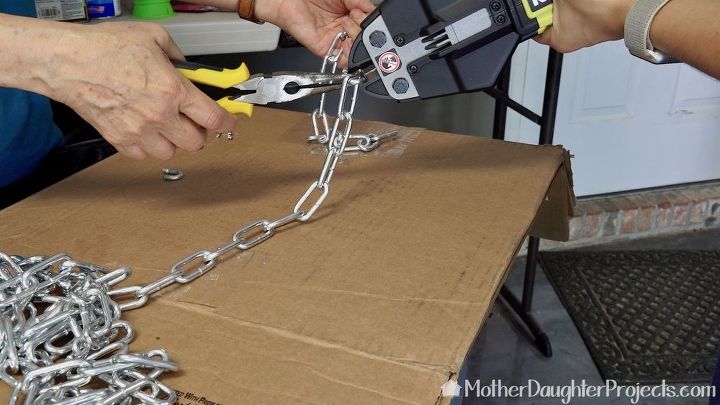
We cut the chain to basically the length we needed with battery powered bolt cutters. You can use manual bolt cutters or have the chain cut where you buy it. If you have it cut in the store you will also need to purchase 'S' hooks or quick links.
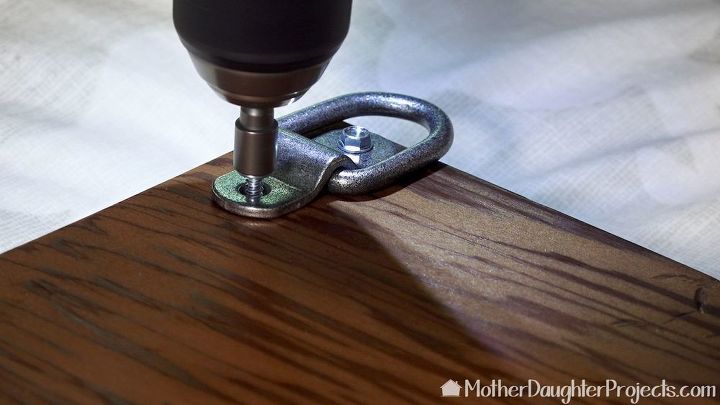
Two of the anchor points were screwed onto the front two corners of the shelf. The other two go on the wall.
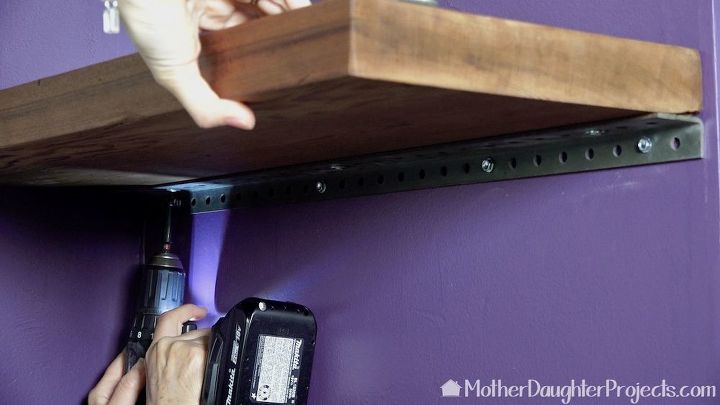
To assemble the shelf, the angle iron is first attached to the wall with screws and anchors and then the board is screwed onto the top edge of the angle iron.
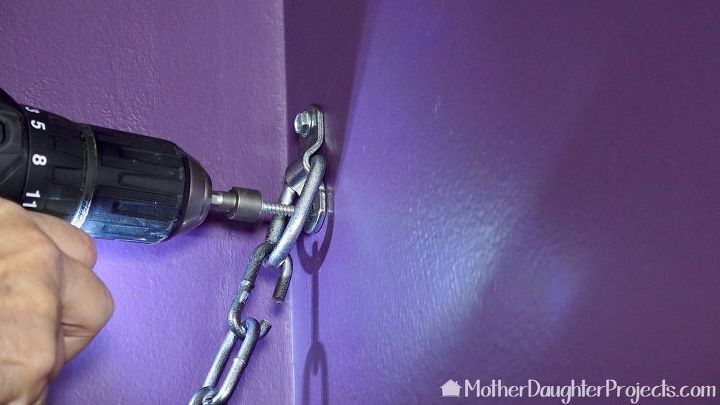
We cut a section out of the top links and bottom links so we could attach the chain to the anchor point. We attached the chain to the anchor point and then screwed the anchor point into the wall.
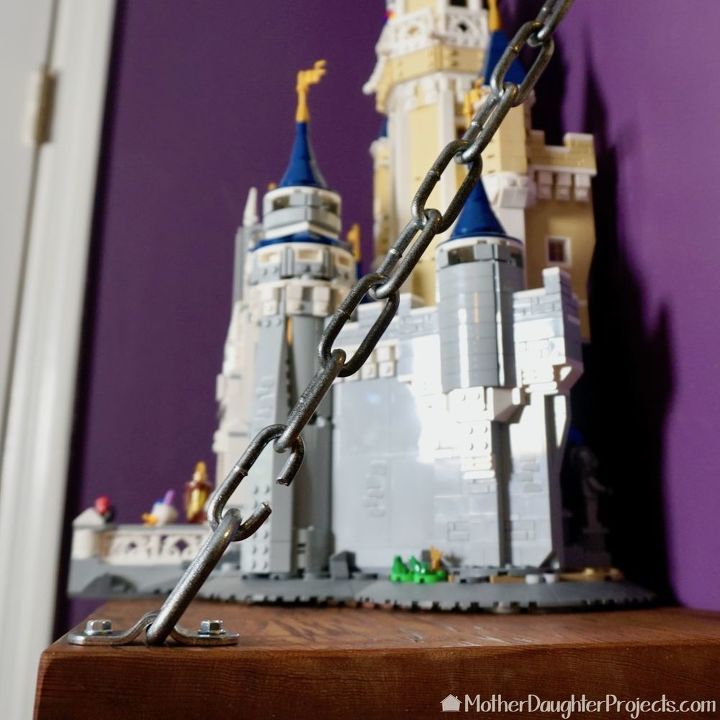
All done! The finished shelf looked like a drawbridge and needed a castle. We thought Steph's Lego castle was a perfect fit for the shelf!
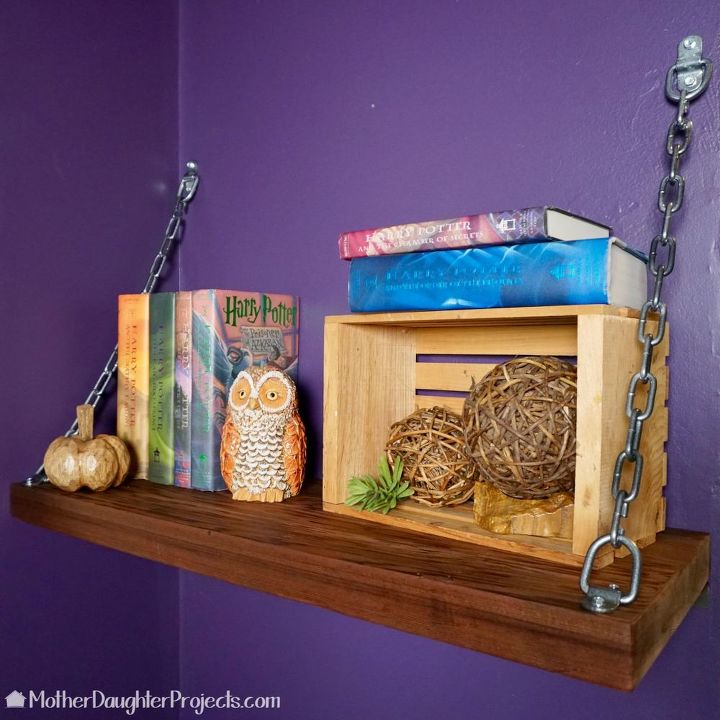
On the other hand, we also love this Harry Potter inspired decor. We can't choose which we like the best. What do you think? Let us know your favorite in the comments!
Resources for this project:
See all materials


Comments
Join the conversation
-
Harry Potter and cool!
-
Love that LEGO castle! I might do this, it looks great!


Frequently asked questions
Have a question about this project?
You mentioned in the resources S hooks. Where do the S hooks come in? Great idea!
Will this shelf take the weight of a few med sized pots? I’m thinking I’d do this for my daughters rooms and put up their plants on it
How do you kill flies in the house