


How I Added a Country Fresh Produce Stencil to My Old Bench
3 Materials
$30
1 Hour
Easy
Just a couple of weeks ago I fixed this old bench using wood putty and Dark Walnut stain. Of the three benches my grandparents made that I have this one had taken the biggest beating. But, with just a little elbow grease I had her looking almost like new again. After that I made a no-sew cushion for it complete with tufting and buttons! Check out the post all about it here.
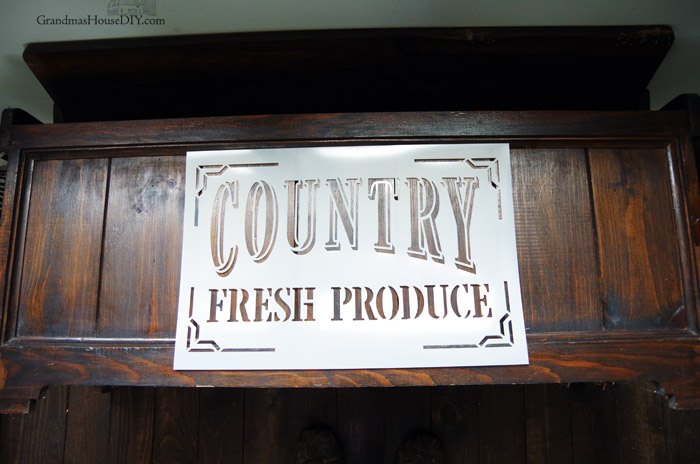
Stencil Revolution makes really neat and high quality stencils and they were kind enough to offer me two! My first post using one of their stencils was my Mother’s Day sign using their Greatest Mom in all the Land stencil. The other one I chose was this Country Fresh Produce stencil.
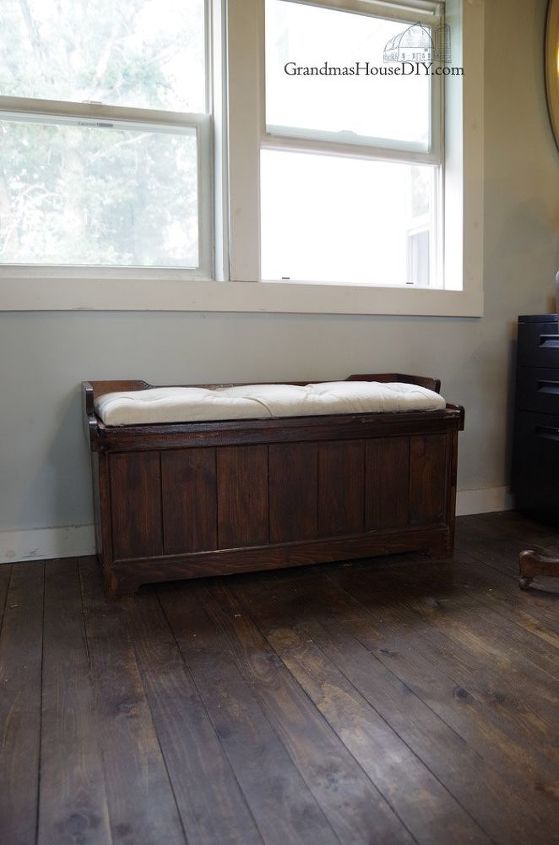
At first I was going to make a sign but after refinishing this bench last month I thought this would be a great opportunity to dress it up even more.
I’ve used regular brushes and paint for stencils in the past but dangit I was never very good at it lol. I went looking online and found the perfect solution on Amazon:
A Sharpie Oil-Based Paint Marker!
I had NO IDEA how this was going to work out but first I laid my bench down and cleaned the front of it really well.
I taped the stencil to the front, allowing it to be a little further down than near the top, so it would be for sure easy to see and read.
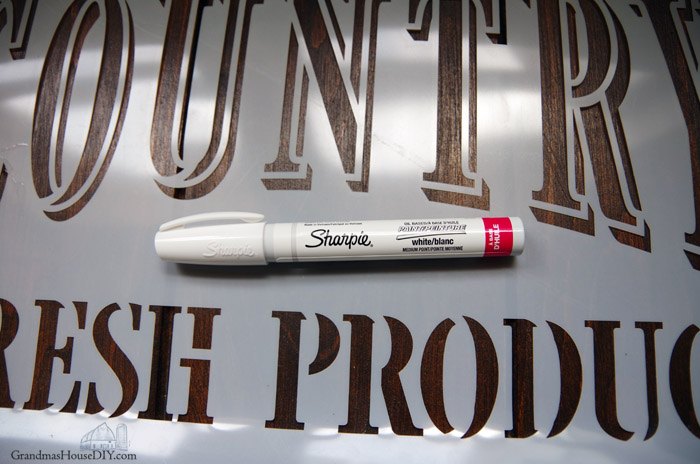
The pen requires a bunch of depresses on its point and lots of shaking but I ended up absolutely LOVING IT.
If I ever do another stencil I am definitely going to be using one of these markers instead of regular paint and a brush.
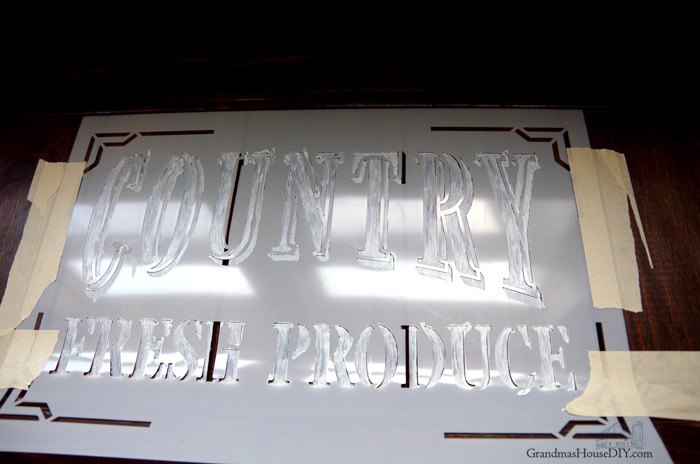
You can see in the photos it did not cover totally on first coat and that was cool with me. I loved how it ended up looking like it had been on the bench for a long time!
You can also see how I ended up moving the corners of the stencil to the corners of the bench. The paint marker dried so fast that I only had to wait a few minutes for the main stencil to dry before being able to do the corners.
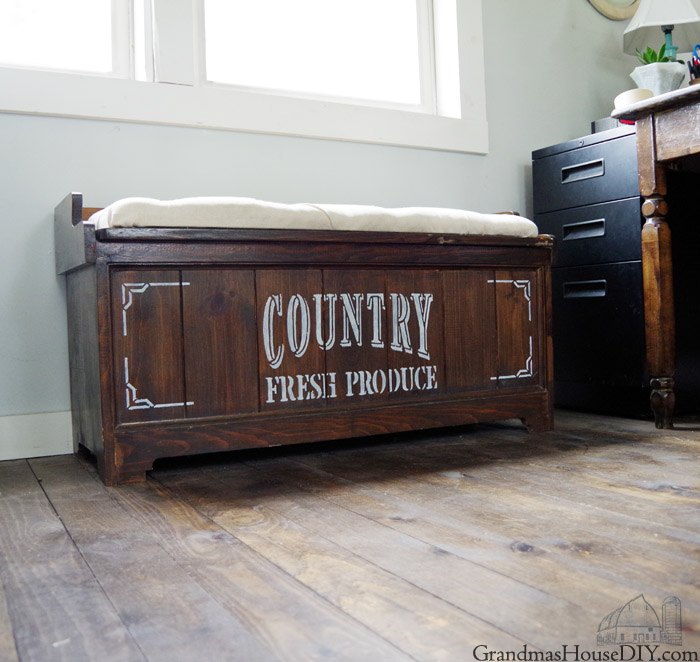
Love how this only took me about 30 minutes! I topped it with a coat of poly acrylic for safe keeping and called my cute bench complete!
Resources for this project:


Any price and availability information displayed on [relevant Amazon Site(s), as applicable] at the time of purchase will apply to the purchase of this product.
Hometalk may collect a small share of sales from the links on this page.More info

Want more details about this and other DIY projects? Check out my blog post!
Comments
Join the conversation
4 of 25 comments
-
I loved this idea... I think because of my decor I would like to tone down the paint on the bench first to make it look a bit more vintage and then do the stenciling!!! But this is a brilliant idea!
-
Love it, looks wonderful!


Frequently asked questions
Have a question about this project?