


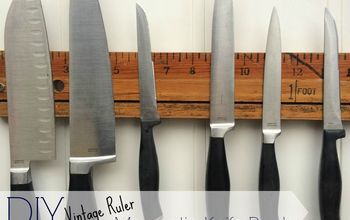
DIY Magnetic Bottle Opener
We wanted to make these bottle openers as a thank you gift for some friends and family who provided some extra help for our rustic wedding. They went the extra mile for us and we wanted to show our appreciation. They went the extra mile for us and we wanted to show our appreciation.
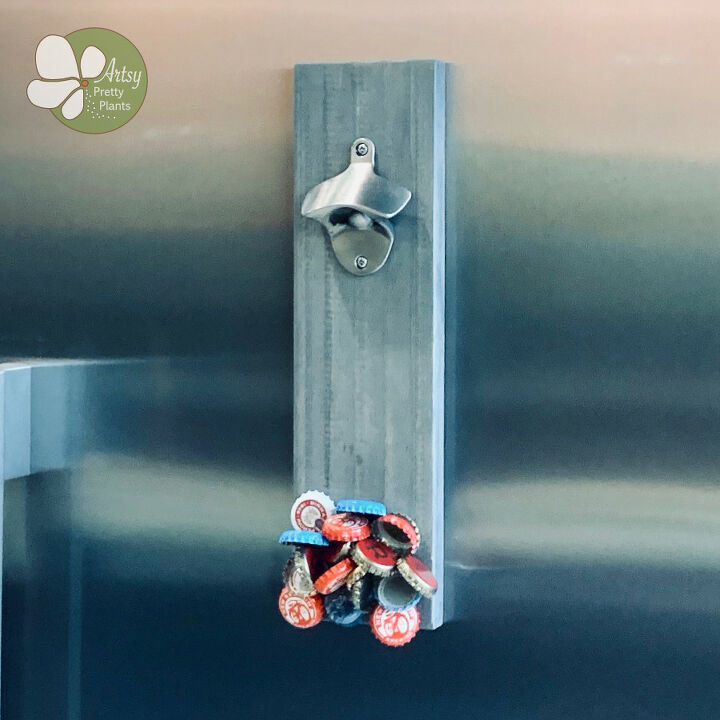
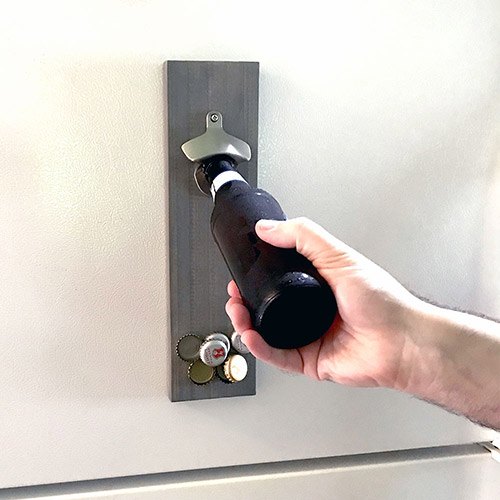
This magnetic bottle opener will hold handfuls of bottle caps and I designed it with a felt covering on the back so it won’t scratch a refrigerator. See how to make this super functional bottle opener below. To see my favorite thing we made for our wedding, check out the wine cork succulents here.
This magnetic bottle opener will hold handfuls of bottle caps and I designed it with a felt covering on the back so it won’t scratch a refrigerator. See how to make this super functional bottle opener below.
**This is a preview of the tutorial. To see the complete tutorial, please visit my website ArtsyPrettyPlants.com.** 
Step 1
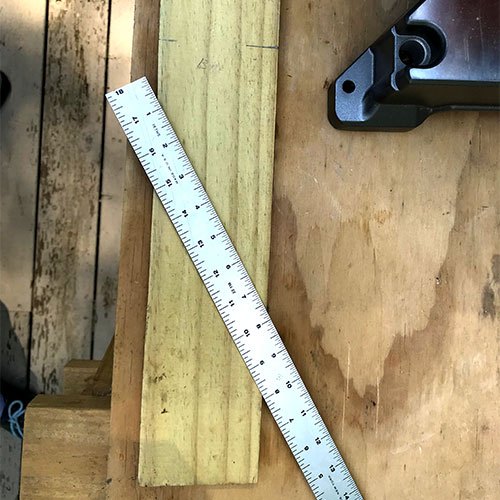
Using a miter saw, trim the board to 13″.
Step 2
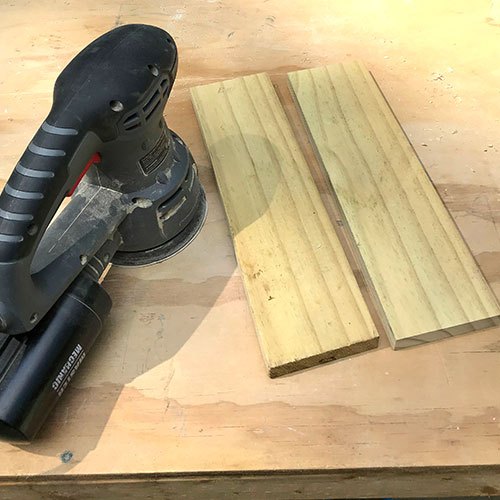
Now take the random orbit sander, sand the board with grit sandpaper and then run the sander over the sharp edges on the back of the board to soften it to help avoid scratching the refrigerator. Repeat with the grit.
Step 3
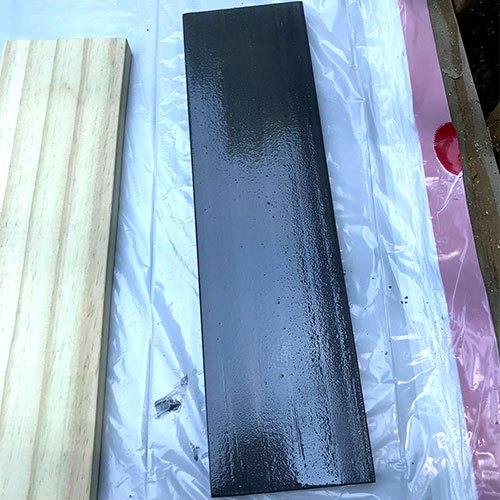
Follow the manufacturer directions to stain the board using the foam brush. Make sure to get the all edges. If you want the extra protection, then after 3 hours, coat it with the Polycrylic. Two coats are best, sanding between coats.
Step 4
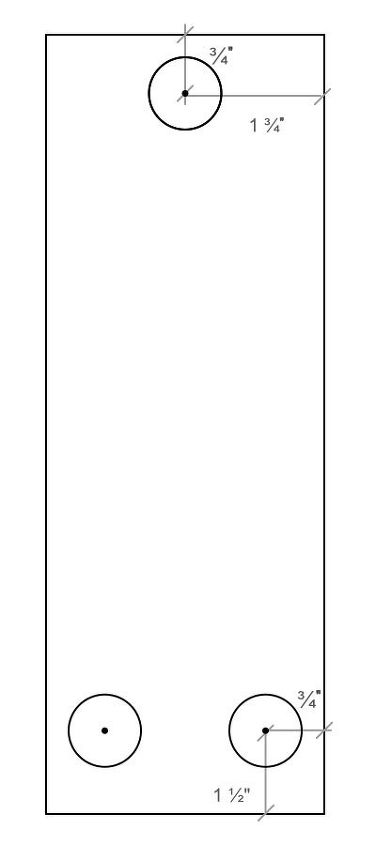
Once the board is dry, measure the locations for the drillings of the magnets. The top of the board will take one magnet. From the top edge, mark ¾” down for the magnet center point and 1 ¾” from the side edge.
Then measure the center of the bottom two magnets 1 ½” from the bottom edge and ¾” in from each side edge.
Step 5
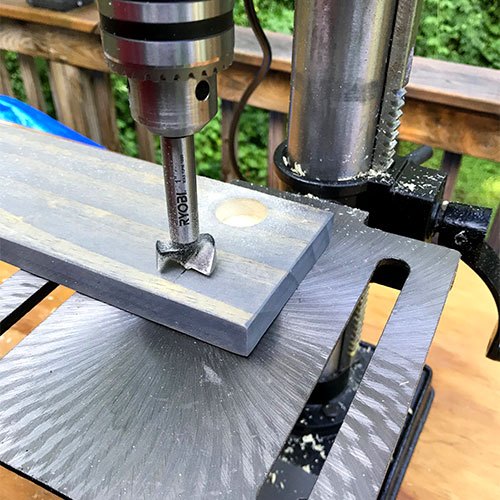
Drilling the holes. Bring down the drill head to center the bit. Forstner bits are a little difficult to use the blue tape flag stop method, so I ended up removing the flag I made. You may need to eye it.
To assess the depth, pull down slightly before turning on the machine, then go slowly, a little at a time so you don’t go to deep. With pallet wood, the thicknesses tend to be uneven and variable so you will have to assess the depth of each hole you drill.
Next, drill for the bottom holes, keeping the same depth.
Step 6
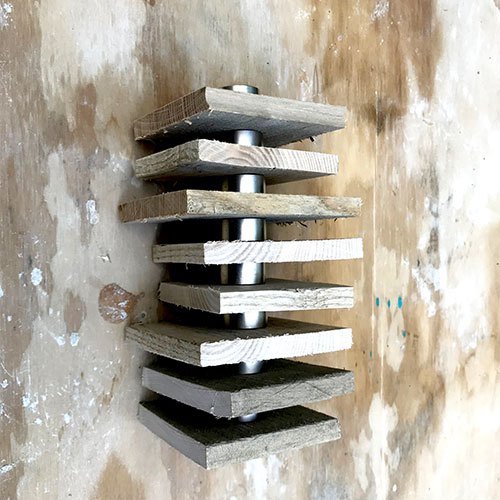
The next step is to glue the magnets. Caution: These magnets are seriously strong and you could very easily hurt your self. Handle with great care.
Hint:
I suggest separating the magnets with something and store them this way. I cut up some scrap wood and separated them and put these scraps in between each magnet. I keep these wrapped with packing foam and in a box.
.........................................
**For the rest of the tutorial, please come on over to see the post with complete images and details at ArtsyPrettyPlants.com!**


Frequently asked questions
Have a question about this project?