


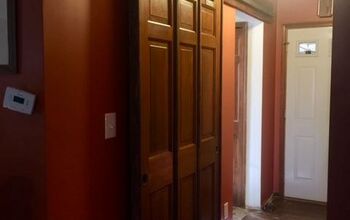
Updating an Old Door

We decided to live in an RV during the 6 months of our renovation. During that time we wanted to make the RV pretty, so we did many projects that brought the outdated camper to a bright and comfortable place to live. One of the projects we did was updating the old plain bathroom door. I originally painted it gray, but it still needed something. So, with a little help from some liquid nails and these ceiling tiles...the door went from plain to having instant character.

The Ceiling panels were already the size of the door width so this was easy to apply without too many cuts. The only cut we were concerned about was for the door knob. Fortunately, the tiles are easy to cut with a razor and after tracing around the knob we were able to cut the knob hole to fit perfectly.
Liquid Nails+Nail gun+caulk= easy door character!
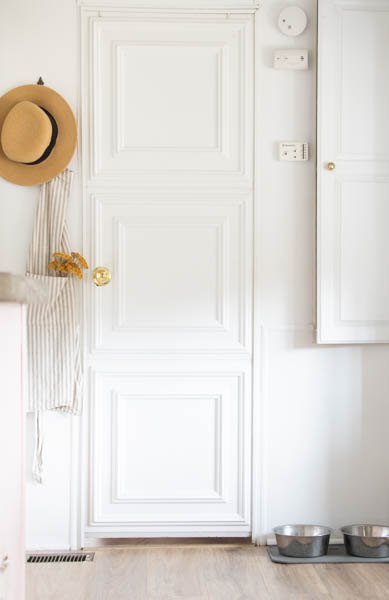
It's amazing the difference, and it just made the camper even brighter then it already was. The panels look expensive, and it fits so flush within the wall.
To see where to find your own ceiling tiles, head to the blog with a direct link to shop!
Comments
Join the conversation
-
This is genius! SOOO creative. A lot of people tack on molding. Takes a lot measuring, cutting, finishing. This is such a great solution. Looks amazing.


Frequently asked questions
Have a question about this project?
Ceiling tiles!? I would have never thought to use them for this purpose. Great idea and one I would like to add to our RV. Where did you find them?
Did you paint everything after gluing and caulking?