


Paint Pouring on a Side Table

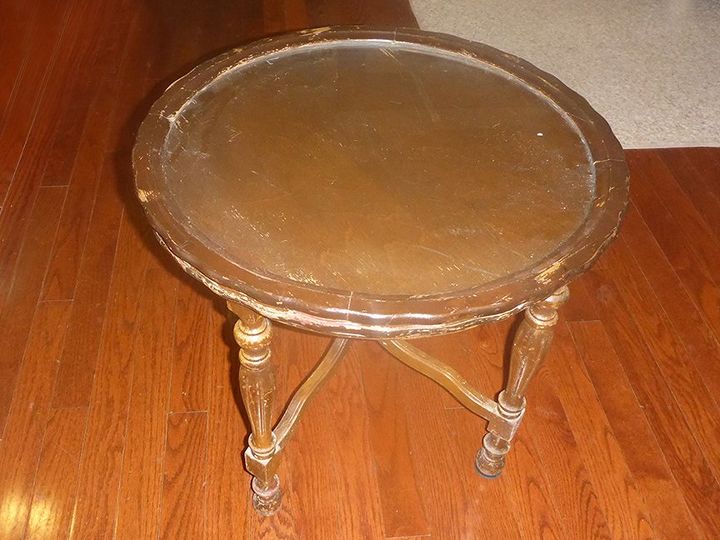
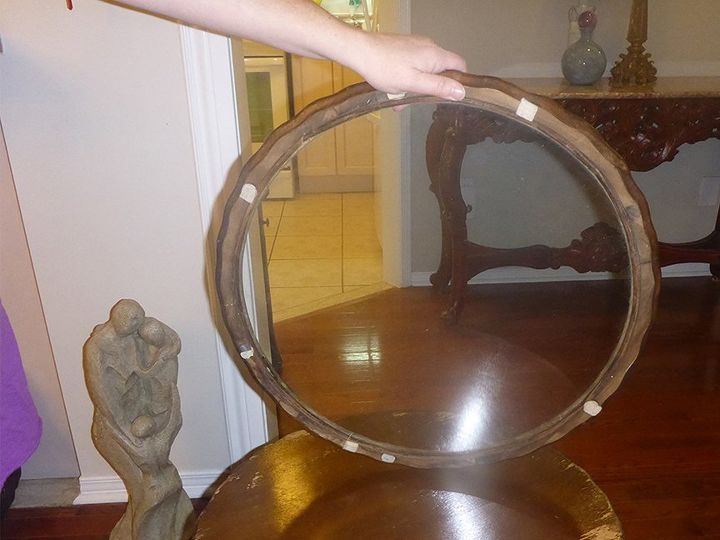
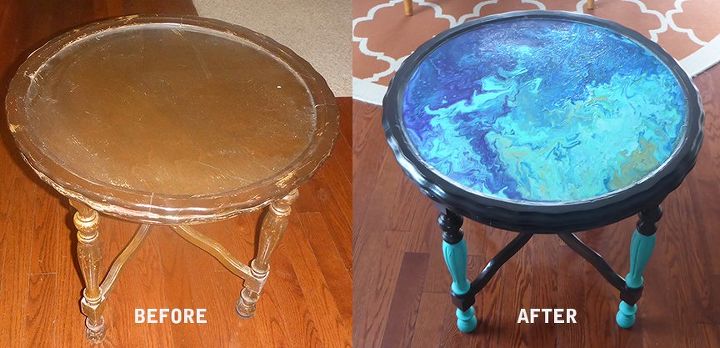
After watching videos about ‘acrylic dirty pours’ I really wanted to try it on a piece of furniture! I wanted something with a lip to avoid the big mess of letting the paint roll off the edges. So I went online and found an adorable little antique side table with a strange little framed glass piece that sat on top of the table -- for $10. Perfect piece for my project!
Step 1: Pouring medium
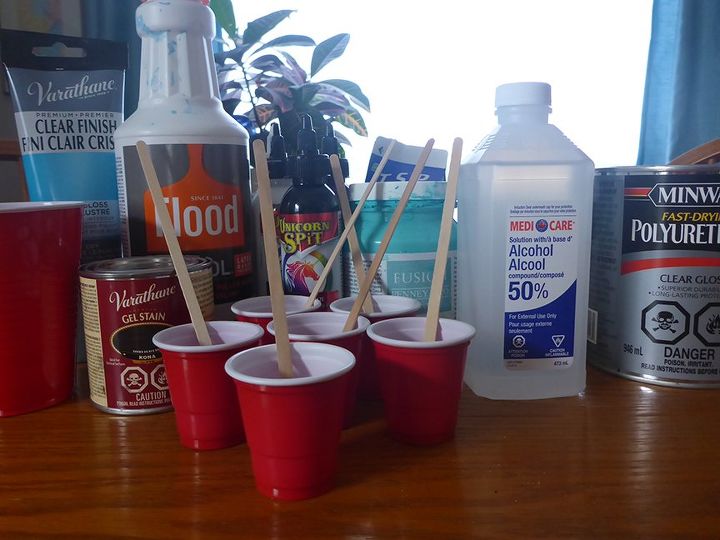
There are tons of videos online about acrylic dirty pour – but this is how I did mine. I mixed several colours, individually, in dollar store shot glass cups.
THE RECIPE FOR EACH COLOUR WAS:
- ½ floetrol
- ½ clear glossy polyurethane (I used a turkey baster to transport it from the can to the cups)
- Enough Unicorn spit or mineral paint to add the colour (it doesn’t require much paint)
- A few sprays of distilled water
- Stir all ingredients together (in their individual cups)
THE PAINT & SPIT COLOURS I USED:
- Fusion mineral paints - Azure blue, Liberty blue & Metallic Pale Gold
- Unicorn Spit – white, purple & black
Once I had all my individual colours set up – I poured them all into a larger cup, trying to keep them layered as much as possible (do not stir).
Step 2: The pour
I did the pour on the bottom side of the glass topper, so I wouldn’t need to worry about sealers or scratches in the paint during regular daily use.
I taped the wooden edges and cleaned the glass with rubbing alcohol.
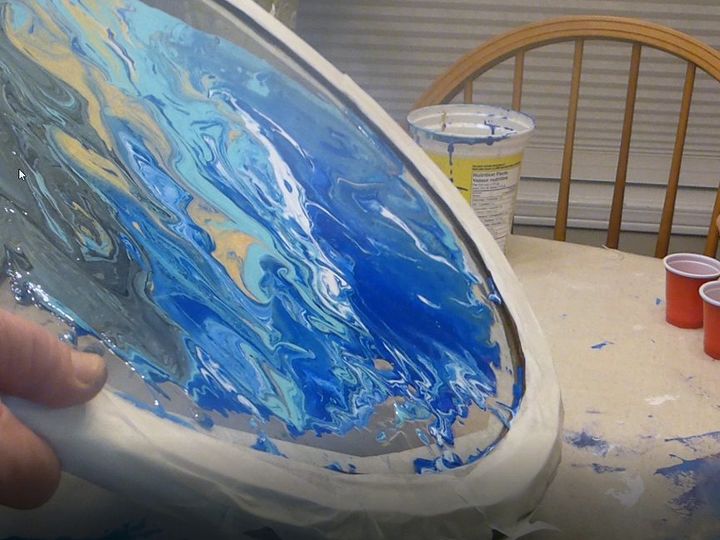
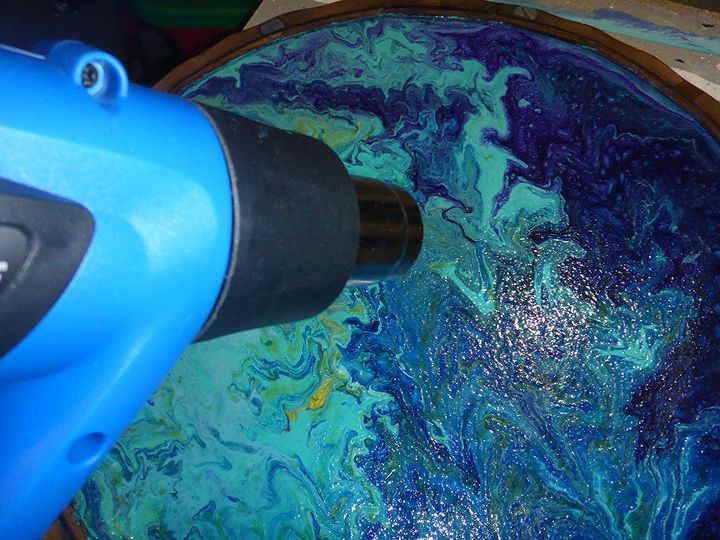
Then the moment of truth, I flipped the cup over on the glass to create a big pool of paint. Then tilted the glass from side to side to spread it out. Once I had full coverage I went over it quickly with a small torch to ensure there were no bubbles from the polyurethane.
After it dried I excitedly flipped the glass over to see how it looked. Whomp whomp whaaaa. It looked terrible on the other side. The darker colours had pooled at the bottom and had a big dark spot. And the whites and golds didn’t make it down that far at all.

Step 3: Change of plans
Because life is all about revising plans – I was now going to use the bottom of the glass as the top: So the next thing I did was seal the ‘pretty side’ of the glass with high gloss poly. I did 3 coats, with 24 hours drying time in between. I felt 3 coats may be over-doing it, but assuming that topper was fairly brittle given its age, I decided it was worth a few extra coats. After each application I went over it with a heat gun, on medium setting, to ensure no bubbles in the finish.
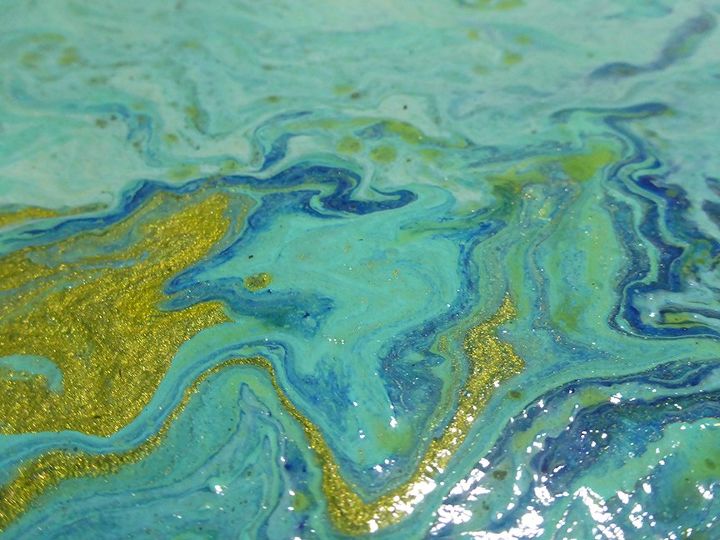
Turns out this was a happy accident – because the poly sealer made the colours pop!! It looked so much more vibrant! And it brought out the metallic shimmer in the gold.
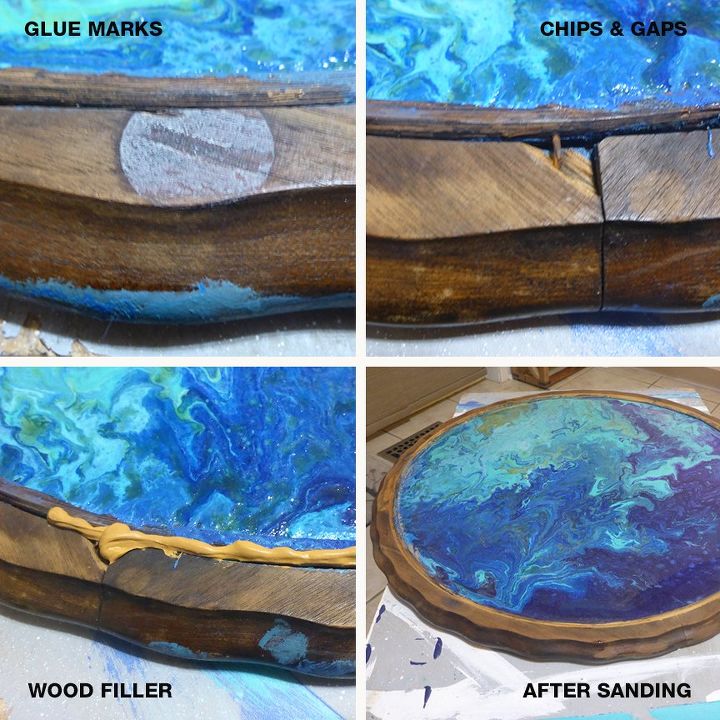
Step 4: The glass trim
Now that I was using the bottom of the glass I had an additional step of filling gaps and chips. And at some point the top was attached to the table using double-sided tape, so there were glue marks to get off as well. So I used wood filler and sandpaper to smooth everything out.
Step 5: Table base
Sanding: I used an orbital sander and then a final once-over by hand using 330 grit sandpaper.
Cleaning: TSP.
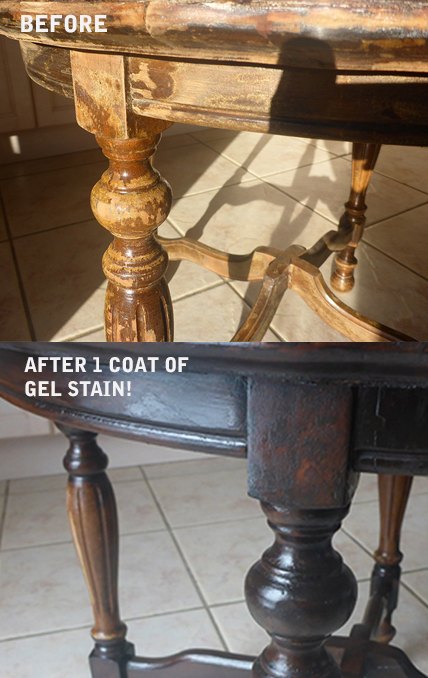
Stain: I used gel stain – the colour is named Kona. I had never used gel stain before. And after reading the label I became a little nervous, because it repeatedly said “meant for bare wood only” and that “all previous finish must be removed.” But I persevered and tried it anyway. I used a lint free cloth and applied it by hand. To say I was impressed is an understatement! It glided on like butter! And the colour was so rich! I only did one coat of stain! And no harsh chemical smell!!
Sealer: varathane clear finish, semi-gloss, 2 coats.
Step 6: Painting a portion of the legs
I wanted to add a little colour to the base and accentuate some of the wood details. After painting I placed the glass topper on it to decide if I wanted to darken the paint colour a little. I decided to do a colour wash using the same Liberty blue as the topper. I mixed 1 tsp of paint and 1 tsp of water and brushed it on, immediately wiping it off with a damp cloth afterwards so the original colour was still visible.
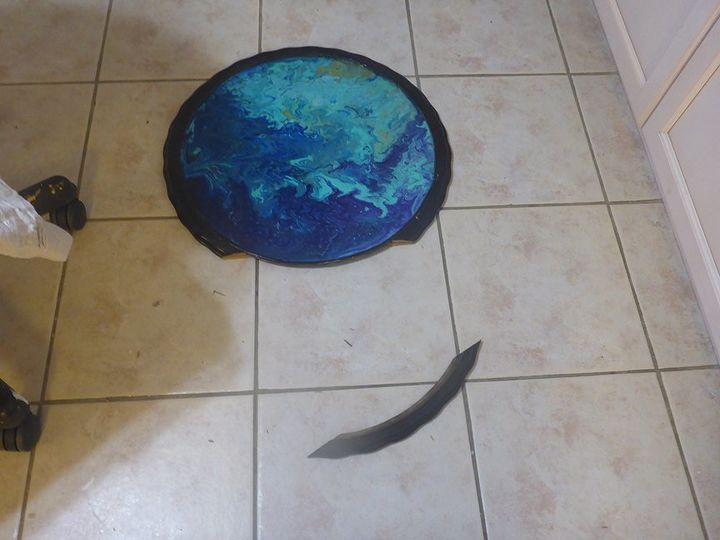
I lifted the table slightly to ensure I got the feet all the way covered. CRASH! Yes, that’s right! I forgot the topper was still sitting on the top. My glass masterpiece had just fallen three feet onto our ugly builder-grade ceramic tiles…
Step 7: Re-group!
So after a few minutes of trying not to cry, it occurred to me that the glass didn’t appear to have cracked?! Upon closer inspection I was stunned to see that while the wood trim splintered and cracked apart…the glass was still perfectly intact!!! Must have been all that poly?!
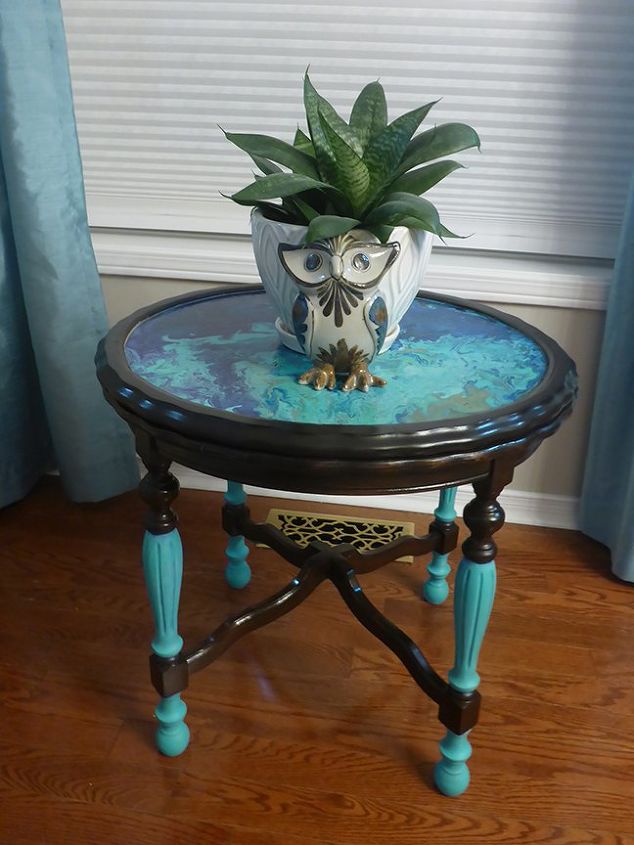
So I fixed the trim using wood glue, filled the cracks with wood filler, re-stained and re-sealed. Then I hot glued the glass into the table base.
I’m so happy to have this piece behind me. Factoring in the holidays and drying times, etc this project took 6 weeks! I’m ready to move on. But I am very happy with the way it turned out. The top has a really cool texture that gives it a little extra visual interest.
Note: I had most of these products on hand so I based my make-over cost on the quantity of each product used.

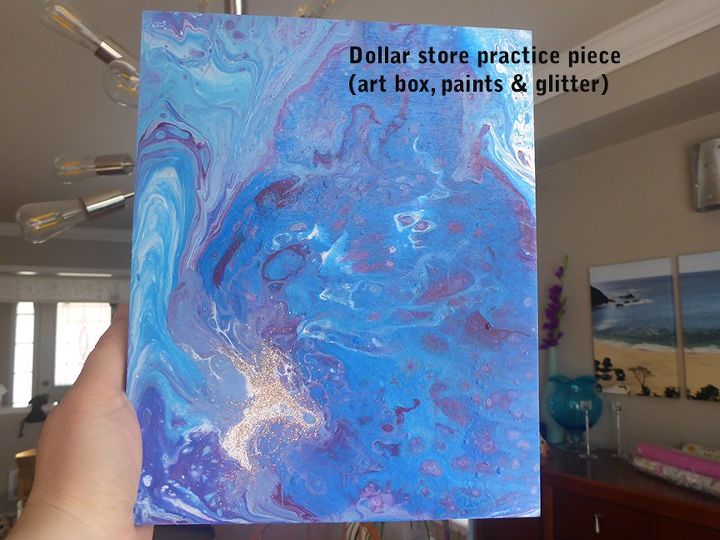
Note: I practiced with dollar store paints/art boxes first and those paints worked great too!
Resources for this project:
See all materials


Comments
Join the conversation
-
It looks fantastic. You sure saved the life of that ugly little table!
-
Beautiful


Frequently asked questions
Have a question about this project?
I love the whole project especially the legs. They put your individual stamp on the project. I do not have a heat gun and I was wondering if I could use a hair dryer?
Can I use something other than "Unicorn Spit" its just too expensive :(
Why not just paint the wooden table top, and then put the glass on top to protect it?