


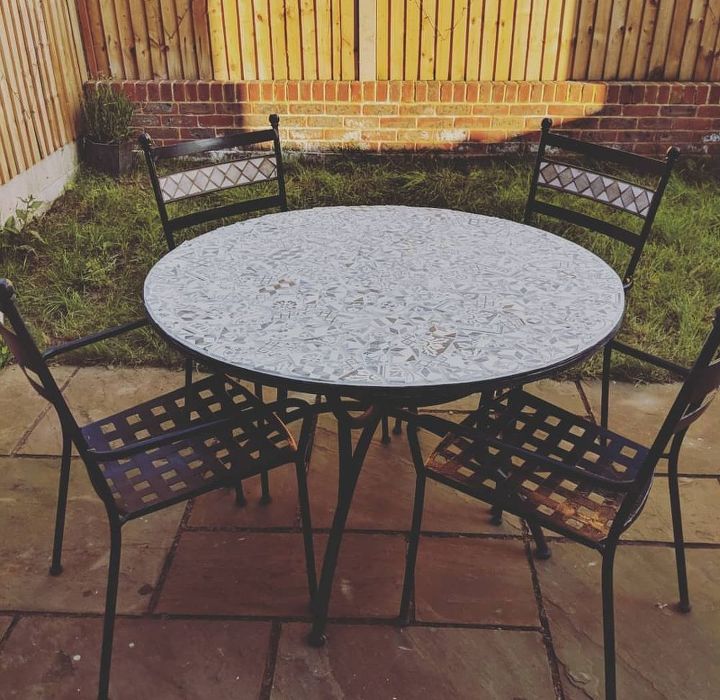
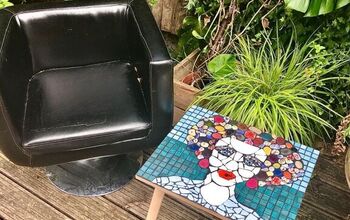
Mosaic Garden Table

I had the most beautiful mosaic garden table but at the time didn't understand the importance of covering garden furniture in the winter to protect it.
Years of neglect lend the beautiful table top to crumble before my eyes when I moved home last year.
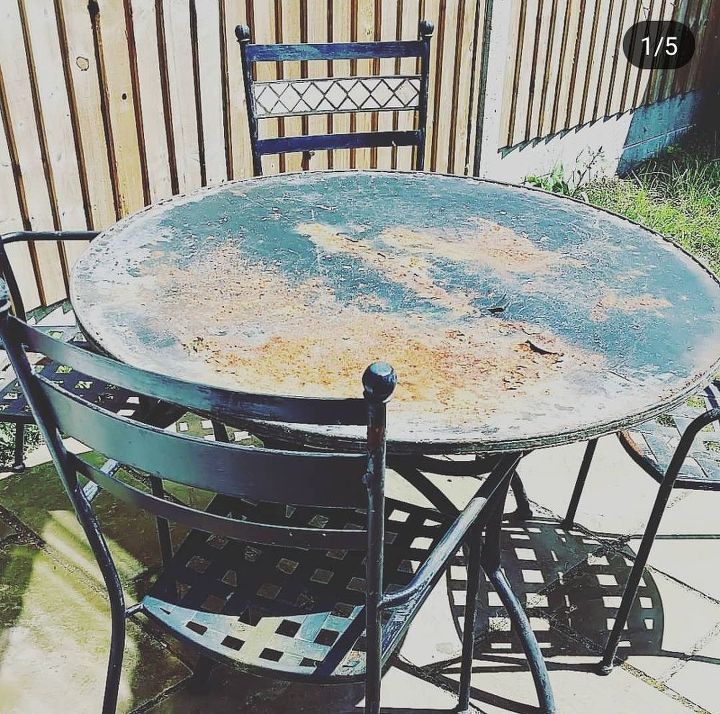
As you see the table rusted under the original tiles. Rather than throw it out and buy a new one (which would have cost hundreds to replace) I decided to try my luck renewing the top myself.
Sadly the tiles which had previously lived on top were unable to be salvaged.
Firstly, I needed to remove the rust by using a hard wire brush. Once satisfied that all the rust had been removed I used sugar soap to clean away any dirt and grease. Allowing this to dry I then need to seal the table from future elements. Preventing a repeat this.
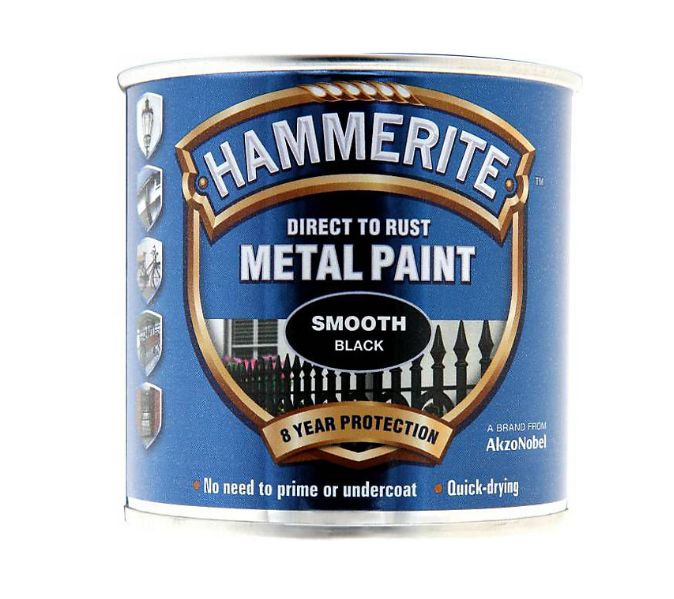
I used an outdoor paint in black - sutible for metal.
I also wire brushed the chairs and repainted them. (They needed to look their best next to the shiney new table)
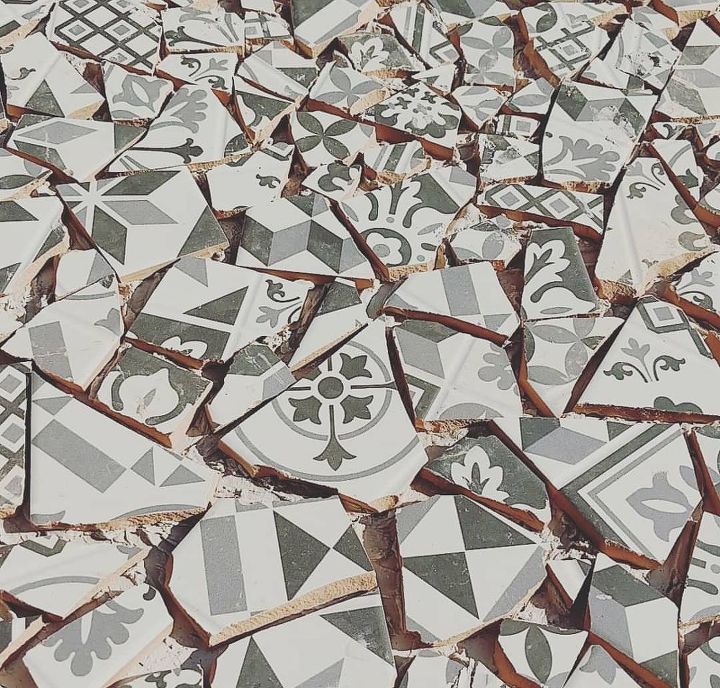
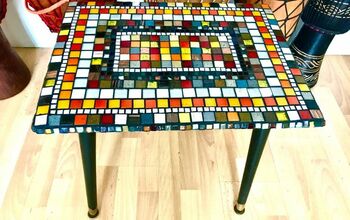
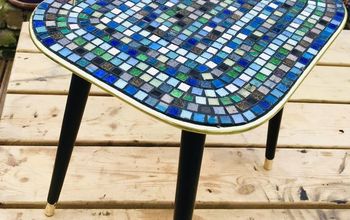
While the table dried I smashed my chosen tile into a heavy duty bag using a hammer. (You don't need the bag but it just keeps all the splinters in one place and made it easier to clean up)
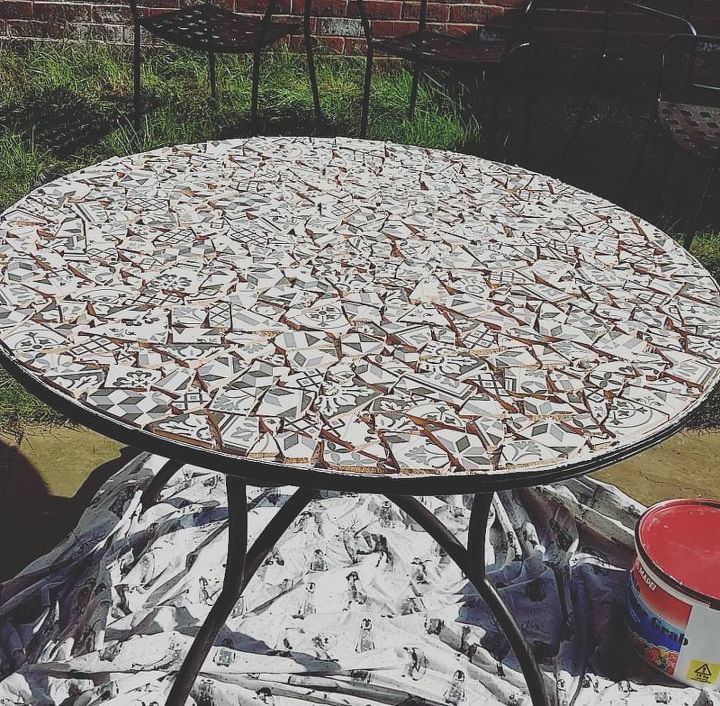
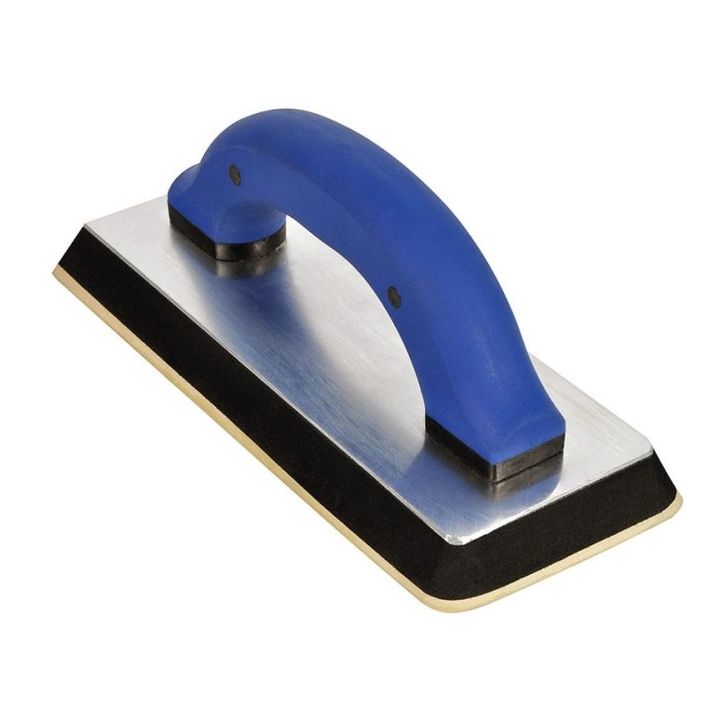
For the grouting I used a grout float, but you can use any grouting tool you feel would work better for you.
Smooth the grout onto the desired area and place the tiles into the grout. try not to leave too big a gap between the tiles as will make the end task harder.
Once you are happy with the layout grout over the top by smoothing it onto and in between the tiles. Use the side of the float to take off the excess grout from the top of the tiles.
Don't leave the grout to dry just yet.
Grab a damp spounge and wipe the excess grout the float didn't manage to remove itself. You may also need to buff the tiles to remove grout from them. once the grout has dried you won't be able to remove any excess - so make sure it is done at this stage.
Depending on the distance between the tiles you may need to repeat this process a few times. (I did mine 3 times)
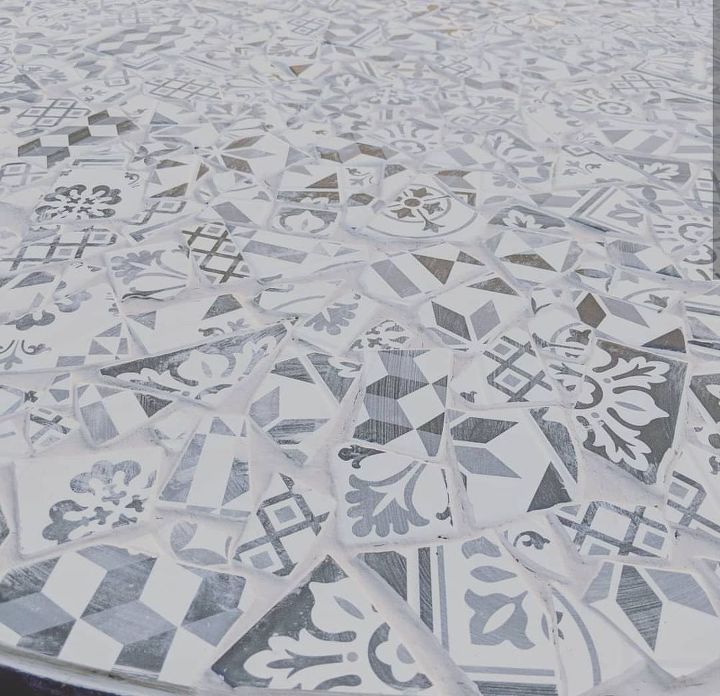
You may want to consider using a sealant to protect the grouting from stains (such as red wine, or mustard and ketchup 😉)
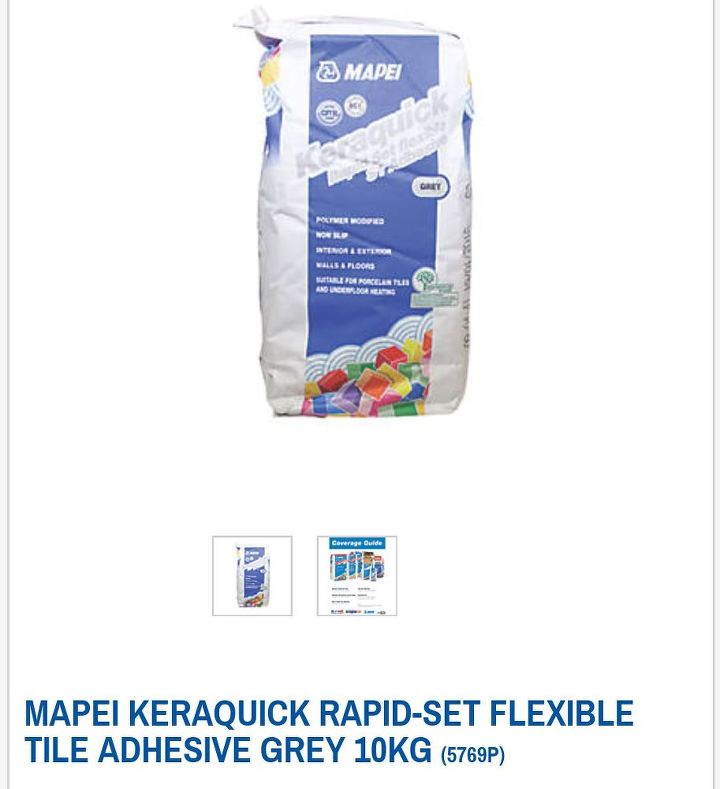
Resources for this project:
See all materials


Comments
Join the conversation
-
Lovely
-
I'd love to have the talent of the skills of making such a beautiful table. It really looks so good, and something like this would look amazing in my backyard. However, I'll stick to the outdoor furniture from https://furniturevogue.co.uk/. They have the best designs I've seen out there when it comes to outdoor furniture. I especially like their wrought iron furniture. They make something so durable look good, even if it usually looks horrible. Wrought Iron is one of the most durable and longest-lasting types of outdoor furniture available, many times lasting decades.


Frequently asked questions
Have a question about this project?
I have a fairly small front concrete porch. Could this be done with broken dishes? Also, going in a different direction, could this be done with those sheets of glass tiles? Do you think they would hold up for a floor?
Thank you for your input
What kind of tiles did you use? Also, what was the base of tour table? Thank you!
Can I do this to a wood table? If so what paint should I use? I live in Florida so table is on my porch. Thank you