


Strategizing a Remodel: Creating a Timeline and Choosing the Projects
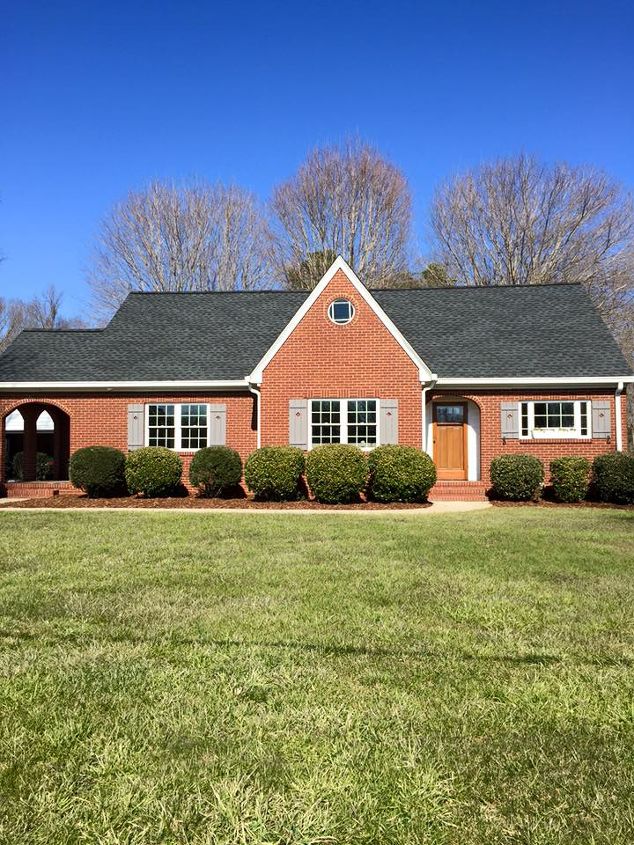
One of the most transformative seasons of life that my husband and I have gone through was our first home remodel. We lived in our little brick cottage for three years, moved away for two, and then ended up purchasing it in 2015. As was common with bungalows built in the late fifties, ours had many small, segmented rooms that didn’t flow into each other. The closets were tiny, and the upstairs was unfinished.
We knew that to make the home sustainable for the long term and to turn it into the family home that we wanted it to be, we’d have to make major changes. That knowledge, added to the fact that the home still had its original wiring, made us realize that we’d need to take on a big remodel. To make the project fit our budget and timeline, we had to be strategic with the steps we took. Here is a brief, high-level look at what we did.
First, we started with the safety features that needed to be updated right away. We took the original dry wall out and in the process, removed four walls from the interior of the home. Two were load-bearing, so our contractor worked in the roof to restructure the beams above to help shift the weight. Once those were down, it was time to replace the wiring. Our electrician took out all of the original wiring and installed new, safer outlets wiring throughout the home.
Next, we knew there was at least some presence of lead-based paint in the home, as it was built more than 60 years ago before more modern regulations took hold. Most of that issue was taken care of when we removed the walls and drywall, but there were still a few interior window sills that we needed to replace.
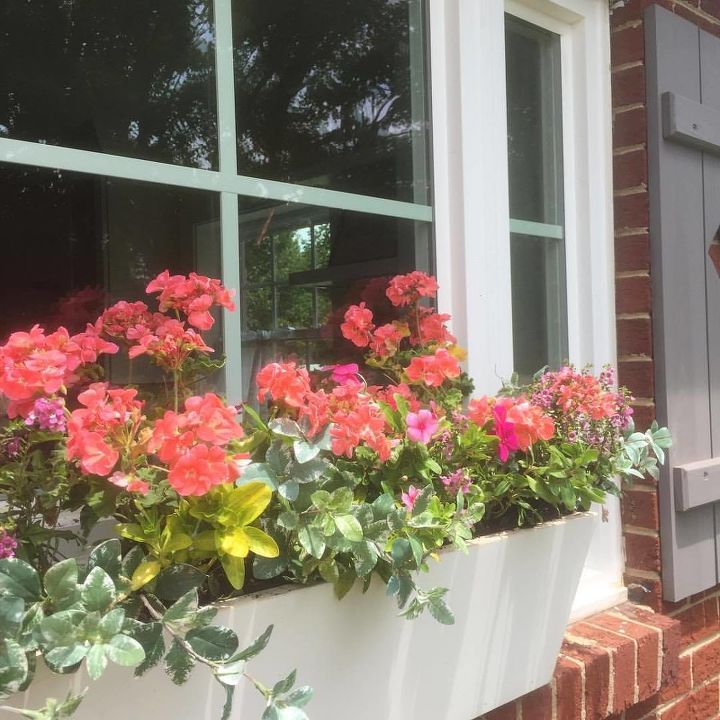
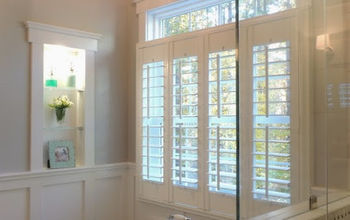
Then came the fun task of replacing all of the windows in the home. These were also original and had become drafty over the decades as the seal loosened. As such, we were losing heat during the winter and draining AC in the summer. We replaced the windows with new, EnergyStar-rated ones that have saved us a significant amount on our monthly utility bill. We used a reference similar to this guide to help us choose a style that fit our home aesthetics while still being functional.
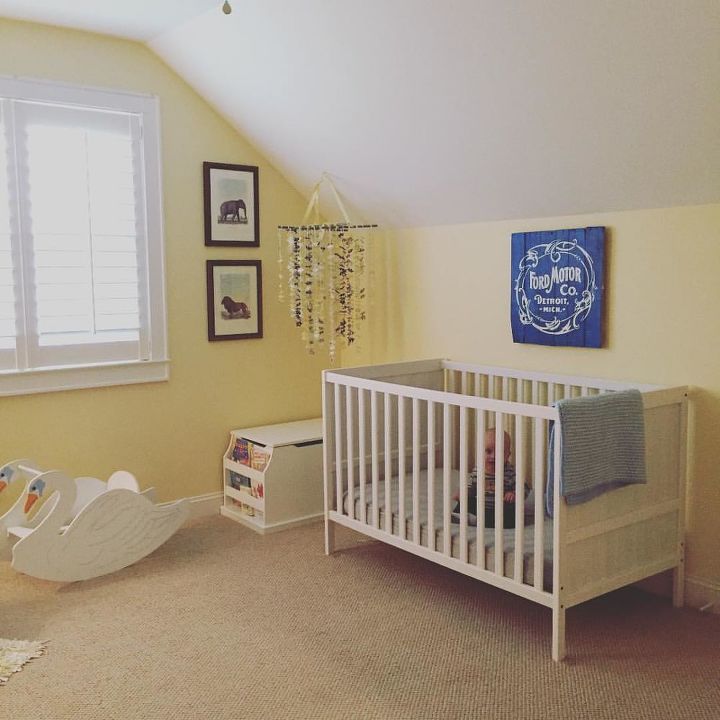
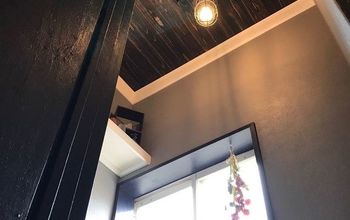
From there, we tackled the upper level remodel. Prior to our project, this had been an unfinished attic space wherein all of the former resident’s furniture and clothing was stored. As renters of this property, the door leading to the upper level had actually been locked to us, so we didn’t even see this space until we purchased the home. We have two children and we knew we wanted to transform this level into their bedrooms and bathrooms.
Together with our contractor, we added two A-frame bedrooms as well as two full bathrooms, thanks to an addition out the back that provided for additional square footage. We then dry walled, painted and carpeted the rooms, adding two miniature closets to each one for storage.
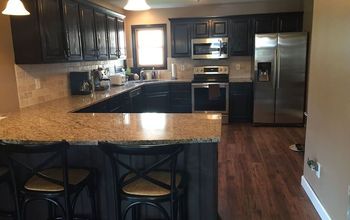
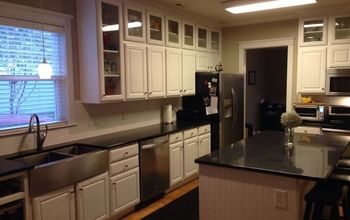
With the new wiring and windows installed, the next step was to add drywall and finish off the downstairs rooms. While the walls were out and before the new ones were installed, we worked with our contractor to develop a series of built-ins throughout the living room, dining room and master bedroom that were all the same arched motif. We also built a custom banquette in the kitchen that I’ve always envisioned in that space. This added a custom, craftsman touch to our home. Then, we mulled over paint colors, chose a specific greige from among the thousand options and the home started to come together.
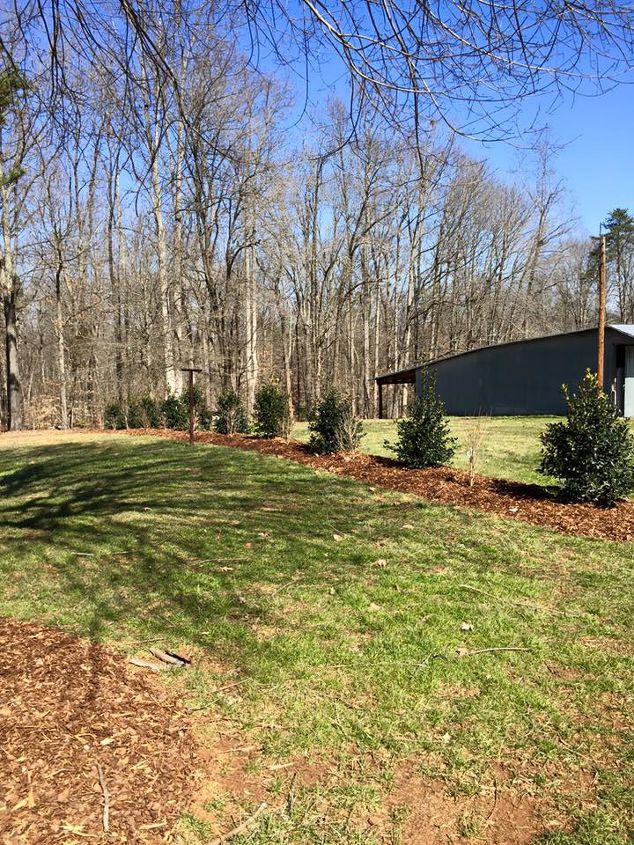
Then, we decided to focus on the exterior. We added a row of trees to act as a privacy barrier between our home and our neighbor’s property. In all, we planted 12 Nellis Hollies and eight Crepe Myrtles. Though they are still relatively small now, the idea is that in about 10 years, the Hollies will be towering and any space beneath their branches, where there tends to be a few feet of just bark if they’re trimmed correctly, will be filled in with the Crepe Myrtles.
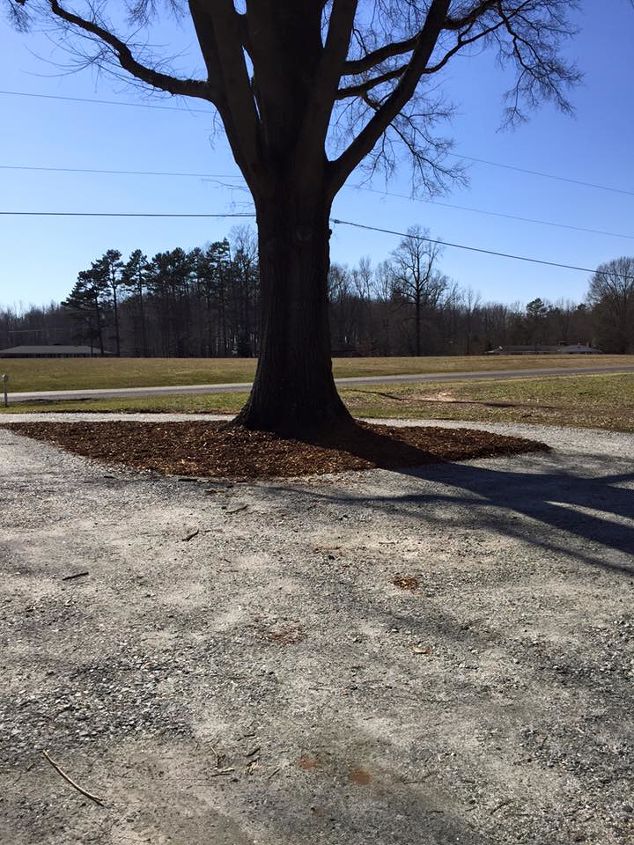
Once that was completed, we turned our attention to the rest of the home's landscape, seeking to add curb appeal. Through a recommendation of our contractor, we found a pressure washer who was able to remove decades of grime, paint and general debris from the brick, revealing its original glory. Then, we re-painted the exterior window sills, removed rusty window awnings and gave the concrete sidewalk a good wash as well. Our next big project was to pave the dirt driveway. As we did so, we opted to add a circle drive to go around our big pin oak tree in the front.
This has been a great addition, but I will say that once we paved the driveway, we didn’t account for how rainwater would run off, and as such, it tends to pool in the adjacent mulch bed during a downpour, which sometimes results in water coming into our basement. Thankfully, my husband is a plumber and plans to add a drainage system in that particular area to move the water away from the house and into the backyard a few feet away.
This project took us two years in all and it was indeed a labor of love. In a few months, we will be leaving this property to tackle another remodel on a family home. While I’m looking forward to the end result, this is one process I was thankful to have behind us! Still, we are excited to take the lessons learned during this project and apply them to the next, creating a space that feels equally like home.


Frequently asked questions
Have a question about this project?