


How to Stencil A Misty Mountain Wall Mural

DIY Wall Mural Using Mountain Pines 5pc Stencil Kit
Hello, Cutting Edge fam! Your wall mural dreams are being answered today on the blog! Transform your accent wall into a sight to behold with Cutting Edge Stencils DIY Mountain Pine Mural Kit! This amazing Mountain pines stencil kit helps you to easily create a beautiful forest wall mural using simple DIY painting techniques. No more waiting, let’s get stenciling!
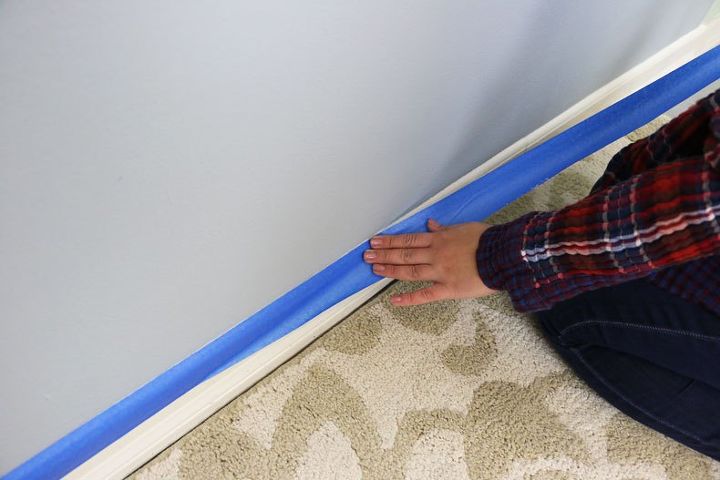
First step is masking off your base board! Take your time and use blue painters tape to protect any baseboards, trim, or crown molding that may get painted over!
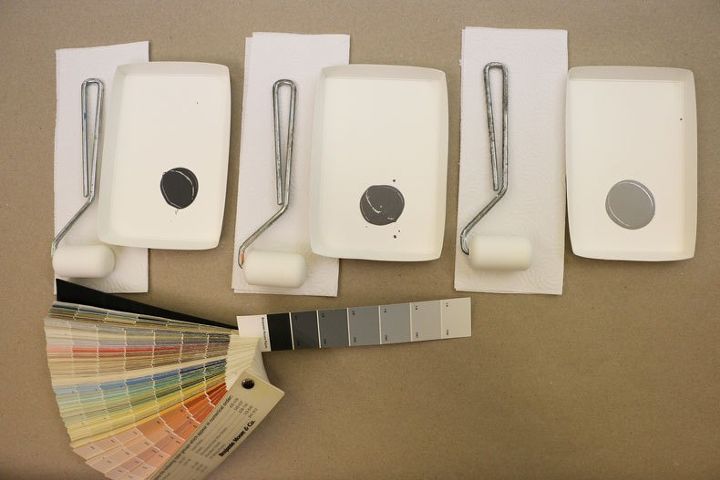
You want to choose your base coat and 3 different values for your pine trees. This does not have to be difficult- it’s as easy as taking a fan deck and choosing a color group!
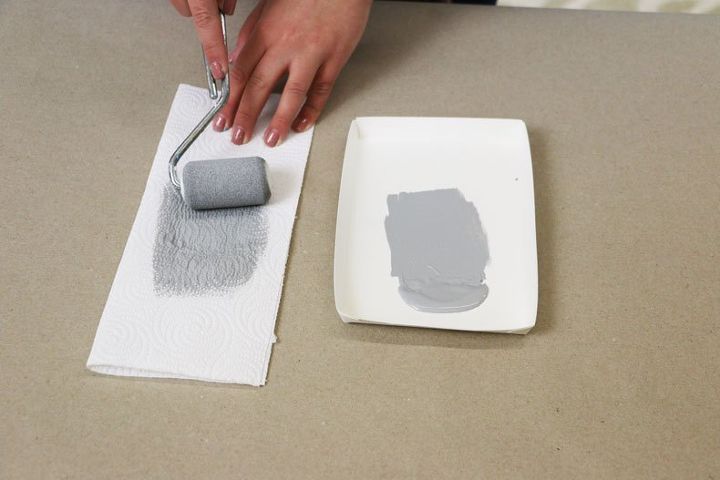
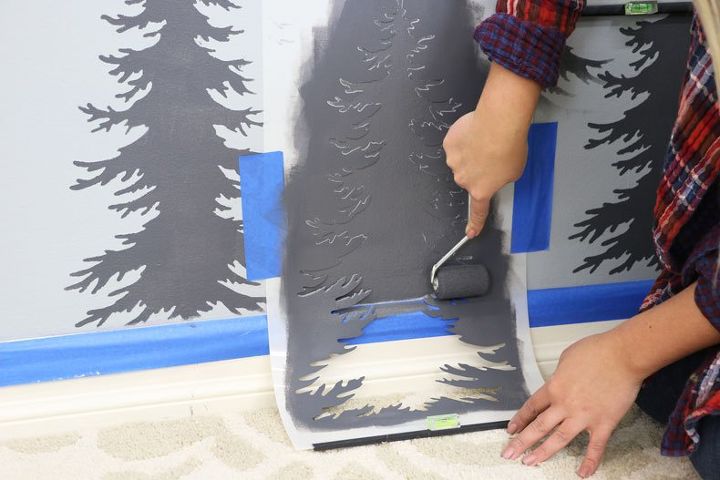
This stencil project does NOT require a lot of paint. Simply load your 4″ dense foam roller and offload the excess paint onto a paper towel.
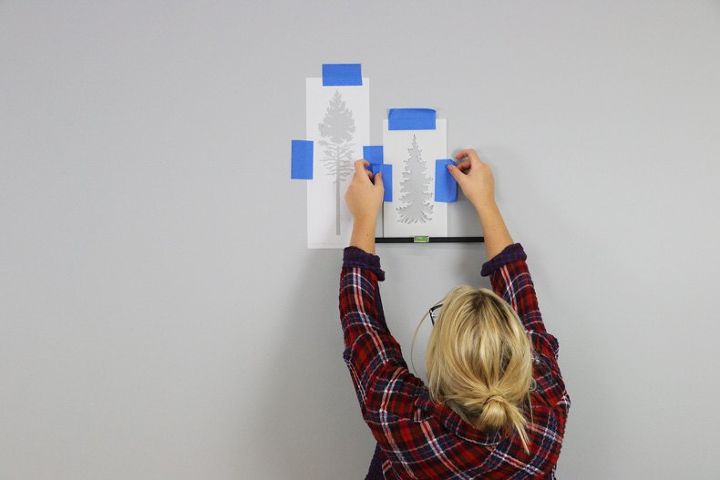
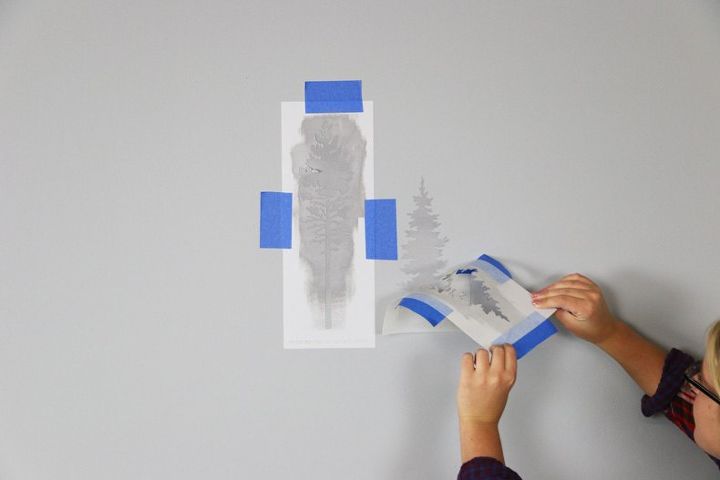
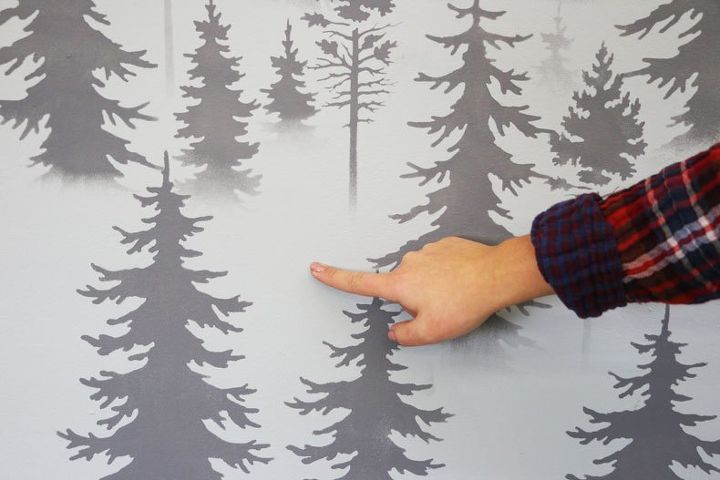
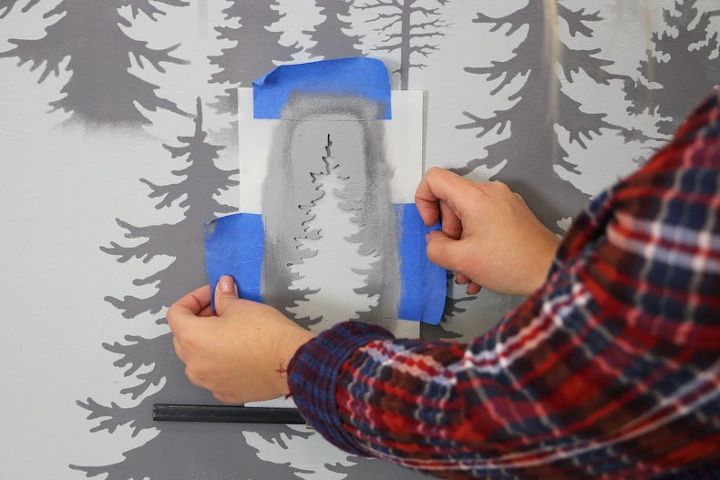
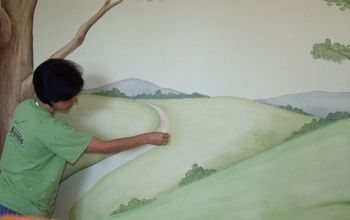
Apply spray adhesive to the back of your stencils to avoid any chance of bleed! Slip on a clip-on stencil level to ensure that the tree stencils are straight! For your first layer of pine trees, you are going to randomly place the SMALL trees the highest on the accent wall!
Take your LIGHTEST color and roll it on. To achieve the misty and foggy look, you will not be rolling on the entire stencil. Instead, once you start to reach the bottom of the tree, apply light pressure to the roller so the bottom isn’t completely covered. It should look like the bottoms are fading away!
Continue randomly placing your small tree stencils along the wall while following the same technique above. Imagine a mountainous landscape where some trees are taller than the others. Have fun with it, you can customize the landscape however you want without making mistakes!
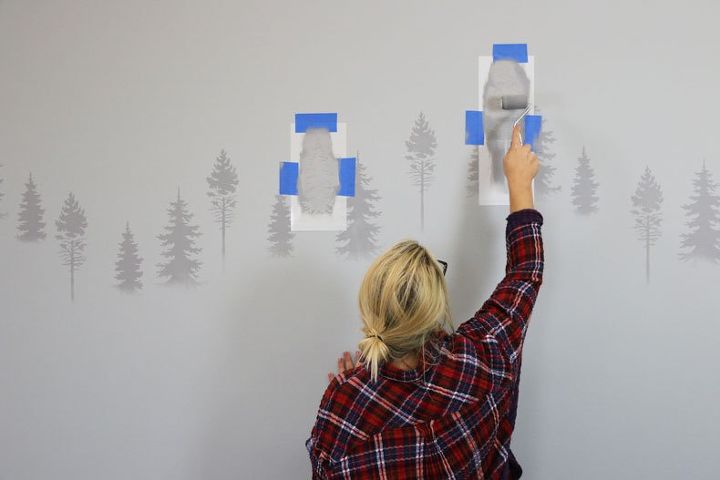
Switch to a MEDIUM size stencil for the last row of your LIGHTEST tree’s.
Now it’s time for the second layer of your trees. Use the same stenciling technique as the first layer, but instead you are now going to use your MEDIUM paint with MEDIUM and LAGRE tree stencils.
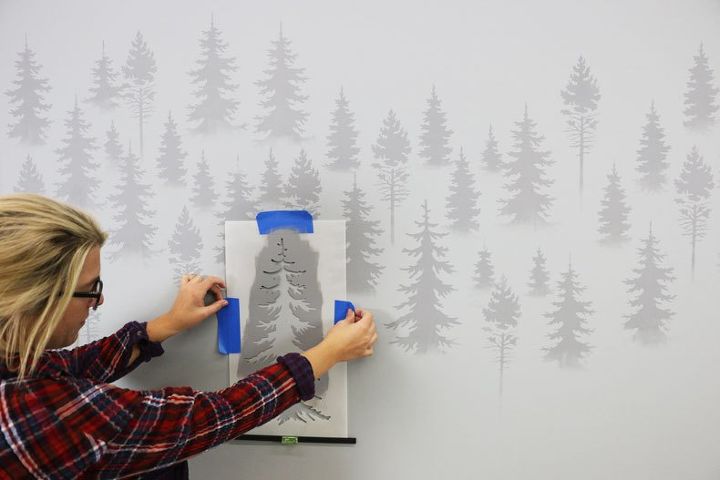
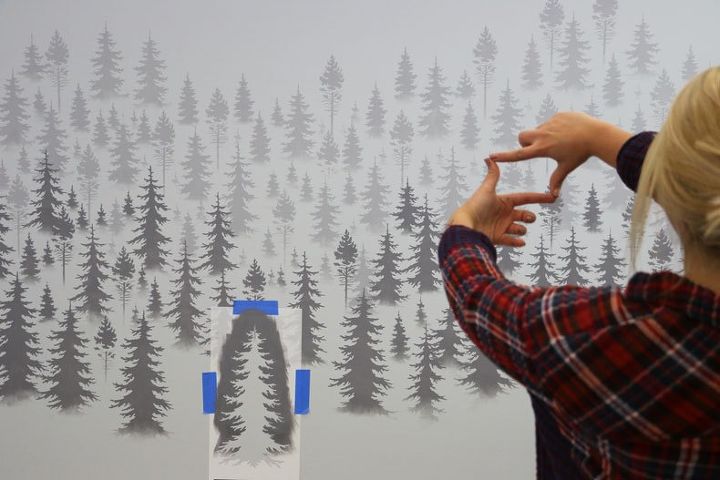
Once each layer is down, you can go back and add partial trees to any open or empty spaces! You can use the same technique as the full trees but stop half way so it looks hidden in the forest! Feel free to make them as big or small as you like!
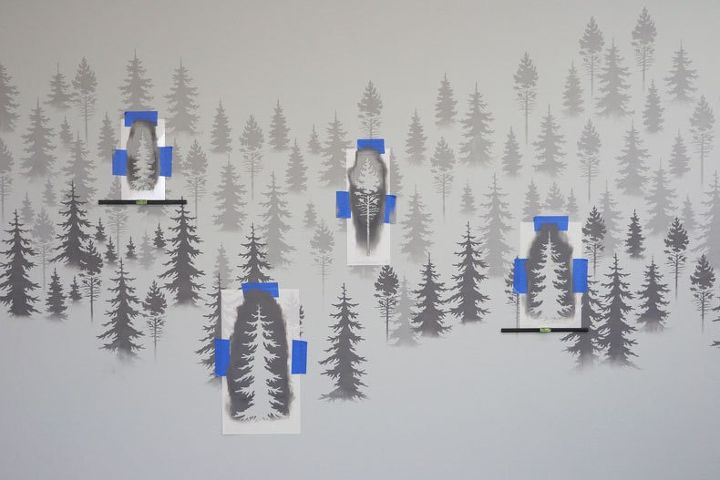
Continue stenciling your second layer of trees all the way down your wall until you reach a good point to begin your last layer with the DARKEST trees.
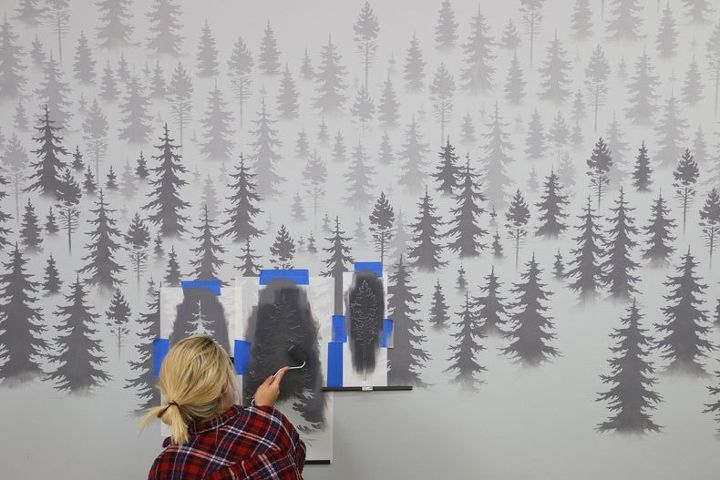
When you get to the bottom of your accent wall, roll the paint down on your stencil towards the base board! If there is still some base coat still showing, use a professional stencil brush and pounce it towards the baseboard for a crisp and even line!
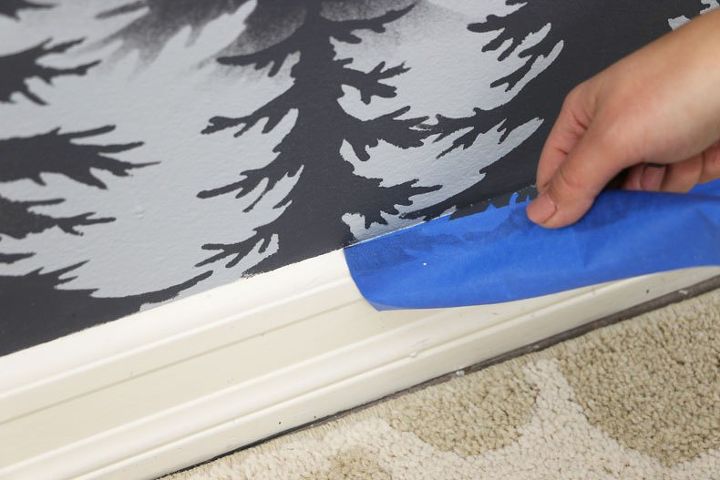
Peel back your blue painters tape to view your gorgeous accent wall!
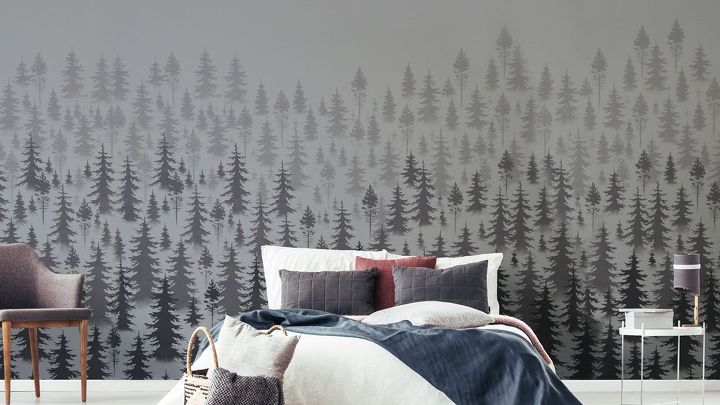
This stencil design is absolutely gorgeous! Use this wall mural in a bedroom, living room, or even a dining room! What do you think?
Resources for this project:
See all materials


Comments
Join the conversation
-
Great work on the wall. I have a solution for the stencils. Try this out.
-
Beautiful!! Excellent instructions. I am inspired to try this in my husband's man cave. We live in the mountains of Colorado (Florissant) . Your project is simply stunning !


Frequently asked questions
Have a question about this project?
Looks amazing! I wander if you could do sea fishes instead?
I love the project but I could not take my eyes off the carpet! I really like it. Curious if the wall enhances the carpet?
What colors did u use?