


Heart Maps
I was invited by some talented bloggers to participate a Top Shelf Clearance Challenge.
The rules were as follows. Buy at least one clearance item for $15 or less. Take a photo of the clearance area and the clearance sticker(s). Then take the item(s) and turn them into something better. This theme was A Piece of the Heart, (since it was done in February) and I was told I could interpret that any way I pleased.
Here is what I came up with...(I did this as a clearance challenge, however making one of these would make a GREAT gift for an upcoming bridal shower, wedding, anniversary or Valentine's Day gift!!!).
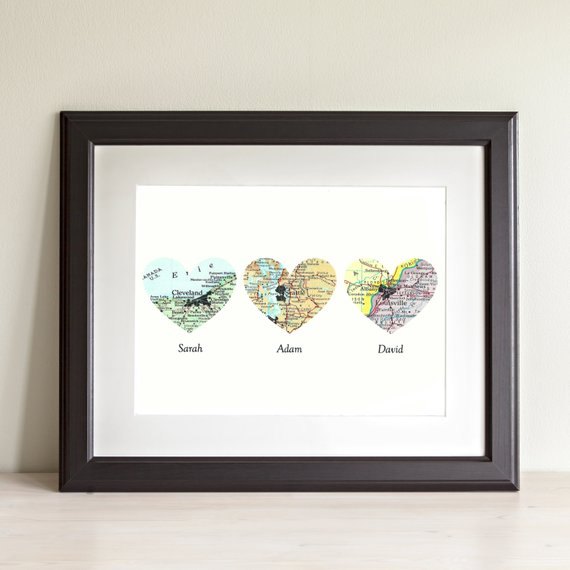
I have been eyeing these cute Photo Heart Maps on Etsy and thought I’d try to make one for myself. I mean how appropriate are these for this challenge and for Valentine’s Day?
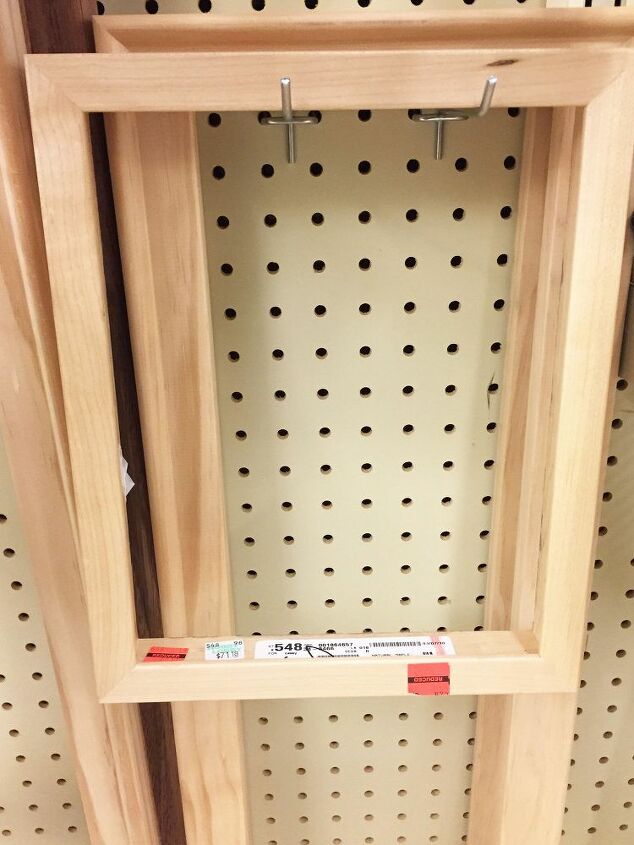
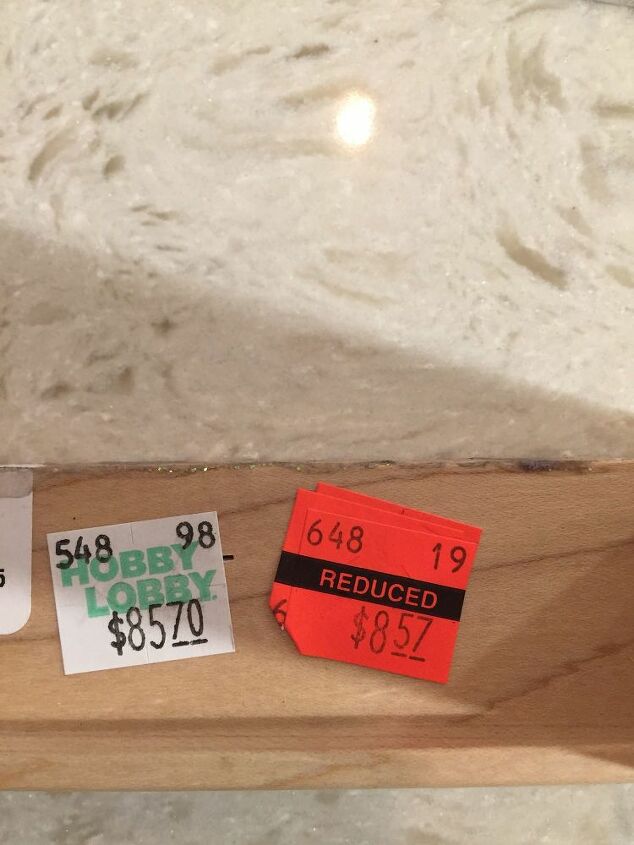
I found the perfect frame at Hobby Lobby for $8.57. It was originally marked $85.70! What? $85.70 for a frame? That seemed crazy. Anyway, I bought it because it was perfect for my needs and was way under the $15 mark. It is a pretty simple frame. As you can see there is no glass and no back, but the wood is very nice quality. It is also a weird, non standard size – 9 1/4 – 14. These things didn’t matter to me though. I knew I could fix it up and would be perfect for what I pictured in my head.
While at Hobby Lobby I also picked up this thick, nice quality 16×20 art board for $4.49. I planned to cut it down to fit the frame and I wanted a little extra in case I screwed it up.
Step 1 in the Top Shelf Clearance Challenge…
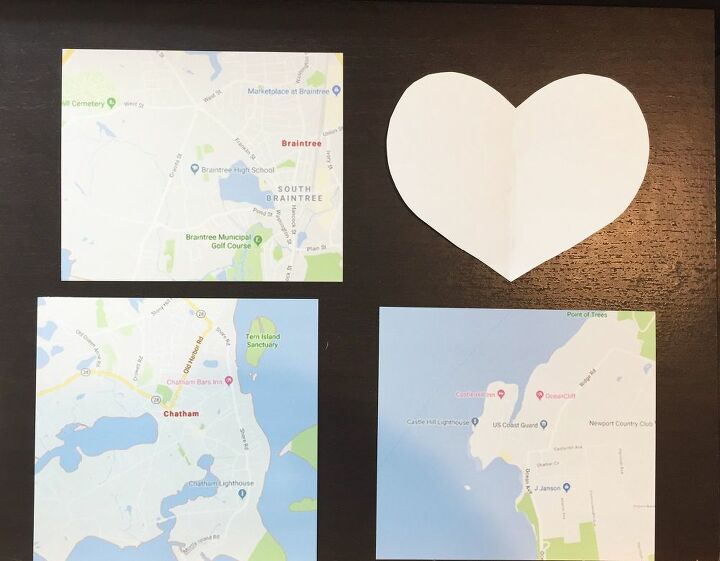
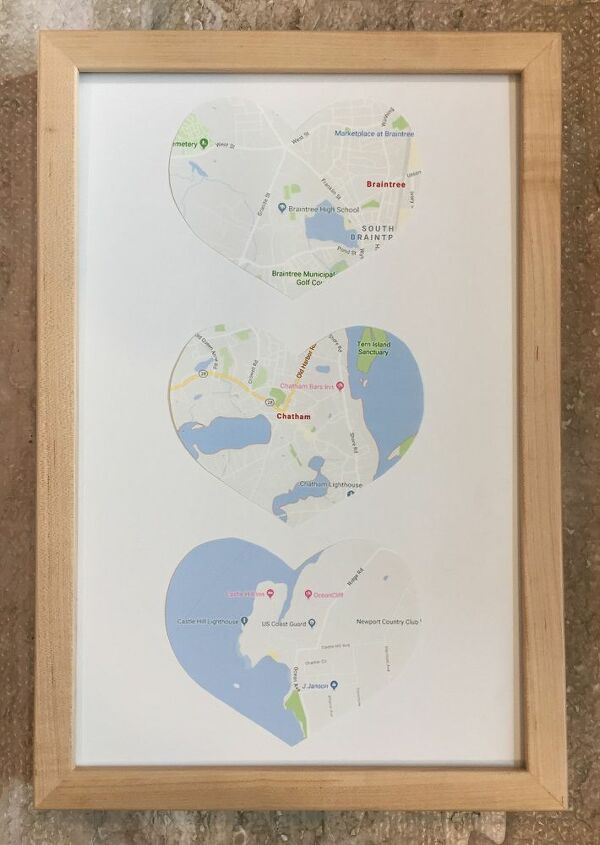
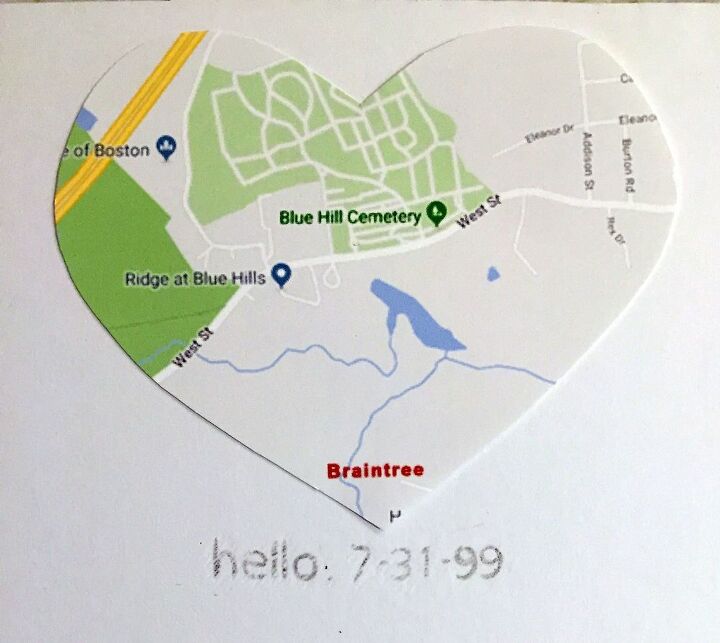
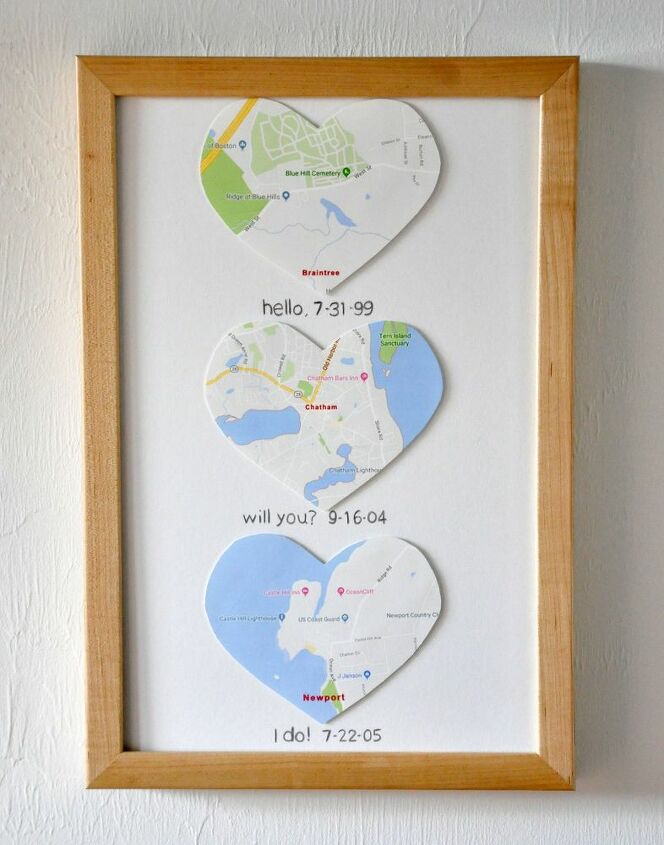
I began by searching on google maps for places that meant something to my husband and I. Where we met (Braintree, MA), where he proposed (Chatham, MA) and where we got married (Newport, RI). I printed out each map on some thick paper we had in our office closet and then used our paper cutter to cut them down to size. Next, I cut them into heart shapes. (I made the perfect heart shape by folding a piece of paper in half and then cutting a half a heart shape. Unfold it, and viola, the perfect heart shape.) To cut the maps I simply placed the heart on top of the map and cut. Easy peasy.
Step 2 in the Top Shelf Clearance Challenge…
I cut the art board down to size using an exacto knife and started playing around with different layouts for my maps. I settled on the layout below.
Step 3 in the Top Shelf Clearance Challenge…
I wanted to add phrases and dates under each map. Hello, 7-31-99 (for when we met), Will you? 9-16-04 (for when he proposed – on my birthday, by the way), and I do! 7-22-05 (for when we got married). We’ve been married a long time! Almost 14 years. Time flies. And this year will mark 20 years together. Wow!
I printed out the words and dates using a font that I liked then I traced the words onto the art board. To do this I simply flipped the paper over, traced the words, then flipped them back over and placed the paper on the art board making sure they were lined up where I wanted them, and traced again.
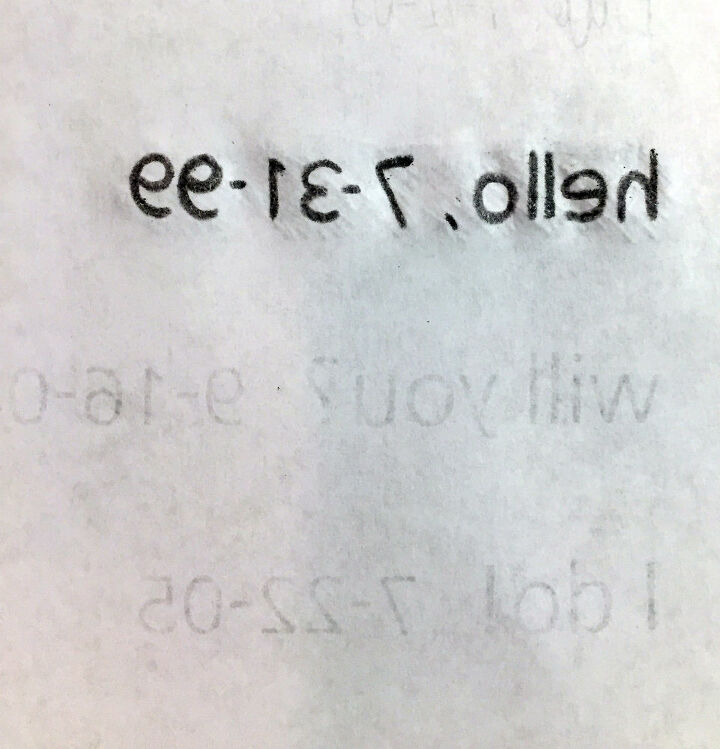
The first set of letters, I didn’t trace the words but rather scribbled over the entire phrase (see pic above). I don’t recommend doing this. It ended up making scribble indentation marks on the art board. You can’t really see them, unless you look close, but I found just tracing the letters looked much better.
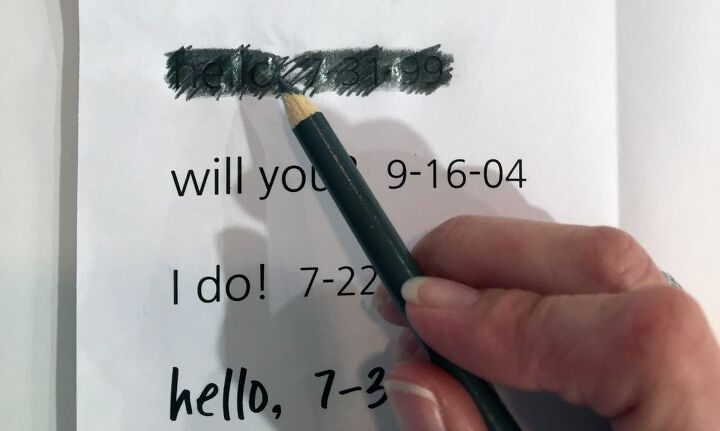
Afterwards I went over the letters with my pencil to fill in any spots I may have missed. They aren’t perfect but look better than me trying to print letters myself. I surely would have messed them up.
Step 4 in the Top Shelf Clearance Challenge…
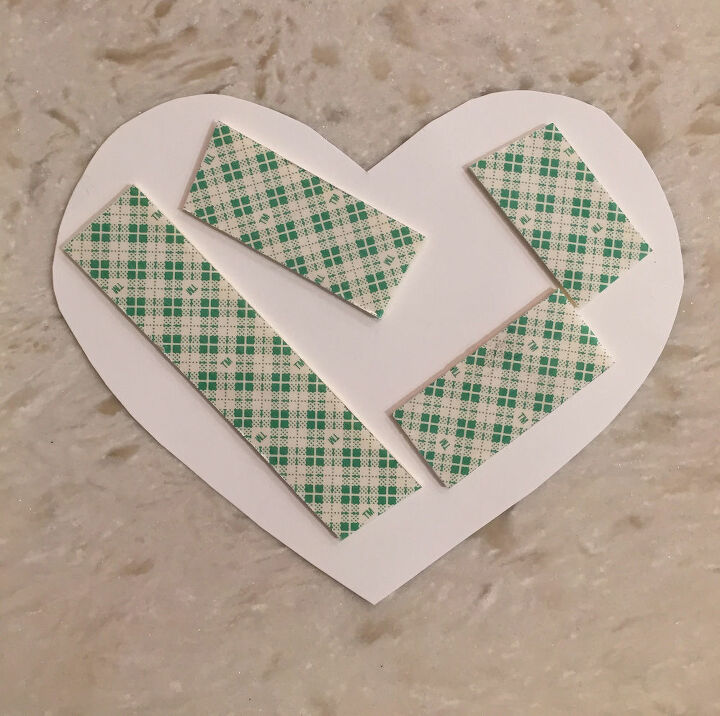
Once the letters looked decent (the above picture is before I prettied them up even more) I used this double sided tape I found in our office to stick the hearts on the art board. I wanted them to pop off the paper a bit.
Step 5 in the Top Shelf Clearance Challenge…
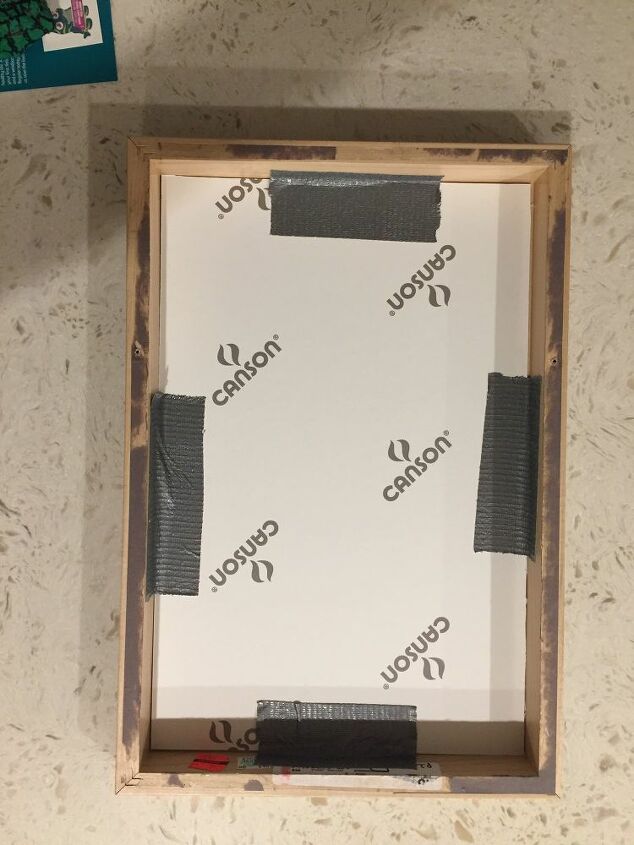
And the last thing I did was tape the art board to the frame using duck tape. It ain’t pretty, but it does the trick!
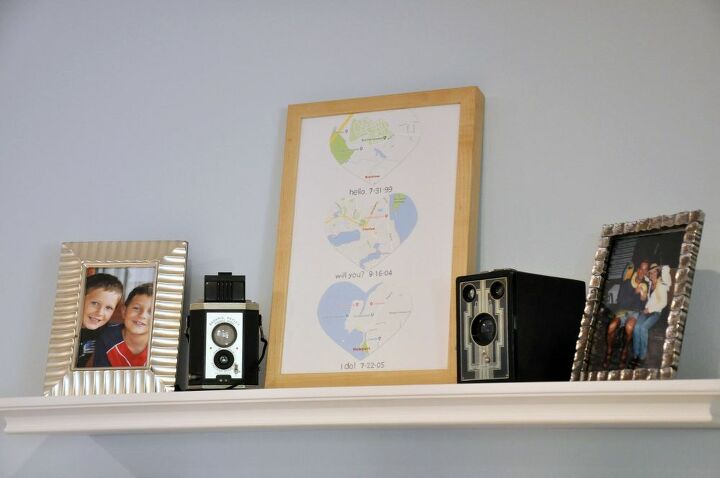
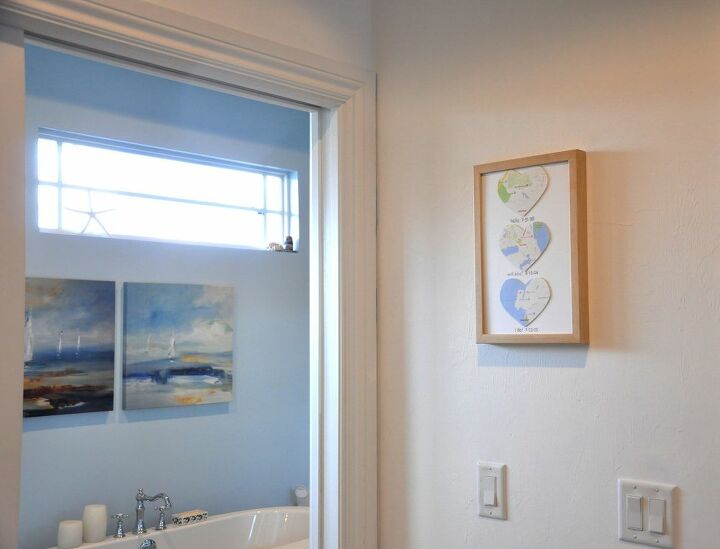
And here it is all finished and hanging in my house…
I tried it out in several different places to see where it would end up.
It may not be as nice as the ones on Etsy, but not half bad for $8.47!
Check out my blog for more details and to see what the other bloggers came up with.

Comments
Join the conversation
-
Now this is cool! What a great, creative, but simple project - sure to make someone smile!! This is what Hometalk is all about!
-
This is such a simple idea to execute, yet would be a most delightful and personalized gift (bridal shower, anniversary, etc.) that could be hung up in a home with any decor. 💗
TFS


Frequently asked questions
Have a question about this project?