


How to DIY a Flagstone Path in Your Garden
This tutorial will give step by step instructions to create a cement and flagstone path in your garden.
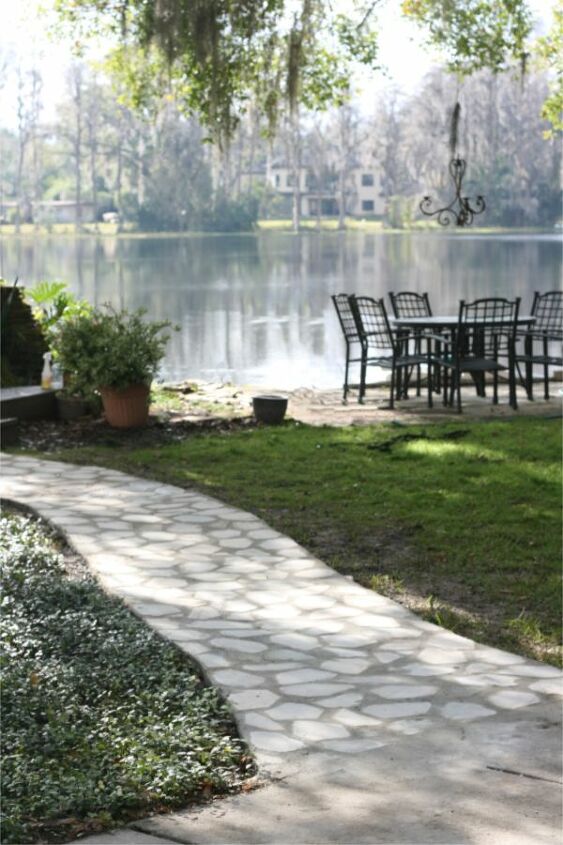
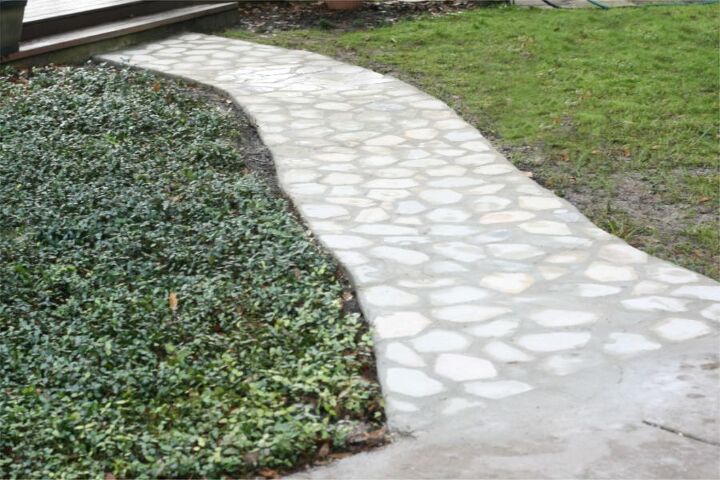
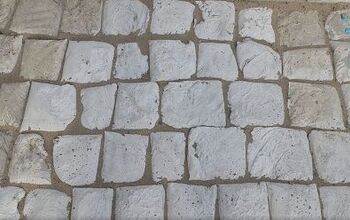
This cement and flagstone path was fairly simple and straight forward. It was a bit laborious, but well worth the effort.

My step by step instructions are in a different location from the picture above, but the same exact method was used.
Step 1. I cleared and leveled the ground for the path. I dug 2" below grade so my path would be 2" below grade and 1" above ground to create a 3" concrete slab to set the flagstones.
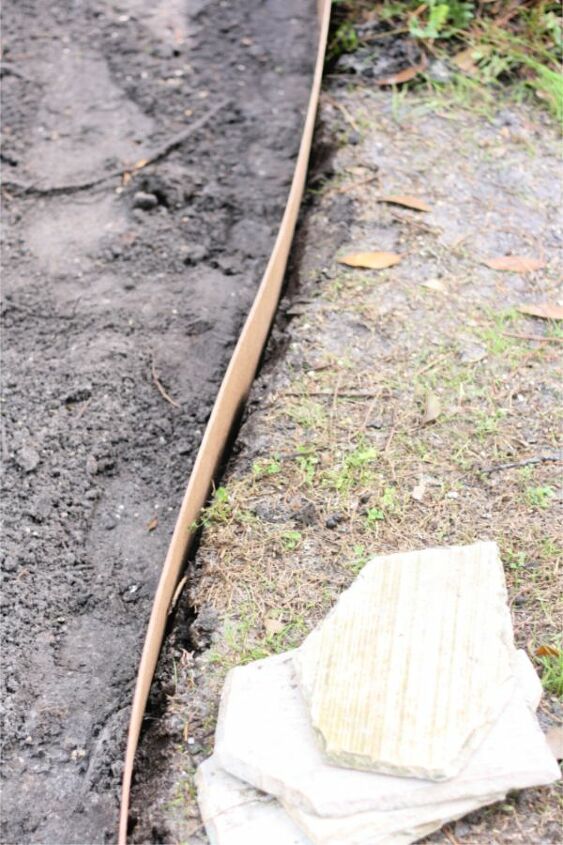
Step 2. Form your path.
I used hardboard(sometimes called Euca board) cut down to 6" strips to form my path. Hardboard can purchased at home improvement stores in 4' x 8' sheets. The store kindly cut mine for me.
On the long path I used wood stakes on the outside of the hardboard to hold the hardboard in place and keep it from moving(bowing,flexing, or tipping) when I poured the cement into the path.
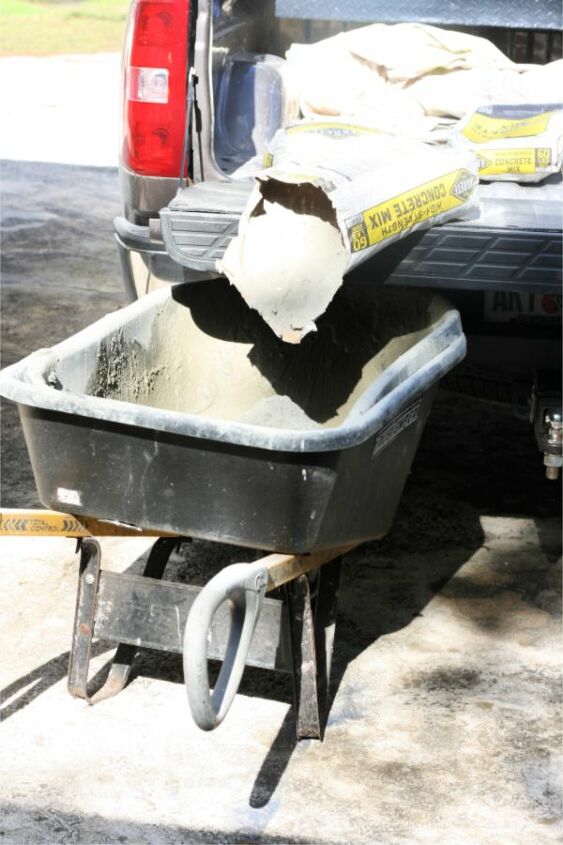
Step 3. Mix concrete.
I used regular concrete mix to pour my path. I mixed tow bags at a time in my wheelbarrow according to the instructions on the bag.
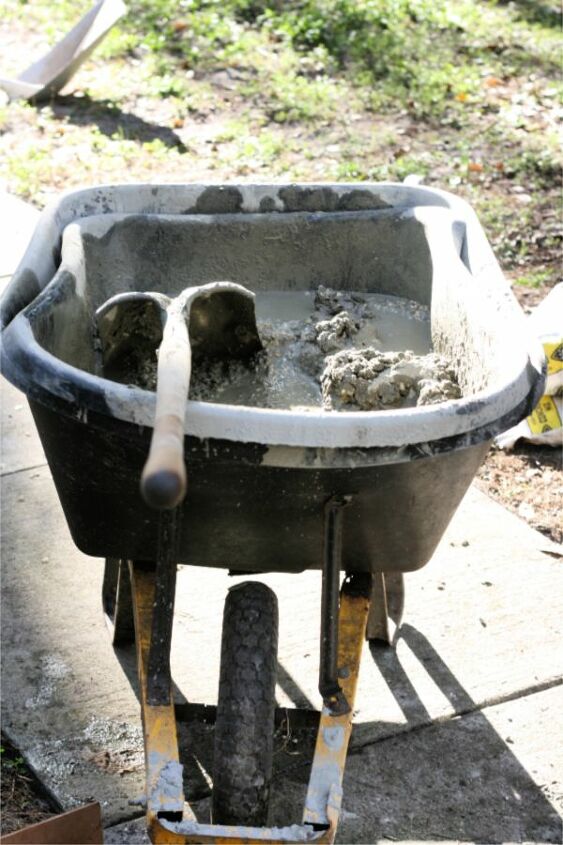
I mixed the cement with a flat shovel.
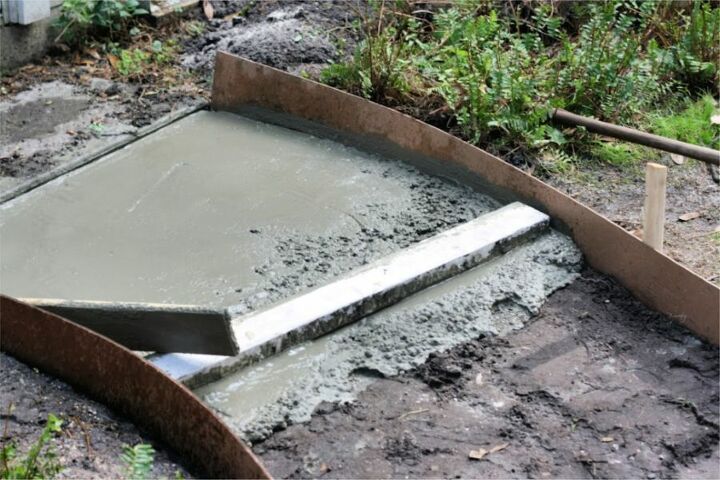
Step 4. Pour concrete and smooth it out.
I poured the cement into the forms and then screeded the cement with and old 2 x 4.
Screeding is the process of shimmy-ing the 2 x 4 back and forth across the cement in short quick motions to smooth it out. This process forces the rocks down and the smooth cement to the top, creating a nice smooth finish.
You could go one step further in the smoothing process and use a float to get an even smoother finish, if you're leaving your path concrete. However, I knew I would set flagstone into this cement so I didn't float the cement.
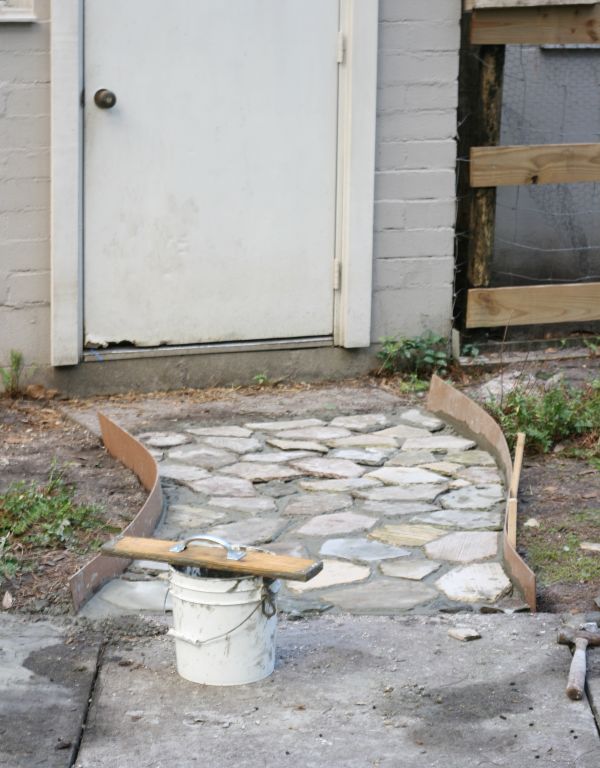
Step 5. set the flagstone
I set my flagstone while the cement was still wet but not mushy. I back-buttered all my stones with mortar because I wanted to figure out the pattern in the process and wanted a little more working time.

The last step was to "grout" my flagstones. I used mortar mix to grout my flagstone. I used the same process as grouting tile. I dumped a scoop of mortar into the seams between the flagstones and squished it into the joints with a float and then wiped the stones clean with a tile sponge and a bucket of water.
One of my goats, Bell, was very curious during the whole project.
This is a pretty simple project, but if your thinking of creating a very long or wide path, or a patio I would definitely recommend a helper or two. Cement is heavy and can get very tiring in a short time if you're working alone. So call your friends and neighbors to help with this, it'll be a lot more fun.
Resources for this project:
See all materials


Comments
Join the conversation
-
I read your comment to my husband and laughed so hard!!!! Thanks for the comment!
-
Can we talk about that goat?🥰 Now I want a goat! 🙋🏻♀️😉


Frequently asked questions
Have a question about this project?
Would this work over an old, uneven, cracked concrete patio? Love the look and really tired of trying to cover it with rugs every summer. 😥. Thanks!
So you have 2 separate layers of concrete? One with the stones & one along the top in between the stones? Wouldnt it crack?
Did you have to "break" the stones to make them fit (like a puzzle)?