


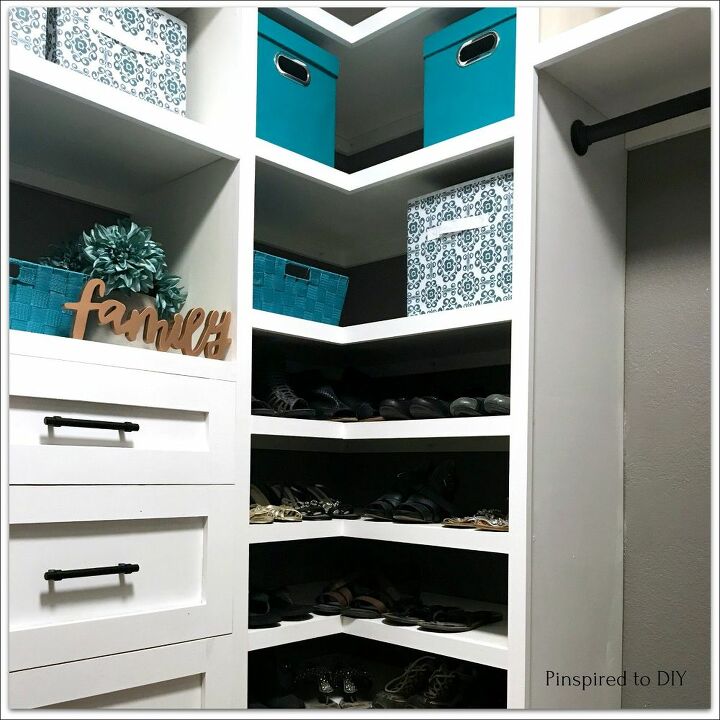
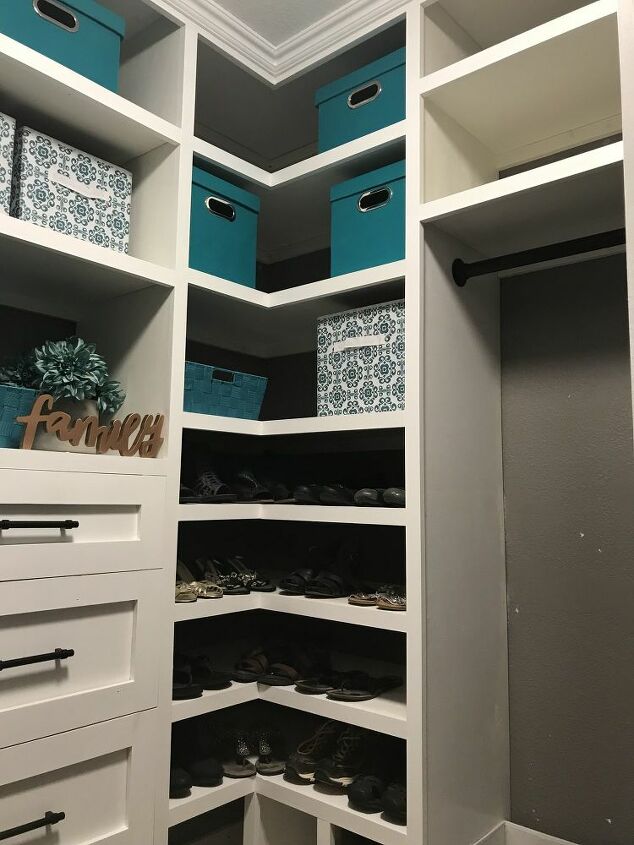
DIY Closet Organizer |Built-In Storage
Over Christmas break, I began watching Tidying Up on Netflix and trying to better organize our closets. My master walk-in closet has always annoyed me, so I finally decided to tackle it! I tore out the wire closet shelving that was in there and created a DIY Closet Organizer with built-in drawers, shelves, and shoe storage. Here's an abbreviated description of how I built my closet organization system, for full details, please visit the tutorial on my website, link is at the bottom of this post.
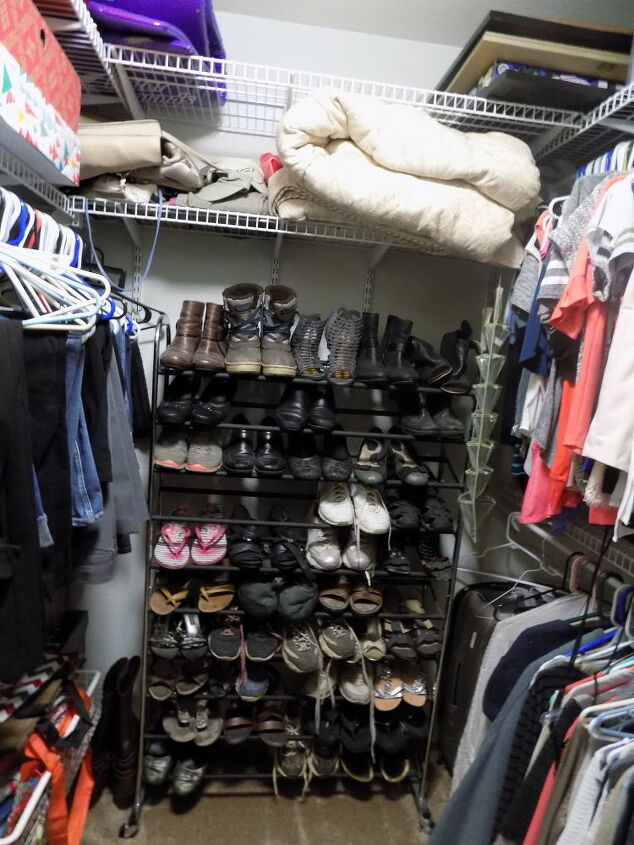
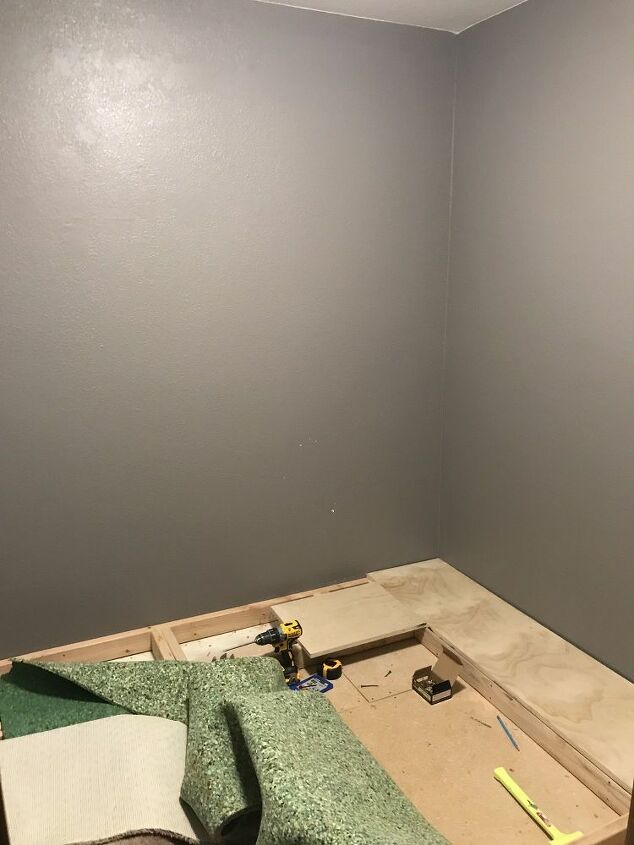
First, here's a pic of how my closet looked before the makeover. Scary!
First, I removed all items from the closet, leaving only the wire shelving.
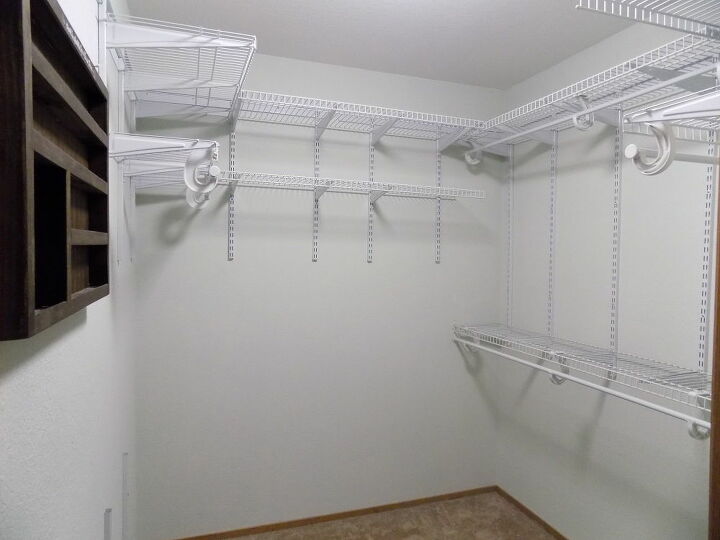
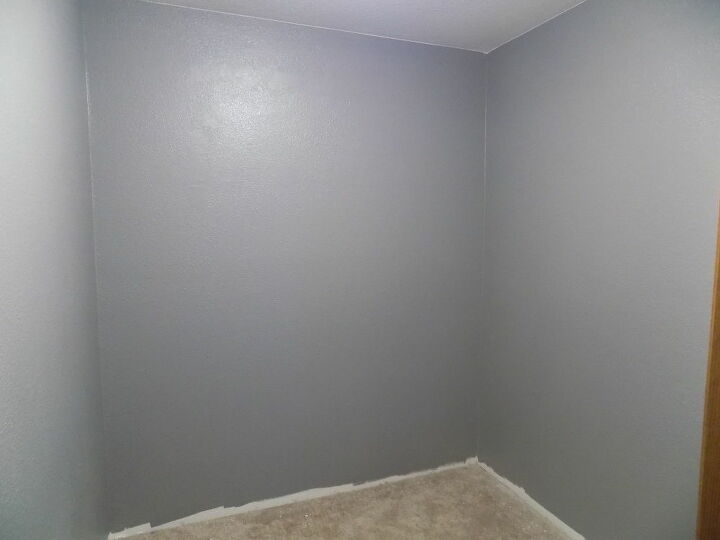
I then removed the wire shelving and repaired all holes left in the walls. I removed the baseboards and pulled the carpet back from the areas where the built-in shelving was to be built. I also painted the walls a medium grey color and let dry completely
Next, I cut the 2x4 boards to create the base of the built-in organizer and attached them to the wall.
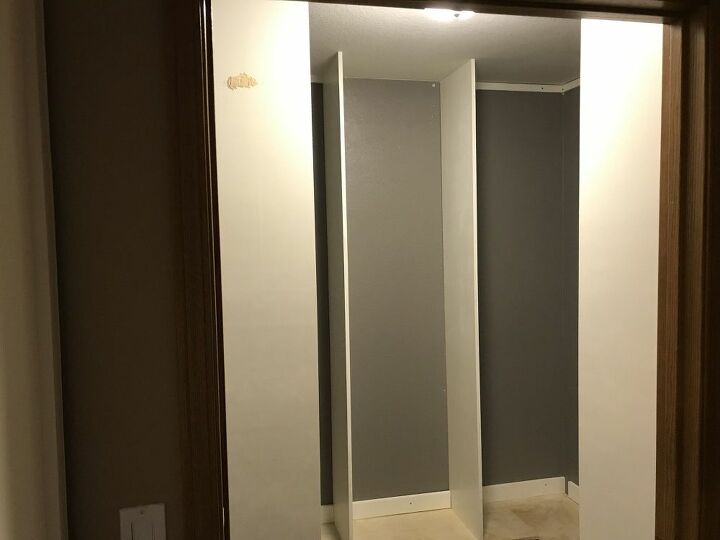
I cut the walls of the organizer out of plywood, painted them white, and then attached to the walls of the closet.
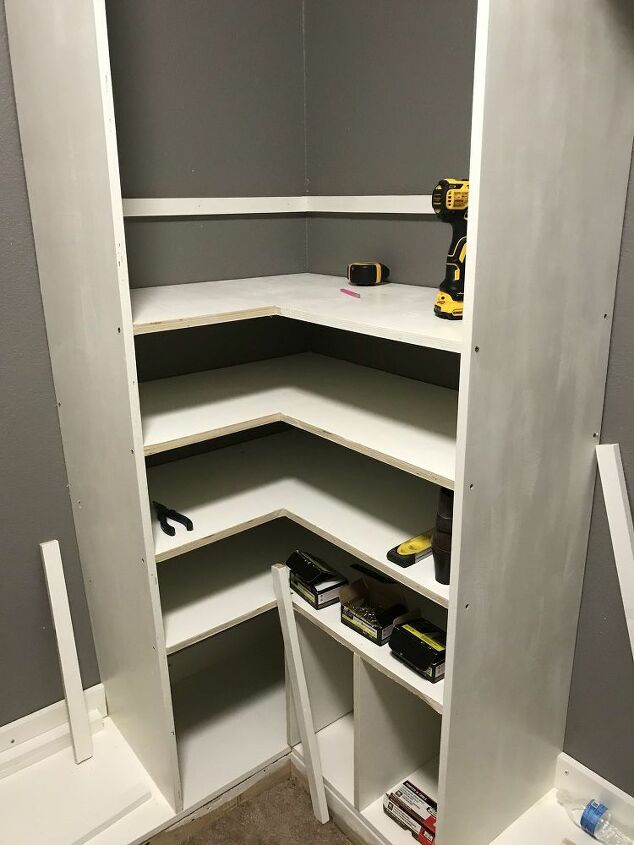
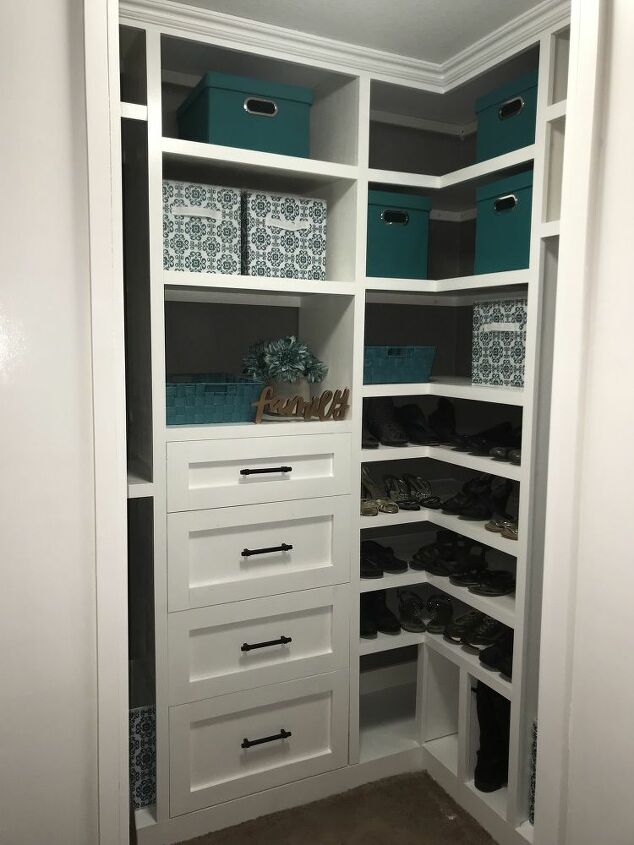
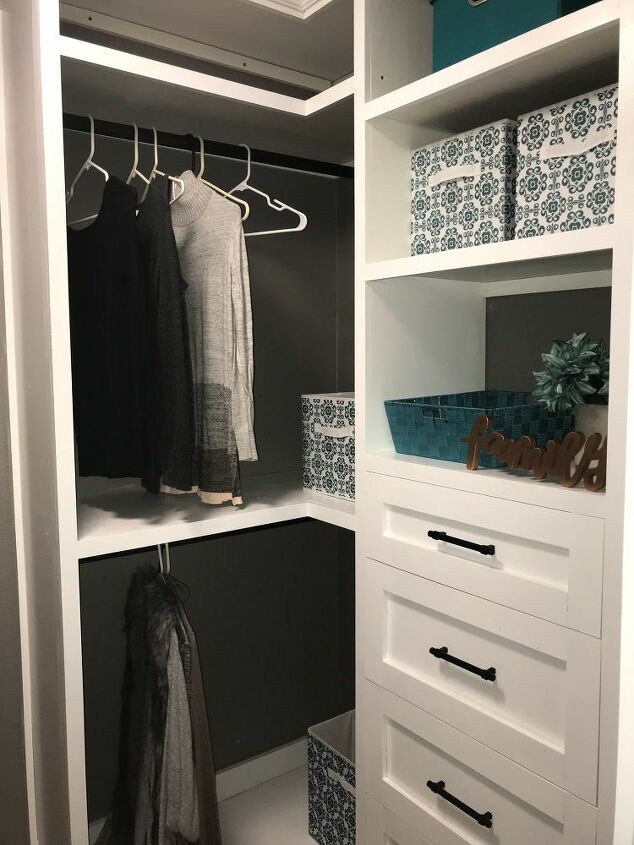
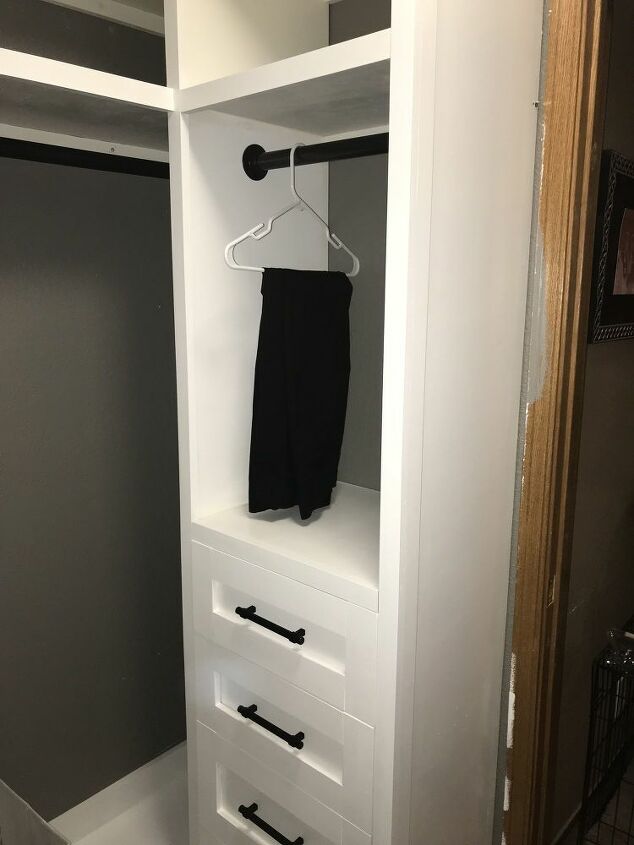
Next came all of the shelving, including for the shoe racks. I cut these out of 3/4" plywood, painted them white, and attached to the walls of the closet organizer.
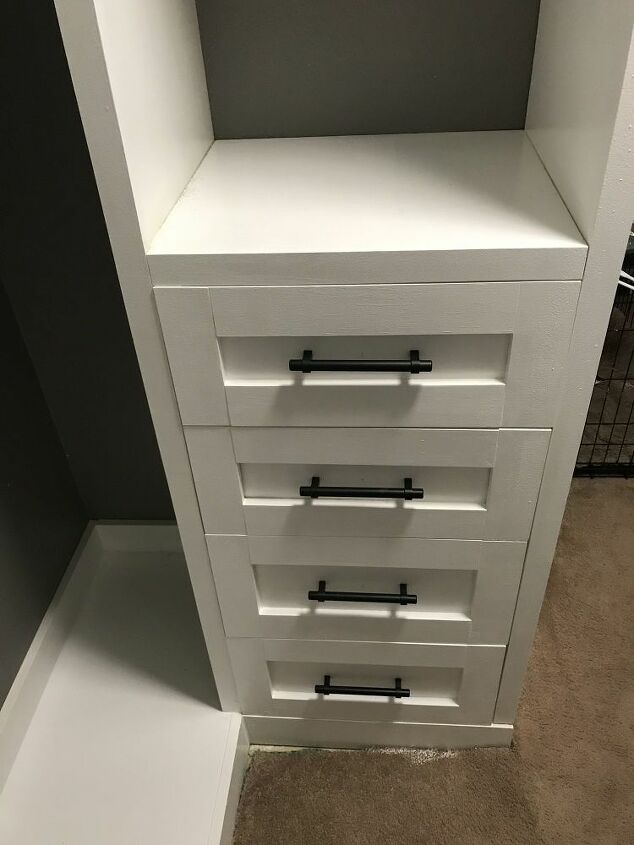
Once all the shelving was installed, I cut the boards for the drawers and then assembled them. I installed drawer rails for each of the drawers, and then installed the assembled drawers.
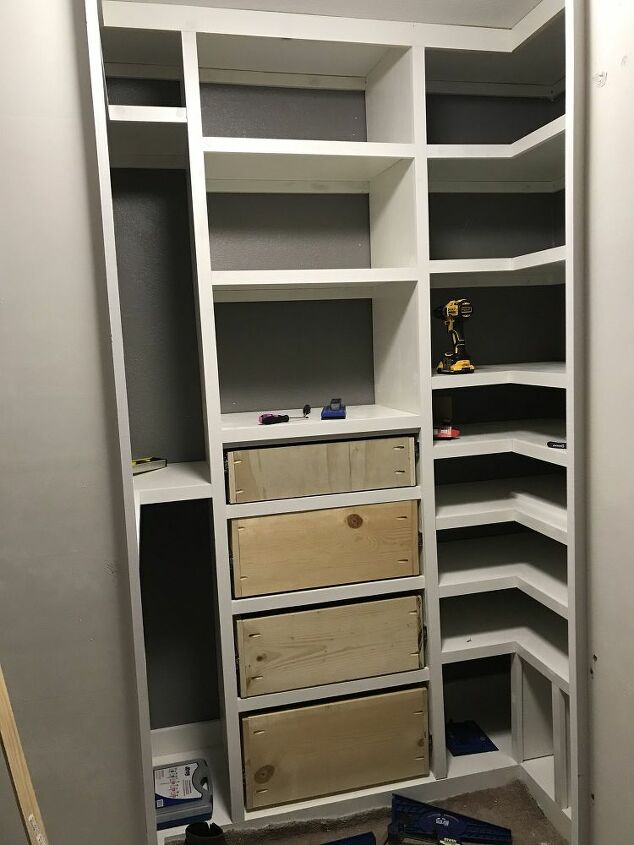
I then attached 1x2 trim to the front of all the shelving and walls. Once the trim was attached, I cut and assembled the drawer fronts and attached those to the already installed drawers. I then added drawer pulls to all drawers.
Next, I cut and installed crown molding around the top of the organizer. I filled all holes with wood filler, sanded and let dry. I then touched up the paint.
I installed the poles to hang clothing, and then started adding my clothing and other items.
Resources for this project:
See all materials


Comments
Join the conversation
-
Love this! Thank you.❤
-
Very nice job. I tried your link but it doesn't work and I'd like to see your step by step process.


Frequently asked questions
Have a question about this project?
What were the tall cubbies next to the drawers designed for and the tall cubby on the bottom in your shoe section. It looks like it might be hard to get something from the back of the left one. I could see the 2 to the right could be used for boots. Just curious, because it looks like you put a lot of thought into your design, I Love it and I hope to create my own. Thanks for sharing
As a woman there's no way I could do this. Do u have a man to help you? I wanna make a custom closet out of a small bedroom I no longer use. I've been thinking Ikea but I like the stick built much better.
How did you support all your shelves? I don't see any L brackets... Or any brackets?