


How To Make A DIY Wood Chalkboard Wall Calendar
10 Materials
$45
2 Days
Easy
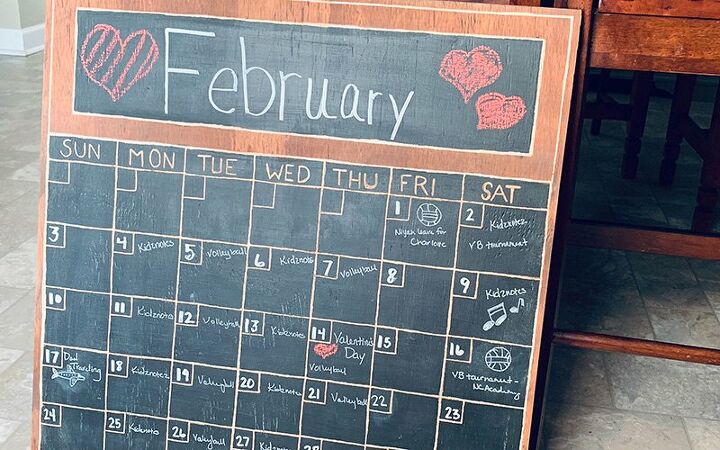
A DIY Wood Chalkboard Calendar that is a stylish, functional staple piece in my command center organization efforts.
- Lay your dropcloth on your work surface and lay your wood board flat on the dropcloth.
- Using an application brush, apply the stain to the front surfaces and around edges of the board.
- Allow 2-3 minutes for the stain to penetrate and then wipe excess using a clean white rag.
- Allow time to dry according to directions on stain container.
- Measure boarder of the board. I chose a ¼” all the way around.
- Using the Dremel Stylo+ and the .08" tip attachement carve out your border.
- Measure the calendar dates space to plan for the calendar box. My measurements are 3.3” wide by 3” tall boxes and 1.5” for the weekday space. Making my box ended up being 16.5” x 23”.
- Carve out the outline for your calendar square using the Dremel.
- Paint the square using the DecoArt Chalkboard paint following the instructions. Two coats in total. First coat applied in the same direction. Allow at least an hour to dry and apply the second coat in opposite direction. Allow paint to dry fully.
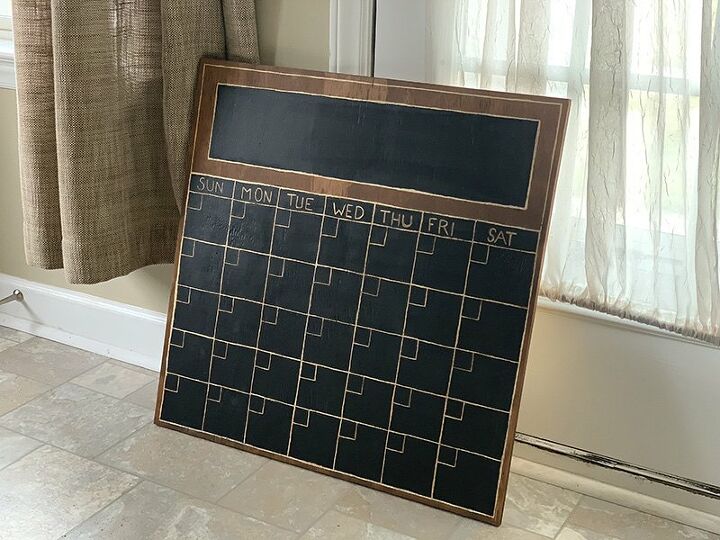
- Using your ruler, speed square, and a chalk pencil, sketch out your horizontal calendar lines. Sketch out those lines using your Dremel.
- Repeat and do the same thing for the vertical lines of your calendar.
- Measure out the month space for your calendar. I chose to leave an inch inside all the way around.
- Using the speed square measure out 1”x1” squares in the upper left corner of each of the calendar squares. Use your Dremel to sketch out each of those squares.
- If you chose, you can add in your dates of the weeks with the Dremel or write them in each month when you update the calendar.
- After 24 hours when the chalkboard paint has fully cured, cover the entire chalkboard with chalk and wipe clean with a rag wet with water.
- Add picture hangers and hang on the wall.
{
"id": "5322162",
"alt": "",
"title": "",
"video_library_id": "5633",
"thumbnail": "https://cdn-fastly.hometalk.com/media/2019/02/17/5322162/how-to-make-a-diy-wood-chalkboard-wall-calendar.jpg"
}
{
"width": 634,
"height": 357,
"showRelated": true,
"noautoplay": ""
}
This project is a part of a roundup of home organization projects with myself and almost 40 other home and DIY bloggers. To see more projects to help organize your home and in process photos for this project head over to the blog.

Resources for this project:
See all materials


Any price and availability information displayed on [relevant Amazon Site(s), as applicable] at the time of purchase will apply to the purchase of this product.
Hometalk may collect a small share of sales from the links on this page.More info

Want more details about this and other DIY projects? Check out my blog post!


Frequently asked questions
Have a question about this project?