How to Build Your Very Own Pallet Wood End Table and Add a Graphic

Art is beauty
by Art is beauty
Have you ever wanted to know how to build your very own end table using FREE pallet wood. Well now's your chance. Head on over to see how its done! and with a Freezer paper transfer from the +The Graphics Fairy LLC too! ‪#‎ReclaimedWood
zerpaper 
Good Morning my Beauties!


While we have been UBER busy with everything going on at our home


I thought I would show you a fun and easy way to make a FREE pallet art End table.


(I used scrap wood with this project also but I have also built the same table with pallet wood)
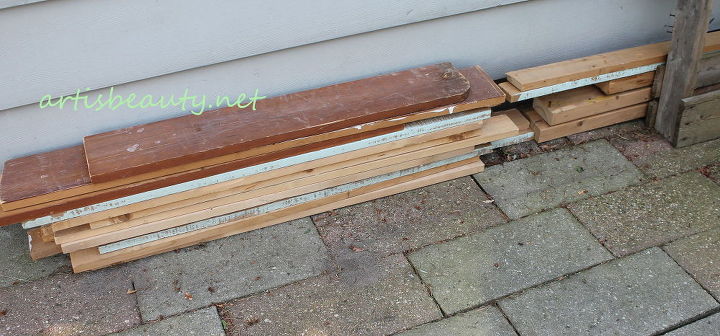
This right here is free pallet wood and other scraps from


out of my neighbors garage. They were happy to have me haul it away.


I knew just what I wanted to do with it.
Like I have said before...free stuff and power tools make my day...


I think my hubby was a little miffed at me because he wanted to build


the table. I usually give him some of these kinds of projects, but that's when he is pestering me to clean out the garage or something..It will usually get him off my case for a couple days...:)
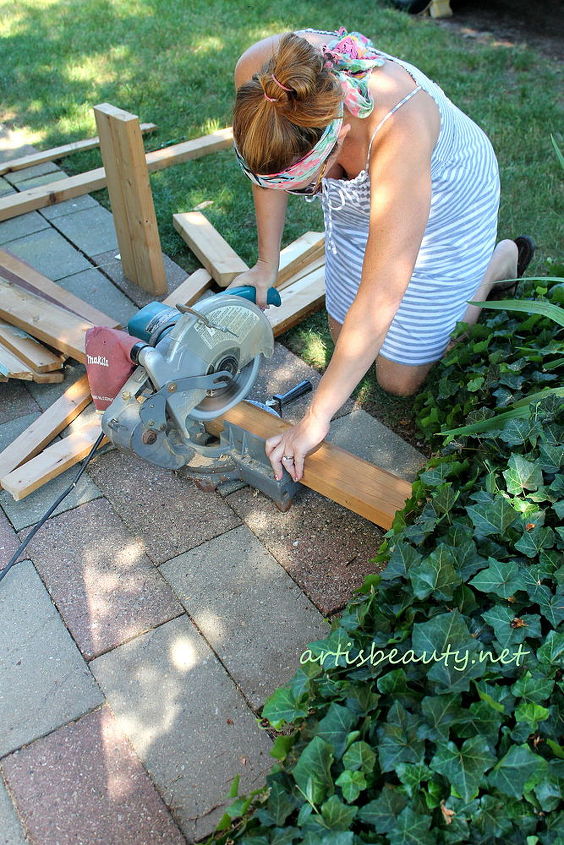
So with a couple of cuts I started making my table.


I had watched my husband make our beautiful farm table for our fire pit last summer


so I knew kind of what I needed to do. IF you head over to the website you can see all the different farm style tables we have built this way using the same common design.
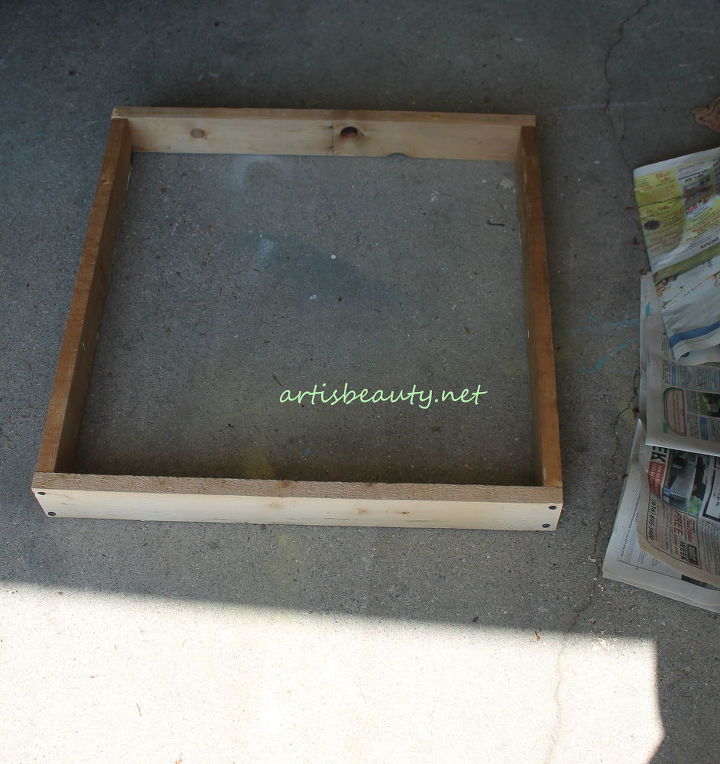
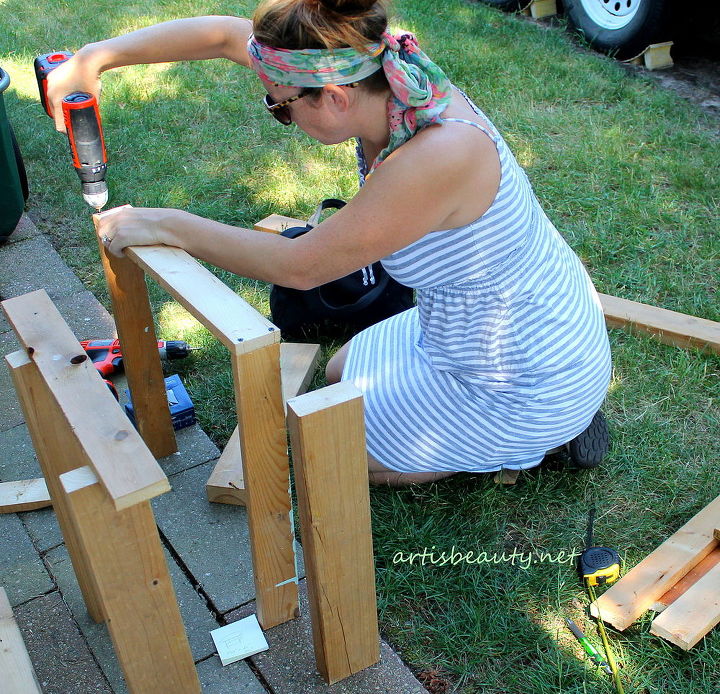
First I made my apron and attached the sides together.
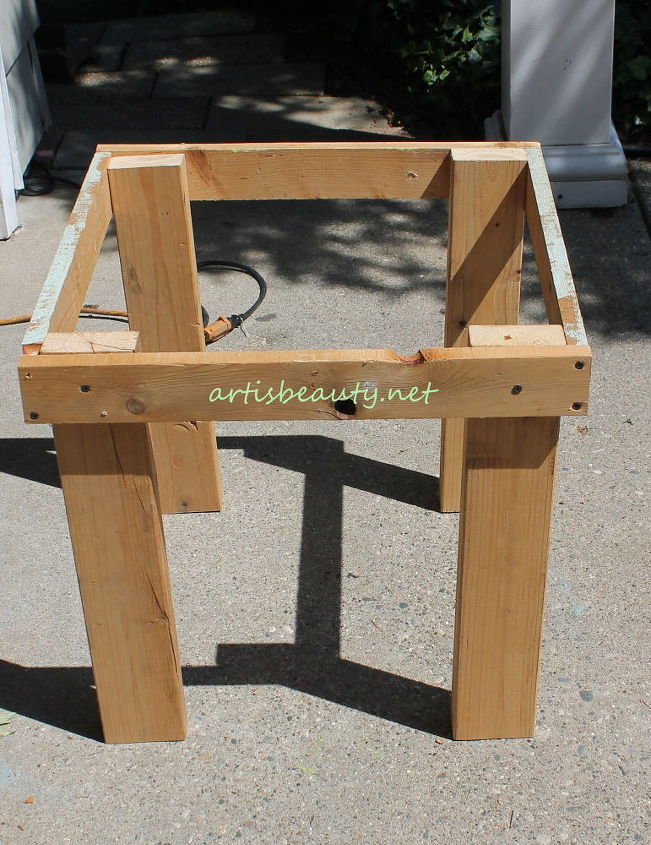
Then I added my legs. Making sure everything was square and level.
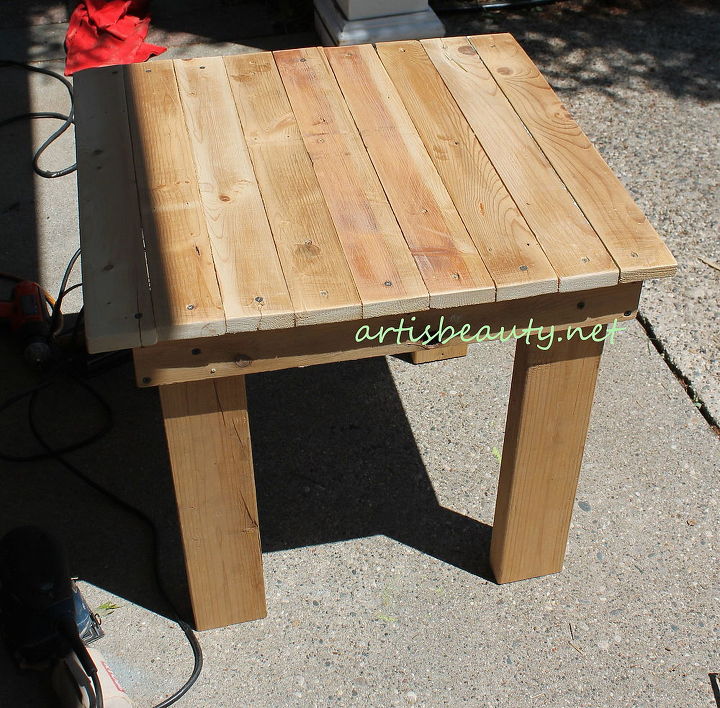
I cut all my boards for the top the same size and started screwing in my boards.


I then stained just the top of my table and while that was drying got started on choosing my graphic
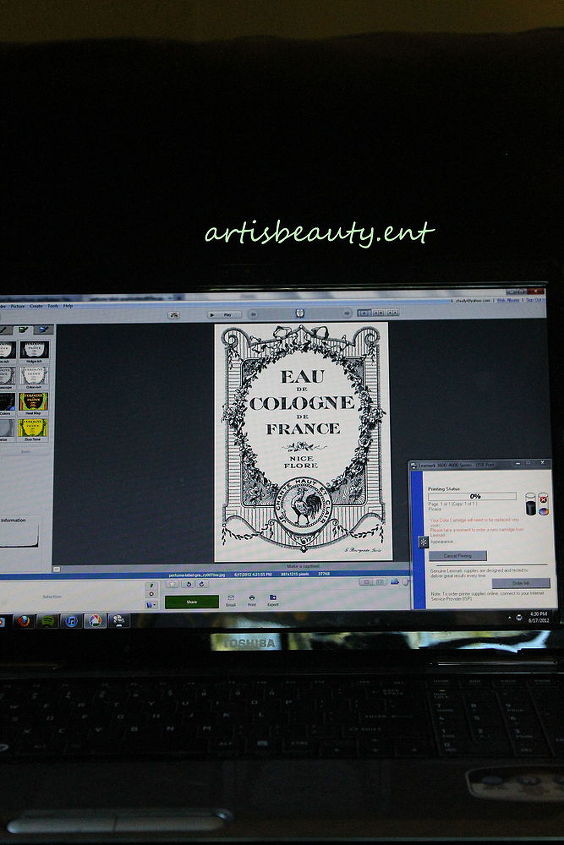
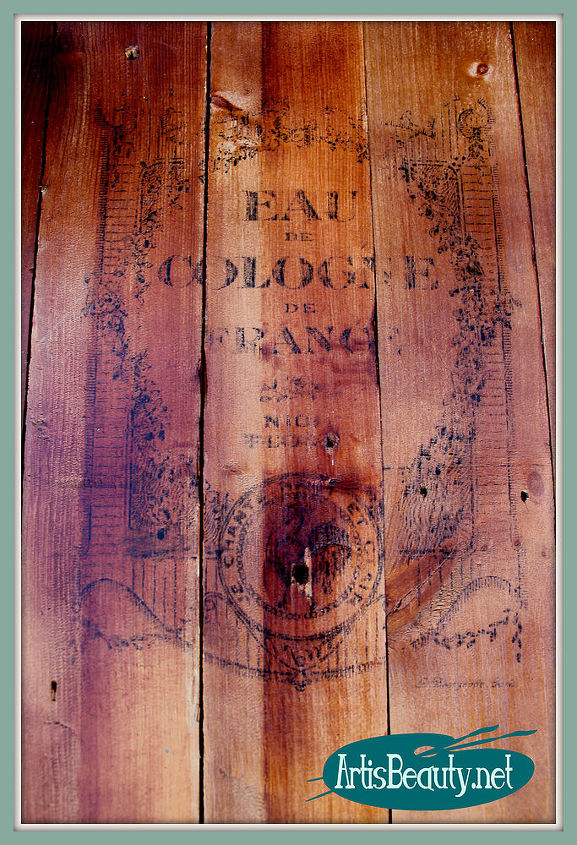
Now for the fun part.. freezer paper transfers.


First let me say how much I LOVE the GRAPHICS FAIRY since she supplies such amazing free graphics.


I went on her website there and got a nice FRENCHY one.
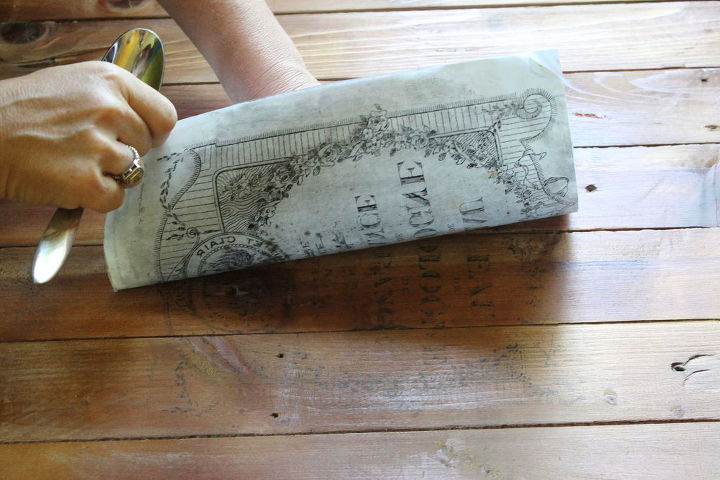
I printed my graphic out on my freezer paper in reverse. I have glued my freezer paper to card stock to make it easier to feed through the printer. Shiny side up so that you can transfer the ink. Now the fun part...again..:) Here is where I lay down my graphic and start burnishing it


with the back of a spoon. Now don't get frustrated with this. I hear from quite a few people that


they haven't had any luck, but practice makes perfect. You can see here the ink transferring to the table. I had to lay it back down a couple times


to make sure it came through enough; you just have to be careful not to move the paper


or it WILL smudge.


VOILA!!! A beautiful FREE FRENCH table.
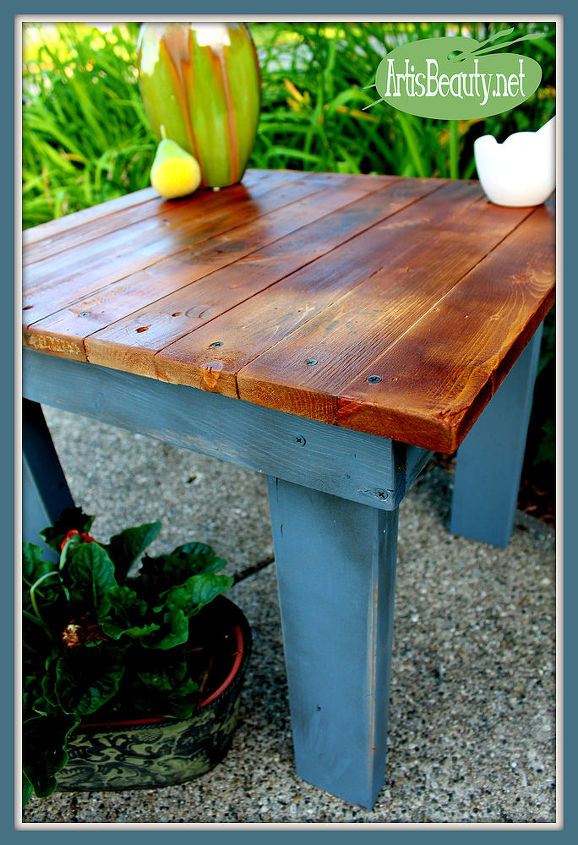
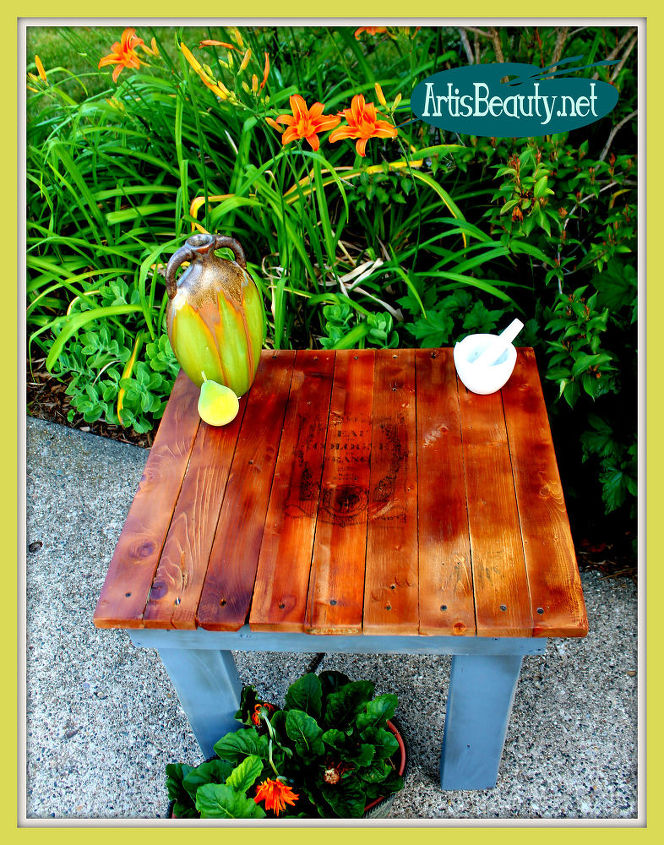
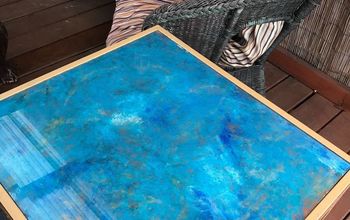
I painted the legs with some paint I had. It was a mix of some blue and cream color, to make a nice dusty blue.
I just love how it turned out; and the best part...FREE!!!


I hope you guys enjoyed this tutorial and find ways to make fun free stuff


for your home too.


Until next time, go make someones day BEAUTIFUL.
Art is beauty
Want more details about this and other DIY projects? Check out my blog post!
Go
Frequently asked questions
Have a question about this project?
Comments
Join the conversation
3 of 4 comments
Next