


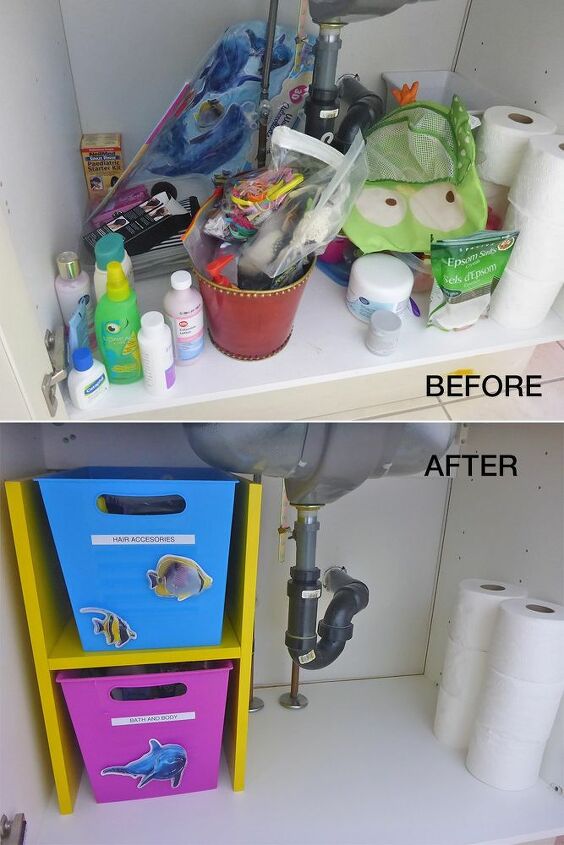
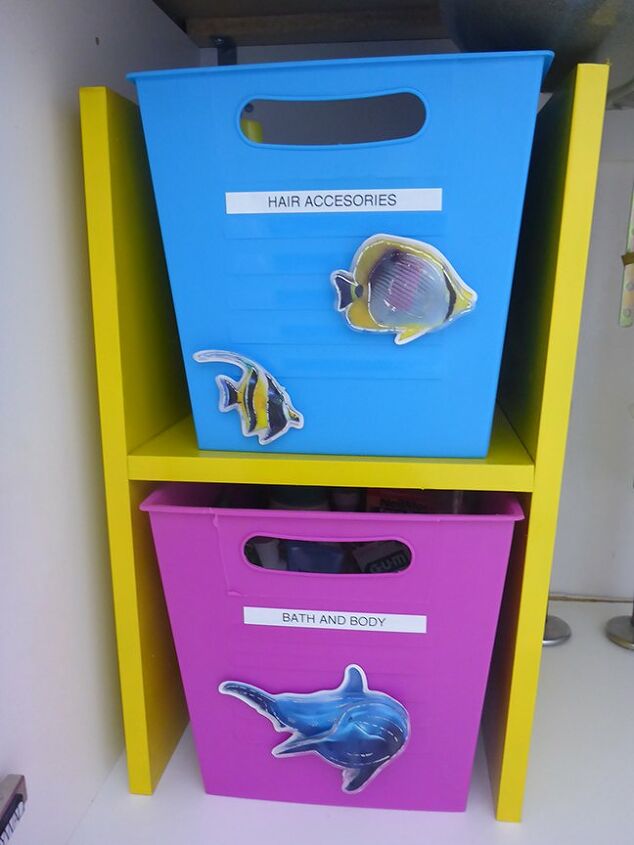
DIY Bathroom Vanity Storage

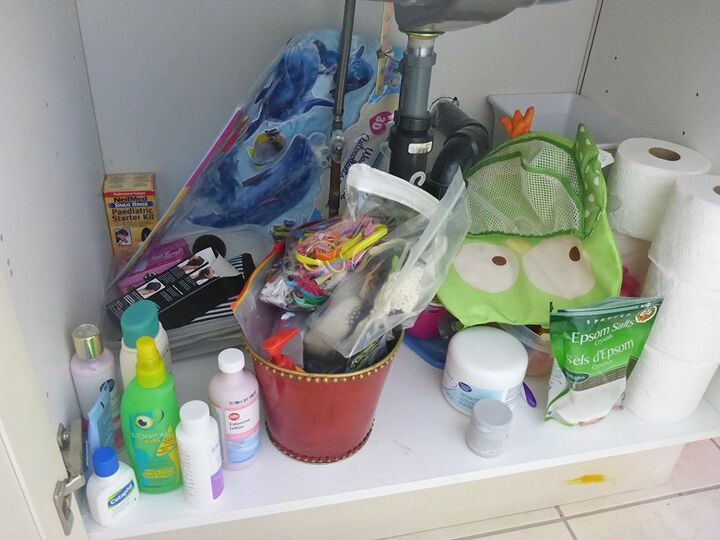
Our main bathroom has kind of become my 8 year old daughter’s bathroom. She’s not the most organized (what 8 year old is?)…and her vanity has become a bit of a disaster zone. If there was a leak in there I’m sure I wouldn’t realize it until it was a big issue! So I needed to find a budget friendly storage solution.
Step 1:
I measured the largest available space in her vanity.
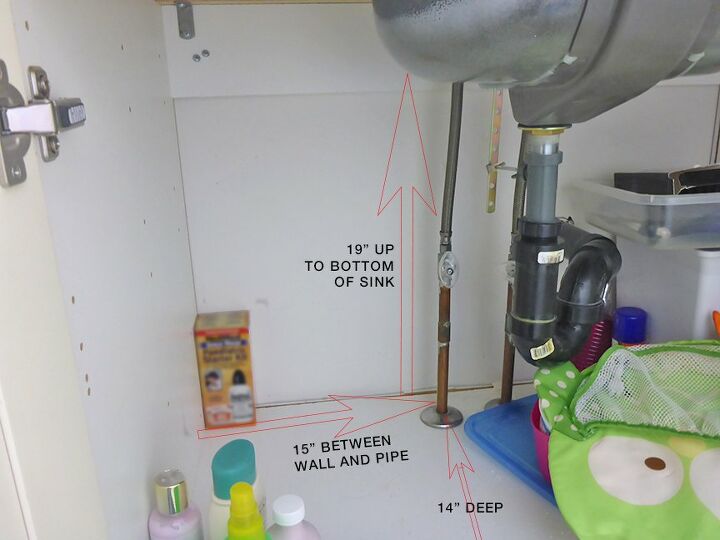
I wanted to create something that would allow me to stack two storage bins in that space, so I decided on a simple H frame.
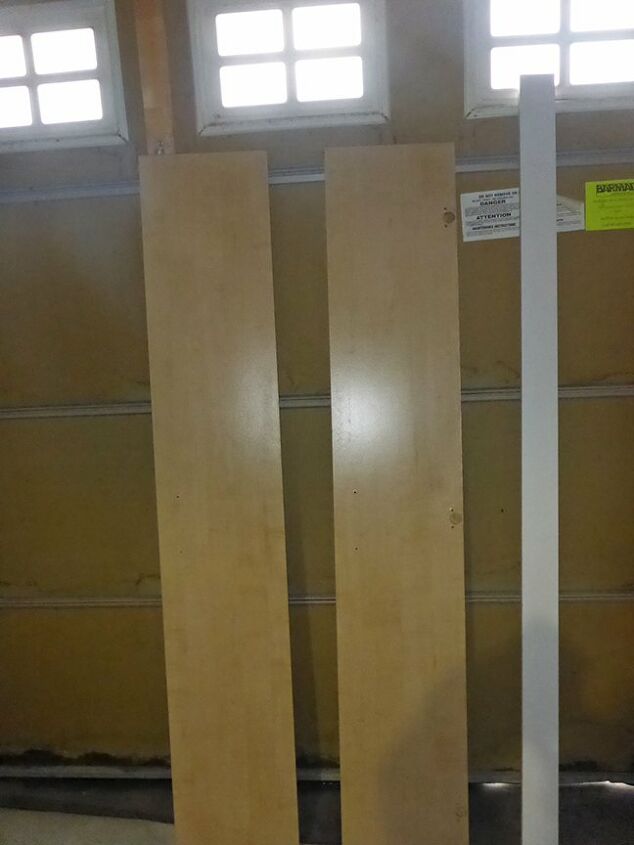
I went into my garage to see what I could use to build the frame. I don’t have any real wood to speak of, but I did find a pair of old doors that I took off a cheap particleboard cabinet, when the hinges broke. I wasn’t sure if this was a viable option, as we all know particle board is a pretty weak substance. But since this was going to be small and wouldn’t be holding much weight…I decided it was worth a shot.
Calculating the bin sizes:
I wanted two, so I divided the height of the space by two…and then subtracted .75” (which is the thickness of the door I planned to use). Then my daughter and I headed out to the dollar store to find 2 bins that would come the closest to the max sizes. Once I found the bins that came closest to our needs, I let my daughter choose the colours. She chose pink and blue.
Step 2:
Now that I had the bins I calculated the exact size I needed to build my H frame. I cut out the pieces using a miter saw.
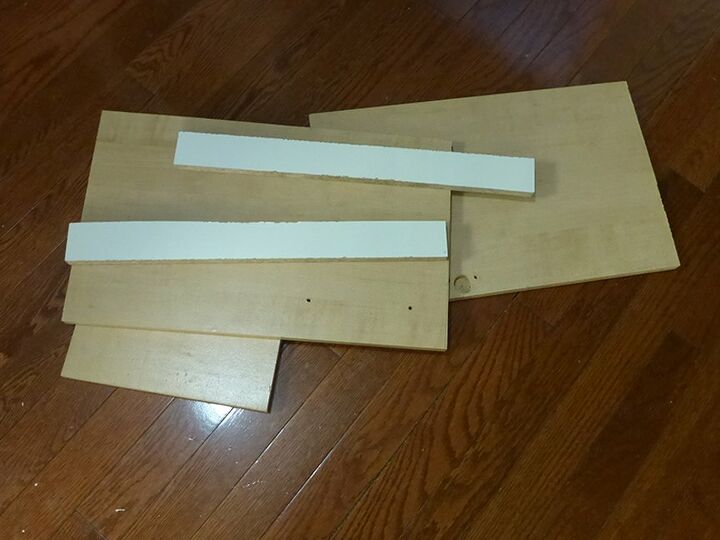
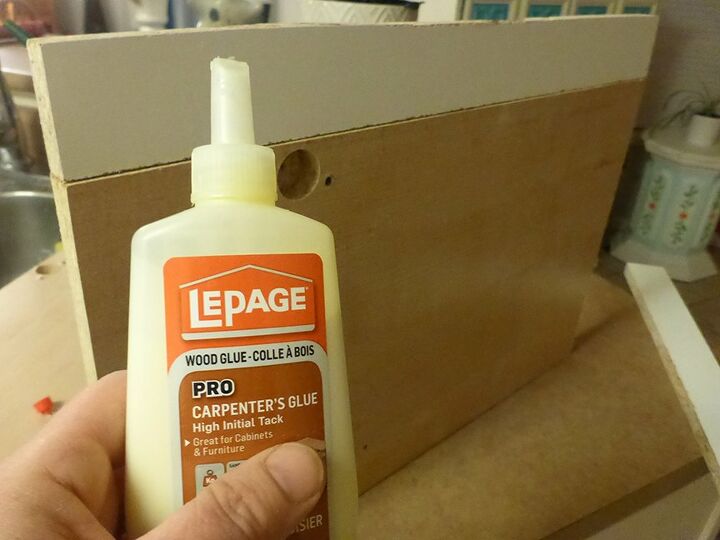
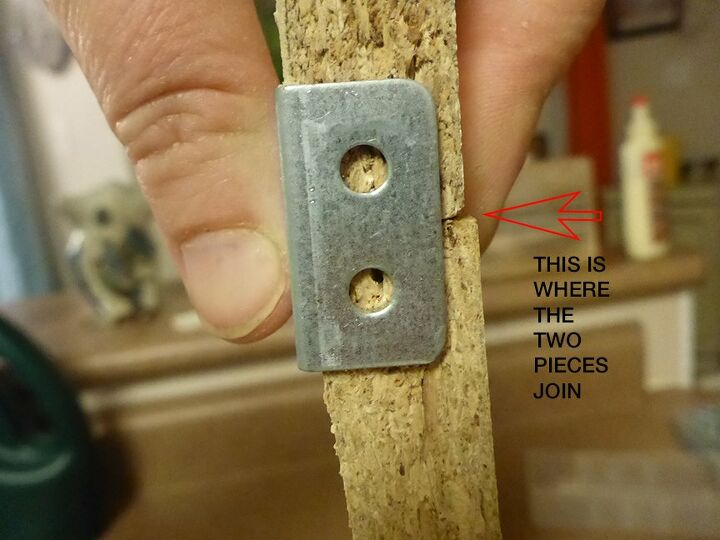
Because the width of the door was not deep enough for the end pieces, I used another piece of particle board I found in my garage to extend it the last 2 inches. I used wood glue to attach the 2” filler pieces to the back of the frame.
Then I reinforced them with little brackets.
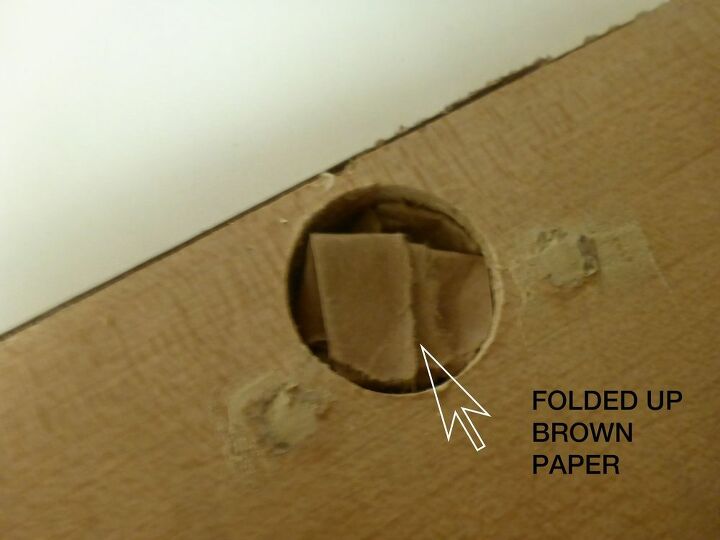
Then I filled all the holes from the door hardware and also where the door transitioned to the filler piece with wood filler.
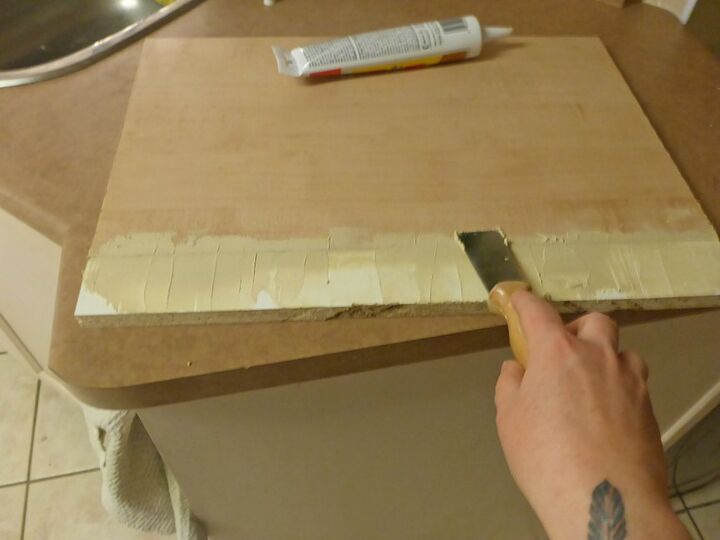
I didn’t want to use up all my filler on the larger holes so I pulled some paper out of recycling and stuffed the holes with paper before adding the wood filler. Once dry I sanded it.
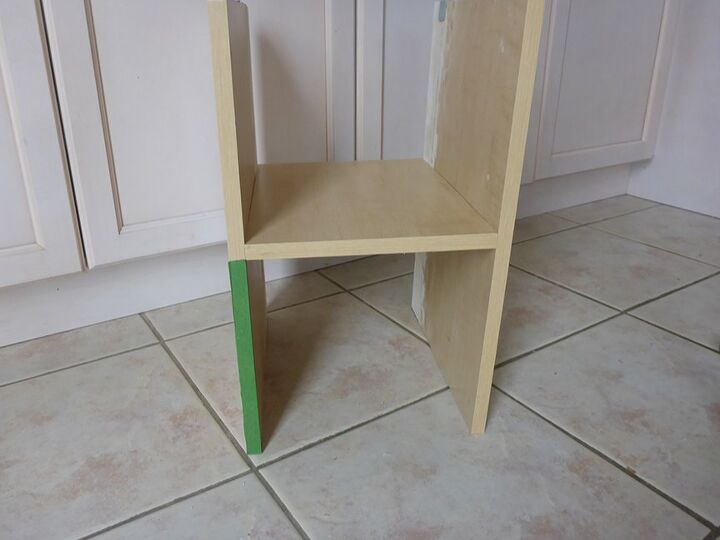
Step 3:
Building the H frame
I only had about ½ inch of wiggle room so I wanted to make sure the shelf was in exactly the right spot! So I measured out a piece of painters tape and taped to the front to use as a guide.
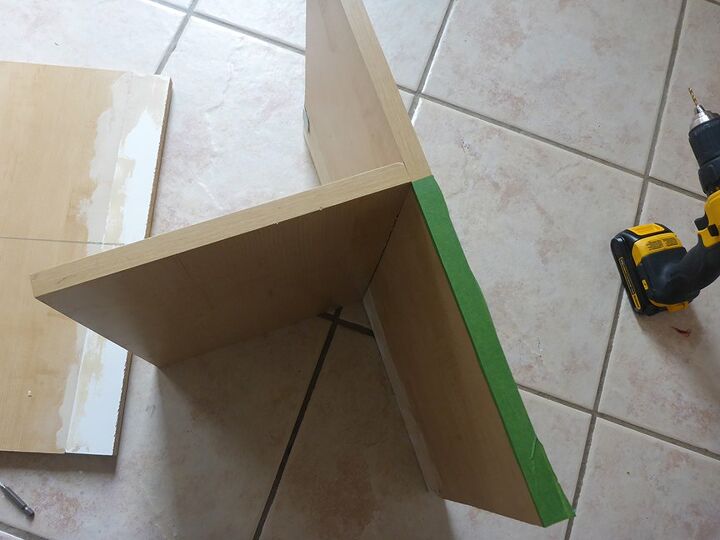
I pre-drilled holes using a 7/64 drill bit and then the screws, to attach the shelf and complete the H frame. I also added 2 little strips of trim to the back to give it a little more support. The frame turned out surprisingly sturdy! Likely because it’s so small.
Step 4:
Painting the frame
Again, I let my daughter choose, as this was for her! She chose a bright “sun yellow” spray paint. I had picked it up ages ago as I thought it was a gorgeous happy yellow.
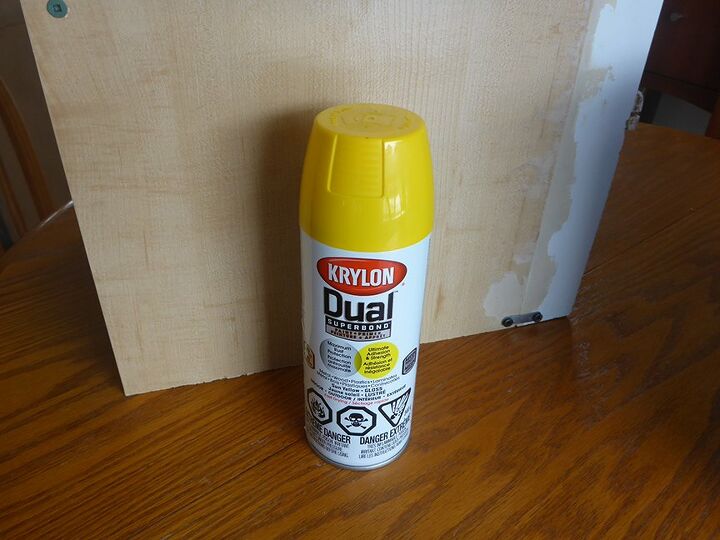
But, lesson learned, I’ll never buy spray paint on impulse again! It was nasty, stinky stuff! It hurt my lungs even though I was covering my mouth and nose with a thick padded sleeve. And the paint ran and looked terrible! But because this was going to be inside the vanity I decided to leave it!

And there it is…my $15 vanity storage (and saving the environment one cheap particleboard door at a time. ;) )
Now that I have figured out the process and know how easy it is..and that it actually works…I’ll be using the other door to build one for my vanity! Although I think I’ll go with a different colour scheme. And definitely different paint!!

Resources for this project:
See all materials


Comments
Join the conversation
-
Great idea! I'm all for containers and shelves! Great job makeing them with what you had on hand.
-
Great job using what you had and getting it all figured out. It looks cool.


Frequently asked questions
Have a question about this project?