


How-To Replace Outdoor Wall Sconces
Thinking about updating or replacing your outdoor wall sconce lighting? Before you buy a new exterior light fixture, there are some things you need to know!
What to Consider When Choosing Outdoor Wall Sconces
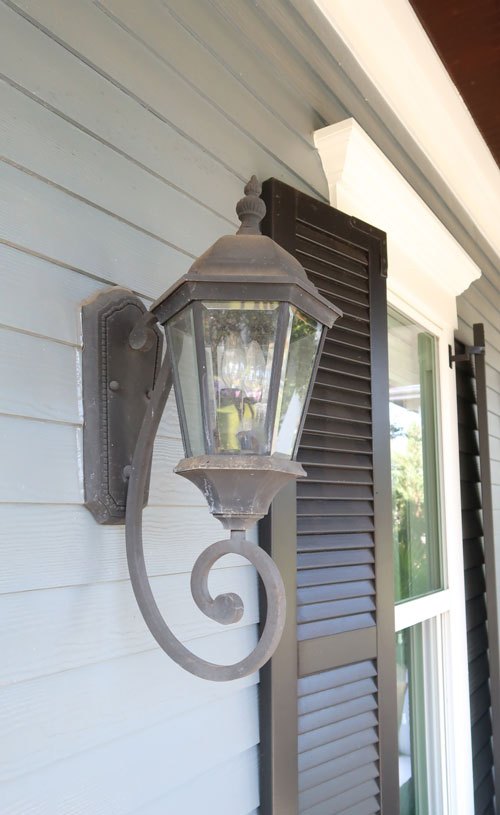
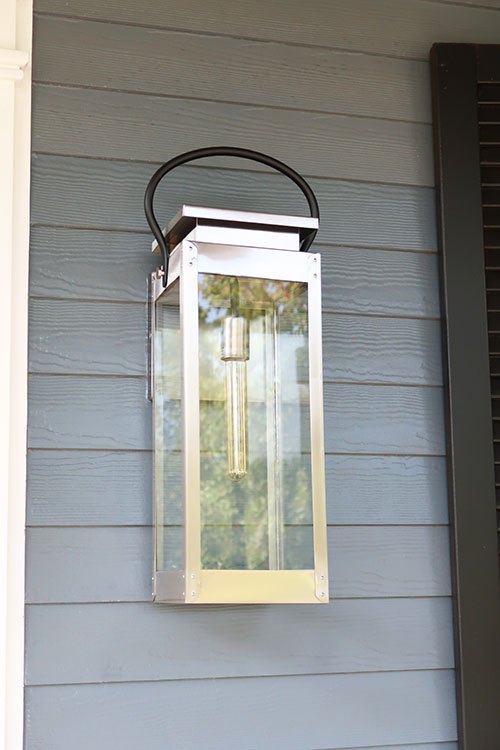
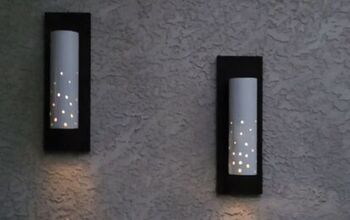
Here is the exterior light I am going to replace in this tutorial.
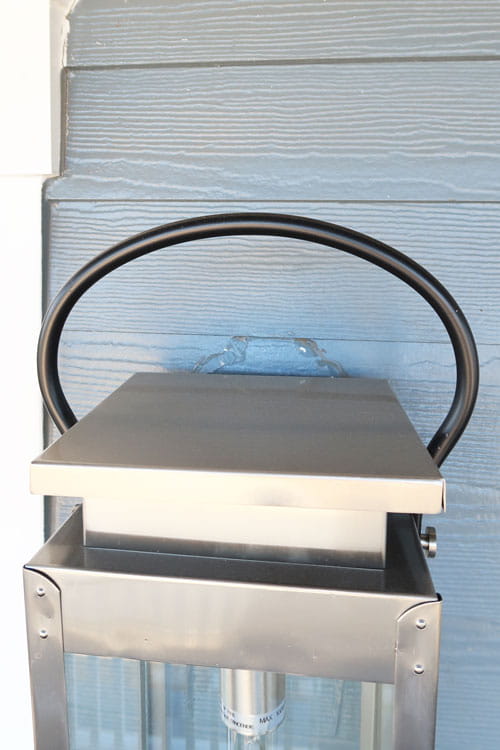
The MOST important part of a wall sconce you need to be aware of is the backplate of the fixture. Why? Because when you pull it off the wall, silicone caulk will be left behind.
In almost all instances, when exterior lighting is installed, the way it is sealed to the wall of the home is with silicone caulk.
Silicone caulk is used because it is waterproof, has a strong adhesion to a variety of surfaces, and is virtually indestructible!
Do you see how large the backplate is? Do you see all the silicone around the backplate of that large shield against the siding?
That is where we begin to run into trouble!
How-To Find Backplate Dimensions
When you go shopping, I want you to pay attention to the following dimensions (you may need to go to the manufacturer’s web site for this):
- Height
- Width
- Depth
- Backplate dimensions
Once you see if the backplate is close to the previous model you are replacing, you can rest easy the installation will be much easier.
- If you find it’s much smaller, you can always go back and try to search for something with a larger backplate.
Or proceed ahead, using this tutorial!
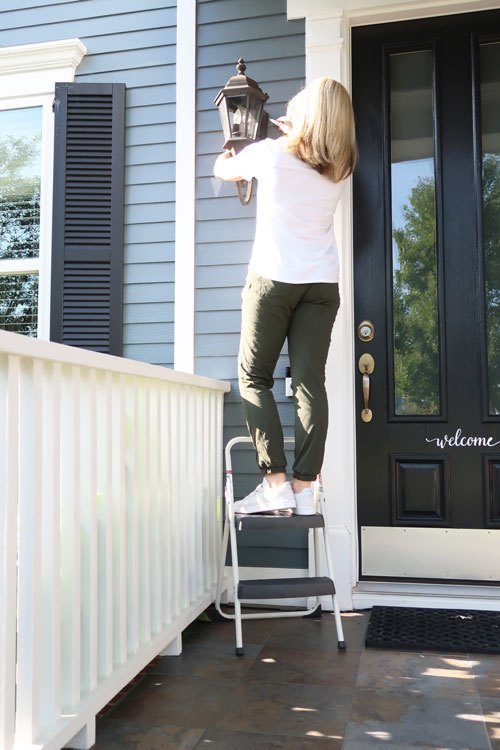
BEFORE BEGINNING: Turn the electricity off at the circuit breaker that feeds the outdoor sconces.
STEP 1: REMOVE THE OLD LIGHT FIXTURE
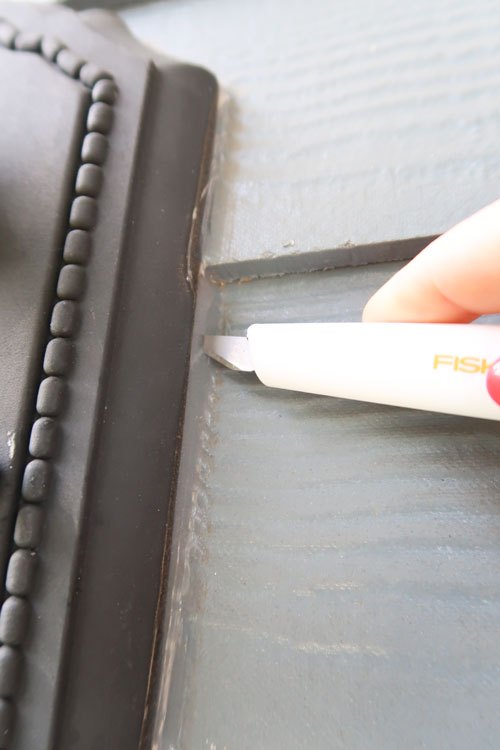
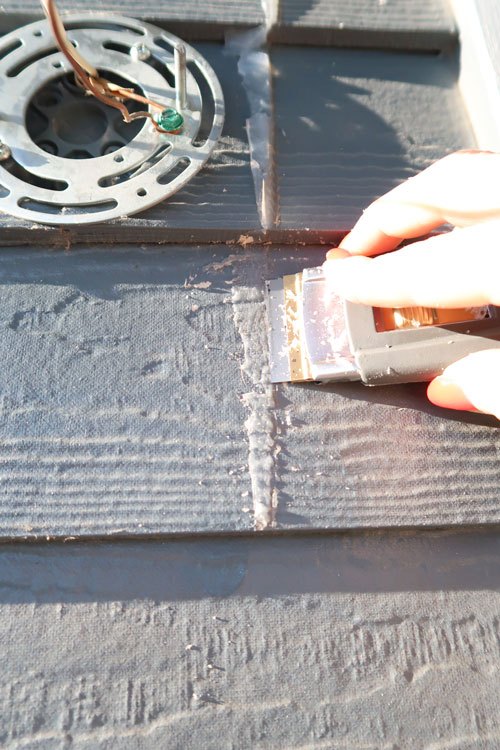
Using the exacto knife, cut into the silicone caulk as CLOSE to the siding as you possibly can! The closer the better.
Work all the way around the backplate in a sawing motion.
Remove any screws that are holding the backplate to the mounting bracket.
Pull gently to remove the backplate from the siding. If you find it’s resisting, run your knife through the silicone to release it in those areas.
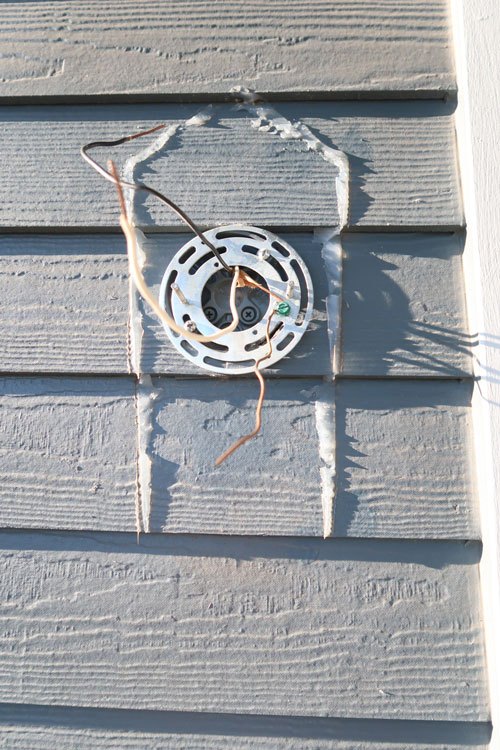
Here is what you will be left with after removing the fixture. Scary right? Who ever installed my lights used a lot of silicone!
With your fingers, see if you can peel off any of the strips of silicone. I didn’t have any luck with this, but it is always worth trying.
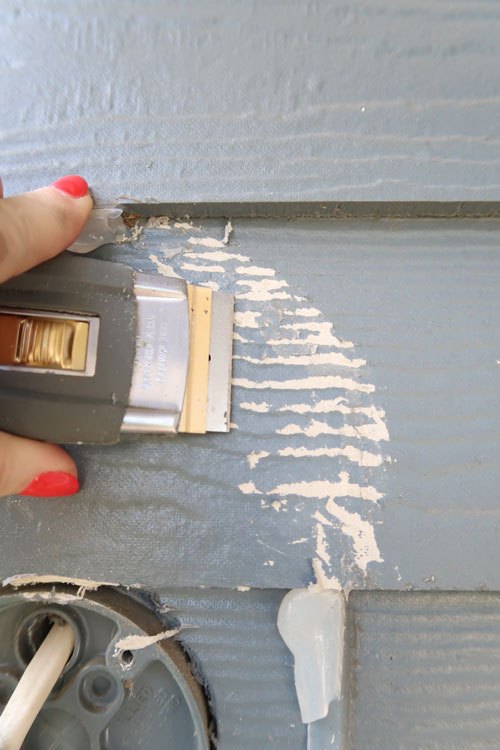
STEP 2: SCRAPE OFF SILICONE CAULK
Get out both scrapers! Start with the larger scraper.
IF YOU DON’T HAVE TOUCH UP PAINT, STOP SCRAPING BEFORE YOU GET TO THE SIDING.
I tried to get as close to the siding as I could without damaging it. It’s VERY hard not to scrape the paint.
This would also apply to VINYL siding, but most people who have vinyl have a separate piece attached to the siding.
If you have brick, I’d say the same. Scrape off as much as you need to, but you won’t need to repaint so leaving a little behind won’t matter.
STEP 3: REMOVE ALL SILICONE PRIOR TO PAINTING
IF YOU HAVE TOUCH-UP PAINT, scrape off the silicone from the siding. It will requiring removing the paint down to the siding.
This job is not fun and takes quite a lot of time, so get yourself some water before you get started – maybe even a snack!
Apply even pressure, so you don’t dig a corner of the blade into the siding. Start with the areas you know will be hidden until you get the hang of it!
The large chuck of silicone I pulled off with my fingers. The smaller scraper comes in handy in the areas between the boards.
This is what it will look like, when you get finished.
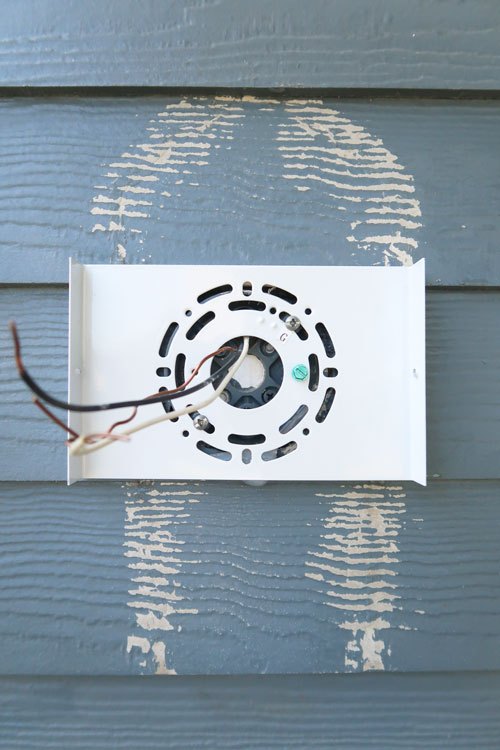
In this picture, I pulled through the wires and attached the mounting bracket that the fixture is going to be attached to. All it takes is 2 screws.
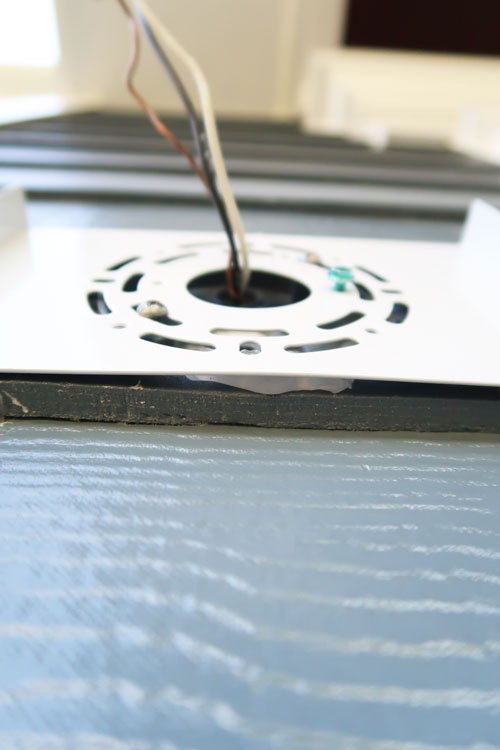
You can see I tucked a piece of the dried silicone I pulled off from the previous installation, to push the bottom of the bracket forward and make the mounting bracket flush with the top piece of siding.
The silicone is acting like a "shim" .
Wipe the siding clean, in preparation for painting. Make sure it is free of all dust, dirt, silicone particles and debris.
If you don’t have touch-up paint, you now can install the light! The first light I installed, I left with the silicone visible and didn’t touch up with paint.
It’s on my 2nd story and not seen by many people other than me 🙂
On the lower level, I aggressively removed the silicone to paint since those sconces are the most visible.
STEP 4: TOUCH-UP THE PAINT
I used a regular paint brush and my leftover paint. Sorry, I don’t have pictures of this stage!
Let the paint dry for an hour or so before attaching the light fixture to the plate.
While the paint is drying, clean up all of those little pieces of silicone that have scattered about!
STEP 5: INSTALL THE OUTDOOR WALL SCONCE
Following the manufacturer’s instructions, assemble the fixture if needed. All I had to do is attached the handle at the top and add the glass panes.
Attach the black wires, white wires and grounding wires together. Attach the grounding wire to the green screw on the mounting bracket.
Using the screws provided, attached the fixture to the mounting bracket.
Install a light bulb and flip on the circuit breaker to test the light is working!

STEP 6: SEAL AND PROTECT WITH NEW SILICONE CAULK
Use clear silicone caulk in a caulk gun to caulk between the wall and the fixture. Remember to cut the tip off of the caulk tube and pierce it with the tool from the caulk gun!
PRO tip: lay the bead of caulk, spray with a bit of Windex, then use your finger to tool the caulk flat.
The excess caulk will pull off onto your finger and away from the wall and fixture. Have ROLL of paper towels handy to wipe off the excess caulk and Windex.
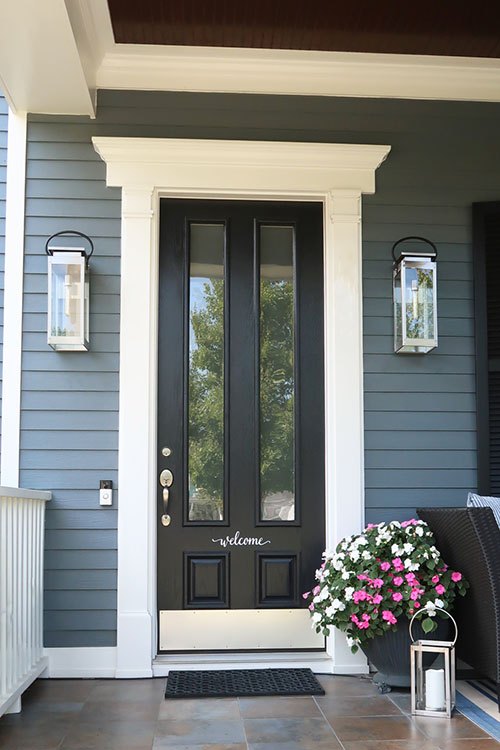
Not an easy project, but it made a huge difference to my entry way!
Feeling inspired? Follow the link below to view the details in this post and shop outdoor wall sconces!
Or want more information on upping your home's curb appeal?
Resources for this project:
See all materials


Comments
Join the conversation
-
Hi, I went to your site to look at this job specifically. I didn't find any night time pictures to see how bright lights looked like at night.
-
wow looks great


Frequently asked questions
Have a question about this project?
If I were to hire someone to install this for me, any guesstimate on how much is a reasonable charge for two light fixtures next to a garage?
I really like the light fixtures you picked. Can you add a picture of it at night with the lights on ? I would've really liked to see how bright those kind of lights are.