


How To Paint Kitchen Cabinets Without Sanding

Today I'm going to show you how to paint kitchen cabinets without needing to sand!
I experimented last summer with a product called Oil Bond when painting my bathroom vanity. Oil bond has very mixed reviews (although not many reviews on Amazon) and I wasn't sure what to expect. I'm wondering if the quality of the paint has anything to do with it - so I recommend spending a bit more on Valspar cabinet paint! I read a blog review that gave Oil Bond a high rating, so I figured I'd start on a smaller project first, and if it ruined my bathroom vanity, that was smaller to fix than my entire kitchen!
For me, Oil bond worked perfectly on my bathroom vanity and the paint has held up quite nicely - no peeling, no scratches or dings and I love how it turned out!

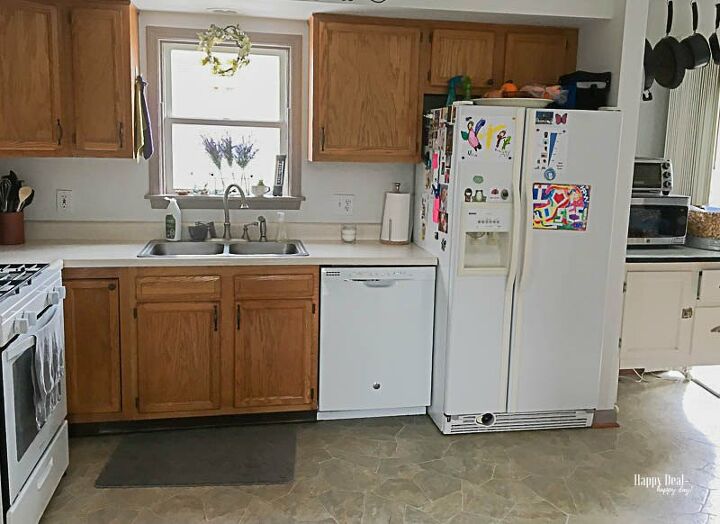
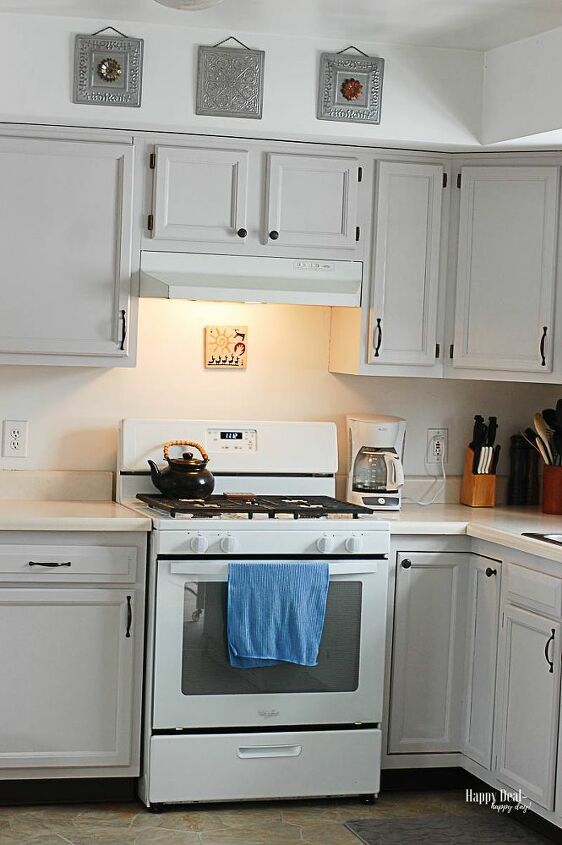
So after I was pleased with my bathroom, I decided to take on my kitchen cabinets. Lucky for me, I have a very small kitchen without tons of cupboards, so I knew it was a job I could handle.
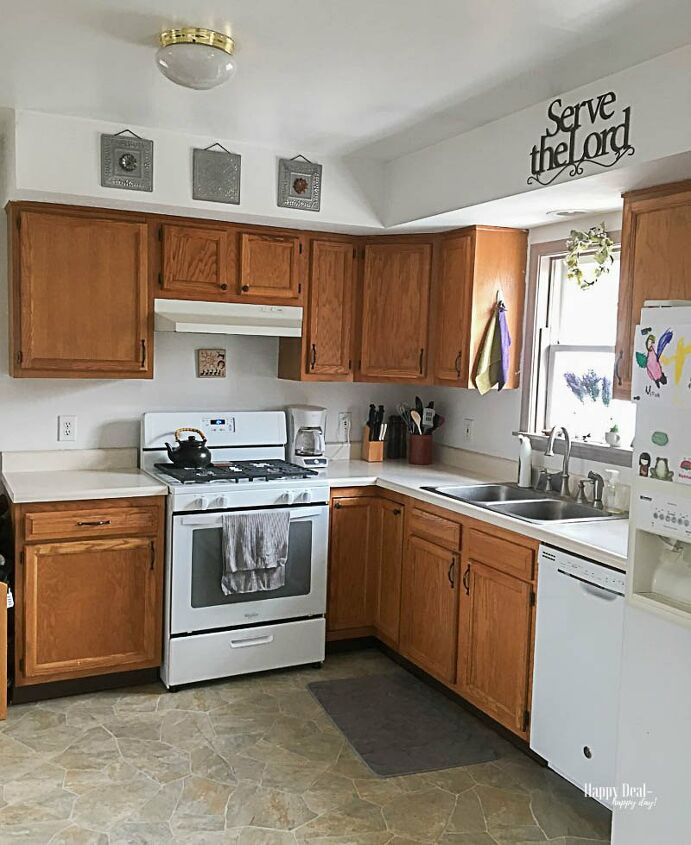
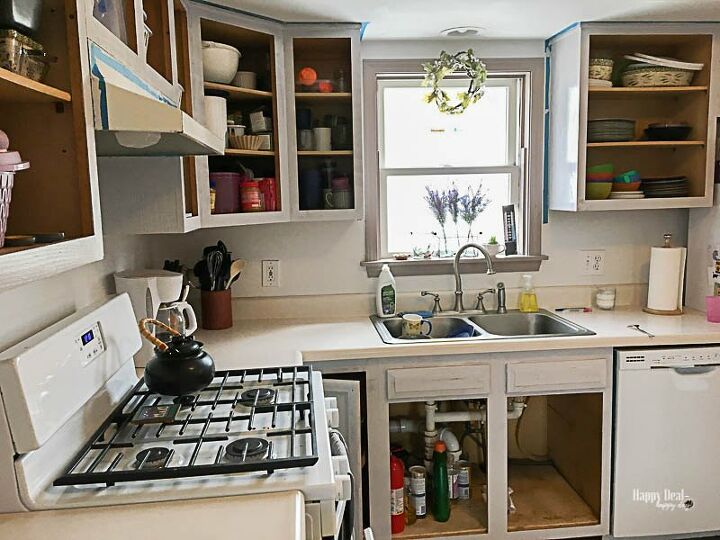
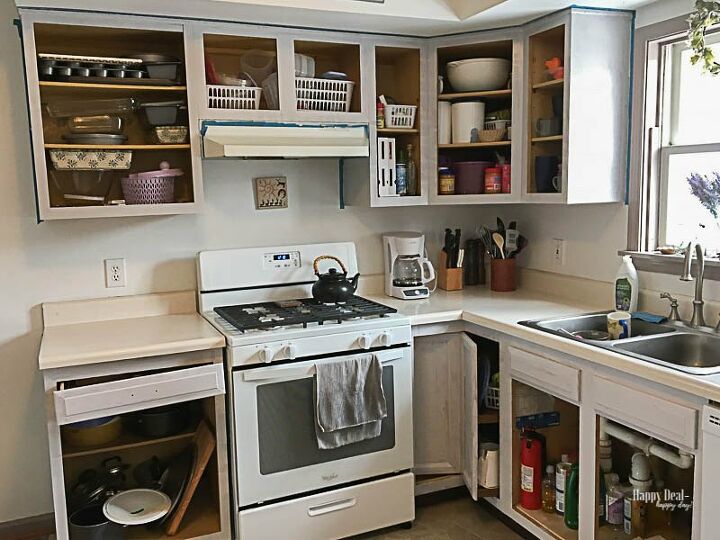
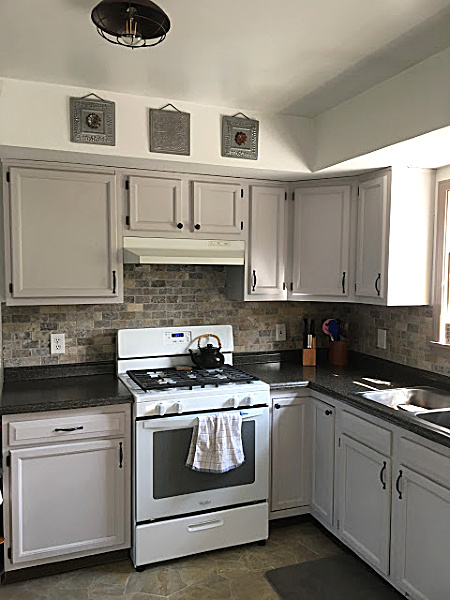
I'm giving you a bunch of before pictures so you can see all of my cupboards and what I had to tackle and paint.
Materials needed to paint kitchen cabinets without sanding:
- Painters tape - I like the ScotchBlue trim and baseboards painters tape
- Valspar Cabinet Enamel Semi-gloss Latex Paint
- Oil Bond
- Foam Mini Roller - especially for cabinets
- Super/Pro Lindbeck Angle Sash Paintbrush, 1-1/2-Inch
- Drop cloth
- drill or screw driver
- rag or old wash cloth
- disposable gloves

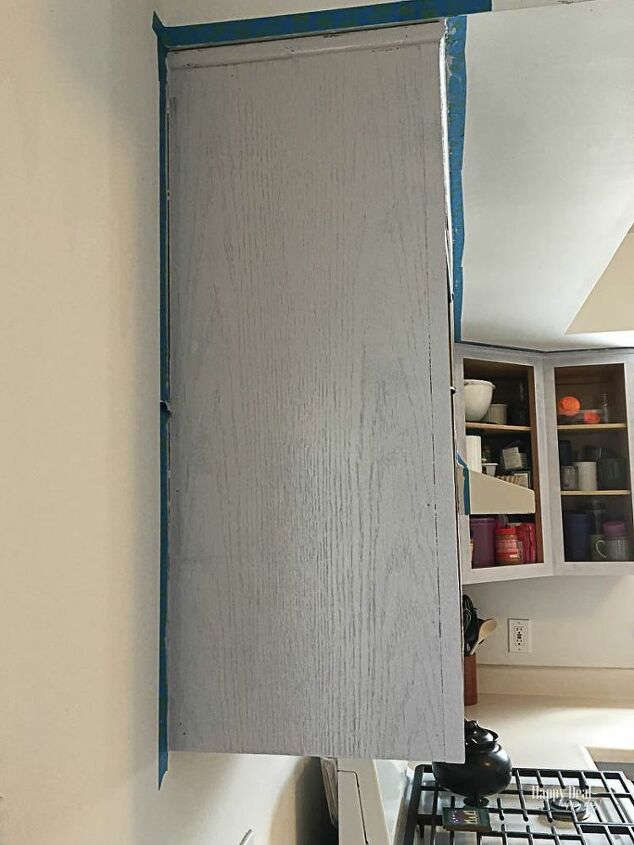
I completed this entire project in about a week. I had only a couple of hours a day to spend on it, plus there was mandatory drying time in between coats. So if you are planning on tackling this yourself, give yourself about a week. On day one, I used my time to remove all of the cupboard doors and taped off the edges with painters tape.
When removing your cupboard doors, I recommend labeling the hardware so that you know where to put them when hanging the doors back up. For example, my plate cupboard, I labeled "PC top," "PC bottom." The screws are all the same, but the hinges sometimes adhere to the wood just perfectly in their spot, and may not fit as nicely in a different spot. So be sure to keep those labeled. I used a drill to pull out the screws and it went way faster that way than using a screw driver!
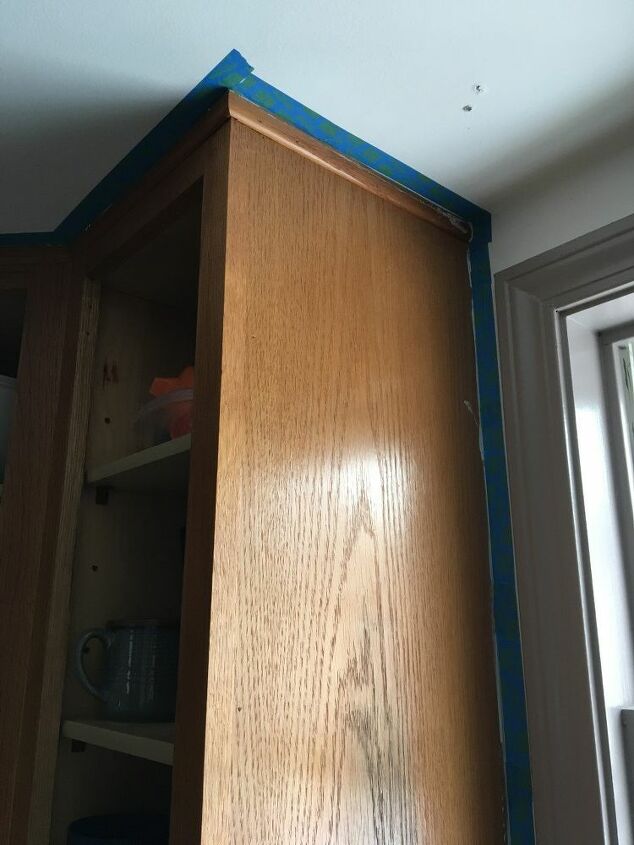
Next comes taping off the edges. I really have to put in a plug here for the trim and baseboard tape from ScotchBlue - this is the best painters tape I've ever used that did not let paint bleed under it! When we moved into this house, it was completely trashed, so much so I didn't know what the carpets looked like when we put in an offer. (Even though it was trashed, it was only an 11 year old house at the time that just needed cosmetic work for an amazing price!) This was not my first time painting in my house, and the cheaper blue painters tape I have used in the past for sure bled paint under it, which is just totally annoying. So try this higher quality tape for sure!
On day two, I wiped down all of the wood surfaces with a damp microfiber cloth. That got rid of grease or dust that I didn't want in between the wood and a fresh coat of paint.
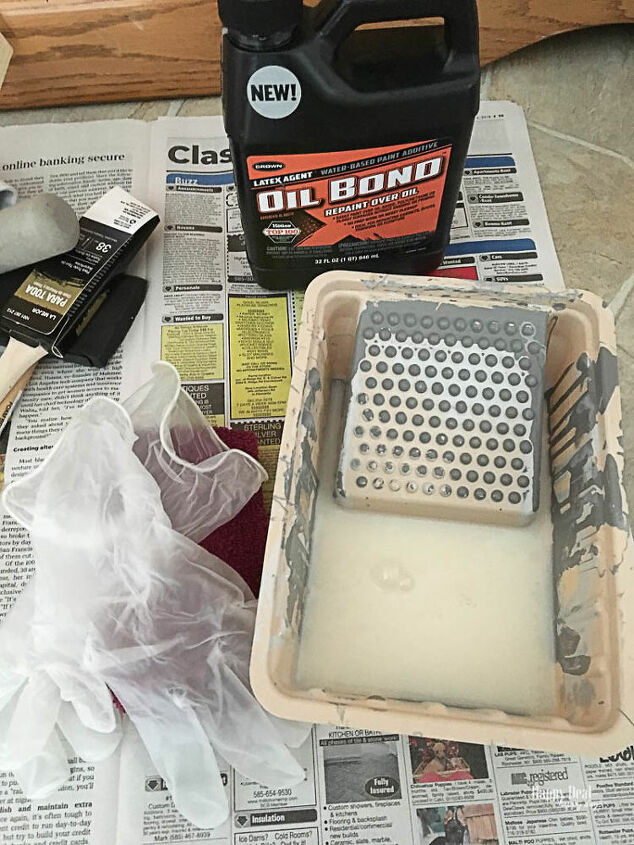
Then I used Oil Bond and wiped it all over the wood I needed to paint as the skeleton of the cupboards. I put on a pair of disposable gloves and I used an old wash cloth I didn't mind throwing away when I was done. I shook it first for about 30 seconds (per the directions on the label) and poured it into a plastic paint tray. Then I just went around and generously wiped it all over the wood surfaces I was going to paint.
You need to wait one hour until it's dry enough to paint on.
When you are ready to start painting, you also need to mix in more Oil Bond in with your paint. Read the directions on the Oil Bond bottle and see how much you need compared to how much paint you have. Take your time mixing it in the paint to make sure it is 100% smooth and fully mixed with the paint.
I used a combination of a 1 & 1/2" paint brush for edges and a foam roller for the flat part of the cupboard frame. This is what it looked like after one coat. (Yes, my one drawer is crooked, and has been since we moved in. Remember how I said this place was trashed when we bought it? Yeah - and we've been here 10 years and its still crooked. But since it works just fine, and we are a busy family, that crooked drawer hasn't made it on the honey-do list to fix quite yet.!)
This is the remainder of the area I painted (minus a cupboard that holds our microwave that I also painted to match.) I was hoping to get away with 2 coats, but did end up needed 3 full coats. The directions on the paint can says to wait 8 hours in between coats and I was faithful to follow instructions!
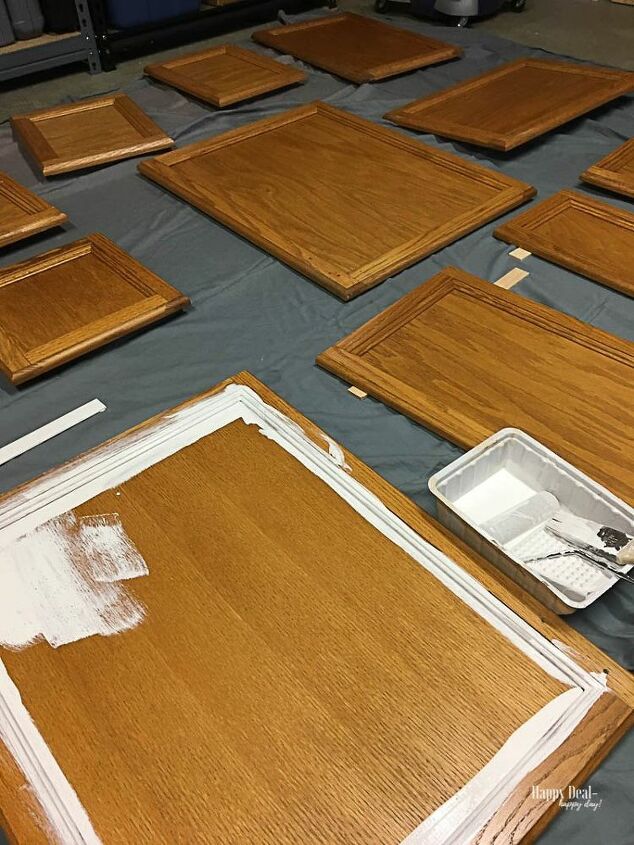
For the cupboard doors, I set up an area in my basement, and used a old king size sheet as a drop cloth. You first need to wipe these down with a damp cloth to remove gunk and dirt, and then generously cover them with Oil Bond.
I used the brush to paint the edges and used the roller on the rest of the cabinet. Since my knees were on a cement floor for this part of the painting, I was very thankful I had knee pads on, and recommend the same for you!
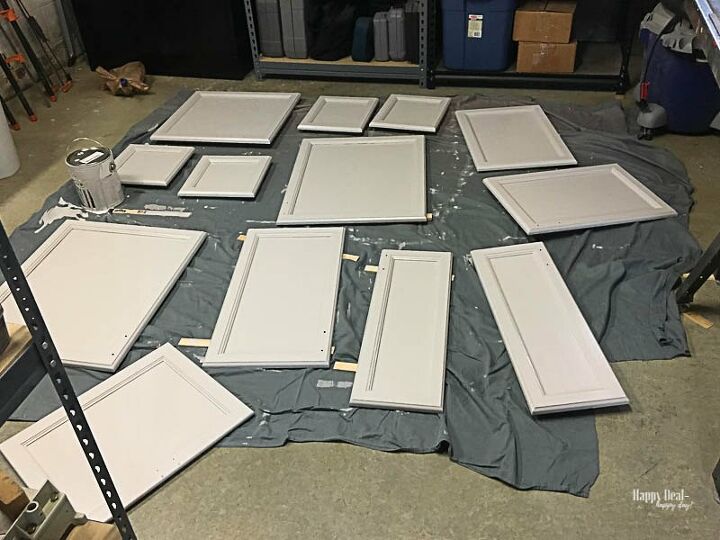
Here they are after three coats total. I also used scrap pieces of wood underneath each cupboard board to keep up off the drop cloth a bit. That way I wasn't peeling them off of the drop cloth and ruining the paint job!
I waited a full 24 hours after the last coat of paint to hang these back up. That part was the most fun because then you can truly visualize the complete makeover!
I did not use a drill though to hang them back up per my husbands suggestion, as he was worried I'd drill in to far and split the doors. (which I can totally imagine!) So he helped me out hanging them back up using a good ole' fashion screw driver.
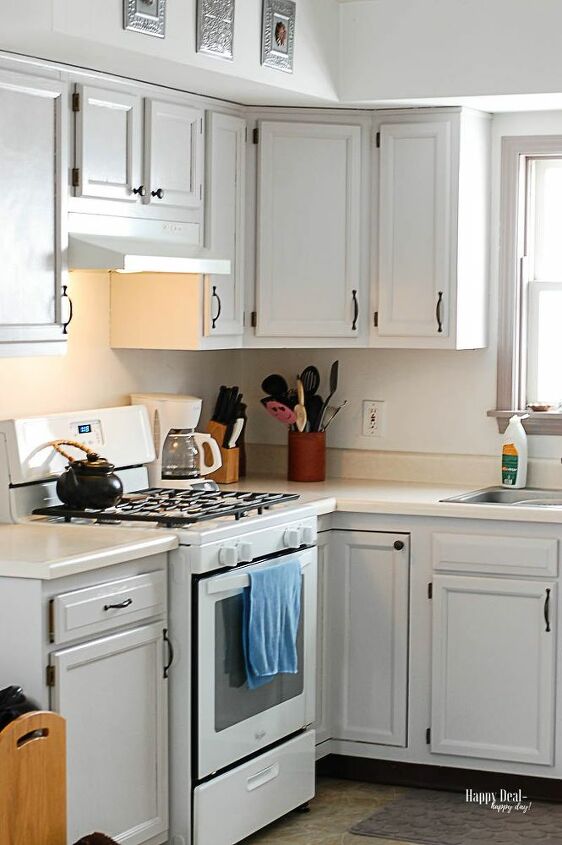
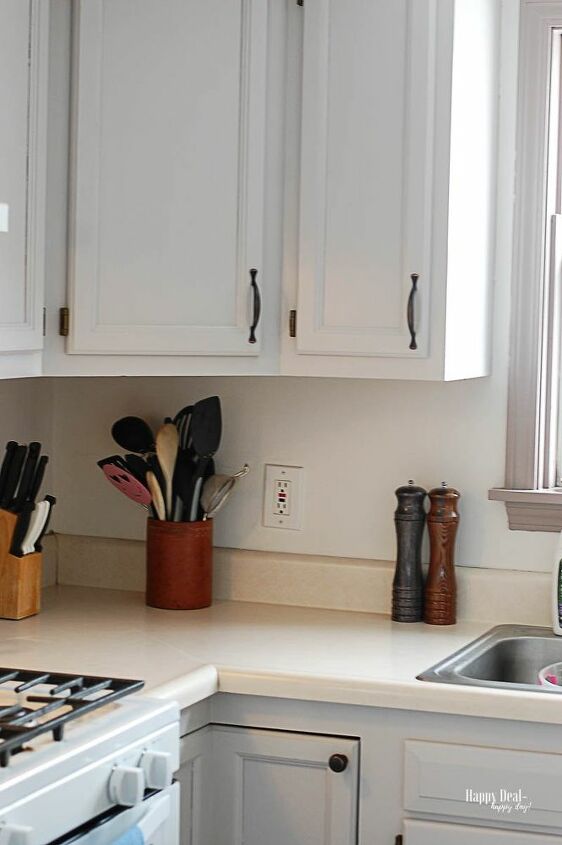
I love LOVE love the color!!!!! My kitchen is so much brighter and clean and fresh looking!
Next on the to-do list is to pick out new counter tops and a tile back splash pattern. (Although, I'll admit I'm getting that professionally finished and I'm not tackling that project myself.) That isn't happening for a few more months, but I'll add more pictures to this post when it does so you can get the official full "after" shots!
I hope this inspires you to give your kitchen an affordable makeover! I'm so happy I completed this and am still shocked that its actually done. This has been a project I've wanted to tackle for a couple of years now, and feels very satisfying now that it is done!
Looking for more painting advice? Check out these posts:

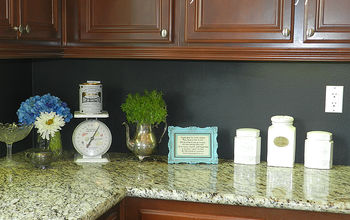
UPDATE: My new countertops and backsplash are now installed!!! I'm in love!!!
Resources for this project:
See all materials


Comments
Join the conversation
-
Beautiful.
-
Great job!!


Frequently asked questions
Have a question about this project?
It looks amazing
What color paint did you use?
can the oil bond be used for metal cabinets?