


DIY Rustic Pulley Lights With Wine Rack

It is coming up on two years since we purchased our new house and the dining room had a large empty wall so I made a 3' pallet clock to fill the space. Once I had made my pallet clock and hung it up on the long dining room wall it seemed lost...inspiration moment! I had some pulleys and rope I had purchased over a year ago that I was saving for just the right project.
I knew I wanted a rustic look with lights and after seeing a wood & rope wine rack I decided to incorporate the idea into this DIY project.
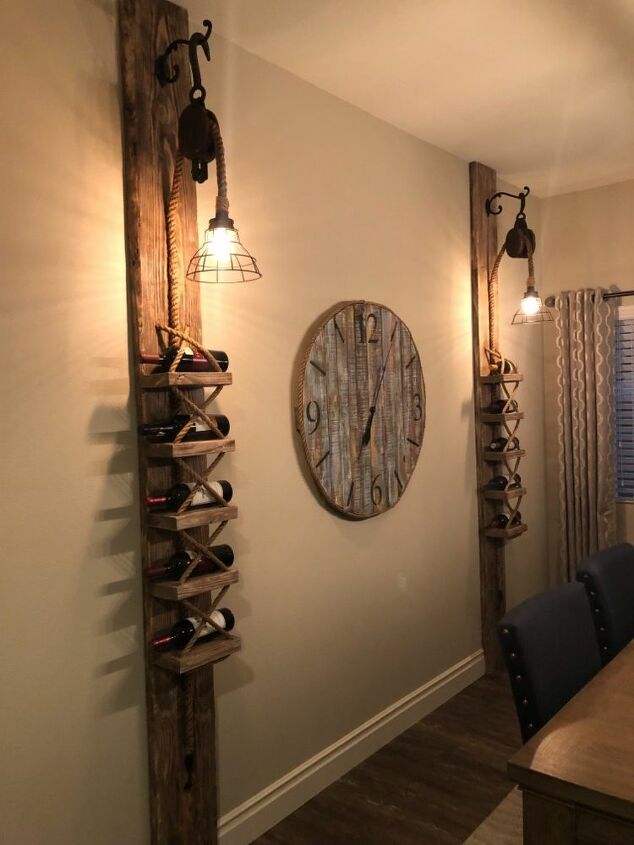
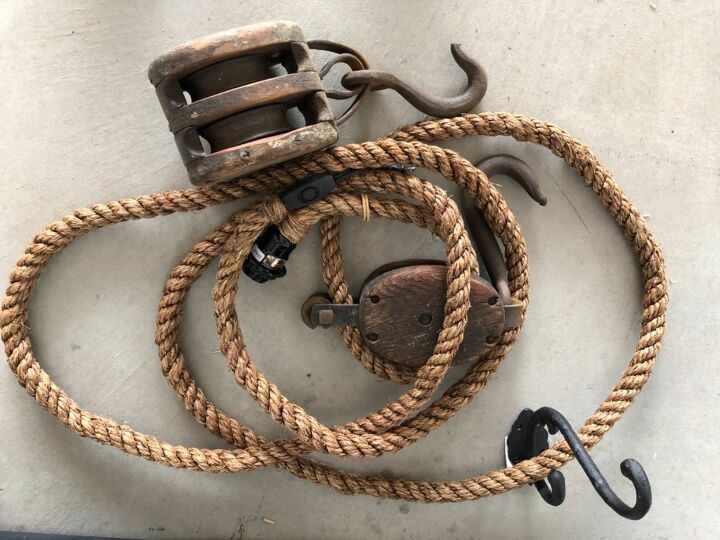
I purchased the 15’ rope (swag) light cord from World Market. We only needed 9’ so we chose to modify the length, which my experienced husband did. The wire light cages came from Lowe’s. The Black Cast Iron Victorian Double Wall Hooks came from Hobby Lobby. The Wood stain is Walnut color (Olympic Maximum Stain).
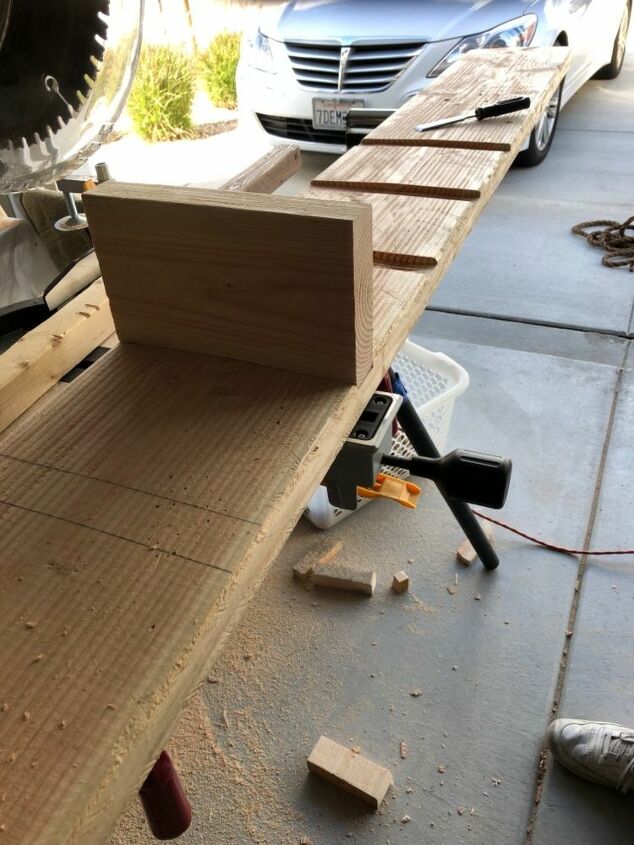
We used 2x10” boards for the vertical uprights that run from the floor to the ceiling, and 2x6 boards for the wine bottles. We grooved the uprights with the saw doing several cuts in the area to be removed then used a chisel. It gives the horizontal boards more support to hold the wine bottles.
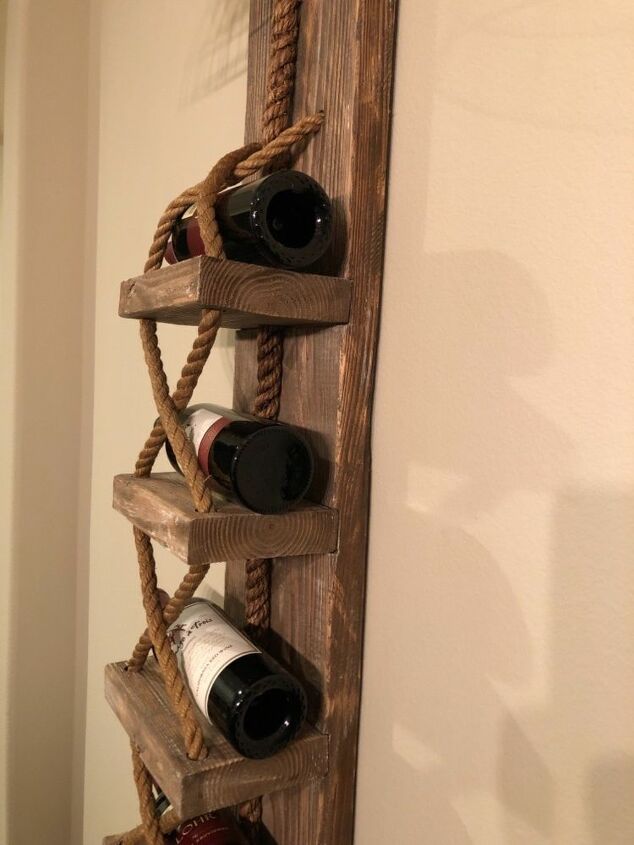
We distressed and stained the boards after they were cut. The rope holes were drilled before we screwed them in from the back. For the front section we used old rope that we had purchased with the pulleys. I washed the rope in a bucket and have used it on many other projects, including the pallet clock.
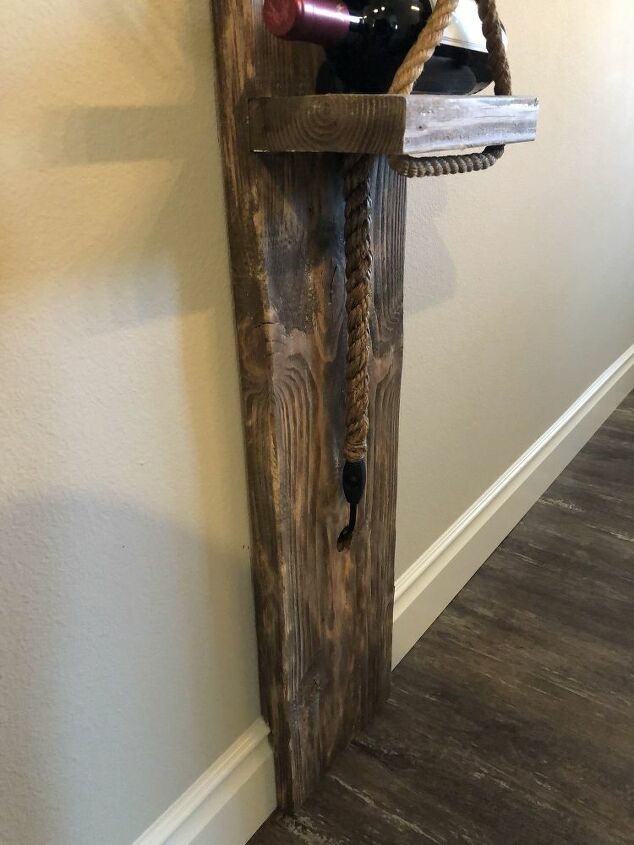
We had electrical plugs right behind the boards so we drilled a hole for the plug and rope cord to go through. The switch on the cord is just above the plug so it worked well. On the backside of the board my husband chiseled around where the electrical plate and baseboard goes. He notched the bottom with a jigsaw so it would fit over our baseboards.
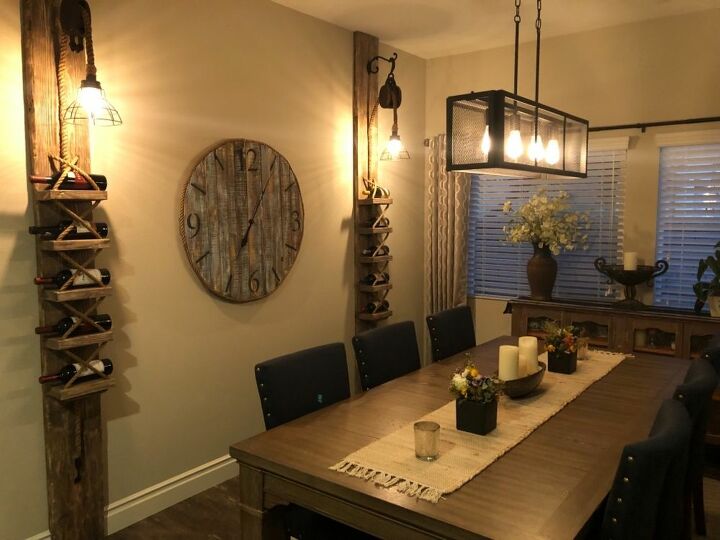
I am loving these lights and wine racks! They really finish off the large wall and complete my vision for the room. My husband was very cooperative in helping with this project, especially when I showed him the pulley lights would also incorporate a wine rack...and of course they had to be filled up 
Resources for this project:
See all materials


Comments
Join the conversation
-
Absolutely beautiful!
-
Very expensive looking ideas! Rocked it!!!


Frequently asked questions
Have a question about this project?
I want to know how you got the wiring inside the rope - or did I miss something?
Great explanation- I would suggest cabinet spacers rather than the metal straws which are expensive. And what about the wheels for shower doors? Too small?
On the top shelf, were the rope comes from the back to the front, is there a groove or something so the wood can lay flat on the wall. This is the coolest thing I have seen in a long time. Not sure if I want the light, but I do want the wine rack. Awesome job.