


How To Make Reclaimed Wood Signs From Scraps
I'm always looking to create home decor on a budget and when I have left-overs from furniture projects, it becomes a challenge to use up all the scraps I have laying around. Today I'm sharing with you how to create reclaimed wood signs from vintage frames.
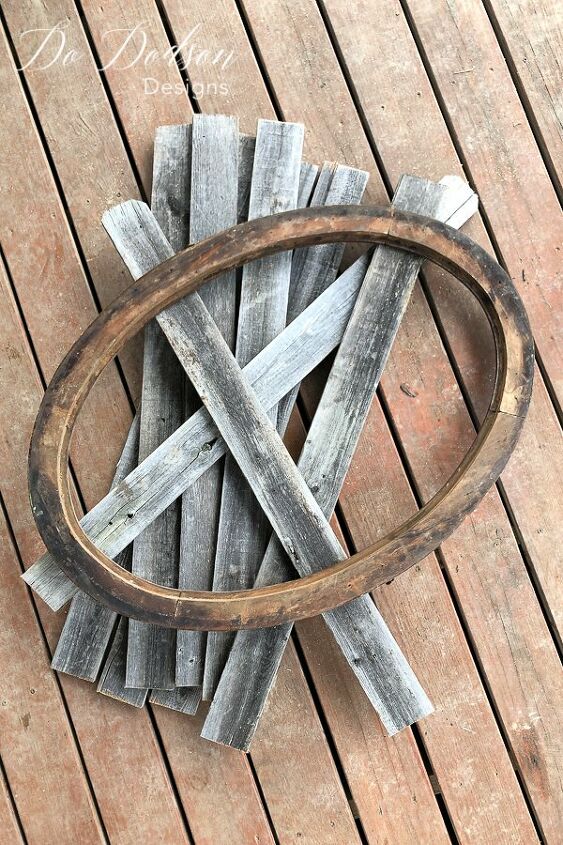
Mirror frames from old furniture are perfect for this project and any old scrap lumber will work too.
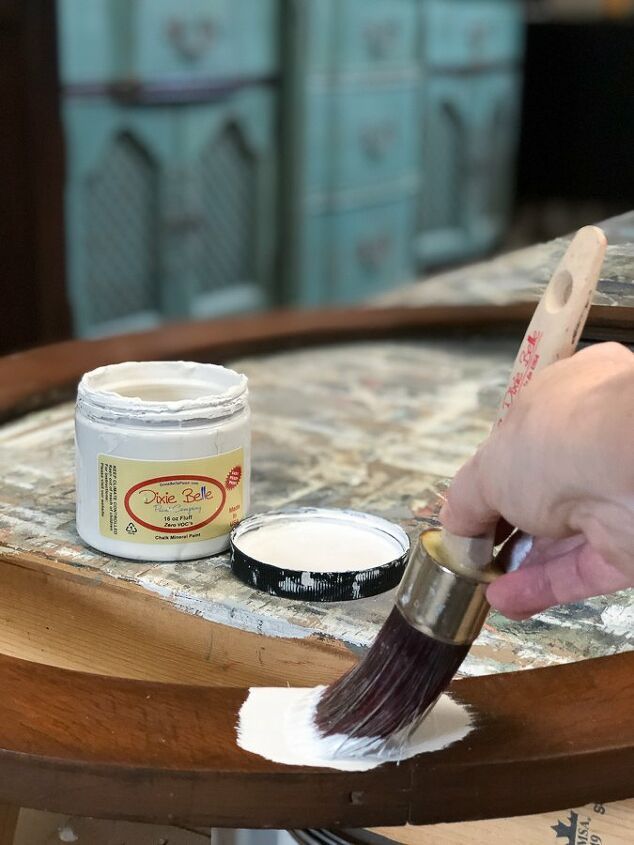
Paint 2 coats of your favorite color on your frame or you can just leave it wood. I like the painted look.

Secure enough boards with screws to create a wood pallet that is larger than the frame. This is temporary to hold it together. This was done to keep the boards in alignment and secure. The next step is the cutout!
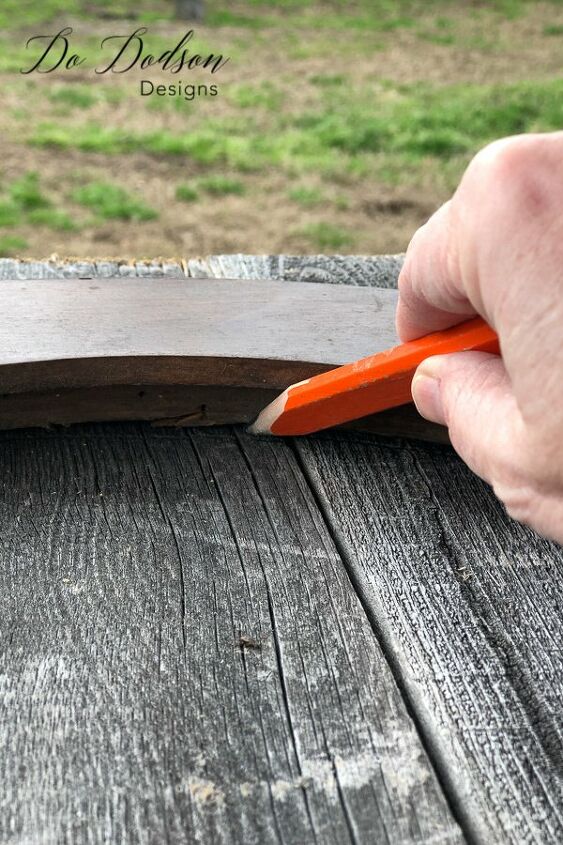
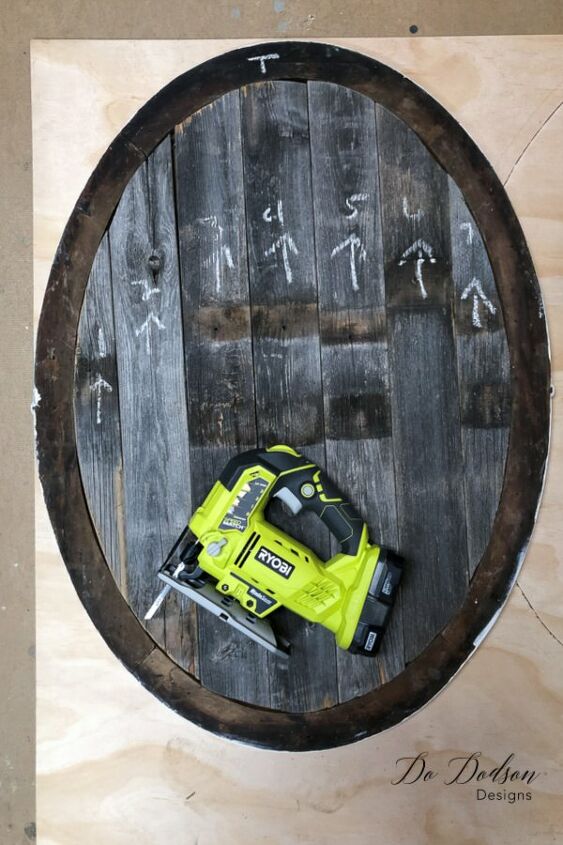
The plan was to create a wood backing inside the frame to create a sign or in this case, a place to hang my decorative wreaths. The trick here is to get the perfect cuts of the reclaimed wood that will lay inside the frame where the glass/mirror had set. By placing the frame on top of the boards, I was able to mark the inset area with a pencil from the underside of the frame. This method will also work on a square frame.
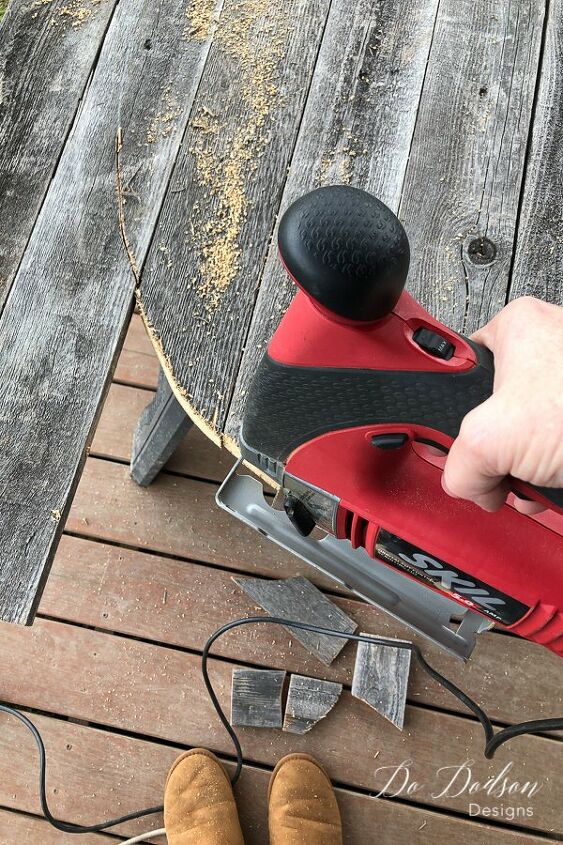
Once you have marked the template for the reclaimed wood, use a Jigsaw to cut the pattern out and cut just a bit smaller than your template. Most frames have about a 1/8 inch inset, but that can vary depending on the size. This method works best with large frames. You want the boards to be as snug in the frame as you can get them. I had a few boards I used an electric sander on to smooth the edges for the perfect fit.
A backer board will be needed to secure the reclaimed wood inside the frame once they are in place. A thin piece of plywood works well for this, but you can even use old paneling, bead board, etc. Anything thin that can be nailed in place. Cut out a template using the frame for best results. Again, I cut it a bit smaller than the template I created, because I didn't want it to overhang and show from the sides once it was hung on the wall.
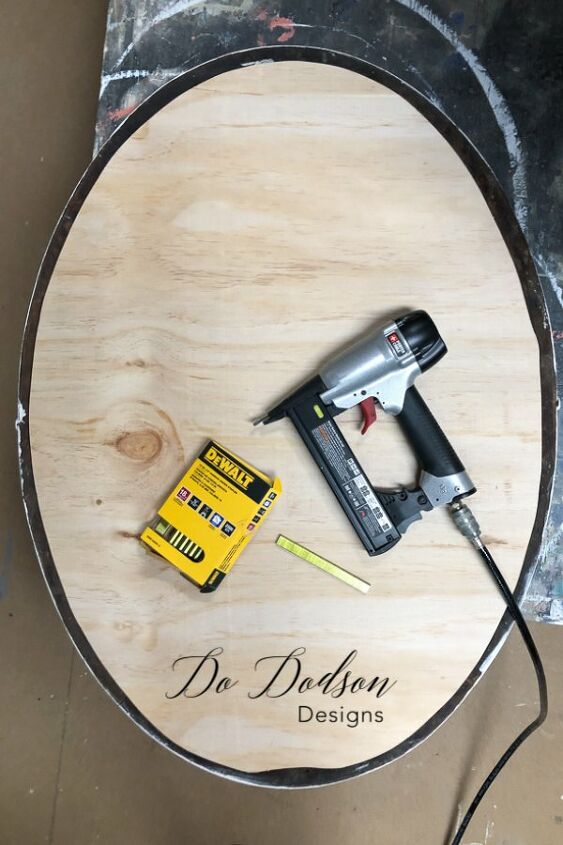
You can attach the backer board with screws, nails or in my case, I used my Pneumatic Staple Gun. It made for a quick and easy project. The reclaimed wood will be secure for a long time. Maybe forever!
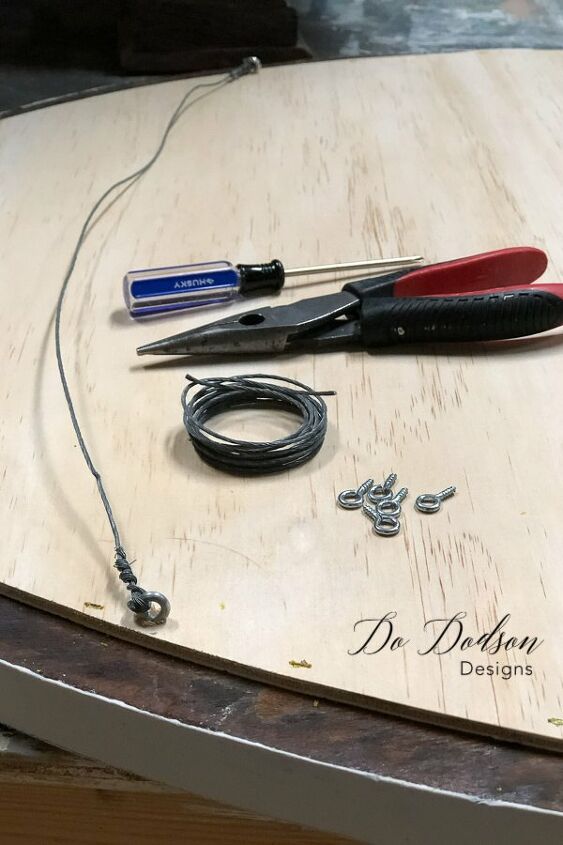
The hanger was created with 2 eye rings and heavy-duty wire because of the weight. It's not super heavy but it does need more than a standard picture hanger. Using this method, the frame can easily be adjusted on the wall.

It's perfect for my space!

What a great way to re-purpose and create beautiful reclaimed wood signs for any home. Thanks for joining me today.
Until the next project... xo, Do 
Resources for this project:
See all materials


Comments
Join the conversation
-
Very pretty
-
Absolutely beautiful!!


Frequently asked questions
Have a question about this project?
How do you treat the wood so you don’t accidentally bring any bugs into the house?
how would you dust it
How is the reclaimed wood anchored to the frame/backer board?