


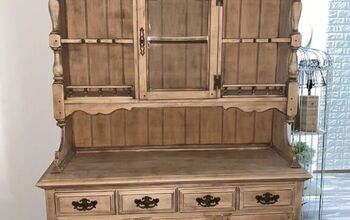
Plain Hutch Makeover

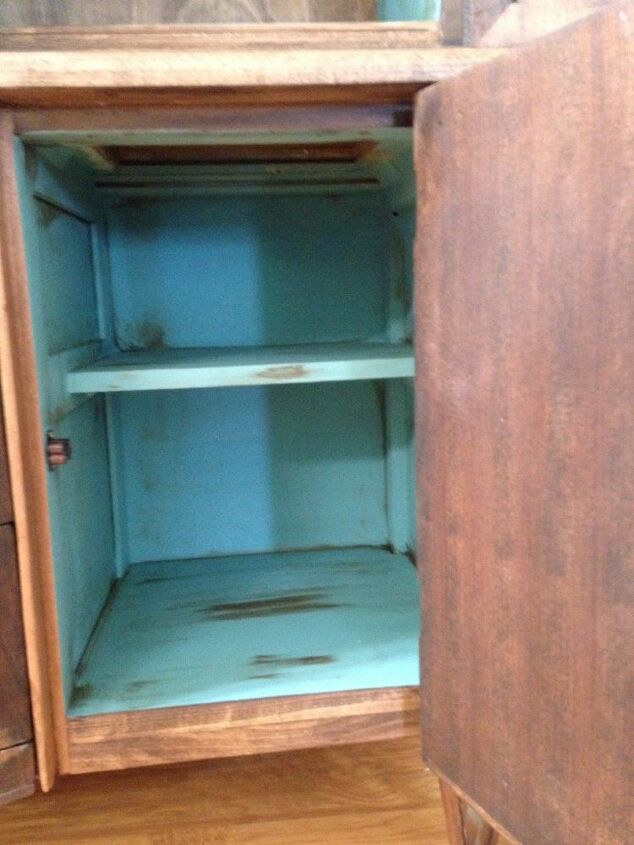
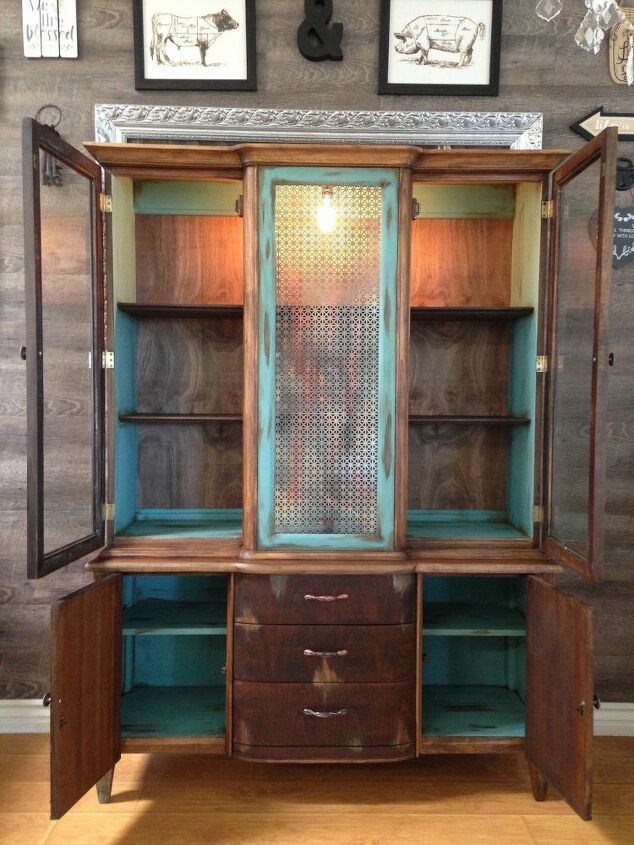
I haven’t posted a project in a while. I have to be in a certain mood to do certain pieces. I have had this hutch in my storage for a few years and just did not know what to do with it. It seems as if everyone is redoing furniture nowadays so I try to make my pieces as unique as possible and designing something can take a while before inspiration hits. I really hate stripping furniture and this piece had 4 sloppy, goopy, nasty paint layers on it. Maybe that is why I kept putting it off...anyhow, I decided to strip it and go from there. After stripping it and staring at it for a while I decided a rustic vibe should work nicely. The piece was in great shape structurally. I wanted to use various stains, teal chalk paint and dark wax. I removed the middle glass and put in a decorative tin piece and added the light fixture and used an Edison bulb which really sets of the piece to me.
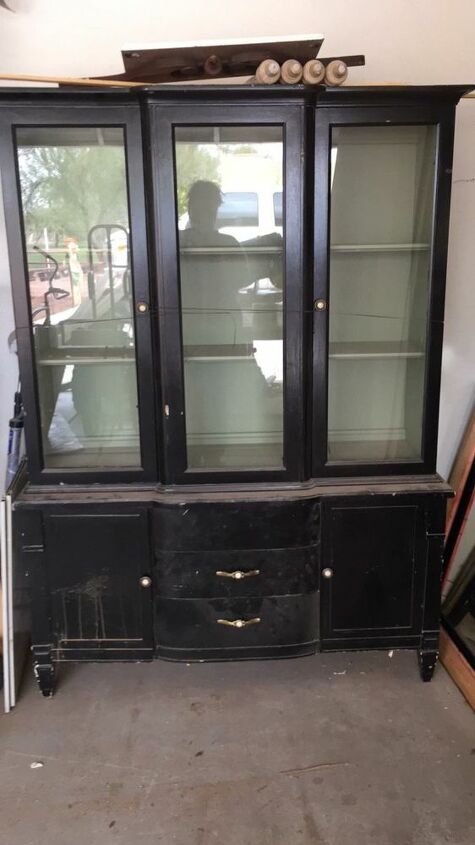
Here is the before. I believe the original color was white but I am not sure. There is just so many layers of paint. I used liquid stripper and a heat gun to get it all ready.
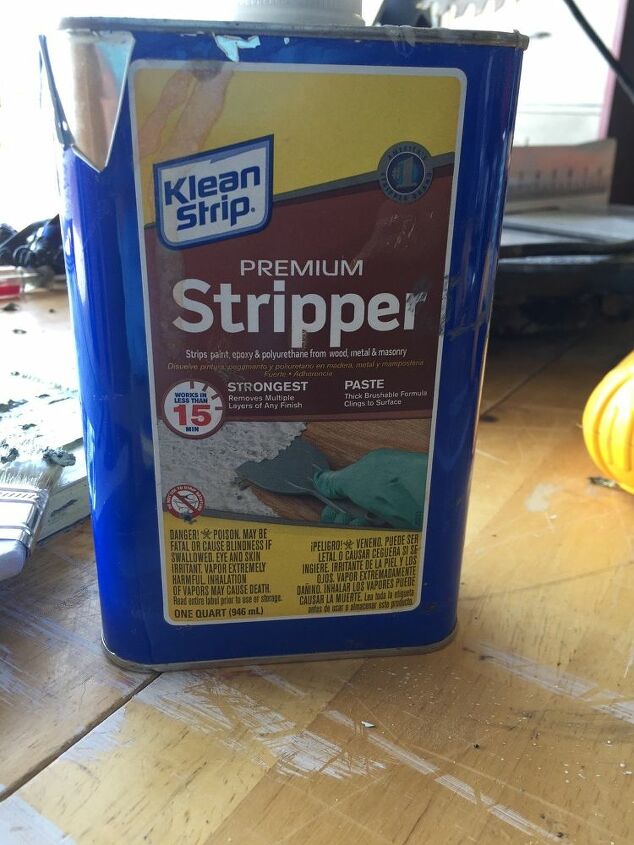
This is the stripper I used. After getting everything off I wiped it down with low odor mineral spirits. Let dry and then started sanding.
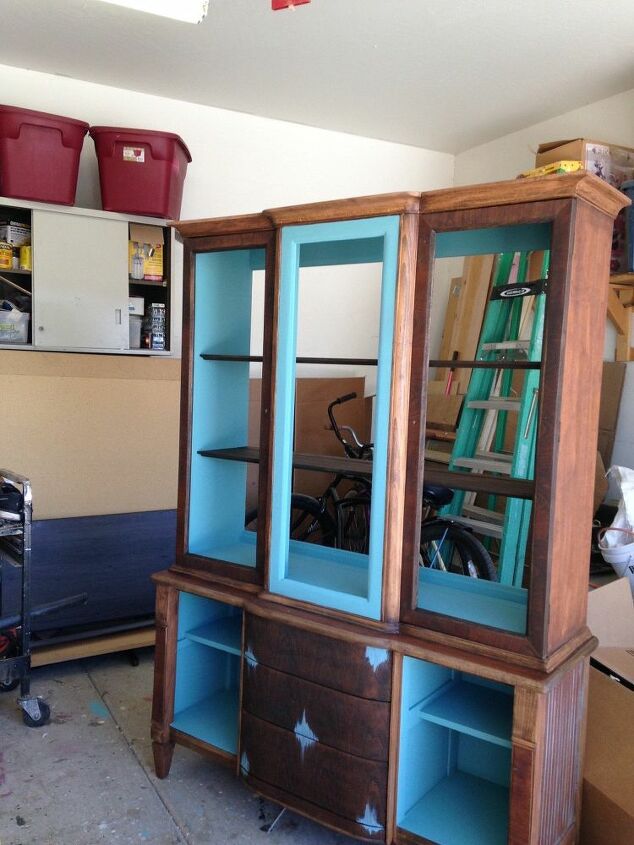
I used special walnut and espresso wipe on stain. I painted the inside of the hutch top, insides of the drawers and lower cabinet with teal chalk paint.
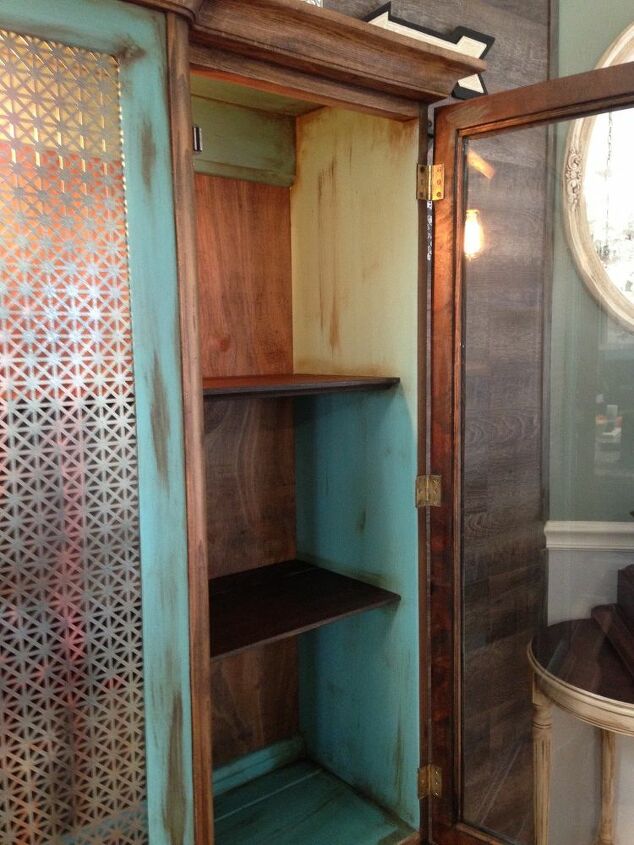
I used dark wax and a chip brush to create the rustic effect. I sealed with wipe on polyurethane before applying the dark wax. I stained the shelves and back.
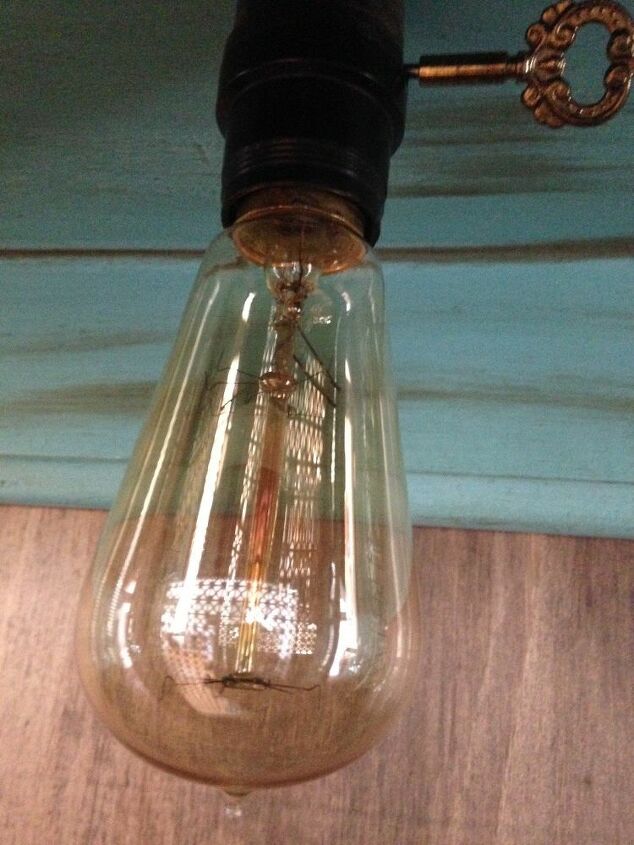
I had the pieces from an old lamp so I used it to add a light to the hutch. I love Edison bulbs and I felt it fit the piece.
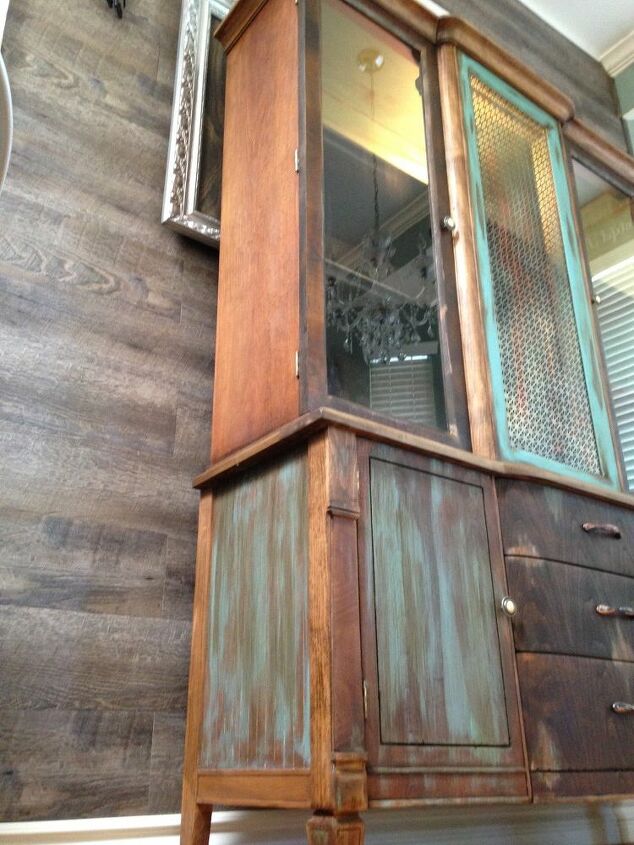
I stained the whole piece then dry brushed the teal chalk paint and a little metallic copper paint on then sealed with polyurethane. When it was dry I added the dark wax.
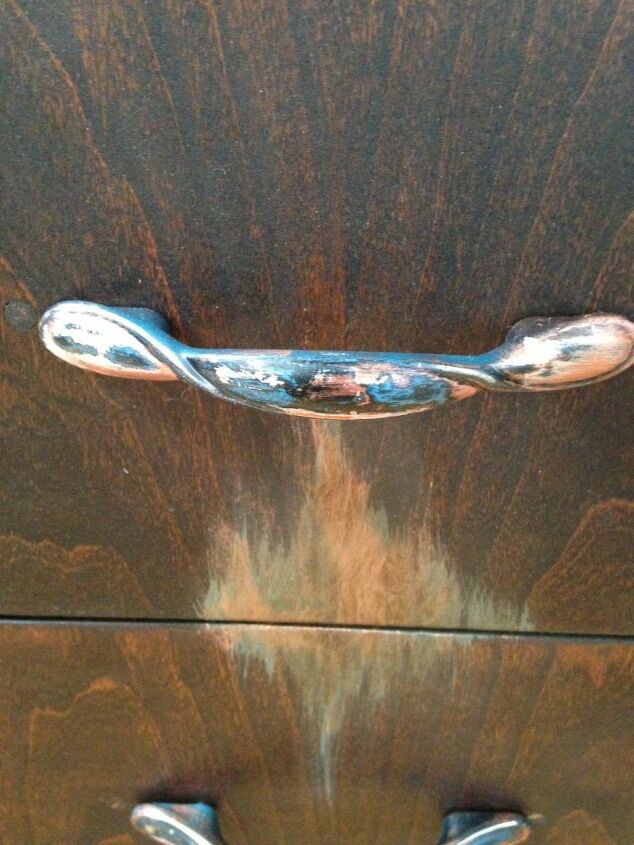
I spray painted the handles with turquoise, black and gold paint. I layered the paint, let dry then polyurethanes them. I wiped with a piece of steel wool to create the look.
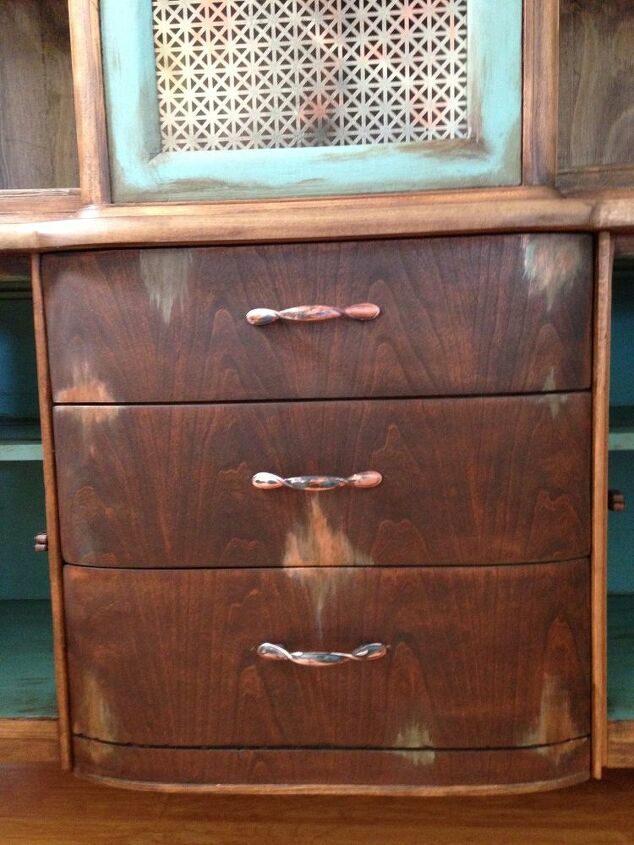
I stained the drawer fronts in espresso. I used a brush to create the distressing. I dipped my brush in the teal chalk paint, wiped the paint off and flicked the brush to create the effect. Starting where each drawer met, I flicked up and then down . I added the copper paint and dark wax also.

I have to say it really came together better than I hoped. If you would like to see more of my work please visit my profile here on Hometalk or my Facebook page. www.facebook.com/memawslovelyglass
Resources for this project:
See all materials


Comments
Join the conversation
-
Inspired already I have a bought hand made island in a beautiful distressed teal's, whits little yellow, and dark stains. Your china cabinet looks ok, but I'm afraid mine would look to diy, I'd need more teal ! Nice try !
-
Well we all have different tastes but do you honestly think that finish looks good. Personally it looks awful to me.


Frequently asked questions
Have a question about this project?
How did you get the piece of glass out of hutch in order to put the tin piece in?
In several places you mentioned using a finish coat and THEN dark waxing. I have generally done things in the opposite order... wax then finish coat. Can you teach me something about why you chose this method?
How to make my own natural window cleaner