


DIY Weathered Wood Dresser

The light weathered wood finish is soooo popular these days! Here's how you can get the look on your own old or thrifted furniture!
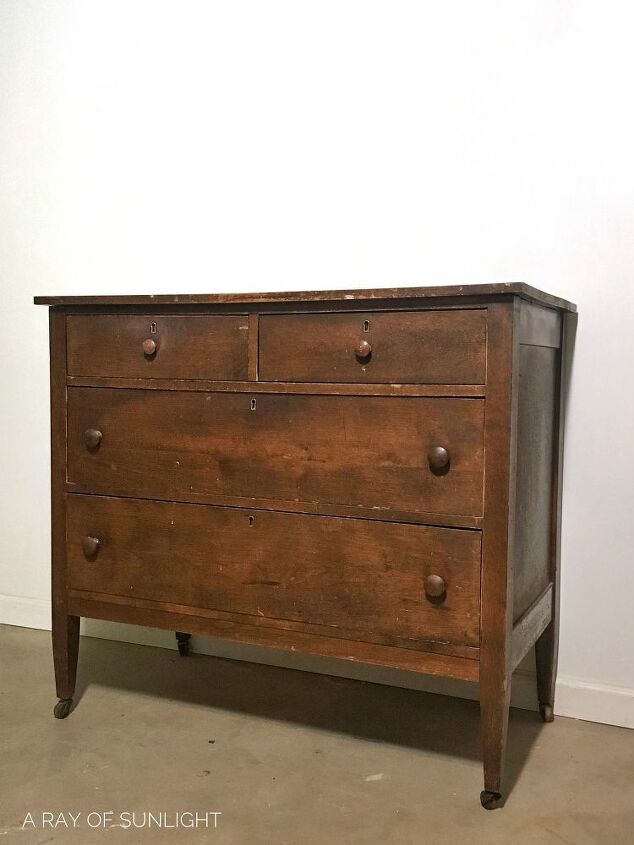
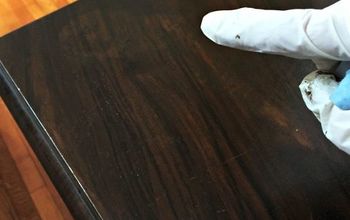
This is how the dresser started out. Old, beat up (especially on the top!) and definitely needing something new.
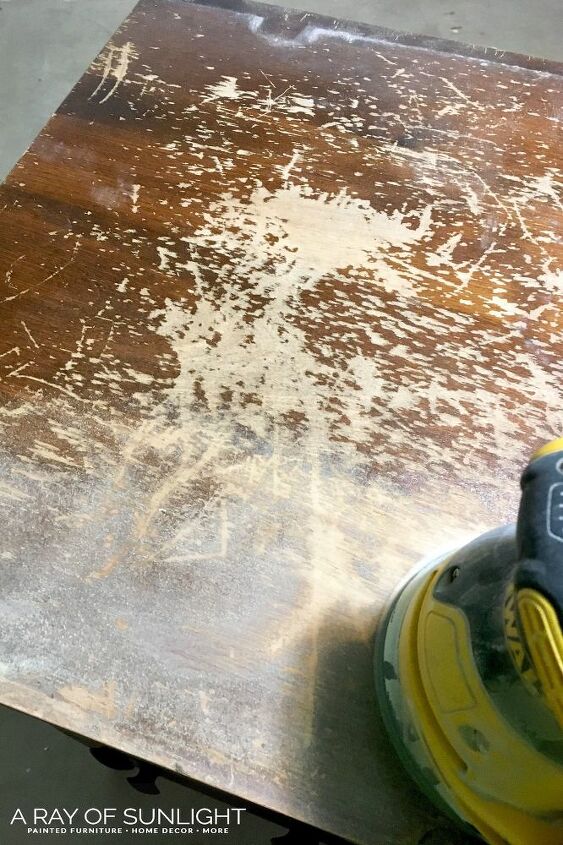
The scratches on the top were allll over, and some were pretty deep, so I knew right off that it needed to be sanded down. Once I got sanding I learned how good that old finish was really stuck on, and it took what seemed like forever to get it off. Really it was about a half hour of sanding and switching out to new sandpaper.
I planned to paint the bottom and stain the top, but as I started to look at it more, I decided to strip the old finish off of all of it.
But I didn't want to sand it down because the top had been a pain! And then combine getting into the details and corners on the bottom, I opted for stripping it down.
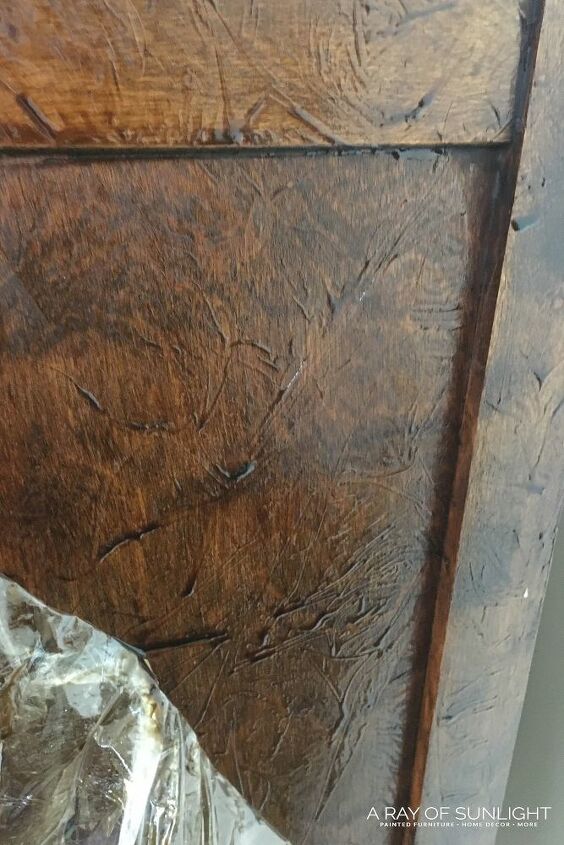
I used my go to method of stripping off an old finish on wood furniture. (click on the link to get detailed information)
I slathered on the stripper, covered it with plastic wrap and let it do all the work while I went to bed.
The next morning when I peeled the plastic wrap away, this is what it looked like.
I then used a plastic scraper, steel wool and mineral spirits to wipe off all of the gunk.
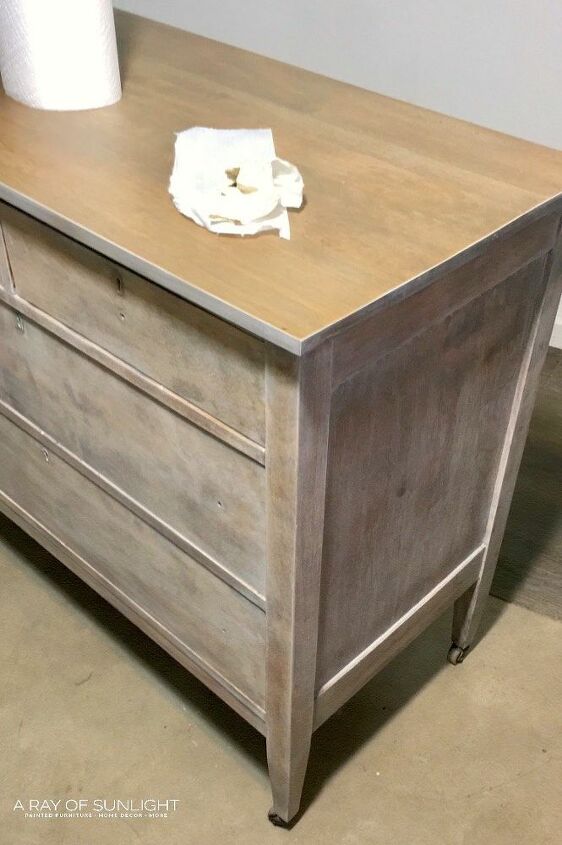
After the old finish was off, I let the wood dry out for at least a day. Because I sanded the top, it was lighter in color than the stripped bottom, so I mixed up a wash (watered down paint) to stain the top of the dresser similar to the bottom.
I lightly sanded to smooth down the wood, and then sealed the wood with my favorite water based poly. The poly makes it so the next step of paint doesn't soak into the wood very much.
Then I mixed up another wash of Country Chic Paint's Sunday Tea (60/40 ratio of water to paint).
Get 10% off your order of Country Chic Paint with the code rayofsun10 at checkout!
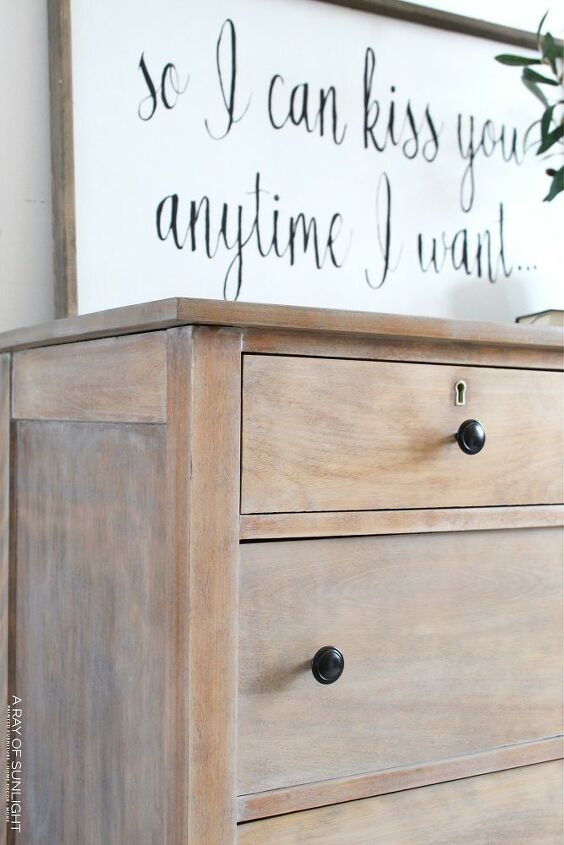
I used a cloth to wipe the wash onto small sections, and then I used another cloth to wipe the excess back off. Afterwards I added a few light layers of the wash to create the finish I wanted.

Once the wash was completely done and dry, I applied more water based poly with my favorite painting sponge from Country Chic Paint. This just seals in the paint and makes it more durable.
Get all of the details on how to get this look on my blog. There is also a video that helps explain the process as well, and links to the products that I used.
Comments
Join the conversation
-
Well you turned a poor finish into a great finish. Job well done
-
Absolutely amazing.
Well done Natalie.
Ps. I love wooden furniture, brought back to life.
Louise


Frequently asked questions
Have a question about this project?
What poly do u use?
Did you put poly all over the dresser or just the top?
I have the same chest with the mirror..this one was my grandparents..my granddad stain it ..would you just lighty sand it and restain