


Easy Metallic Labels With Alphabet Stickers and Hand Lettering
I use metallic waterproof tape to make quick labels to mark my garden plants, but here's how I make prettier versions for storage containers indoors. These labels are easy to keep clean with a damp cloth and I love the look of the silvery labels.
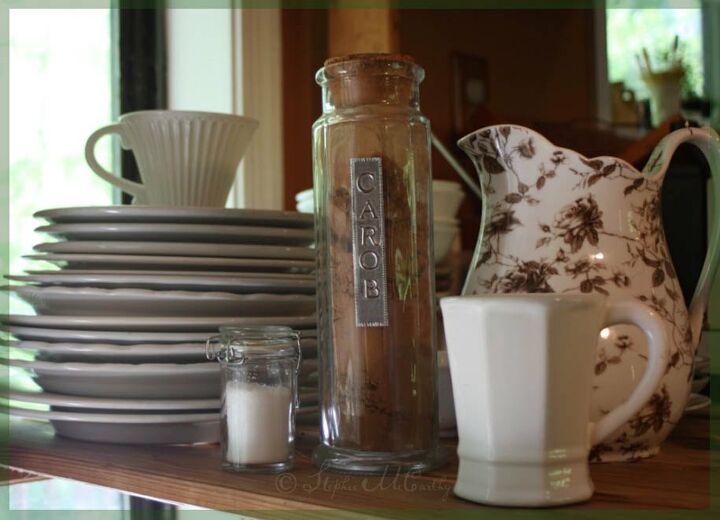
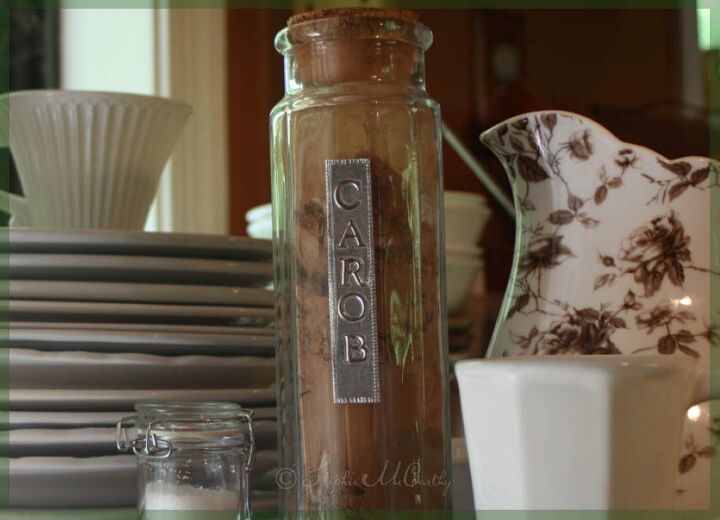
I made this metallic label for my 'CAROB' jar with Nashua Waterproofing Repair Tape and foil alphabet stickers by "Sticko". Nashua Waterproofing Repair tape comes with different colors of backing, and I've found that any color backing works, but do not use the duct-tape with texture. What I use is the shiny aluminum foil tape.
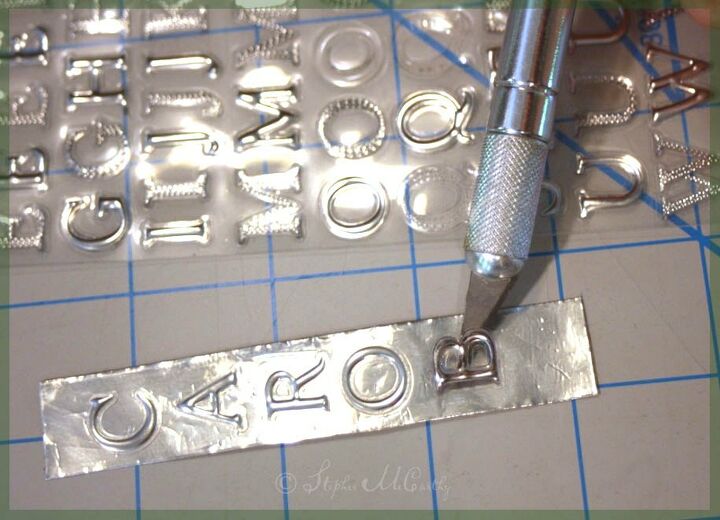
I started with a 1-inch strip of the tape and used an X-ACTO knife to transfer the letters in a stacked formation. You can just as easily make a horizontal design. The knife helps control the placement of the stickers and doesn't pull off the adhesive, as your fingers might.
This wonderful tape can be etched with a pencil. I used a pencil to etch a simple border around the edge of my carob label. I used a straight-edge to make a thin outline then filled it with small dashes all around the edge.
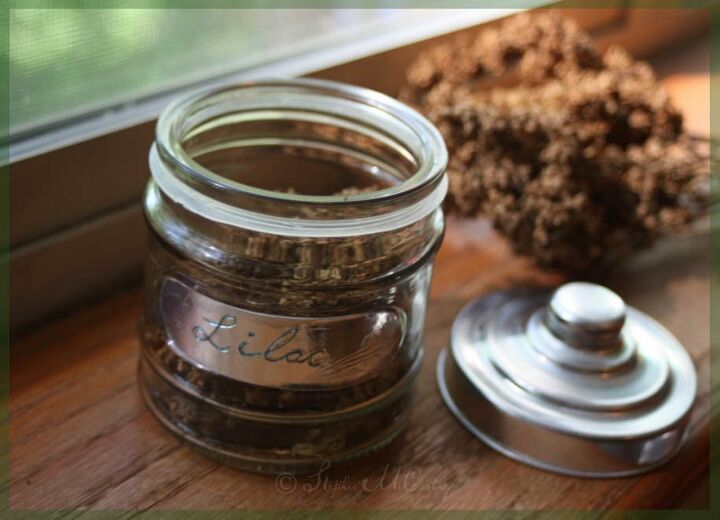
For this 'Lilac' bud jar, I did hand-lettered script. I simply etched the letters into the tape with my pencil, then highlighted the letters with ink from a blue Ultra-Fine Point Sharpie pen.
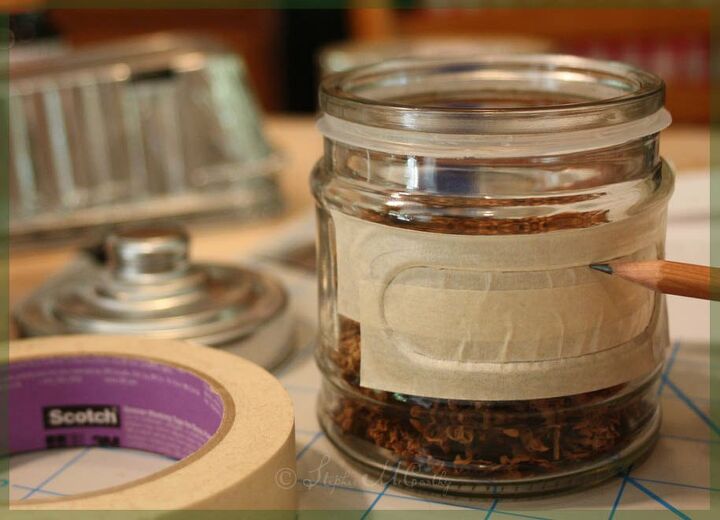
This is how I made my template for this label. I applied masking
tape to the jar then outlined the space where the label would go.
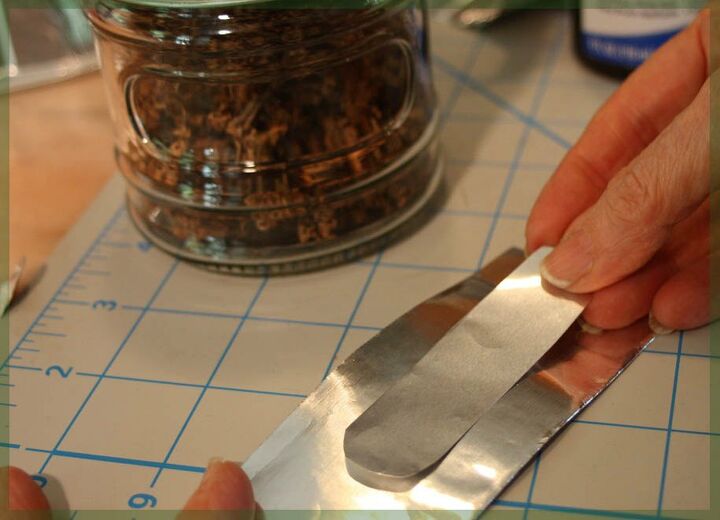
I removed the tape and transferred it to a flat piece of pie-pan aluminum and cut it out for a template. Here you can see I was using the template to draw the outline of my label onto some aluminum tape. Lots of experimenting went on as I looked for what would work best.
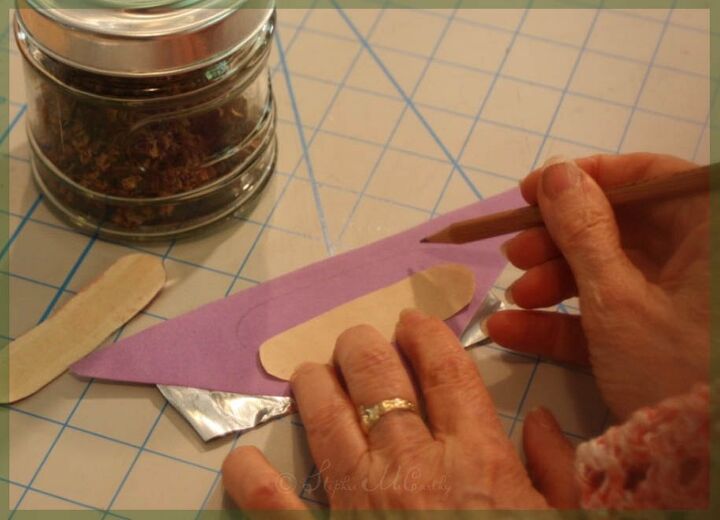
Here I have applied aluminum tape to the back of some lilac paper. I traced the label shape onto the paper and I cut along the outline. This creates a metallic label with a paper back. The tape will stick directly to glass, metal or plastic but I want labels that I can remove and replace easily. My solution was paper backing and rubber cement.
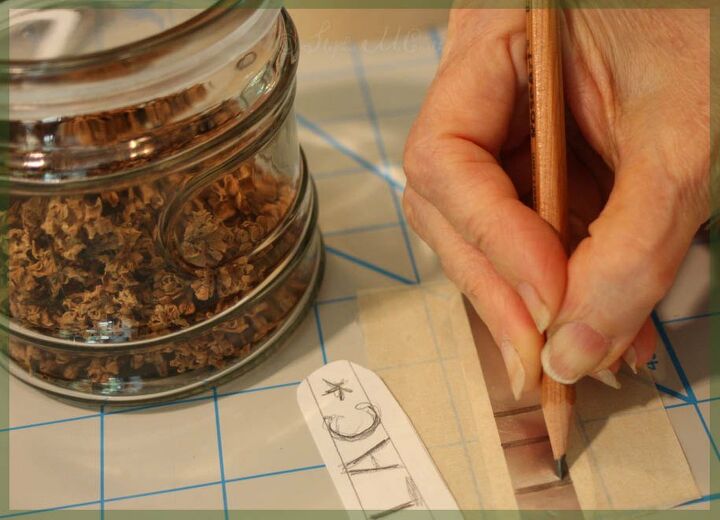
Here I was practicing the word "Lilac". As you can see a pencil is all you need to etch your lettering into the aluminum tape. However, to make it stand out more, simply go over it with an Ultra-Fine Point Sharpie pen in any color you like.
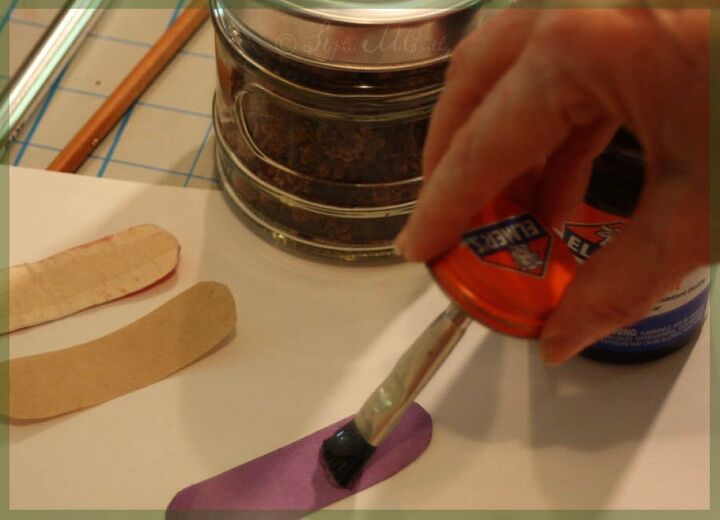
If you'd like to be able to easily remove your labels and change them in the future, use rubber cement on paper backing to attach it to glass, plastic, or metal as I did. Hold your label in place for several minutes until it grabs.
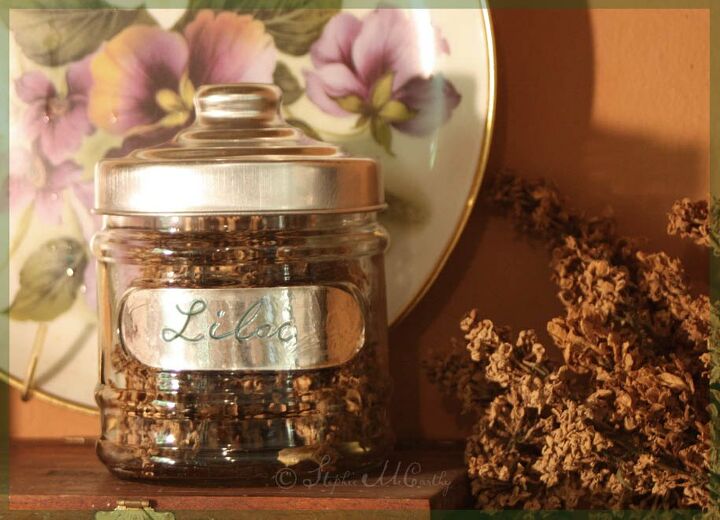
Now I have a label that is easily cleaned with a damp cloth and when I want to change the label, I can remove the rubber cement easily. By the way, I found these wonderful metal-topped jars from the Dollar Store and LOVE them! I love creating and using every-day, inexpensive items to make wonderful things. If you do also, I hope you'll visit my Home page here to see what's new.
Resources for this project:
See all materials


Comments
Join the conversation
-
I love this! Am going to try it for sure, I think to label my spice jars!
-
Beautiful job! Your jars look so much better than mine, I used a white chalk pen on black labels and thought they looked good! LOL You have put me to shame. Lovely job!😃


Frequently asked questions
Have a question about this project?
What a great labeling method. I'm definitely bookmarking for later reference. Lilacs are my favorite flower, so I have to ask - what do you use the dried lilacs for?