


How to Drain Your Hot Water Tank and Save Money
This easy home maintenance task will help you save big money on repair costs and energy bills: How to drain your hot water heater tank!
If you’re like us and you’re looking for ways to save on your energy costs but you haven’t had the opportunity to upgrade to a new high-efficient, tankless hot water system then you’re going to need to know about this trick to improve the efficiency and prolong the life of that existing tank. Draining your hot water tank every so often will make the tank last longer and perform better which will save you big money!
[You may also like: Garden Equipment Maintenance Checklist!]
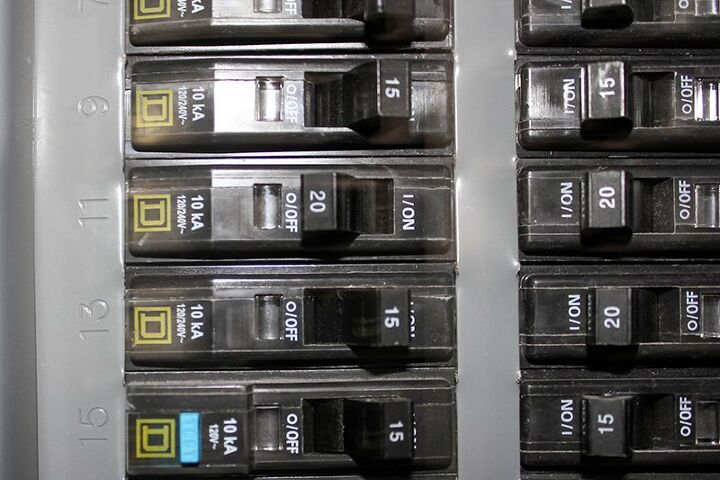
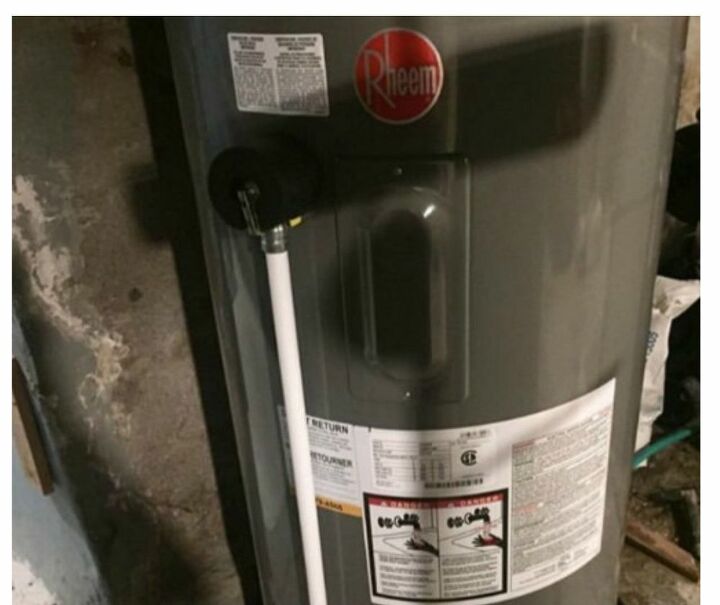
You’ll start by turning off the tank. This is very important for two reasons: The tank is likely filled with 120 scalding hot water so the longer the tank is off before working the better and running the unit without water in the tank could quickly destroy the heating elements causing costly repair situation. If you have an electric tank like us, it has to be turned off at the main breaker panel.

Next, locate the cold water supply valve. This is probably located at the top of the tank with the cold pipe clearly marked on the tank. If you’re not sure, very carefully touch the pipes to see which is colder. If one pipe is covered in insulating foam, that is the hot supply, the cold is likely bare. Turn the valve all the way off.
[Want to save even more on energy?! Learn How to Install LED Light Fixtures to Replace Old Utility Lights!]
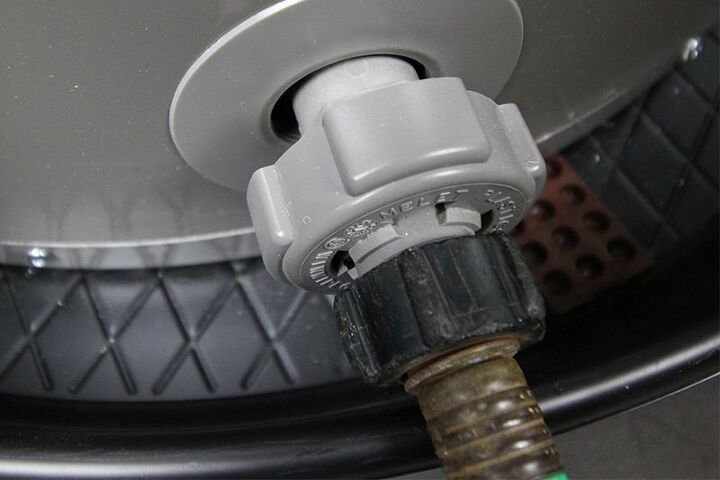
With the power and the water turned off, we can go ahead and attached any ordinary garden house to the drain at the bottom of the tank. Now we have to decide where the water will go. Remember, gravity will take the water out of the tank so we’ll need run the hose flat or downhill. If you’re in the basement and your home has a sump pump or a functional floor drain you’re in luck. If not you may need to empty the tank into a bucket. Keep in mind, the typical residential tank contains 40 or 60 gallons of water, so that’s quite a few buckets! :)


Comments
Join the conversation
-
All the sediment settles on the bottom of the tank. Draining one to two gallons of water a month or till water runs clear a month is all that's needed. Draining the tank completely and refilling with fresh water introduces water that is laced with minerals that coat and settle the inside of the tank making this process futile. The strength of the new minerals can corrode the anode quicker discoloring the water and giving the water a sulfur odor. If the tank has never been flushed then doing this once will clear most of the sediment but should not be done as a regular regimen.
-
Yes I'm about to do it. How do you replace the pressure valve


Frequently asked questions
Have a question about this project?
How to replace the pressure valve