


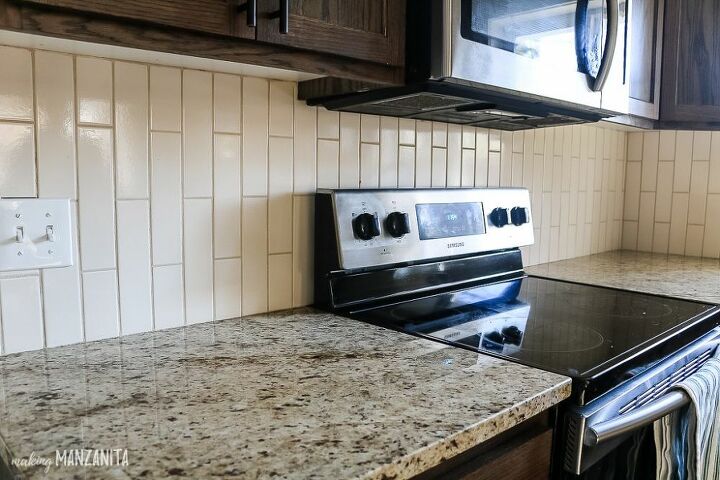
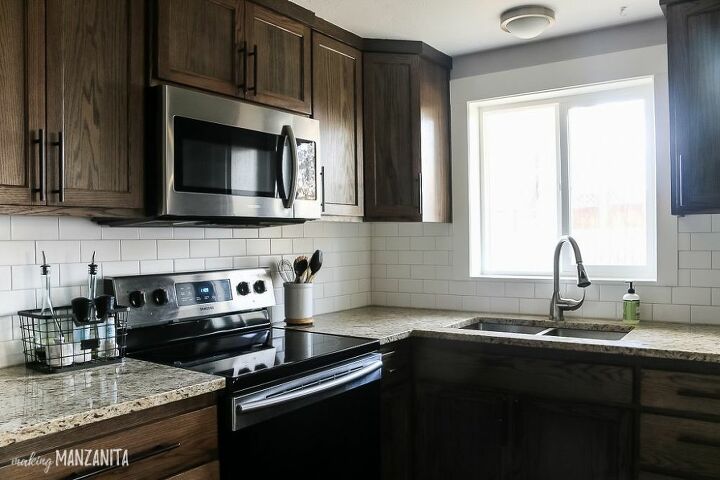
Installing Subway Tile Backsplash
If you love this project, grab your quick start DIY guide & subscribe to our blog!
Want to learn how to tile a backsplash in your kitchen?? In this post, we will walk you through the step by step process for how to install subway tile backsplash using tile adhesive! Bonus: there’s a video tutorial too!
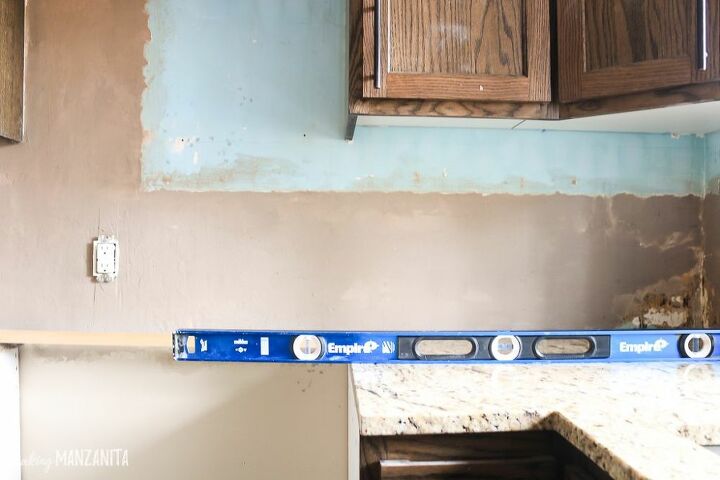
We’re going to assume that you’re starting with all of your old tile removed and your wall where you will be installing the tile backsplash is flat.
1) Put your tile and tile adhesive in the room you are going to be installing and maintain the temperature at 70 degrees or more for a full 24 hours before you start this how to install a subway tile backsplash.
Note: if you still have ANY mastic or mortar still on the wall, you need to go back and work more on the tile removal process.
2) Next thing you’ll need to do is level out your wall.
3) While your patching dries, take this time to prep the area. You need to cover your surfaces with some Red Rosin heavy weight paper and tape off any fixtures you want protected.
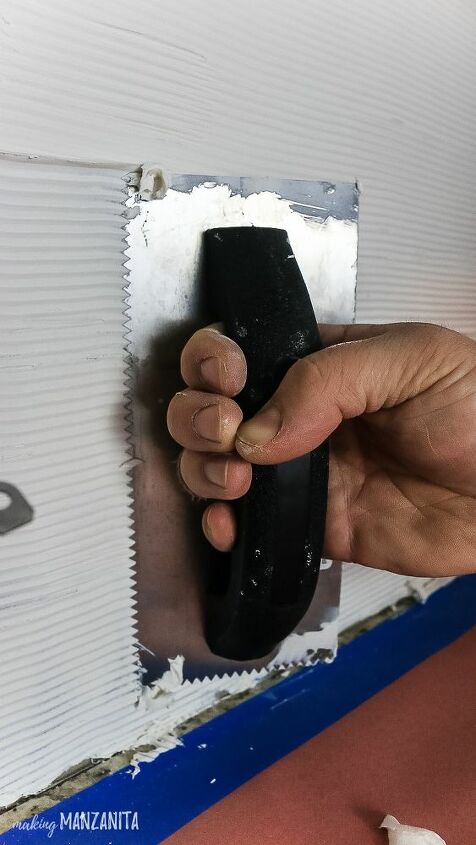
4) After the patch material has dried completely and you prepped the area, start by using the straight edge of your trowel to put a skim coat of the ceramic tile adhesive on the entire surface of the wall where you will be installing the backsplash.

5) With your skim coat layer of adhesive down and dried just enough, you are ready to start putting your tile on. Take your 3/16th v-notched trowel and apply more tile adhesive to the small area of the wall.
Only put the adhesive down over a small area at a time.
You’ll need to cut down some pieces on the edges and corners with a tile saw. Be sure to take the tile saw slow to avoid chipping tiles.
6) Scrape any tile adhesive off
7) After the tile has set for at least 24 hours, you can move onto grouting. When mixing up your grout, be sure to follow whatever the instructions included with your grout because the instructions may differ based on what you are using. If you mix the grout improperly it can lead to all kinds of complications.
To remove the excess grout, just take your sponge, dip it in water, squeeze most of the water out until your sponge is slightly damp, and clean off the excess grout.
8) Wait for grout to dry.
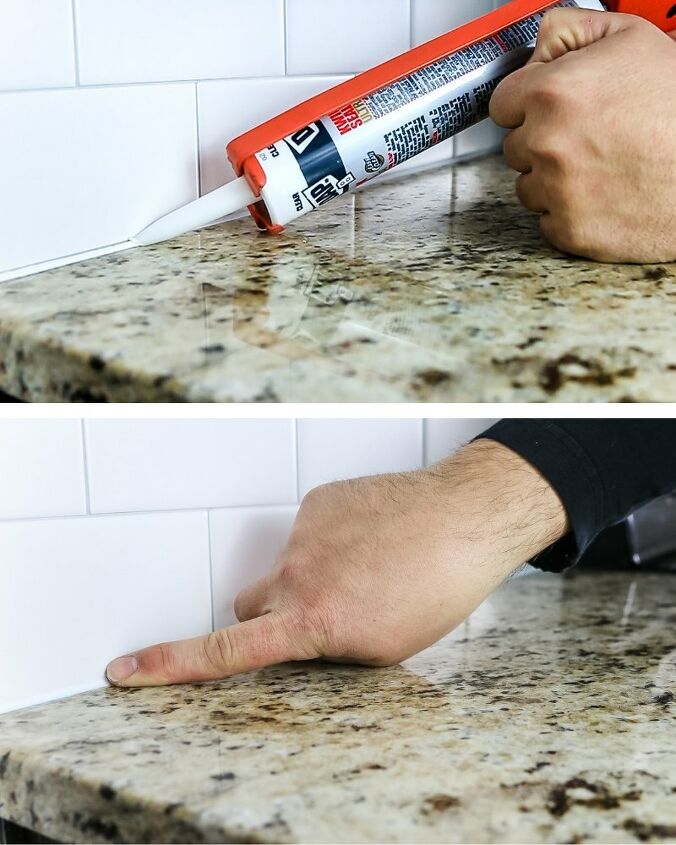
9) Next you need to caulk the bottom, where the tile backsplash meets the countertop.
10) The final step with any tile backsplash is to seal the grout. Using grout sealer, simply apply it with foam paint brush directly to the grout lines. Wipe clean when finished.
Hooray! You are done learning all of the steps for how to install subway tile backsplash.
Resources for this project:
See all materials


Comments
Join the conversation
-
Your instructions are exceptionally good. The backsplash is beautiful and perfect !
-
Yes


Frequently asked questions
Have a question about this project?
So you removed vertically installed subway tile and replaced with subway tile placed horizontally? Wow!
I was wondering if I had Formica as a back ground can we install it over the exsisto strip this off. To make a tile backsplash