


Wall Curio Makeover

My friend and I just began renting retail space at a tea house. It is a very tiny area so we need to make use of every inch available. It is also important that what we sell and how we display it reflect the personality of the tea house. As you can imagine, everything is light and dainty (and beautiful). We are working on a shoestring budget, so we are trying to use display pieces that we can get very inexpensively or, even better, free! My friend found this wall curio in her father's basement when they were packing up his house recently. It is all plastic and in its original condition, not very attractive, but...
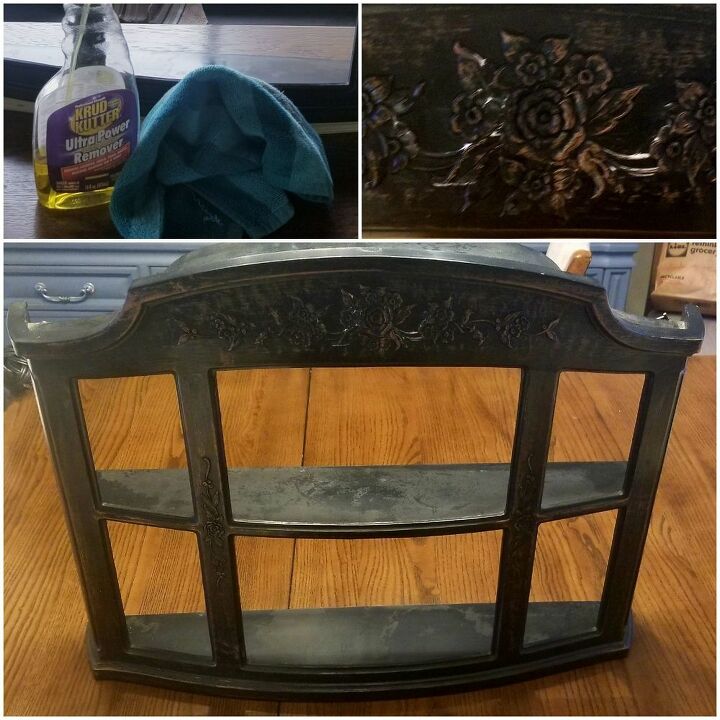
This is the piece in all of its original glory! The plastic was colored to look like a dark wood. There are flowers "carved" into the face of the unit. The shelves, as you can see, are mottled and just not very attractive at all.
I began with my trusty bottle of Krud Kutter and a clean rag. I thoroughly cleaned the piece, making sure I got all the dust and cobwebs off.
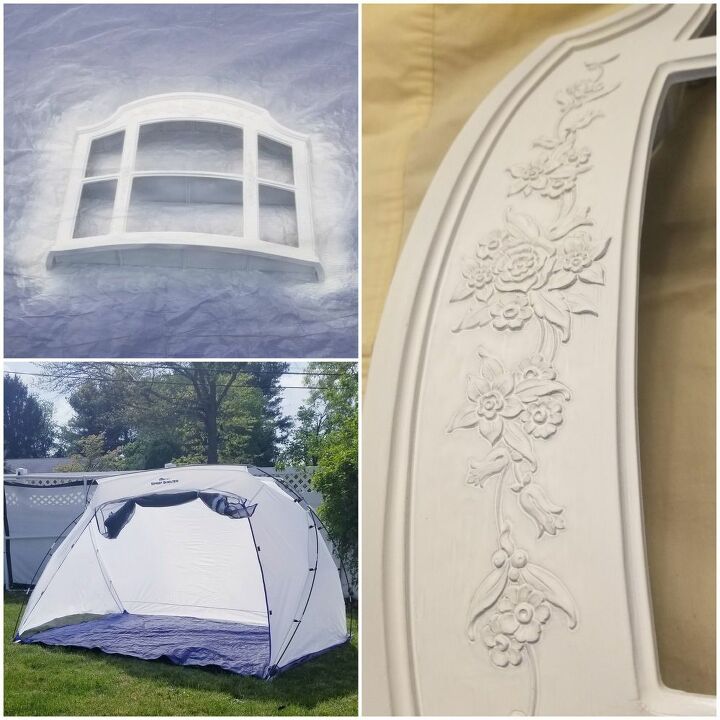
Once the cabinet was clean, I set up my new paint tent (I love it!!!). I spray painted the unit with Rustoleum Chalky in white. What a difference that made, but it wasn't time to stop yet.
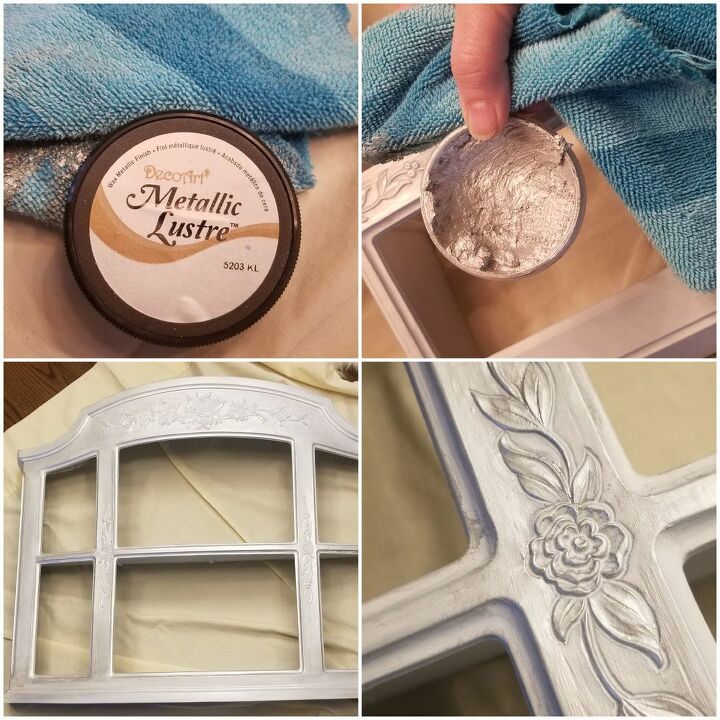
DecoArt Metallic Luster in silver is an amazing product. I love using it for highlighting, and in some cases, totally covering a piece. In this case, it was somewhere in between. I applied the cream with a clean rag and made sure it went into every nook and cranny. I set it aside to allow the cream to dry.
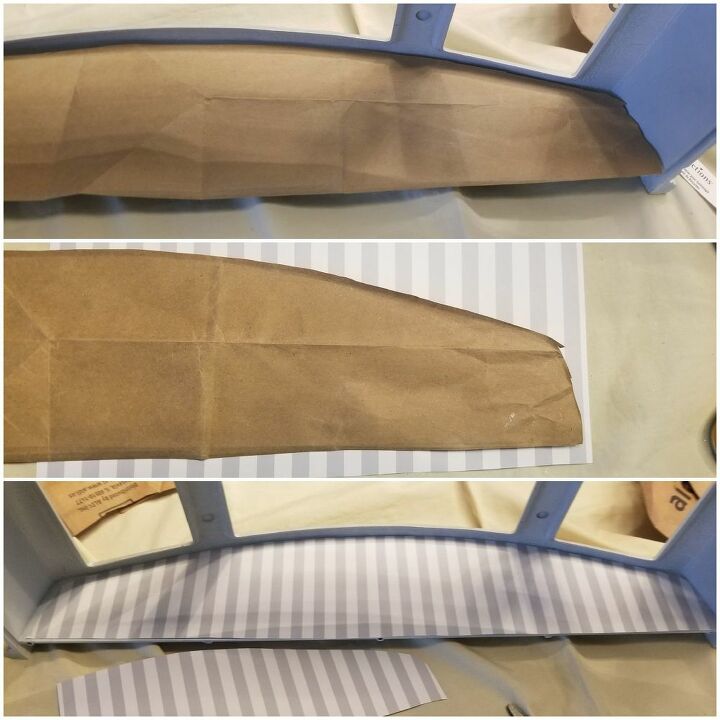
While the coat of silver was drying, I made a paper pattern for the shelf paper using a grocery bag. I then cut scrapbook paper from the pattern and trimmed it to fit the shelves. I set these aside and moved back to finishing the cabinet.
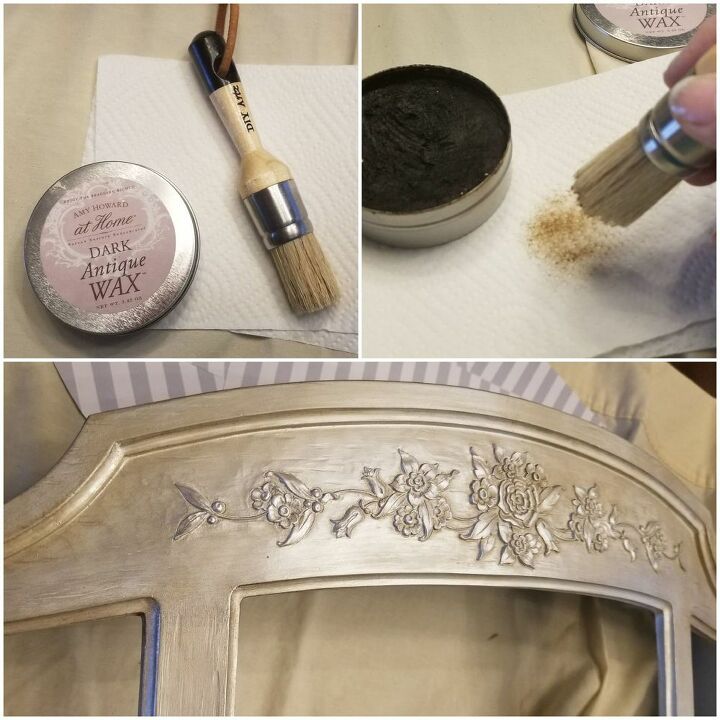
Using dark wax, a wax brush and a paper towel, I gave the unit an allover coat to add depth and tone to the curio. To do this without going overboard and making it dark all over again, I loaded the brush with wax then brushed off the excess on the paper towel before applying it in a circular motion to the cabinet.
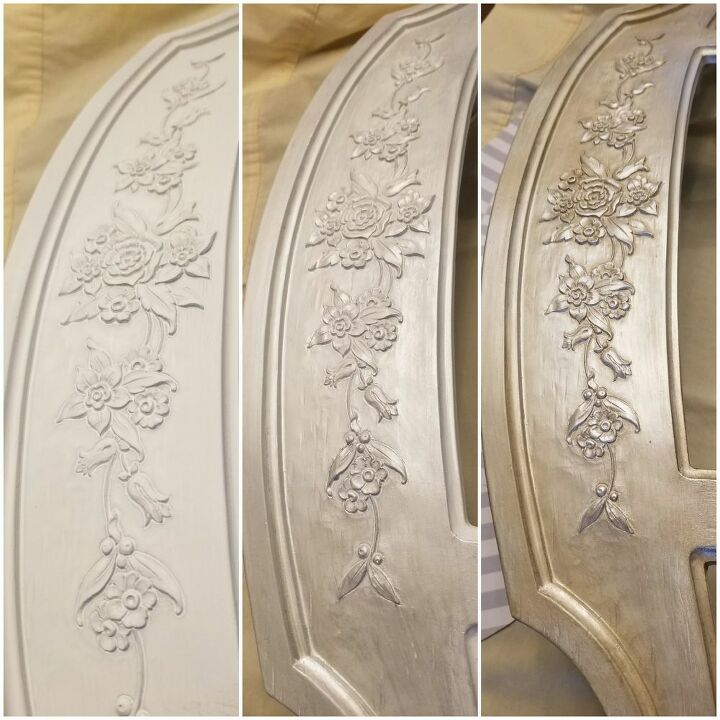
Here is a collage of the finishes in progression. From left to right: 1-chalk white; 2-with silver cream; 3-with dark wax. You can see with each application how nicely the details emerge.
After giving the dark wax a chance to dry, I applied some silver highlights.
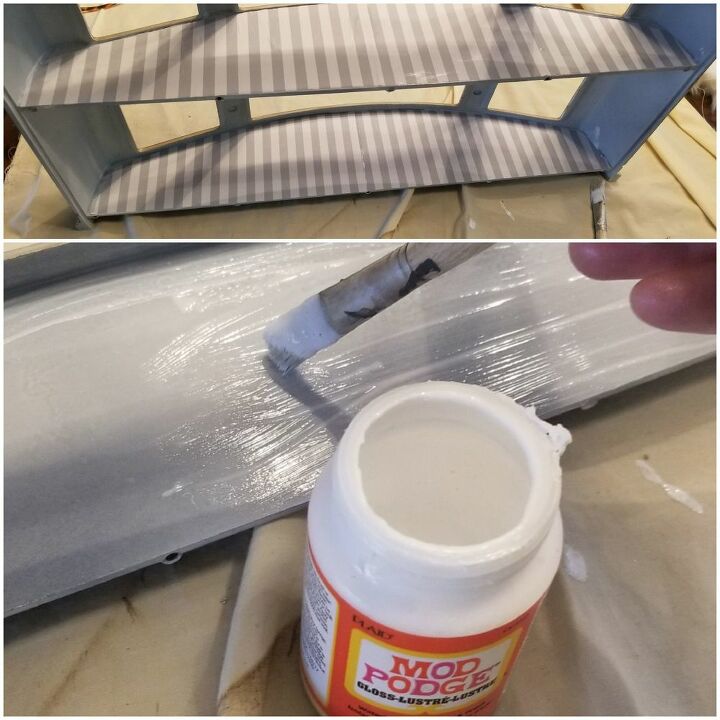
Lastly, I applied Mod Podge to the shelves (one at a time) and set the scrapbook paper in place. As the Mod Podge was drying, I smoothed out any wrinkles that formed. Once it was completely dry, a final layer of Mod Podge was applied to protect the paper.

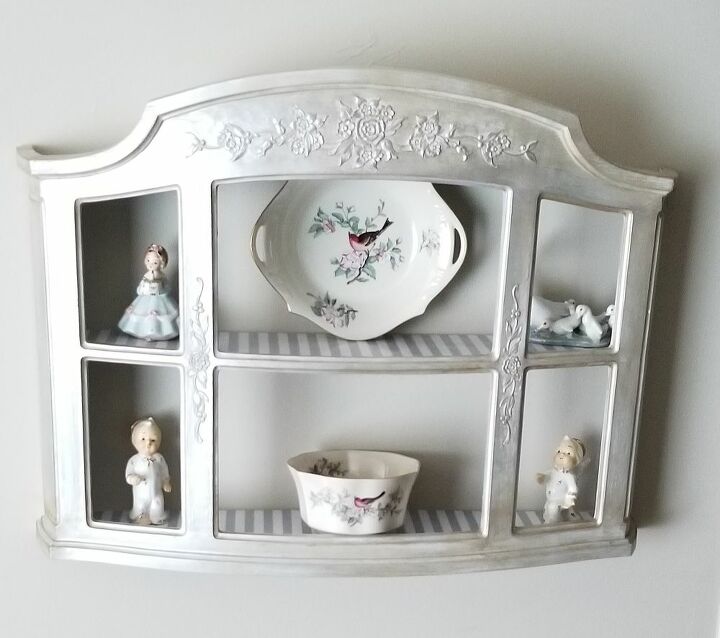
This is what she looks like now! I can't wait to get her hung on the wall at the tea house!
Resources for this project:
See all materials


Comments
Join the conversation
-
Very pretty, I love how the creme warmed up the color to look antiquey.
-
You are SO dang smart! Be proud of that!! Those dishes are tooooo cute ;)


Frequently asked questions
Have a question about this project?
Great idea to use a tent for the spray paint to contain all the particles blowing around. Is the tent made for this- or did you just buy a tent made for camping? Genius!