


How to Paint Curtains With a Stencil
Learn how easy it is to transform ready made curtain panels into custom draperies by painting them with a stencil.
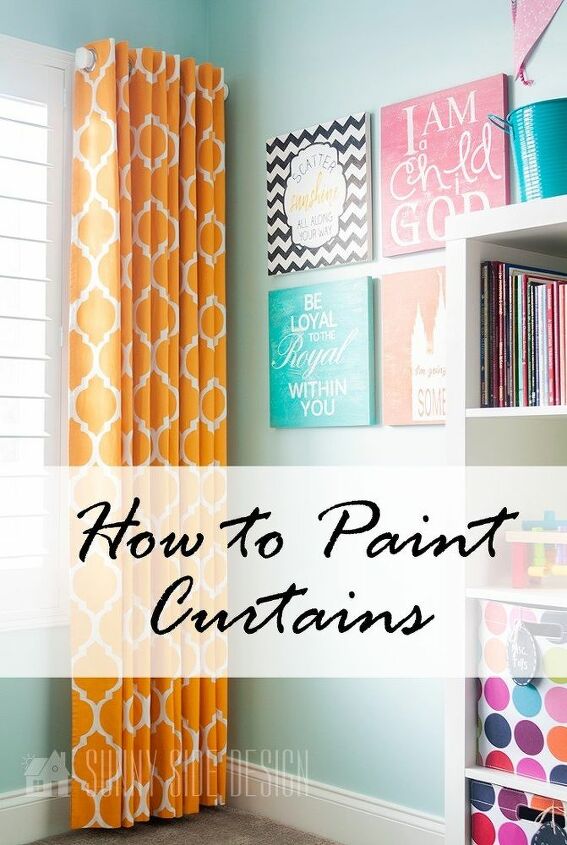
Have you ever wanted a specific look to your curtains but couldn't find them anywhere? Or maybe you can find them but don't want to fork out the money for them? You can transform ready made curtain panels into custom draperies for a fraction of the cost! We'll show you how easy it is.
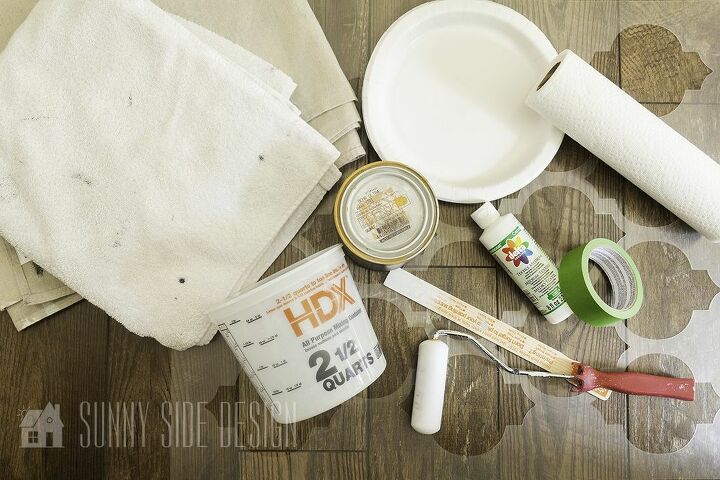
Here’s a list of supplies you’ll need for this project:
-curtain panels
-Drop cloth
-Paint
-Fabric Medium
-Bowl to mix the paint and fabric medium
-Stir stick
-Disposable foam plate
-Paper towels
-Baby wipes
-Foam roller
-Stencil
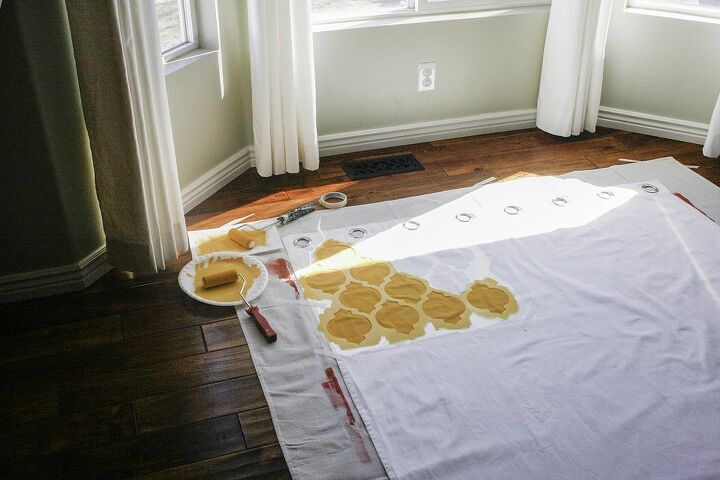
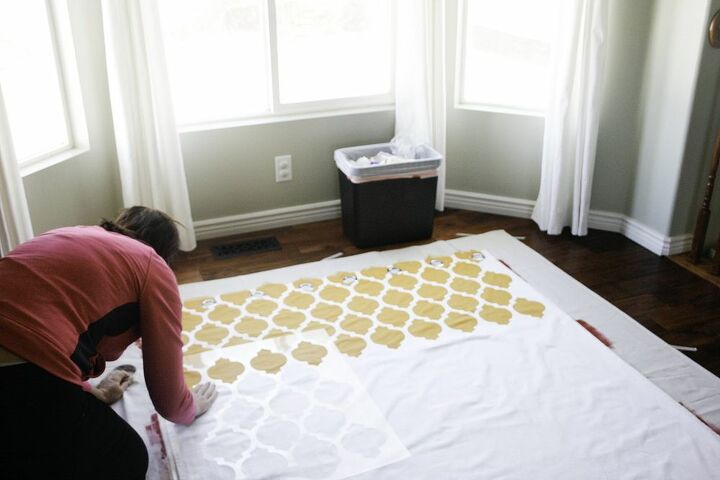
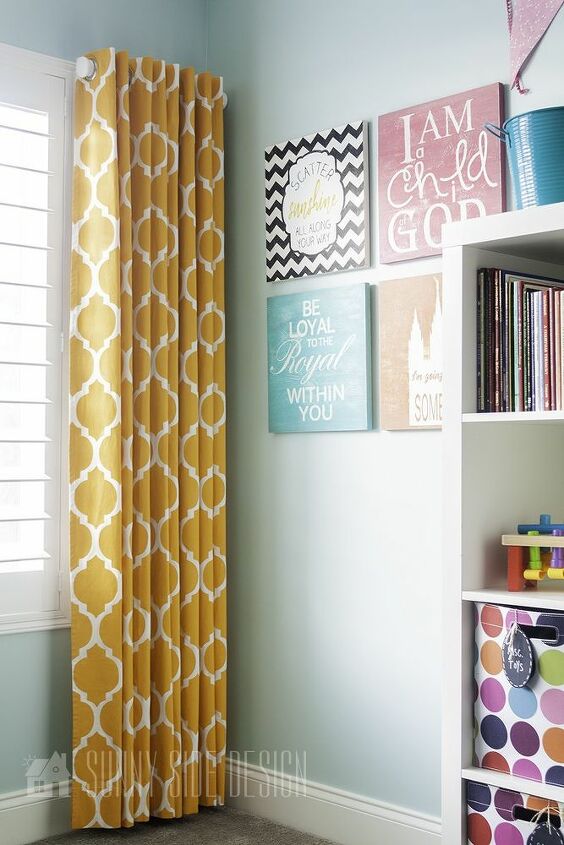
I used the MERETE room darkening curtains (from IKEA), 1 pair, bleached white, 57×98” for $29.99. It’s a great price for a pair of curtains that already have the gromets added and ready to hang. First you'll want to spread out the drop cloth on a flat surface and secure it to the ground with tape. Then spread out a curtain panel and pull the edges so they are taught and secure with painters tape. After mixing 1-part fabric medium to 2-parts paint you're ready to begin painting.
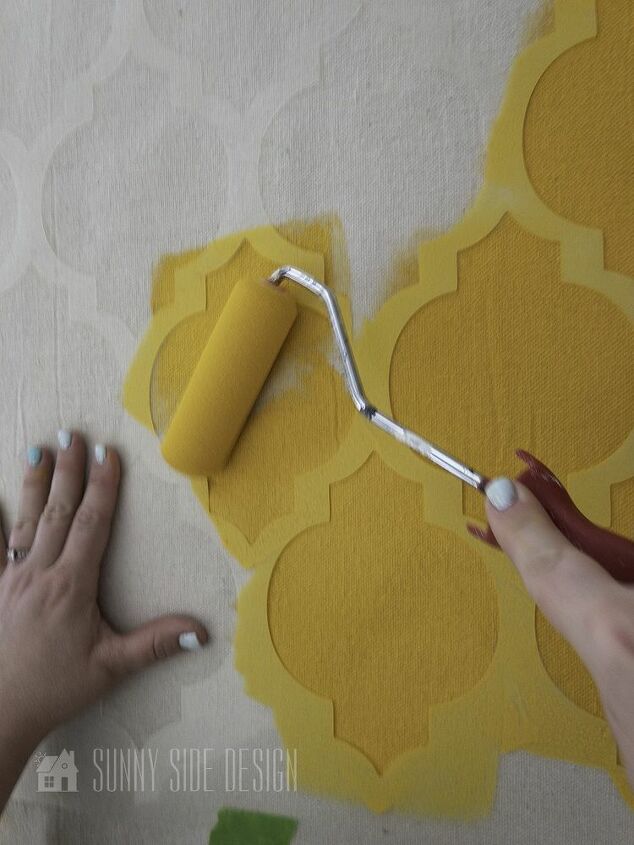
Position the stencil of your choice on your panel and secure the edges with painters tape. I used the Casablanca stencil from cuttingedgestencils.com. Begin by loading the roller with paint. You’ll want the roller to be fully covered but not too saturated with paint. After the roller is loaded, roll it onto the paper towel with very light pressure just to remove any excess paint on the roller. Start with the roller on the stencil and gently roll it off of the stencil and onto the fabric. We did this with each of the cutouts on the stencil to help prevent any paint bleeding under the stencil.
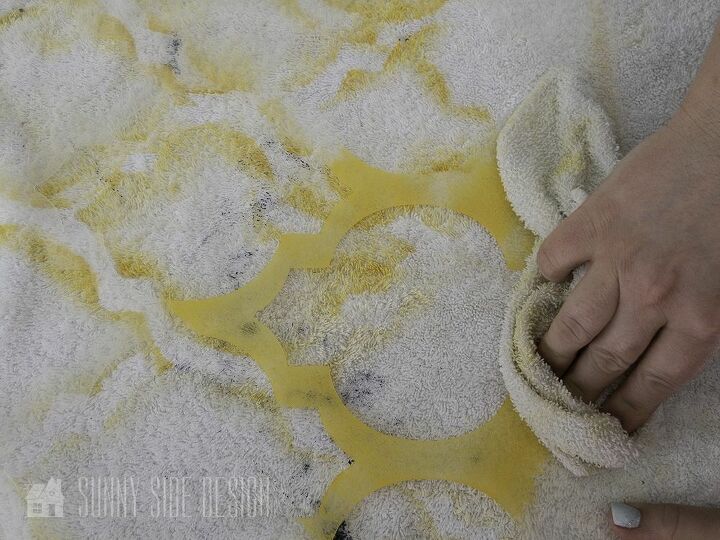
Once you’ve completed painting the entire stencil, carefully peel the painters’ tape up and lift up the stencil. We then laid the stencil down on an old towel and used the baby wipes to clean off all the paint from the stencil. Clean the front of the stencil and then turn it over and clean the back side. (You can purchase baby wipes at your local dollar store…we went through a lot of wipes!)
Once the stencil has been cleaned, carefully position it, lining it up with the previous pattern and tape into place. Repeat the same steps as before. As time consuming as it was to clean the paint off after each time we had painted the entire stencil it was well worth it. This helps prevent paint build up which can distort the stencil shape each time you proceed to paint. Cleaning will also help prevent any paint that got on the back side of the stencil from getting on the curtain in an area you don't want it.
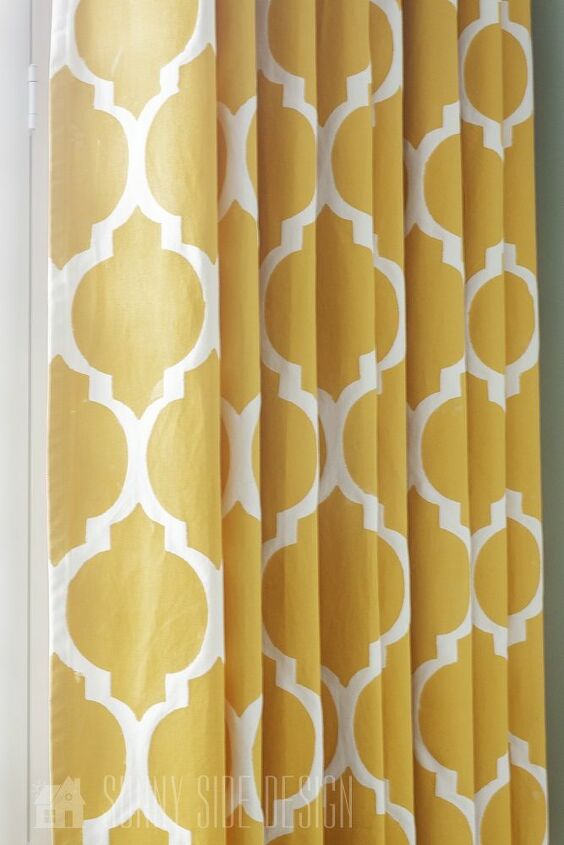
After you have painted all of the panels and they have all completely dried, you’re ready for the last step! The paint should be heat set to ensure it’s properly bonded to the fabric and won’t wear off when washed. If you were painting a small area, say an image on a shirt, you could easily use your iron. Since we had painted an entire curtain panel, we tossed them in the dryer for about 20 minutes each. A light ironing may be needed to get any wrinkles out, but after that they’re finally ready to be hung!
Now you can sit back, relax and enjoy your beautiful new curtains!
For a MORE detailed tutorial please see our original post here:
https://www.2thesunnyside.com/how-to-paint-curtains-with-a-stencil/
We also have this short video tutorial so you can see how we painted these darling curtains a little closer.
If you'd like more great ideas for DIY projects around your home please visit our site and subscribe to our newsletter. You'll be the first to know when we're working on something new!
www.2thesunnyside.com
Resources for this project:
See all materials


Comments
Join the conversation
-
I actually used this technique to stencil a border on a $20 area rug from Walmart. Oddly, I never made the jump from area rug to curtains. Looks like my dining room (where the rug is) will get another "mini-update"!
-
These look beyond awesome!!!


Frequently asked questions
Have a question about this project?
Since they're "heat set" you can wash them?
Very cool. I had no idea I could make custom curtains? I have some solid green pottery barn curtains I can stencil white and make them new. Thank you!!!
Where did you get your stencil?