


How to Update an Antique Serpentine Front Dresser Using a Transfer

As soon as I picked up this gorgeous curvy dresser, I had my vision. Iron orchid designs recently came out with paintable transfers. Yes, you can paint them! Most just use watercolors, or super watered down paint, maybe colored stains, it should be translucent and it's a fun way to add your own twist to these transfers. So needless to say, I wanted one as soon as they hit the shelves! And Astoria Foliage was my favorite 😍 So i grabbed one of those transfers from my local distributor, along with other IOD goodies because of course you can't just buy one thing! 😆 They are all so pretty and fun!
Getting a little off course here, so to recap, my plan was to do a little chalk painting, apply the transfer to the drawer fronts, and color it up all pretty 🎨 But as you can see, that didn't happen. Read on to see how I got this look that I call "Rustic Elegance in a Simplistic Way" and when my original vision took a turn....
Ps....
If you've never used transfers before, I do not recommend trying it first on a curvy area. It is extremely difficult to apply a transfer correctly on something that isn't a flat surface. You need to know how these work, know what to expect, and know how to work with them before applying to drawer fronts like these. Transfers are expensive and you don't want to waste your money! Practice on flat surfaces first. Do a few transfers before attempting this type of project 😉
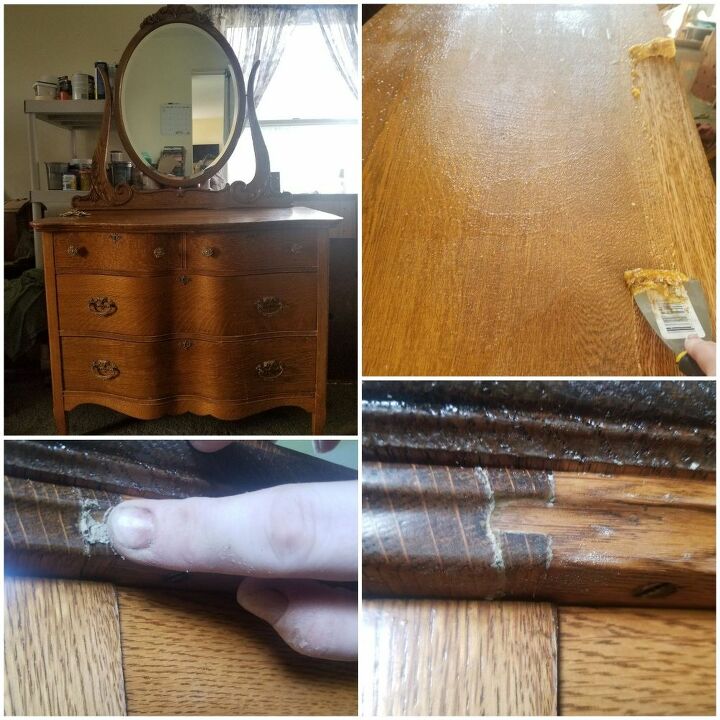
The first thing you should always do with any project is PREP! Even tho some paints say "No Prep", that simply isn't true if you want a long lasting and durable finish. Scrub your piece down inside and out with your favorite cleaner, I prefer totally awesome from the dollar store. Strip the piece if necessary. I had to with this dresser because it had about 6 inches of varnish on it 😄 Fill and holes, fix any cracks, replace any missing details. Then give it a good sanding. Be careful if it's veneer! You don't want to sand through it! If your piece has a lot of deep scratches like mine did, start with a 100-120 grit. Then gradually move up in grit. If using a wood stain, don't go above a 180-220 grit, otherwise you will close the wood grain. Now wipe your piece down with a damp (water) rag. This is the proper way to prep. Doing this ensures proper adhesion and all your hard work will last a very long time!
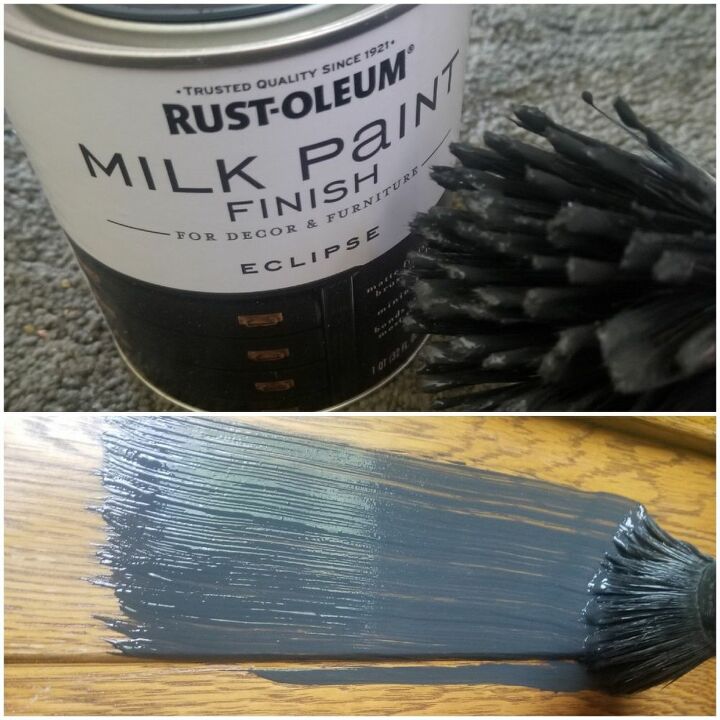
Lets start painting! I knew I wanted this piece to get a good amount of distressing, so I chose to use rustoleum milk paint in eclipse which is a dark gray, but not quite black (This isn't a true milk paint since it is premixed. True milk paints come in powder form, but this still gets the look I was after). So I mixed in a little bit of my homemade black chalk paint to darken it up. I painted the sides, and the top and bottom molding pieces. I knew the transfer was going to go over the middle frame pieces so I didn't want to paint those. 2 coats should do it and sand with 320 grit sandpaper in between coats to really soften up the paint. Don't forget the mirror if you have one!
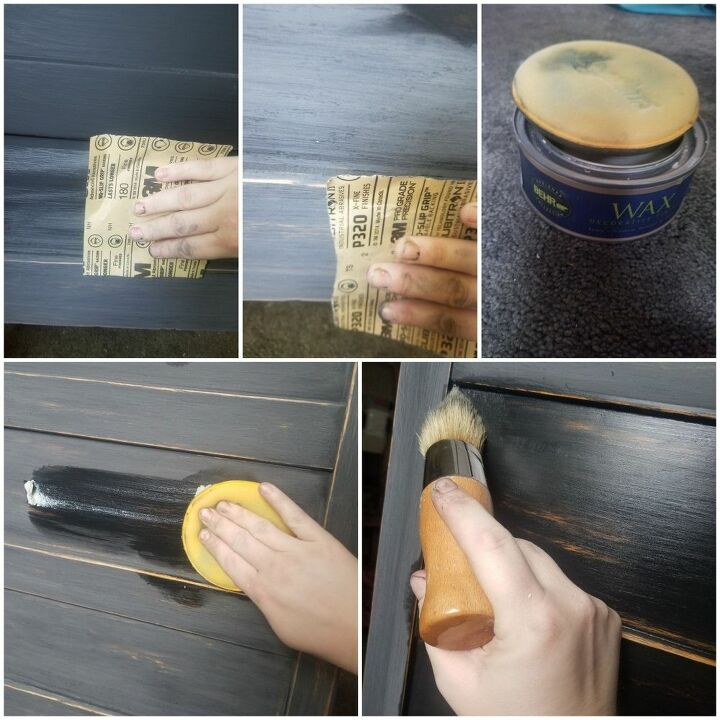
After your paint has dried, start distressing. I started with 180 grit to get down to wood quickly. I basically sanded all over since I wanted a lot of that bright oak to peek through. Once I saw wood, I switched to 220 grit to smooth any sanding marks, and then 320 to soften. Then I sealed with behr clear wax according to instructions on the container
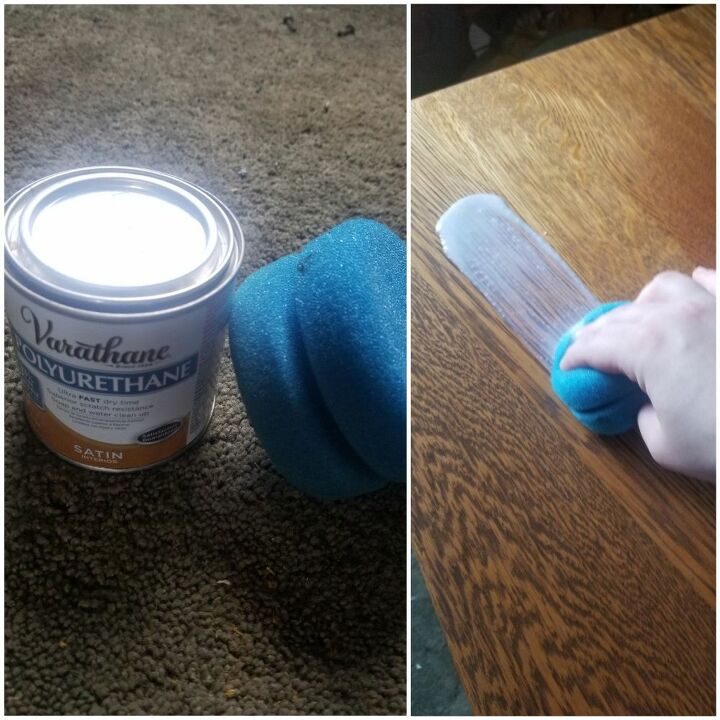
Now it's time to seal the wood. Always seal before applying a transfer, and never use wax. Wax will inhibit the transfer from adhering properly. I used varathane polyurethane in satin for this project. Using a sponge or applicator of your choice, apply 3 coats to all of the bare wood only, moving in long even strokes. Allow 2 hours dry time between coats. If it feels rough, give it a light sanding with 320 grit sandpaper
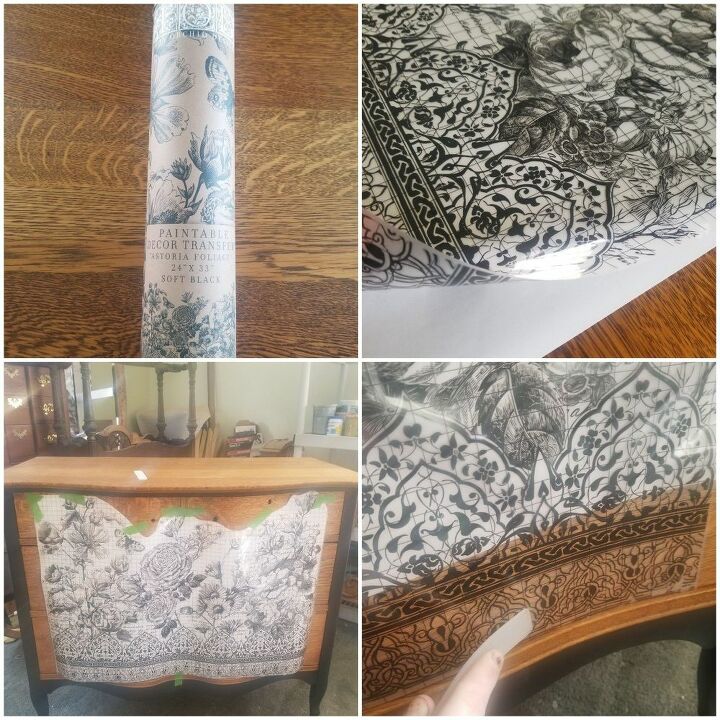
After the poly has dried, get ready to apply the transfer. Always leave the protective backing on until you are ready to apply, and only do it in sections. For this piece, I only cut off the extra around the design on the very top. I wanted the actual picture as a whole across the entire front. So I positioned the transfer where I wanted it, and taped the top to hold it in place. Working in small sections, i cut off part of the protective backing and started to apply the very bottom. The tool that is included is very handy! Press down firmly all over the part of the transfer that you are adhering to the wood
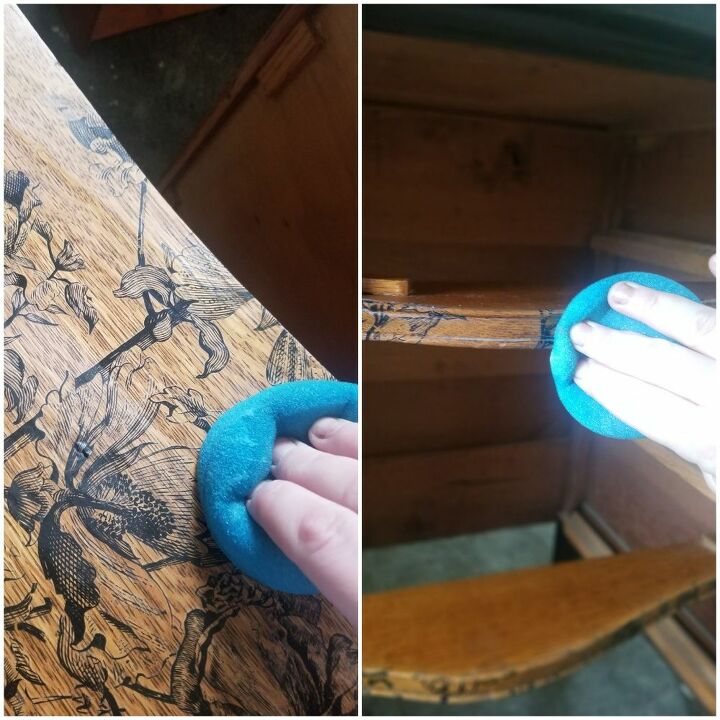
Continue to move in sections, cutting away the protective liner as you go. You can easily see where the design didn't adhere when you lift the plastic (circled in red). Just place it back down and press again. Some areas are really difficult to get off that plastic layer. Use your fingers, fingernails work really well too. Really focus on those thin frame sections. Make sure it's sitting correctly and press it into the molding. Positioning it correctly over the curves is extremely difficult, so don't expect perfection!
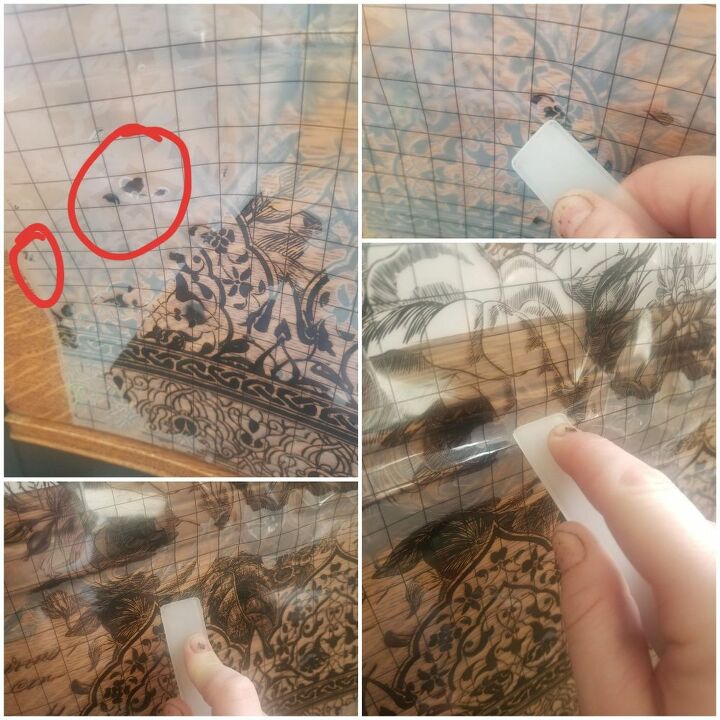
Once you've worked your way all the way up, slowly start removing the plastic layer, laying back down and focusing on those stubborn areas as necessary.
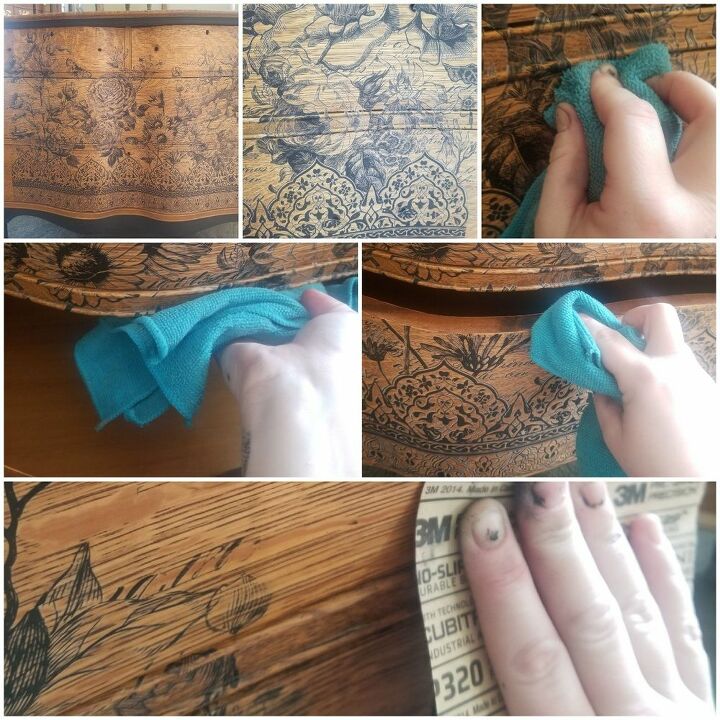
Now that you've removed the entire plastic sheet, go over the transfer with a clean rag. Press down any areas sticking up, remove any loose pieces hanging off the top and bottom of the drawers. I had a few wrinkles from positioning it differently over the curves, so I just lightly sanded over it with 320 grit sandpaper to smooth those areas out. I also distressed the sides of the transfer so it wasn't such a blunt line.
After all that work, you definitely want to seal it! Using the same sealer as before, apply 2-3 coats over the drawer fronts and frame moldings that the transfer is on.
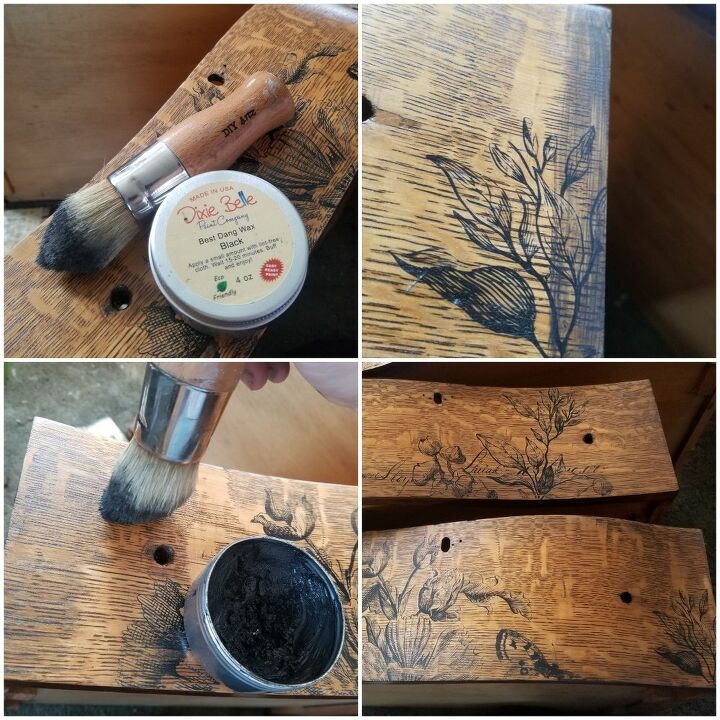
I shaded in some Dixie Belle's best dang wax in black all around each drawer to add to the framed affect and age it a bit. Just add to the edges of the drawers, pull it outward and wipe amy excess you don't want
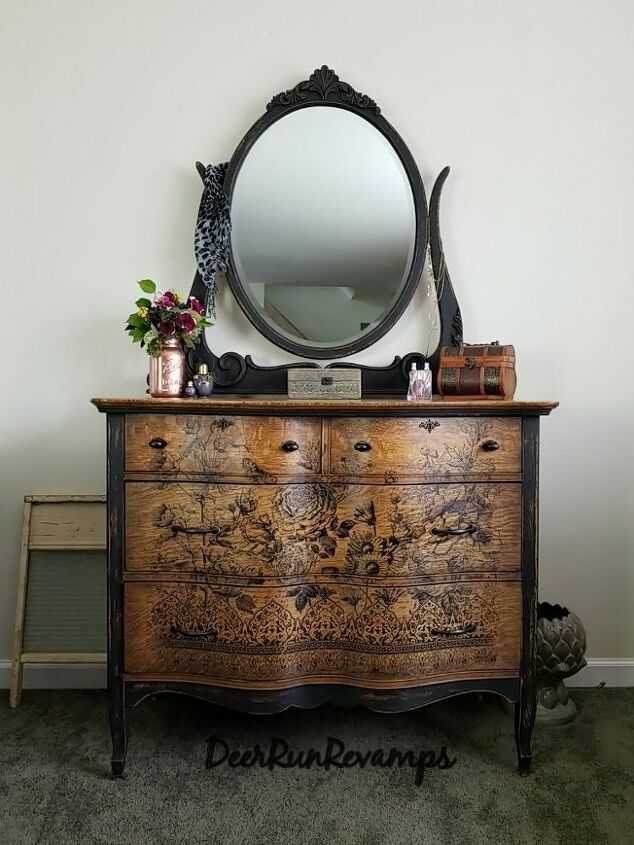
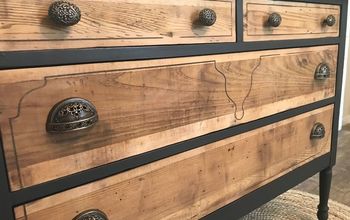
Now enjoy your gorgeously updated dresser 😍
Links are included in the materials section for all of the products used.
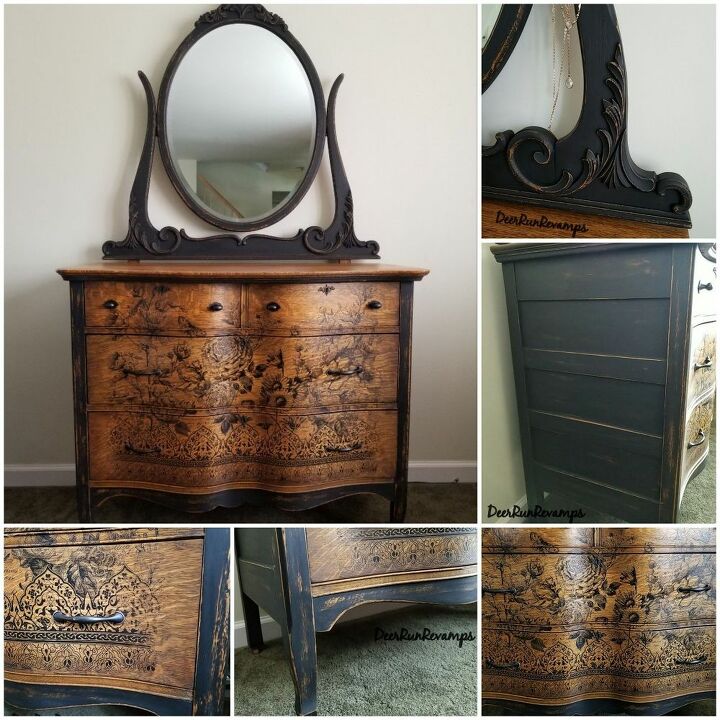
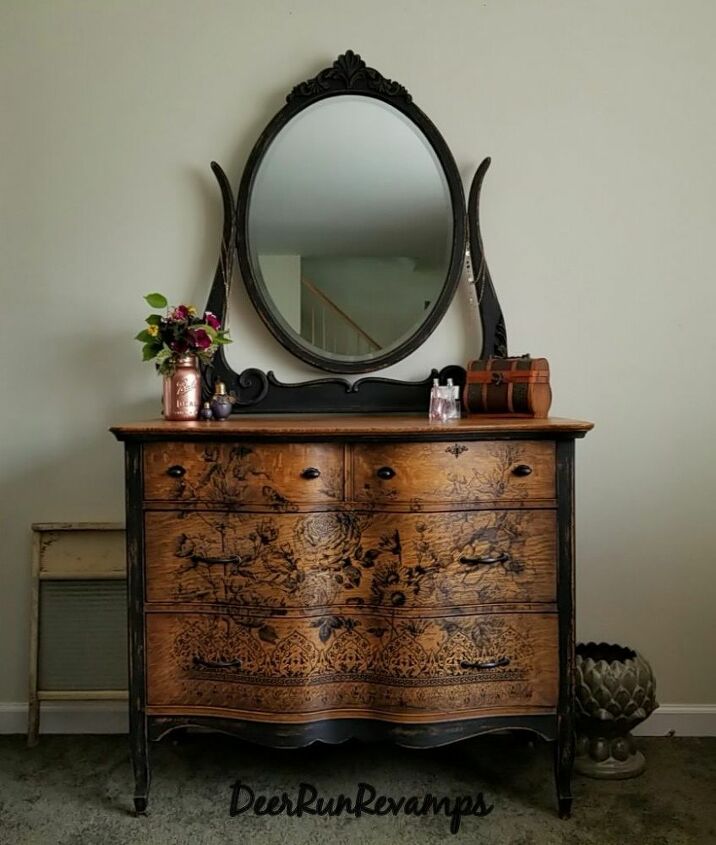
Truly rustic elegance in a simplistic way 😍
Resources for this project:
See all materials


Comments
Join the conversation
-
Absolutely gorgeous!
-
where did you get the transfer - I didn't see it in the resources list


Frequently asked questions
Have a question about this project?
Hello!
I keep coming back to pics of transfers on raw wood. Loving it!
I have stripped a cherry serpentine dresser, highboy, actually, and transfers are my plan.
As I was rereading your post, I was wondering why you didn't go side to side, following the curves, rather than going up, and fighting the curves? What am I missing? Because I am a done once, do it right kinda chick. :)
Thanks for sharing your expertise. I am going to pick up that transfer from your shop. I appreciate it!
Hi...
I LOVE the dresser!!! Just beautiful!!
Regarding the transfer...you said it was paintable. Do you have any examples of painted transfer work that you've done..? My brain is trying to visualize it but...?????????
gorgeous!