


Give Your Vintage Seat a Classy, Stylish Knitted Cover

This is my latest project. Oh boy...I've been chewing on this one for months. First, I had to take off the old cover from the seat, and remodel it to a new modern look. That went surprisingly well. But then I got stuck. I have no clue how to sew fabric on a seat so I went to a furniture upholsterer and asked for advice how to do so. she told me I should have kept the original fabric and use it as a pattern. oeps.... I struggled for weeks with all kinds of fabrics but no results until I realised I can knit ! Wool takes every shape you like and it's easy peasy to sew together...and voila...my cosy home made seat. I wish I could show you the whole project from taking off the original fabric 'till the new shape but the pictures got lost...so sad about that
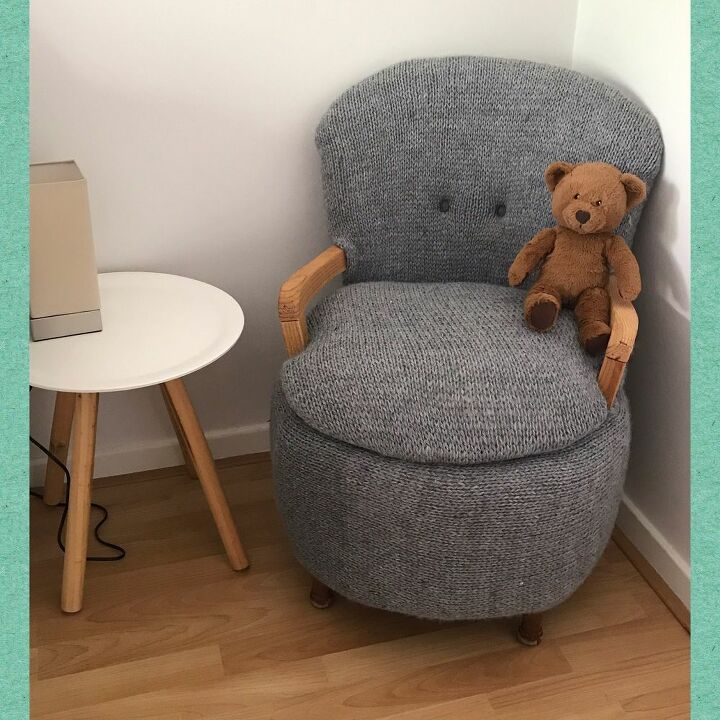
so this is my end result... you can take of the cover from the seat cushion if it's necessary to have a little wash
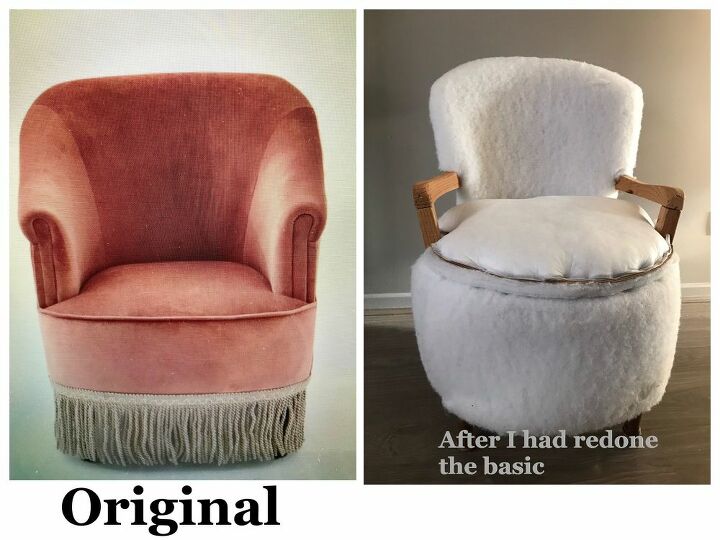
I wish I could show you how I turned the vintage seat to a more modern look but I lost all the pictures I am so sad about that.
Maybe you recognise this seat from an other project I posted (10' elastic wall picture holder) It's that ugly seat you see under the picture holder.
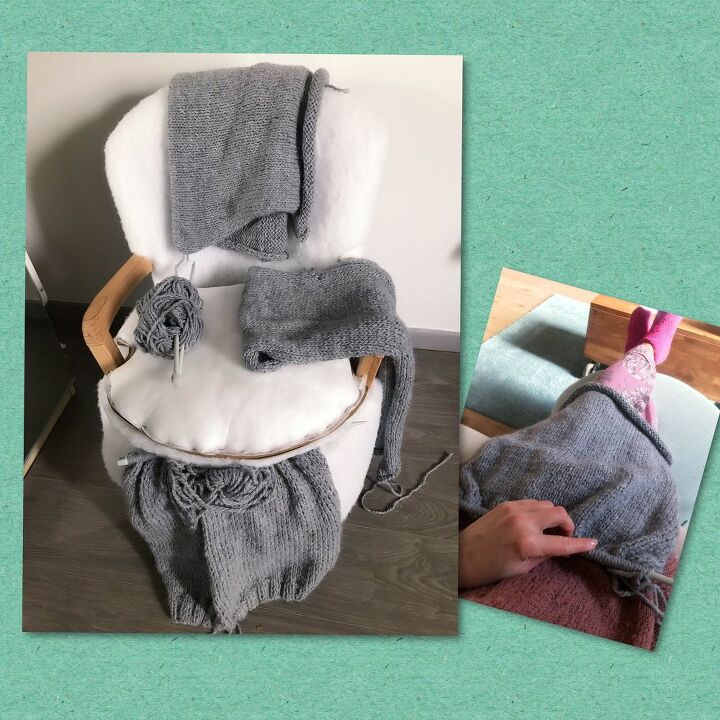
I bought some very cheap , warm grey wool and knitting needles nr 8. I wanted it to be a little loose . All the pieces I knitted were rectangular shaped. It was a guess and try project . Wool takes all shapes and is stretchable so I had to fit it to the chair a few times before I was sure I had knitted enough. But it was fun knitting while watching tv
first I sew the longest piece around the chair using a child needle.
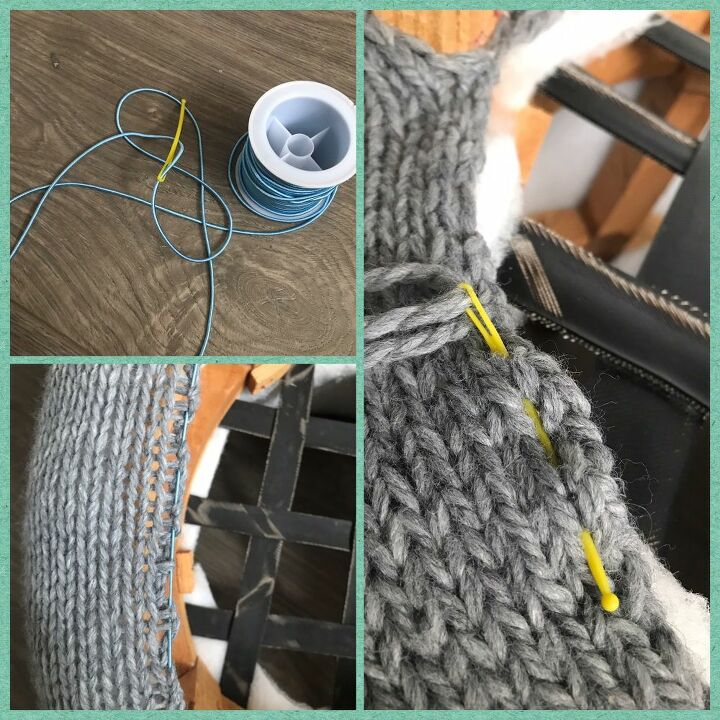
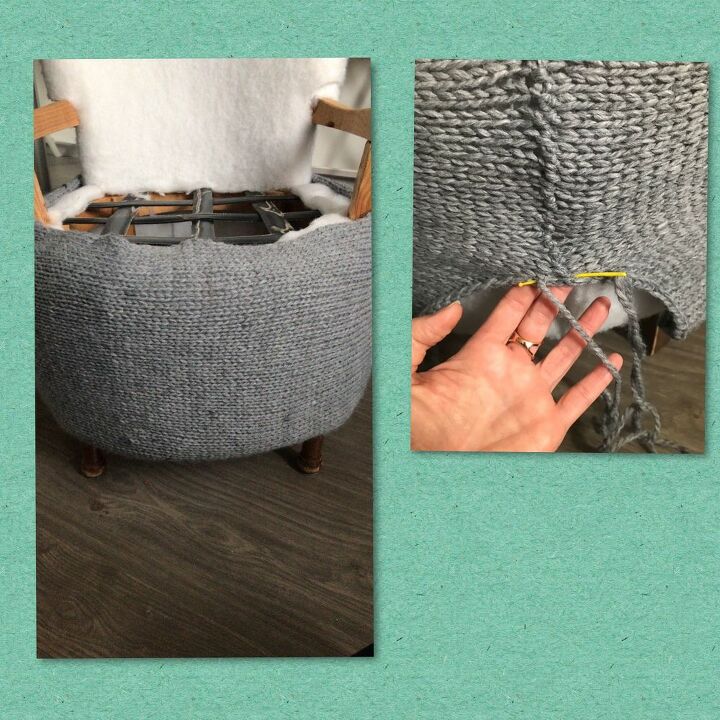
I turn the seat upside down and took some elastic rope and used it at the bottom of the chair to shape the fabric and keep it nice and tight around the legs. I went all around. I used wool to do the top side and did the same. went all around to shape and hold everything in place.
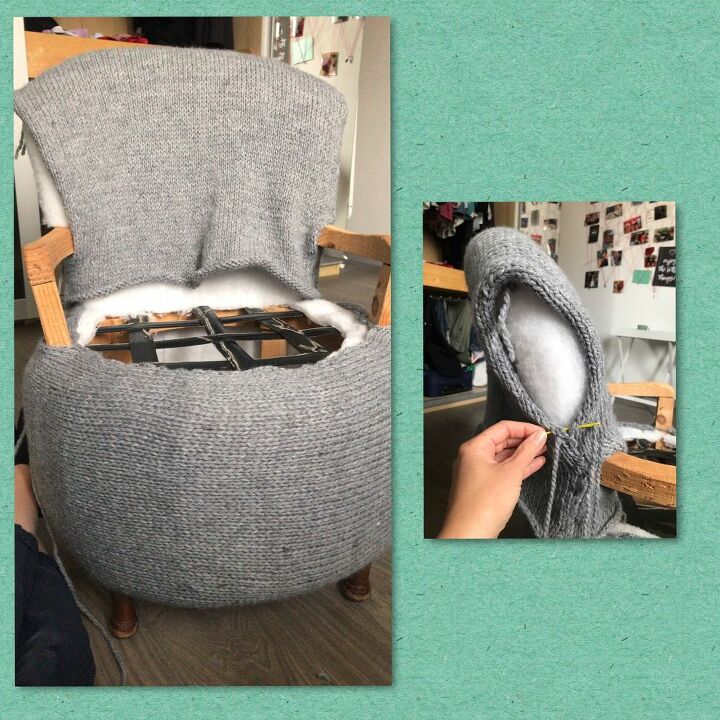
next step was the back part. I used some wool and just sew the whole thing together. you shape it while sewing. A little stretch this way, a little pull that way
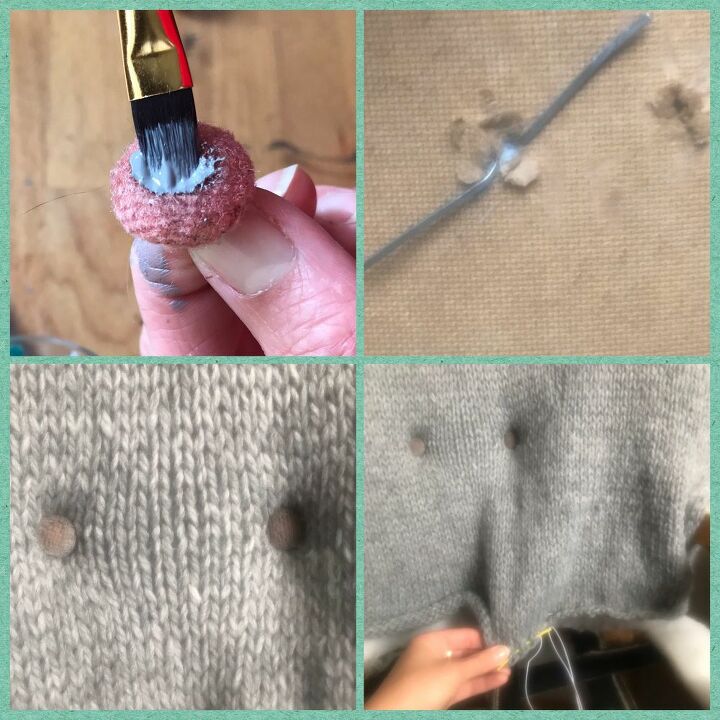
I reused the original buttons and gave them a layer of grey paint. I pulled them through the holes and split them at the back to stay in place ( can't show you , but the back of the seat is made from a thick kind of cardboard with a few holes in )
once the buttons are in place, I could sew the top to the bottom
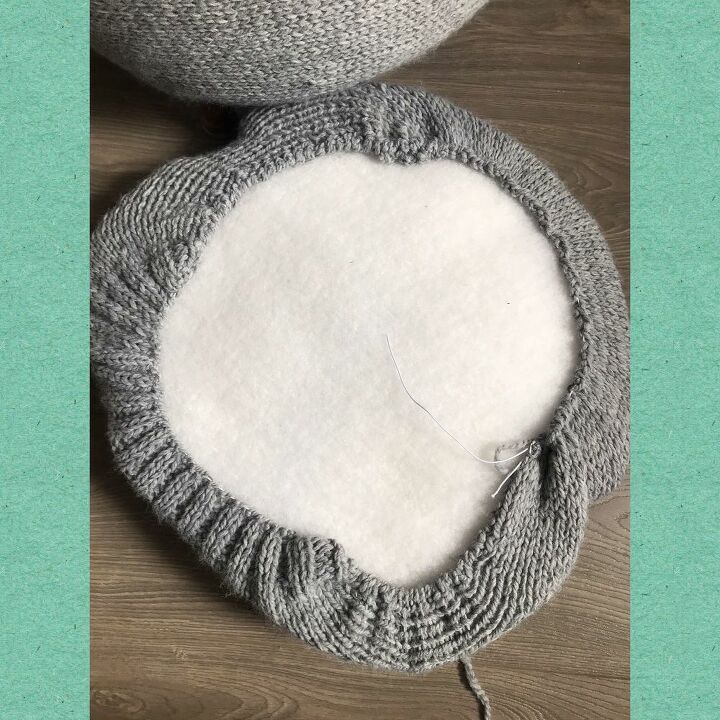
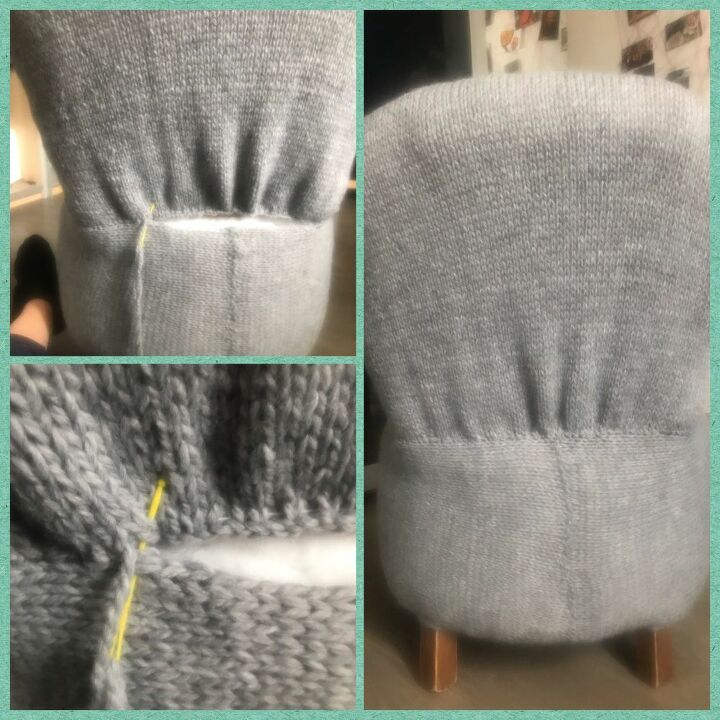
last step was the seat cushion. No sewing this time . I just used some elastic rope to keep it in place. Went all around and pulled until I had a nice shape. Thanks to the elastic rope, I can still take it of to give it a little wash from time to time
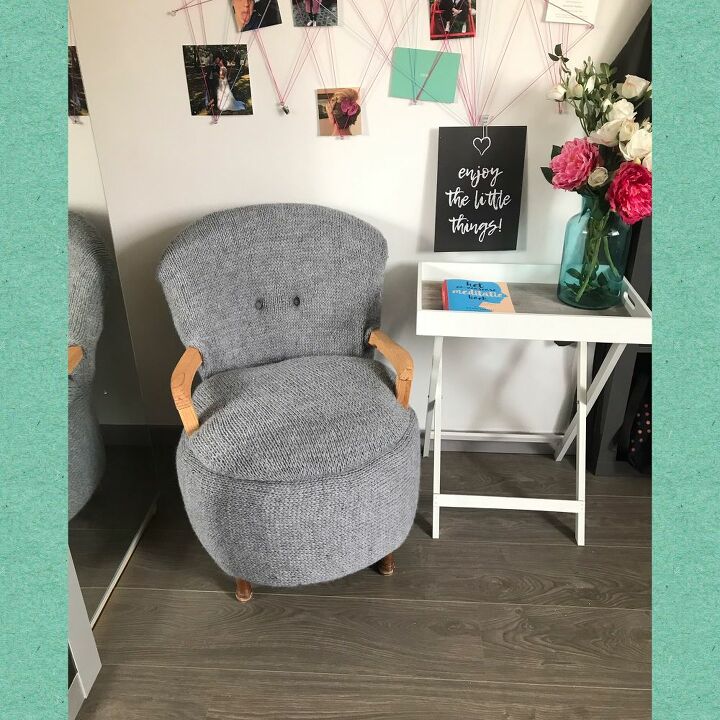
Put the cushion in place and done ! I am so happy with the result !
The make over from the vintage look to the modern look was difficult, but giving it a new cover was so easy peasy.
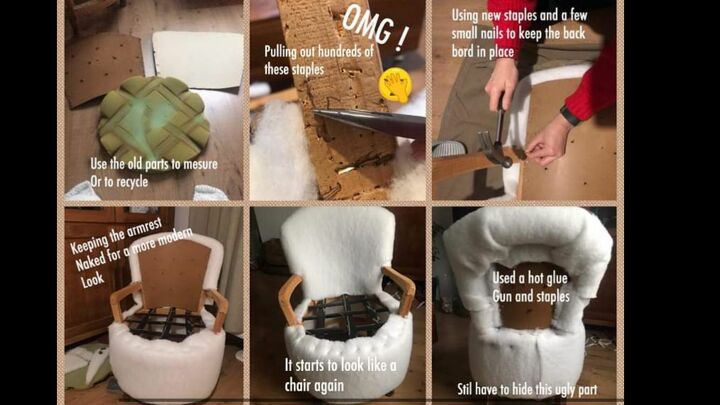
Yay ! I found the picture from the make over
Resources for this project:
See all materials


Comments
Join the conversation
-
You did an excellent job on this and SO different and creative! Beautiful!
-
WOW, what a beautiful and cozy looking chair, you did an outstanding job! What talent! I am amazed!


Frequently asked questions
Have a question about this project?