


Picture Perfect Jewelry Organizer 2.0
One way to upcycle old, ornate photo frames is to make them into fun jewelry organizers. I made a couple of these for my nieces a few years ago, and they were big hits! But since posting that tutorial, a question I have been frequently asked is, what about post earrings? With chicken wire or hardware cloth, you can really only hang hook-type earrings. This afternoon project offers a solution that works for just about any style of earring.
HOW-TO
You will need:
· Sturdy picture frame
· Needle-nose pliers
· Ruler and pencil
· Wood slats
· Bandsaw
· Dowel rod
· E6000 glue
· Cup hooks/knobs
· Finish of choice and brushes
1. FRAME
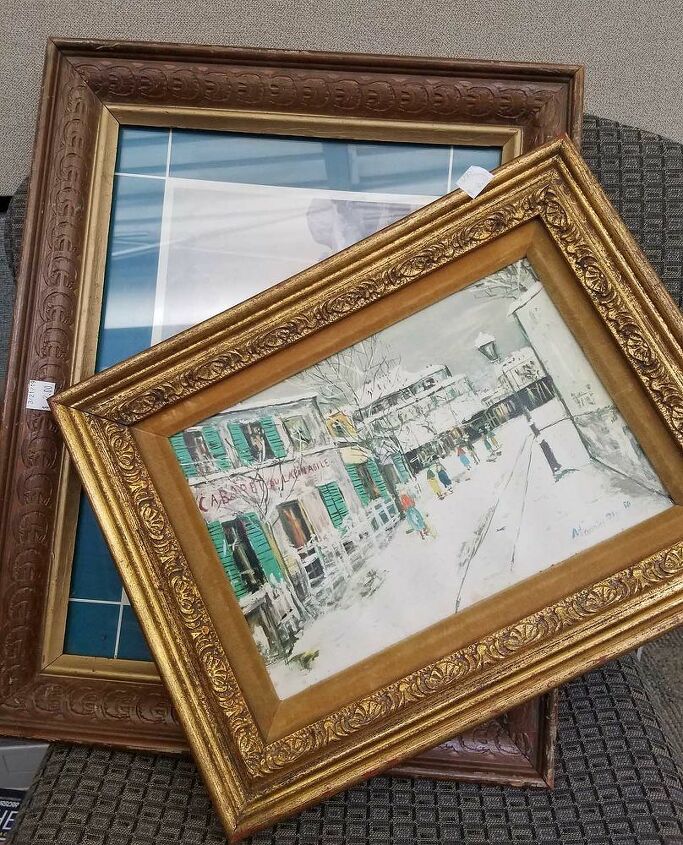
The Habitat ReStore is a great place to find picture frames, which is where I purchased these two for $8 total. I chose them based on their solid construction and decorative detail.
To get started, flip over the frame and remove any backing paper. Then remove the staples or clips holding the picture and/or glass—I used needle-nose pliers. Discard unless you can recycle.
2. PAINT
The finishes I used were:
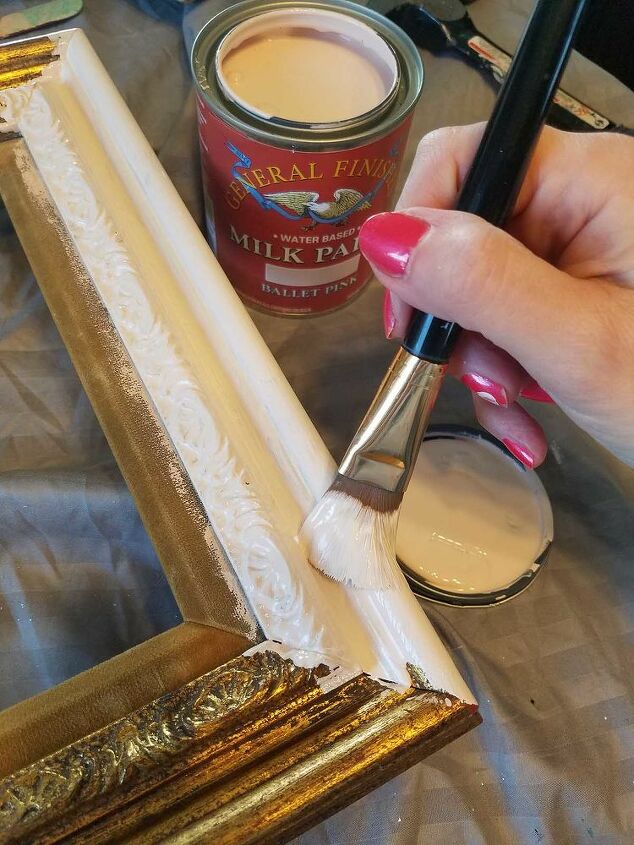
· General Finishes Milk Paint – Ballet Pink
· General Finishes Glaze Effects – Winter White
· General Finishes Pearl Effects – Champagne
Ballet Pink – I painted the entire frame with two coats of Ballet Pink, making sure to get down into the crevices and covering over all of the gold finish. I used Painter’s Pyramids to hold the frame up off the table so I could get the edges better.
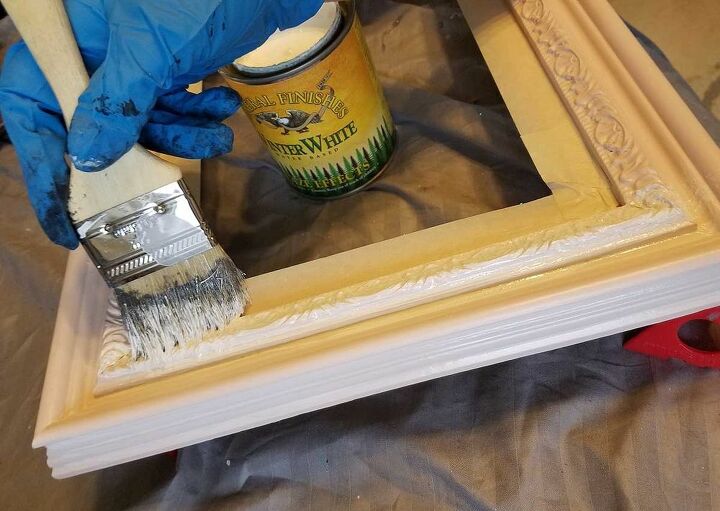
Winter White Glaze – Working on one side at a time, I applied a pretty liberal coat of white glaze with a chip brush, getting it down into all of the recesses. I used a cloth to quickly wipe off the excess, which gave a really pretty effect over the pink. I have used other glazes before, but not the white, and I have to say, I really love the look against the soft pink. I will be using the white glaze a lot more often!
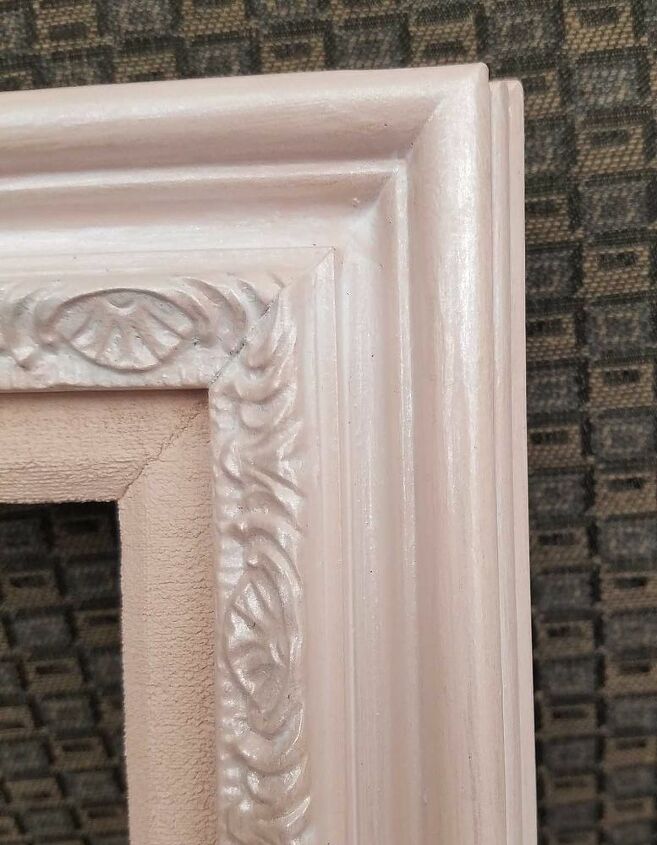
Champagne Pearl – To kick up the glam factor, I next went over the frame with the Champagne Pearl Effects. The trifecta of the Ballet Pink, white glaze and champagne pearl is a soft and beautiful winning combo.
3. SLATS
The next step is to create the notched slats for the earrings to hang from. I purchased a few pieces of thin maple stock from Woodcraft in the perfect thickness and width – 1/8" x 3/4". These are actually made to be accent strips for cutting boards, but the size works great for this project without a lot of work.
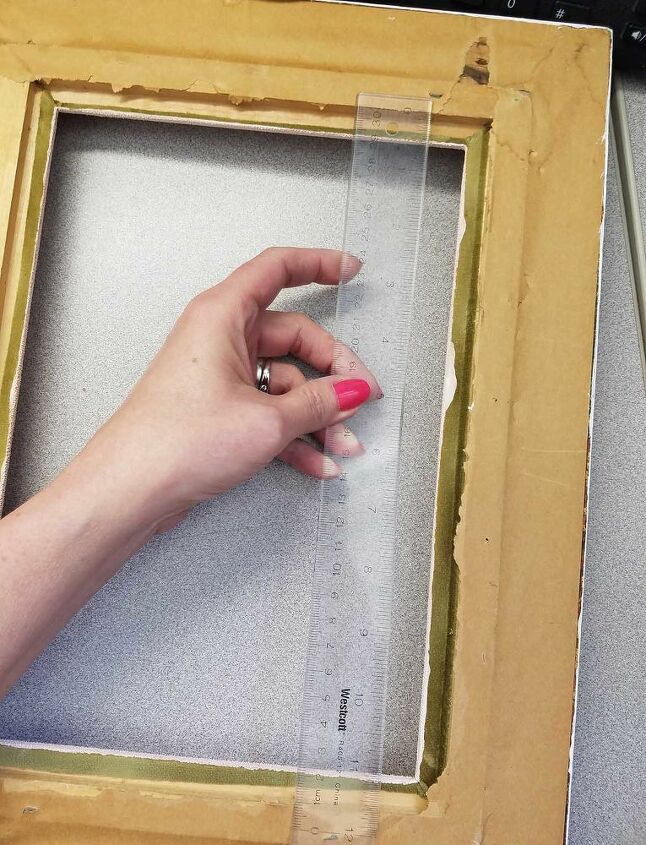
Measure. Determine which way you want to orient your frame, then measure the width of the area where the slats will go. I measured from the inner lip of the frame so the boards wouldn’t be flat against the wall when the organizer is hung. Next, measure the ends of each slat in approximately 1" or enough room for the first notch to clear the edge of the frame. Now, measure the usable area of the slat.
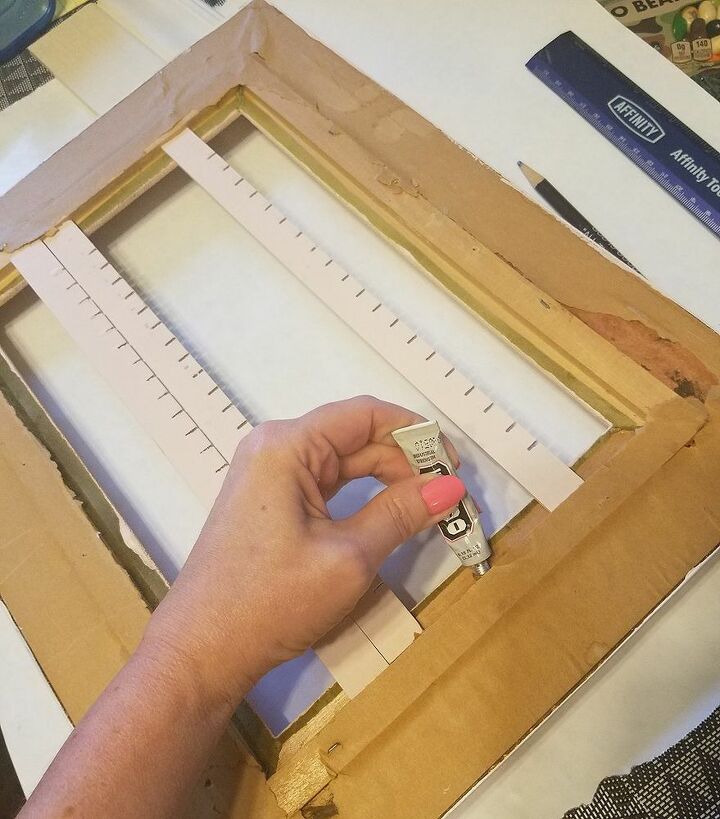
Mark. I had 10 usable inches between the edges of the frame, so spacing out the notches every 1/2" gave me 20 notches per slat. (Thankfully, because I wanted it an even number since earrings come in pairs, haha.) Make a mark for each notch. I also marked a guideline along the length of the slat for a depth of 1/4" per notch.
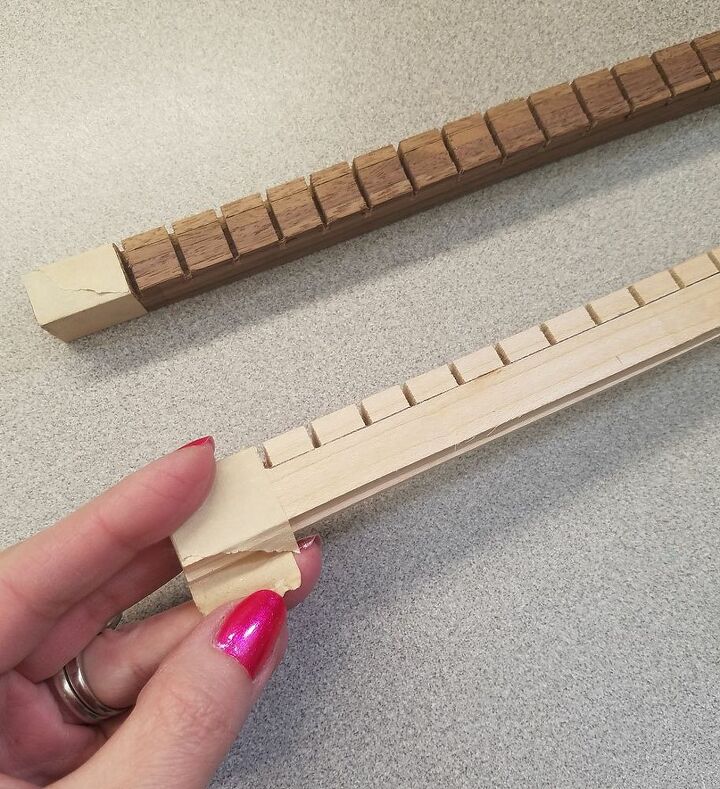
Cut. To make cutting the three slats quick and easy, I first bundled them together with tape, making sure not to cover the area for the first cut. The stock was 16" in length so I needed one end cut down a little as well. My dad then cut everything on his bandsaw in no time, following my guide marks. The width of the blade worked perfectly for creating a slot for the earrings to set down in. I sanded off any little burrs with a small piece of sandpaper.
Finish. Paint or stain the slats to coordinate with the frame. You could use a contrasting color or stain, or paint them to match the frame like I did in Ballet Pink.
Attach. Evenly space the slats inside the frame where you want them to hang. I eyeballed it to get a general idea, then measured and marked so each slat would be straight. Attach each end with some E6000 adhesive or some epoxy. Note: If your frame is very wide, it may be a good idea to add a support behind all of the slats to keep them from bowing, especially if the owner wears a lot of heavy earrings.
4. HOOKS & HARDWARE
To expand the usability of your jewelry organizer beyond just earrings, add some cup hooks, knobs and/or a dowel rod to the wooden edges of the frame. I spray painted some cup hooks with a sparkly Krylon Glitter Shimmer paint in Shimmering Silver.
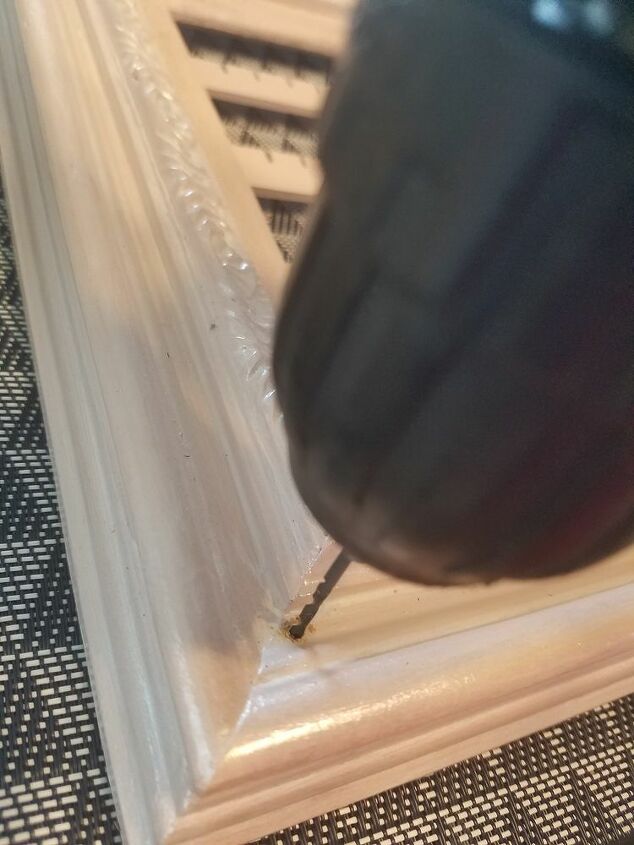
I added two of the larger hooks on each side of the bottom edge of the frame to rest a dowel upon. I spaced three of the small ones on the left and right ends of the frame. I drilled a small pilot hole for each and then tightened them by hand.
For the bracelet rod, I used a 1/2" birch dowel, but 3/8" would work well too. Be careful going any smaller though, or your dowel could bow with the weight of the jewelry. I cut the 36" dowel to length and gave it a test-fit once I had my hooks in place.

Next, I painted the dowel Ballet Pink and sprayed on some sparkle with Krylon Glitter Shimmer. I used two ceramic beads on the ends of the dowels to act as stoppers. I scooped out the ends of the dowel a bit with a Dremel tool so the bead would have a little saddle to sit down in. Then I glued them in place with E6000. Once dry, I filled in the little holes with some Timbermate Wood Filler and then painted and shimmered both ends.
The last step is to add a sturdy hanger on the back strong enough to hold the completed organizer loaded up with jewelry. I recommend two hangers, so the frame remains level even if the jewelry is heavier on one side. I used two HIGHPOINT 42mm x 7mm sawtooth hangers. You could also sit your organizer on a dresser or vanity.
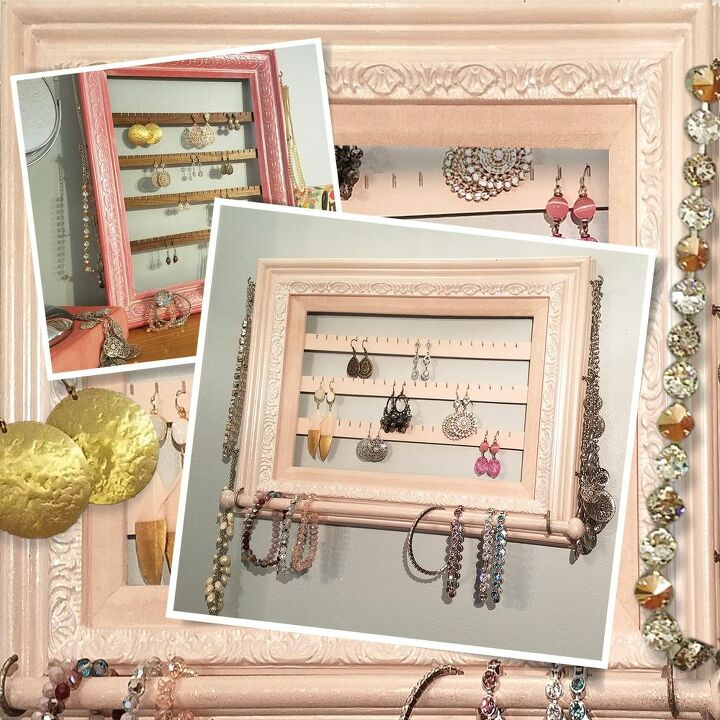
Now it's ready for jewels! In this image you can see the second organizer I made with GF Coral Crush Milk Paint and walnut slats. Customize these any way you like! They make great gifts to keep earrings, bracelets, necklaces and the like tidy and uncluttered. And one can be made in an afternoon (minus paint drying time). Find an old frame, paint it, add hangers as needed and just have fun!
Check out my blog link below for the entire post.
Resources for this project:
See all materials


Comments
Join the conversation
-
I made two like this for my daughter she was limited to space so I had to make smaller ones but she had alot of post earrings so on the dowel I went to local dollar store and found a nice table runner with lace on ends and attached it to dowel let it hang about 8 inches and she can attach to the runner material. She hasn’t lost any earrings since I made it. Thank for the color combination with the white glaze it looks great. Can’t wait to make more with all these ideas.
-
Use an old repurposed picture to make a magnetic make up caddy. I used an old picture, painted the glass with magnetic paint. Repainted and decorated the frame. Then added some repurposed medicine bottles to it (used velcro to attach them). Added magnets to the back of my make up containers and stuck it to the magnetic painted glass. This saves counter space or adds a place for make up when there is little counter area or storage.


Frequently asked questions
Have a question about this project?
I'm afraid I found your photos confusing, unclear. I wish they were taken from further away and without other things in front of the objects. Also, no post earrings? The reason for the hanging places? Could you show us how you meant them to be hung? Thanks
I used buckram (for hats) and glued it into the back of my frame. Now I can put post earrings and hook earrings!