


Under $300 DIY Bathroom Remodel
Add Value To Your Home With These Easy DIY Bathroom Remodel Ideas. Bright fresh Boho Style Learn How To Get This Look For Your Home.
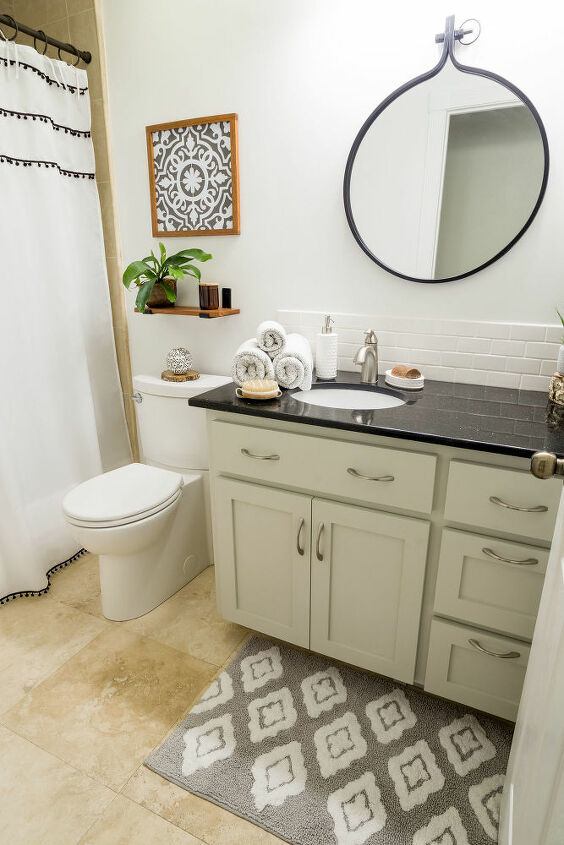
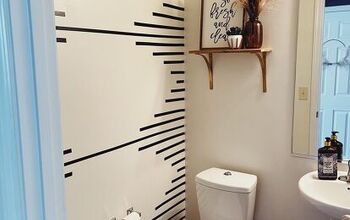
Our DIY bathroom remodel was way over due. Why did I let this bathroom get so bad? Life is busy and it was never a priority until now. We started taking a serious look at each room in our house so we could decide what needed updating since we are planning to sell our home in the near future. This photo is the bathroom after we did some minor updates.
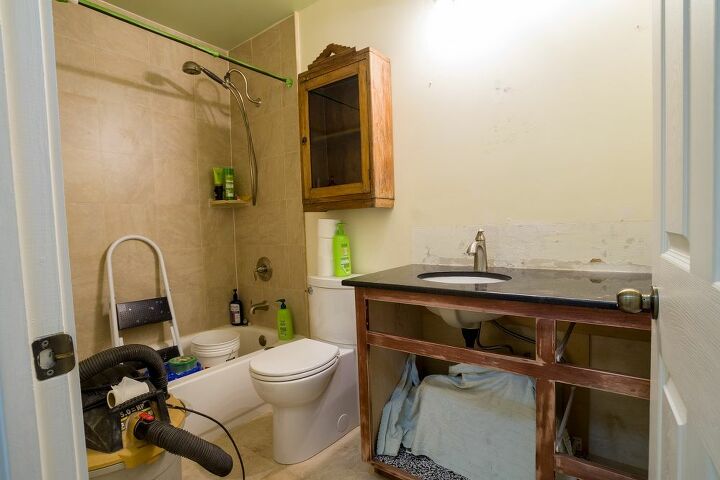
Before DIY Bathroom Remodel
The amount of time and money we invested in this makeover were minimal, however the results were HUGE.
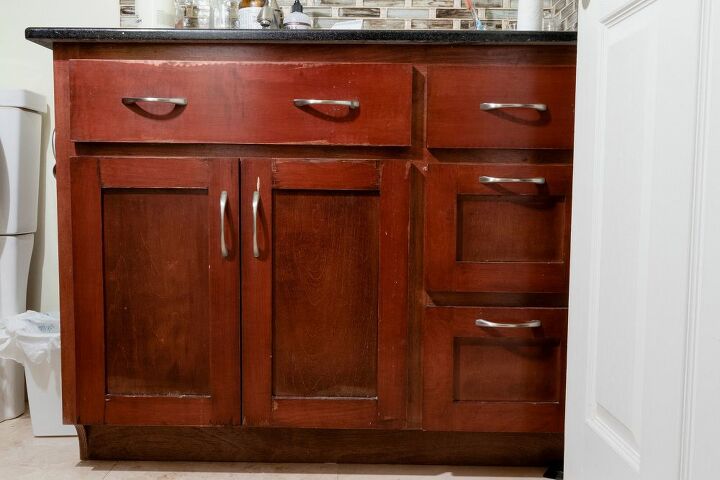
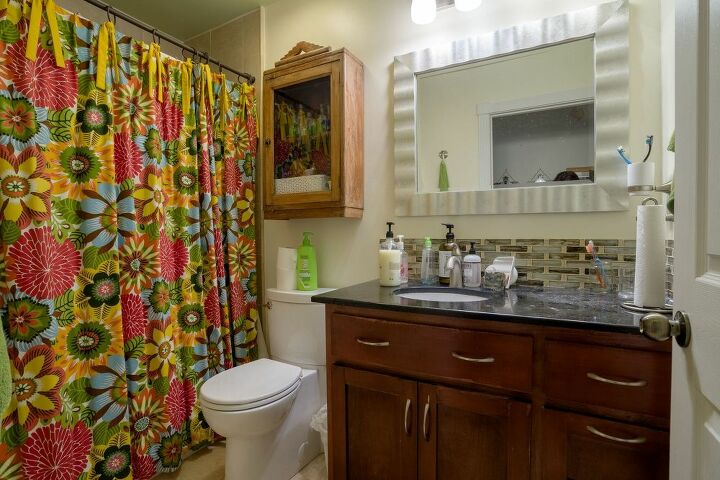
The vanity cabinet we had custom made six years ago needed updating since the finish did not protect it from water, so we tried to sand it and add stain and it looked awful, so we had to make a decision about totally changing the look with paint or stripping it down to the wood.
Updating with paint
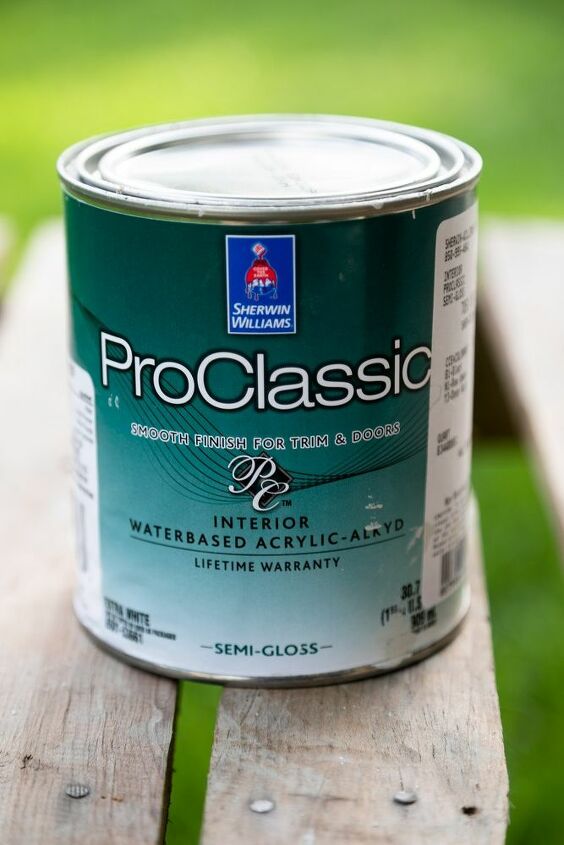
Painting the walls, ceiling and vanity cabinet made the biggest impact on this DIY bathroom remodel.
The color Useful Grey sounded more than useful with its warm undertones in this grey paint it would marry all the elements in the bathroom together. Perfect choice for this bathroom makeover. I removed the cabinet doors to sand and paint outside, but the cabinet base had to be sanded and painted in place.
Preparing for painting
When prepping for painting removing anything that can be removed makes it easier to paint. I removed the hanging antique cabinet since it would not fit in the new bathroom design. Using painter's tape I covered the curtain rod to protect it from paint splatters. I covered the vanity, toilet, bathtub and floor with drop clothes.
After painting the ceiling and walls I then painted the vanity cabinet and doors.
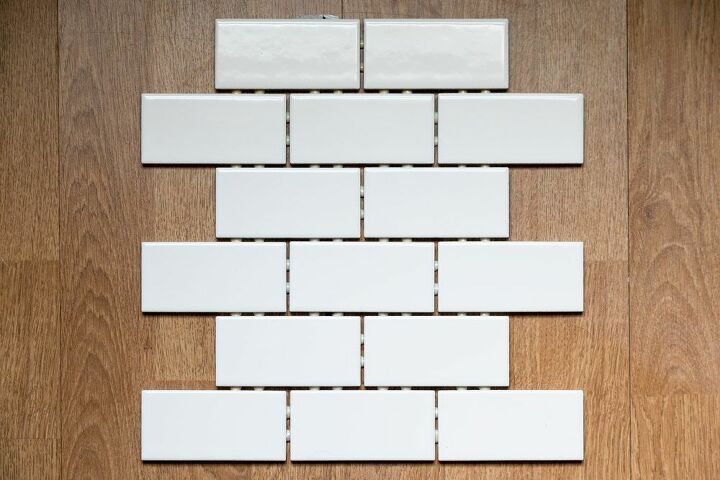
Back-splash tile
Next item on the to do list was the back-splash and the current one it had to go.Choosing a small white subway tile was going to update the bathroom and keep it neutral too. Once again small investment, but big impact.
Styling a bathroom with accessories
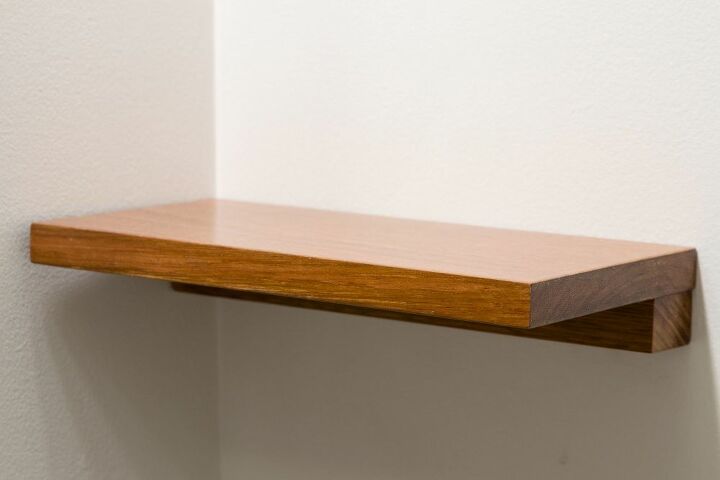
The accessories play a large role in the overall look of the space. The bathroom needed toothbrush storage, but I wanted it to look modern with a Boho vibe, so I had to DIY this exotic wood shelf for the toothbrush storage. The wood is beautiful and needed nothing but varnish.
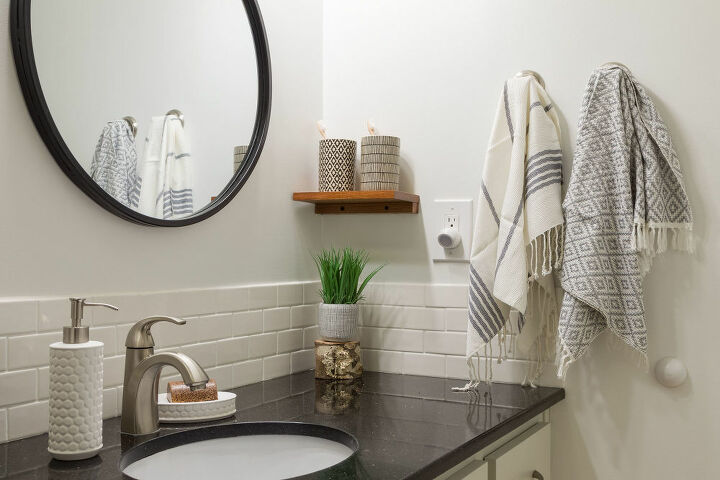
Toothbrush holders
After exhausting all my resources for toothbrush holders I had to think outside the ordinary for something groovy that would fit in with my "new" bathroom design. I found these small canisters to hold toothbrushes and they had an added bonus with the pops of color inside each one. The bamboo toothbrushes are an environmentally friendly choice and they add another organic warm accessory.
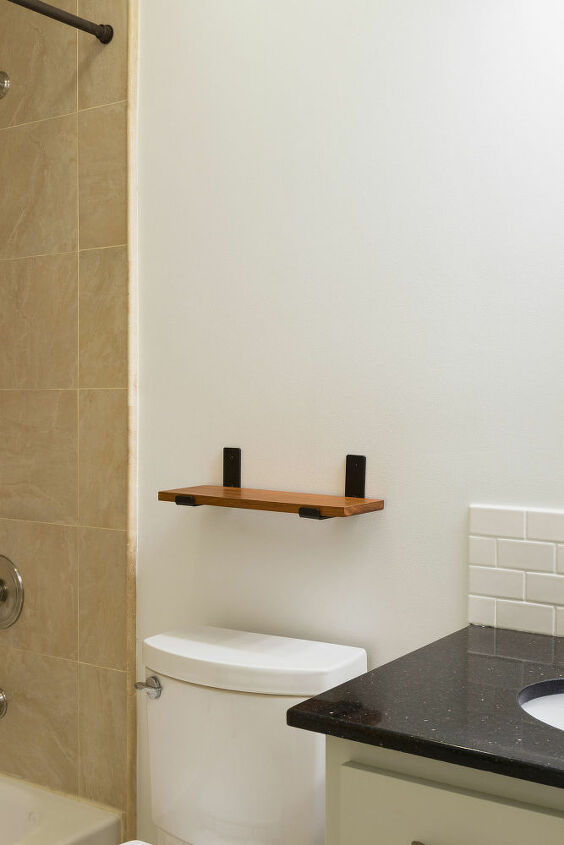
Exotic wood shelf
Love the exotic shelf my hubby made and installed with the strap brackets, however, the new white walls are looking a little stark so I decided it needed something.
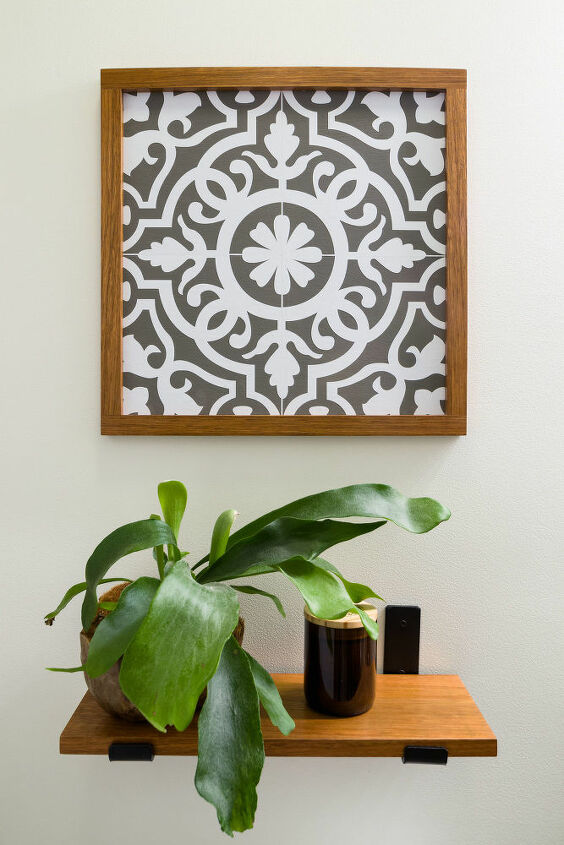
Moroccan faux tile art
I really wanted to replace the back-splash with the trendy Moroccan tiles, but since we are selling the house it had to be neutral, however, I could get the look with a piece of faux tile art. I mentioned my idea to my daughter, Olivia, who is the Cricut expert and she set to work on the faux tile art and my hubby cut the exotic wood frame. It's perfect and I love it! You could easily make one too see how HERE.

Did I mention that am obsessed with geometric patterns? Circles, squares, diamonds, stripes and rectangles are all used in this remodel with the colors white, gray, black and browns.
New mirror
The new (budget friendly) mirror added an edgy industrial punch to the DIY bathroom remodel.
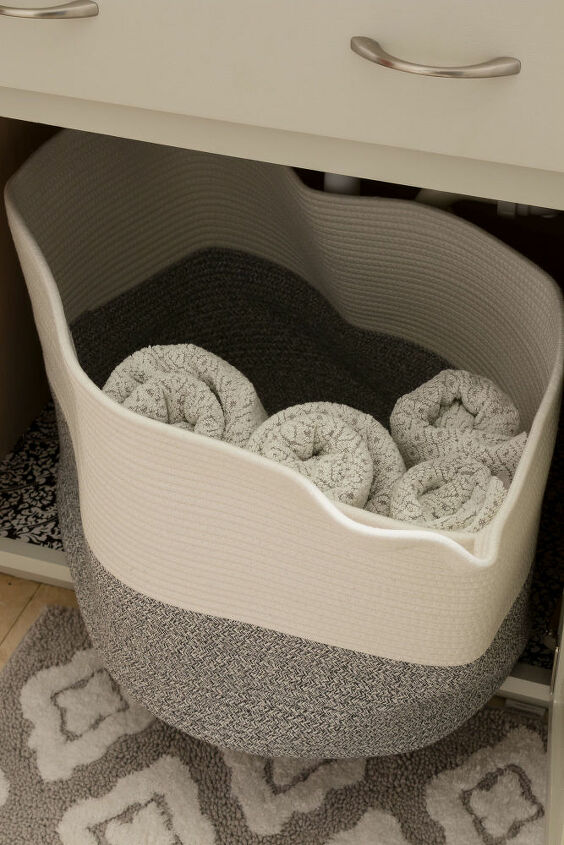
Rope basket for organized storage
The area under the sink we needed to use for storage, but the plumbing made it difficult to add an organizing basket, so I found this large rope basket to keep towels organized. Since the rope basket easily bends to accommodate the plumbing it is perfect for under the sink organized storage.
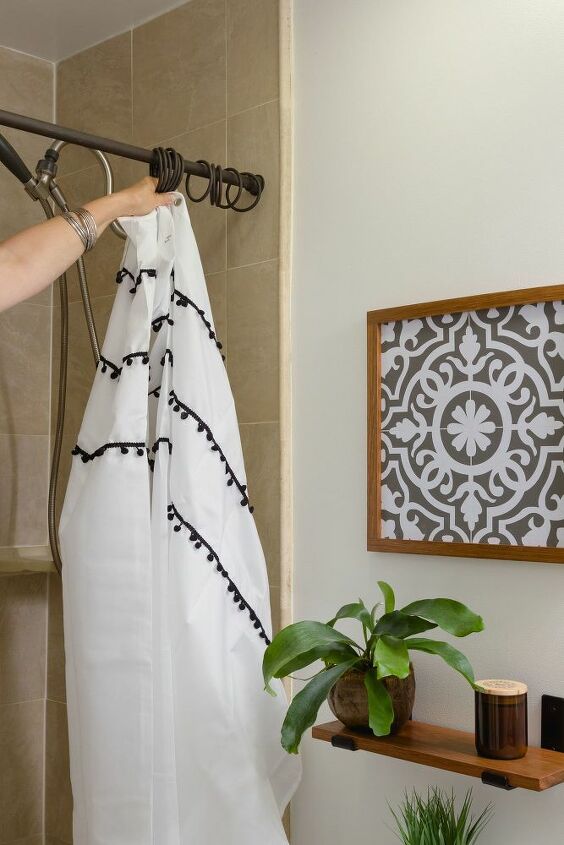
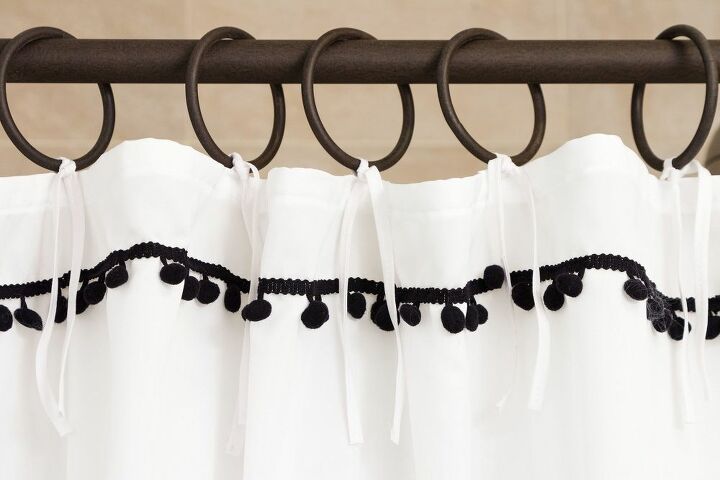
Shower-curtain dilemma
The shower-curtain hardware I custom ordered years ago and since I still like them and they are attached to the tile I decided they would be included in the bathroom design. You can see in the photo below that the rings created a design dilemma. I ordered an extra long shower because I needed to cut the header off and add ties to able to attach it to the rings. See how I did that HERE.
Thank you for stopping by. I hope you found some inspiration to tackle a makeover.
Happy DIY'ing,
Kippi
Resources for this project:
See all materials


Comments
Join the conversation
-
I love your remake. Very on trend! Also love the Moroccan tile framed display. It’s just enough to give the room some punch. Super awesome.
-
A lot of bang for your buck, I think. The turkish towels look groovy with the overall design. Great mirror.


Frequently asked questions
Have a question about this project?
Where is the pic of the finished room?
Where did you use “useful grey” and “special grey” I don’t see either of those in the final picture. Thanks.
I would buy your house for the bathroom 😍😍