


An Affordable Small Laundry Room Update
I am so excited to share our super quick and affordable DIY laundry room update!
The laundry room has been one of those rooms that I have not enjoyed looking at or being in. Since it is connected to our in our main living area, on display regularly, and used frequently, I decided that this week it was time to give it the most affordable facelift ever.
I’d like to start off by saying that I know I’m lucky that the laundry isn’t in the dingy basement or garage, and it could definitely be worse, but I’m a person who has to feel good in a space, so I take this stuff more seriously than most.
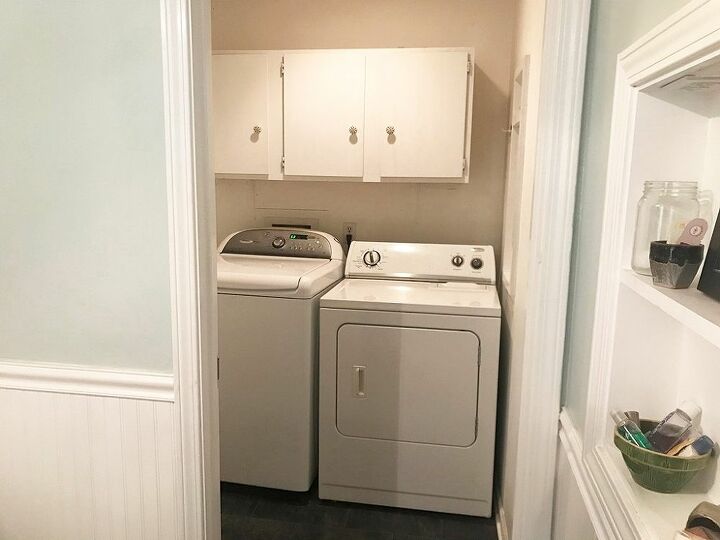
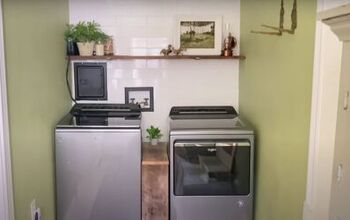
Ok, let’s take a look at the before, shall we? As I said, not terrible, but pretty blah and we never used the cabinets above for anything, so they were a waste of space.
I also wish we had a matching W/D set, but that hasn’t worked out in my adulthood yet. Maybe someday.
Last weekend I decided to finally pull the trigger and purchase the items we needed to update the room.
Here are the list of supplies we used in our DIY laundry room update:
- Tic Tac Tiles 12″x12″ Premium Anti Mold Peel and Stick Wall Tile in Subway White (10 Tiles per set)
We were excited to be gifted these tiles. We measured to ensure we ordered enough sets to cover our main wall.
- 2 shelves from IKEA (birch and aluminium)
- Valspar paint in Fragile Blue Cactus accessories from IKEA
- Frame from IKEA with a free printable from my blog inserted
- Pendant light from IKEA
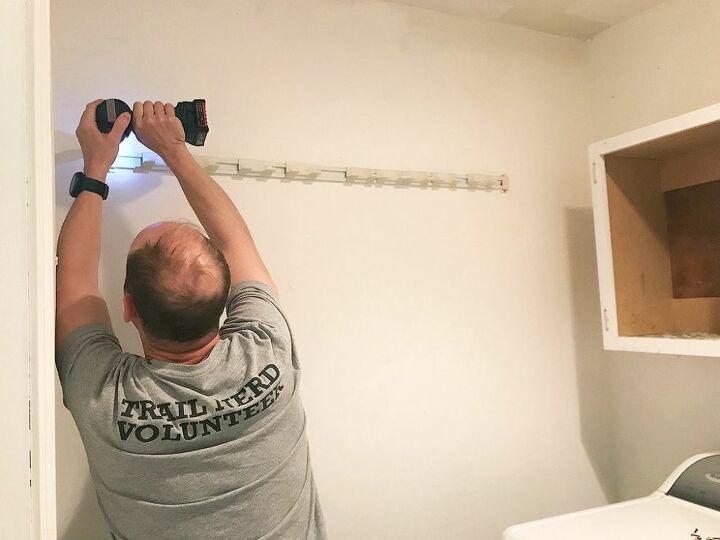
We started by removing the cabinet and some wall hooks.

Then repaired the damage.
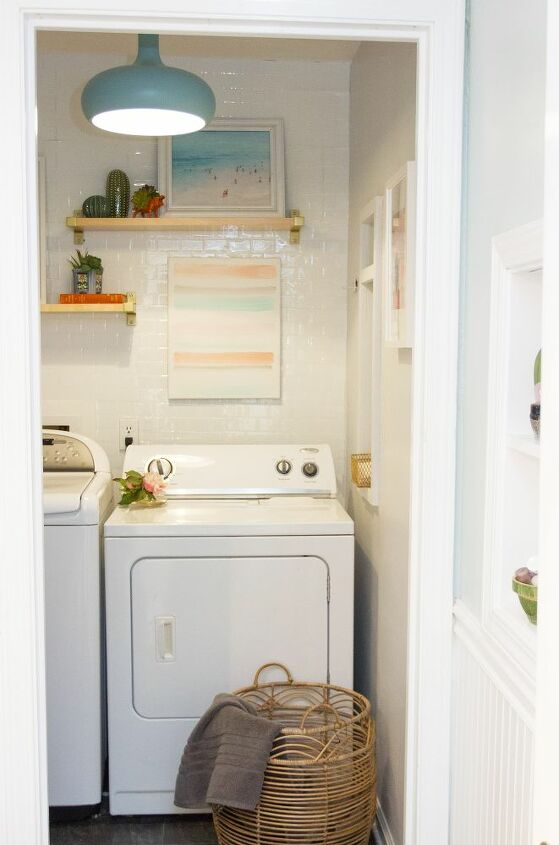
I bought a gallon of paint (Valspar Fragile Blue) which is grey with a hint of blue, and got to work painting the room. I painted all walls except the one behind the washer and dryer since that is where I wanted to apply the tiles.
If I were to paint that wall it would have taken a couple of weeks for the paint to cure before I could apply the tiles. No one has time for that!
Next I painted the ceiling and added one more coat of wall paint, and then the real fun started.
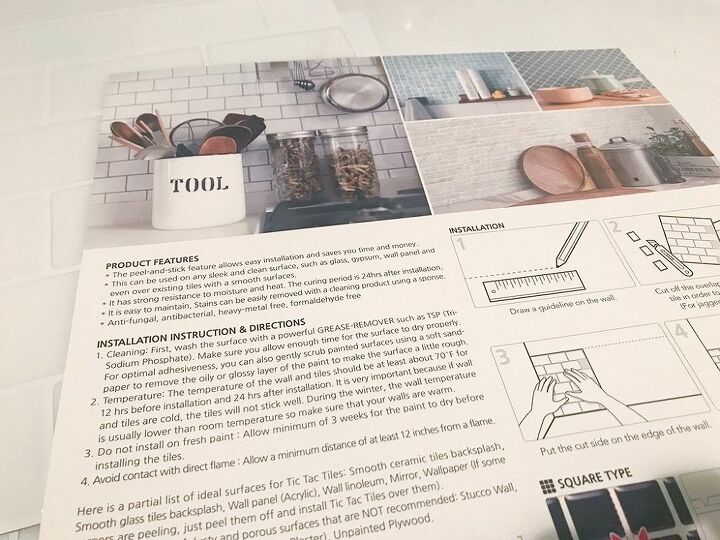
I started off by reading the directions in detail.
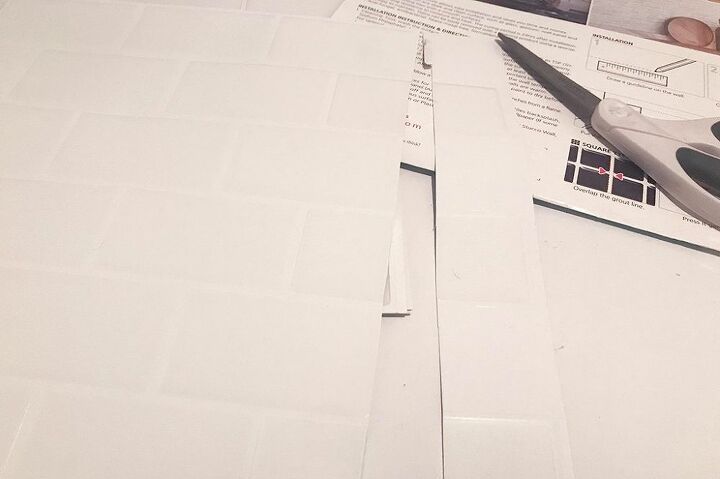
Then I started tiling in the top left corner of my feature wall. The directions recommend taking a pair of scissors and trimming the tiles that go along the edge for a perfectly flush look.
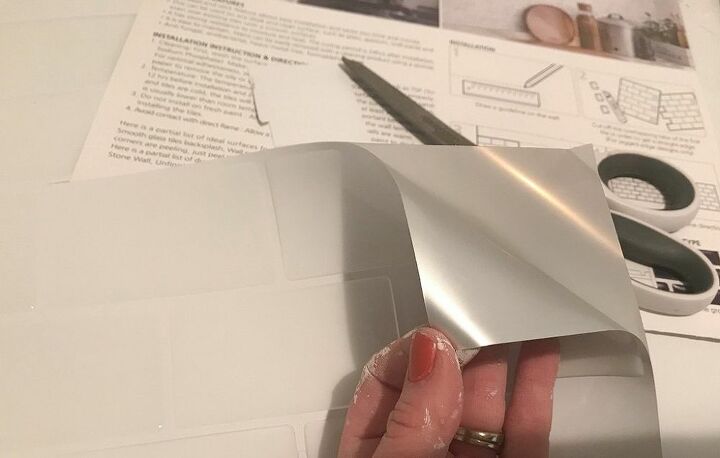
Time to apply the tile sheets. As you can see, the back of the 12″ x 12″ tile sheets is made of a very strong adhesive. It is also completely opaque so you can’t see any of the wall behind it (that’s a relief).
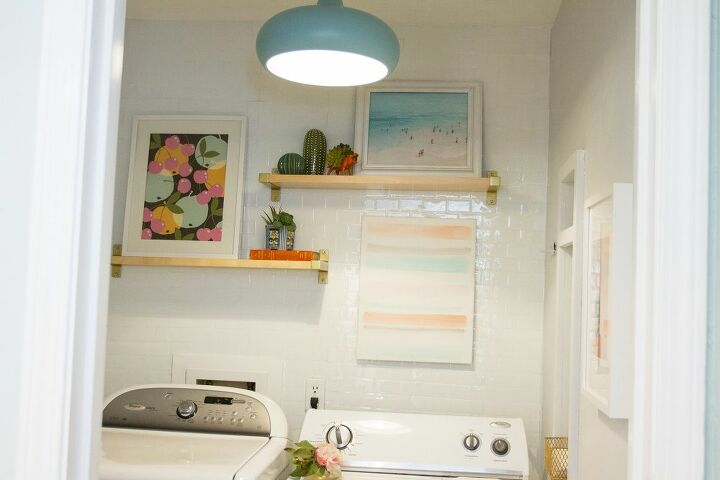
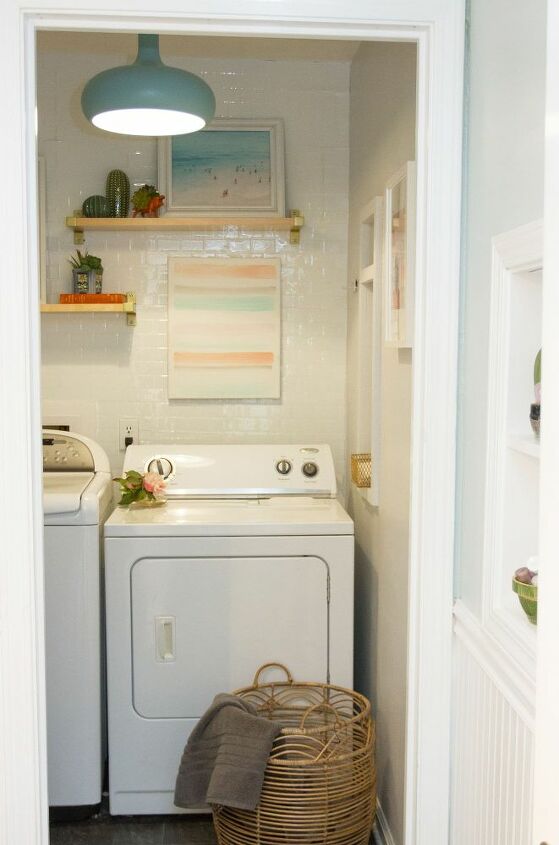
I carefully applied each sheet on the wall from left to right and top to bottom until I covered the wall completely. Here’s a detail shot of how the tile looks up close. I love it!
The tile sheets add so much sparkle to the room and really make it pop. I am in love—keep scrolling for the after photos!
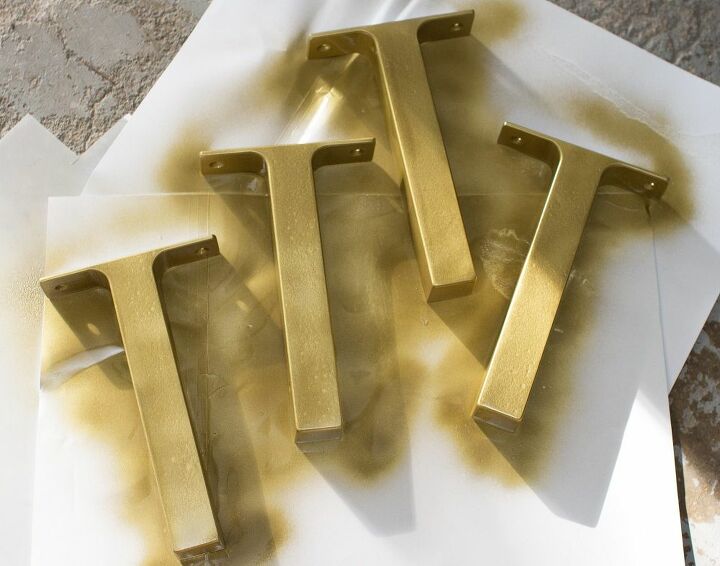
Next I took the aluminum shelf hardware and spray painted it gold.
Once dry, Ted installed the two open shelves staggered above the washer and dryer. He then installed the pendant light using a converter kit from Home Depot (roughly $16), which saved a lot of time and frustration.

Now the fun part—styling! I LOVE styling a shelf. It’s one of my favorite hobbies.
I shopped the house for some art and accessories from other rooms.
ART/ACCESSORY SOURCES:
Art print at left is from IKEA a few years ago, Cactus accessories are from IKEA, hippo succulent holder was a DIY project, Beach photo by my talented friend Rusty Wright, Stripe painting below was one I painted a couple years ago, Vintage book from a thrift store, Vintage succulent planter
I think everything ties nicely together color-wise, and the space feels much more alive and fun in my opinion.
And here are more photos of our DIY laundry room update … I’m really happy with the results and even more happy that we did it for roughly $100.
I’d still love a matching W/D set, and we do plan on adding a modern sliding barn door here eventually, but now that I like the room so much more, I’m not in a hurry to cover it up.
The is a recent clearance Opal House for Target find. I love it! And here it is a different angle.
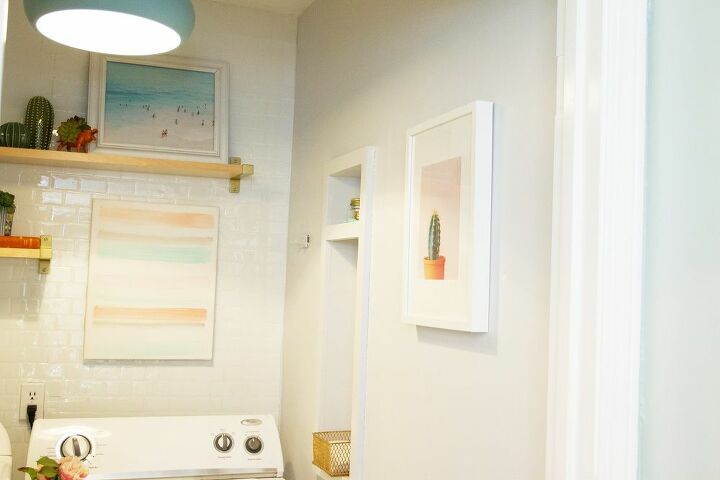
I printed and added a in the IKEA frame to bring in a simple pop of color.
I like the little cubby area. It works well for convenience items such as dryer sheets, etc. And a few more detail shots.
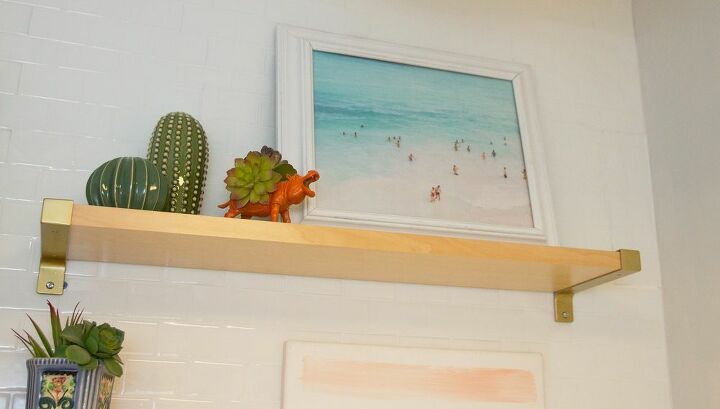
The beach art print just makes me smile, and transports me to an imaginary vacation.
Can’t get enough of the ceramic cacti and my angry hippo friend.
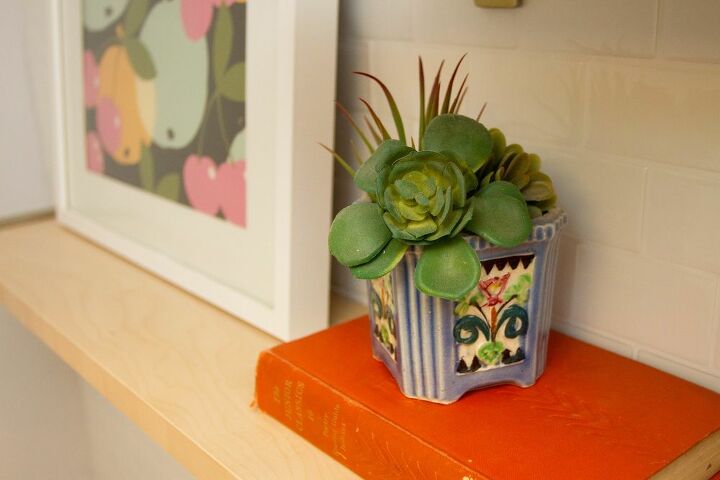
Love this vintage planter. It’s from my dad’s childhood with some faux succulents placed inside.
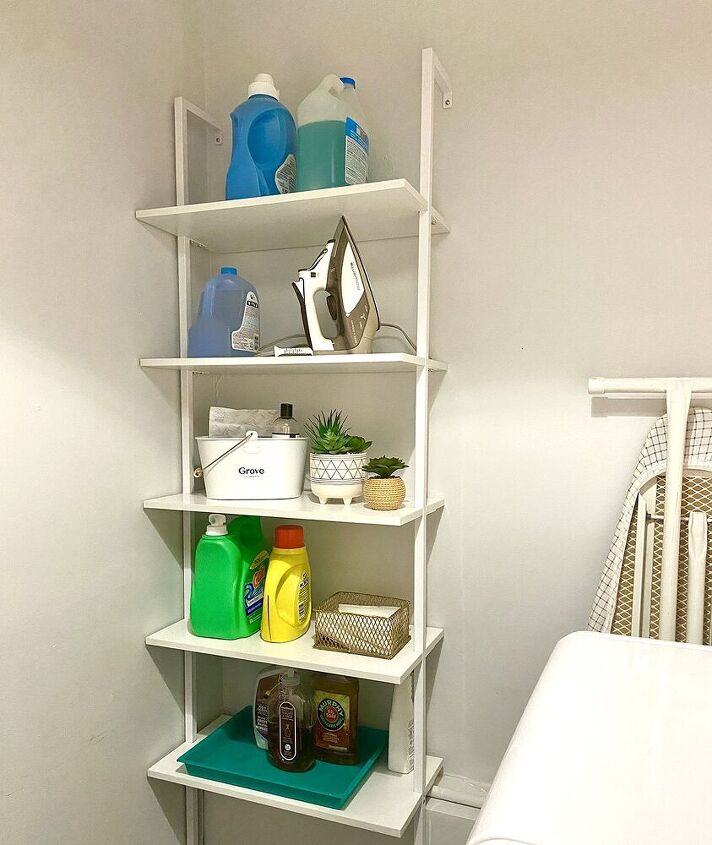
We added a ladder shelf in the corner to hold some basic laundry items—nothing fancy, but it is functional.
That’s the quick tour. What do you think of our DIY laundry room update?
Resources for this project:
See all materials


Comments
Join the conversation
-
Cheerful area now - gives doing a repetitious chore a pleasant vibe.
You have inspired me!

I would need a bit more storage, but that is a personal preference that is adaptable. Time to start planning!

-
My utility room is empty now awaiting new tile. While I cannot rip out my cabinets (though I would like to), you have inspired me to dress up what I can. Like you, decor is important to me , so I spend as little time in my drab utility room as possible. Thanks for the inspiration. Your space is so cheerful now! Manfredsmom


Frequently asked questions
Have a question about this project?
Where do you store your cleaning products, detergent, dryer sheets and so forth?
🤦🏻♀️..Why all those pictures if it’s a laundry room you need cabinets for ur detergents, fabric softeners,sprays, I would of put those $200 installing a new cabinet.
Beautiful transformation. I’m curious about the thickness of the “paper” tile...i have “bumpy” sprayed on paint/plaster the builder sprayed on. Not like knock down but still not a smooth surface. Would that show on the “tile”? ( Most quote marks ever in a post🙄)