


Faux Brick Wall
This has to be my favorite DIY project I've ever done! I took a pretty blah corner wall in my living room and made it into a focal point. This was a weekend project because of the drying time needed.

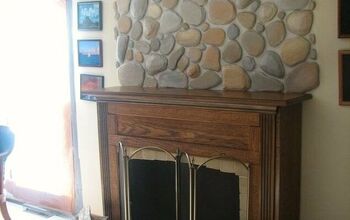
Here's the area before I started.
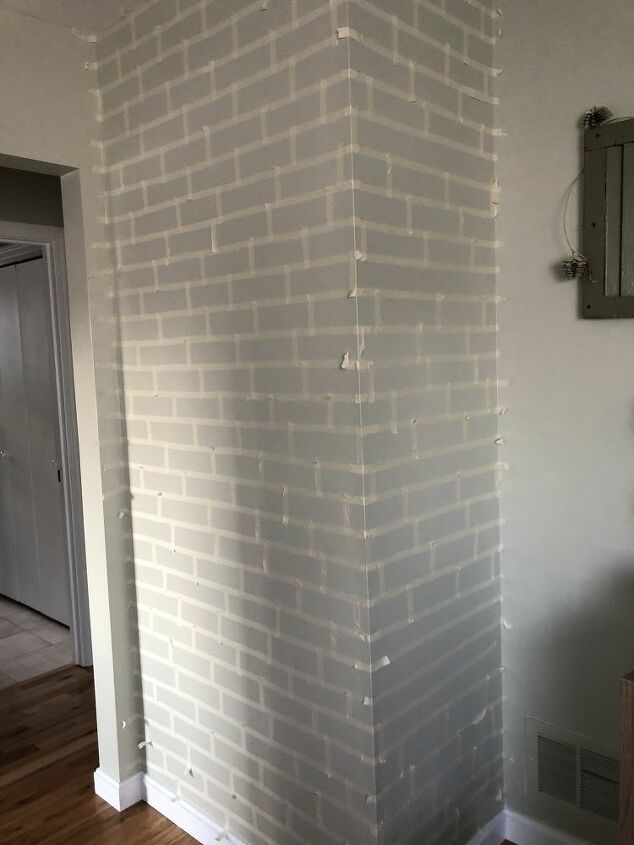
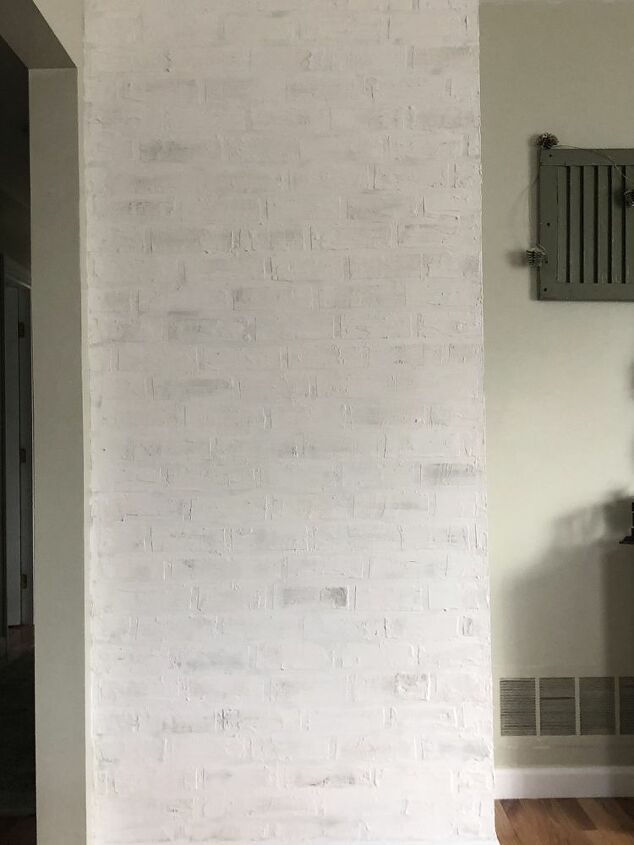
STEP 1:This will be the most time consuming part of this project. It took me about 2 hours to do the taping so put on a good Hallmark movie.I wanted my "bricks" to be 7 inches by 3 inches. To start measure down 3 inches from the ceiling. Using a laser level and a yard stick as my guide I made a faint pencil line across the wall (don't worry you will be painting over the wall so it won't show). Using 1/2 inch wide tape run your tape under the pencil line so your brick will be 3 inches wide (if you place your tape on top of the pencil line they will be 2.5 inches)Continue on taping the horizontal lines by measuring from the bottom of the previous piece of tape until the wall is done.For the vertical lines I measured 7 inches across put a piece of tape, then measured 7 inches from the end of that piece of tape. I did this for the first three rows then just mimicked the pattern for the rest of the wall. It’s much easier doing the small vertical pieces of tape and I didn’t need a level to keep them straight.
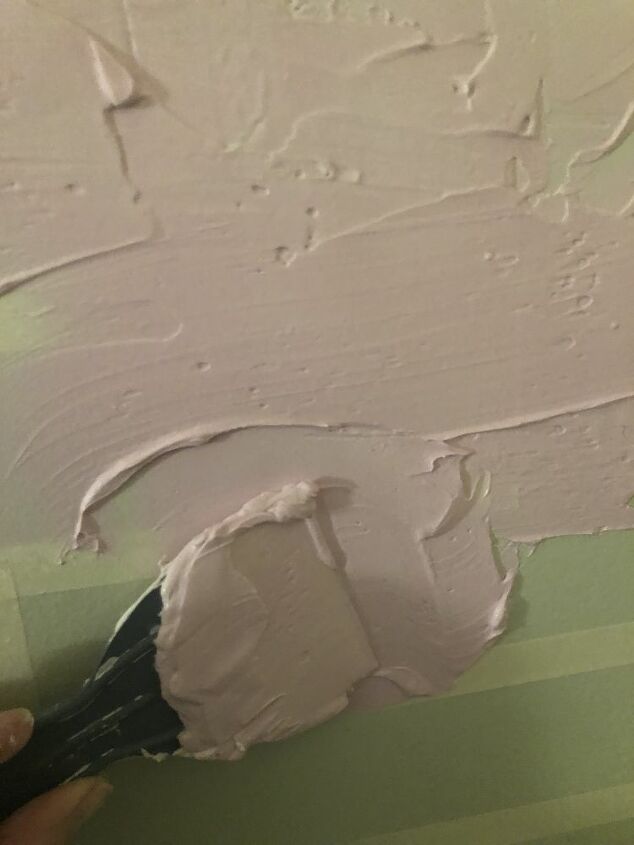
STEP 2:This is the fun part! Apply joint compound to the entire wall. It's just like icing a cake.
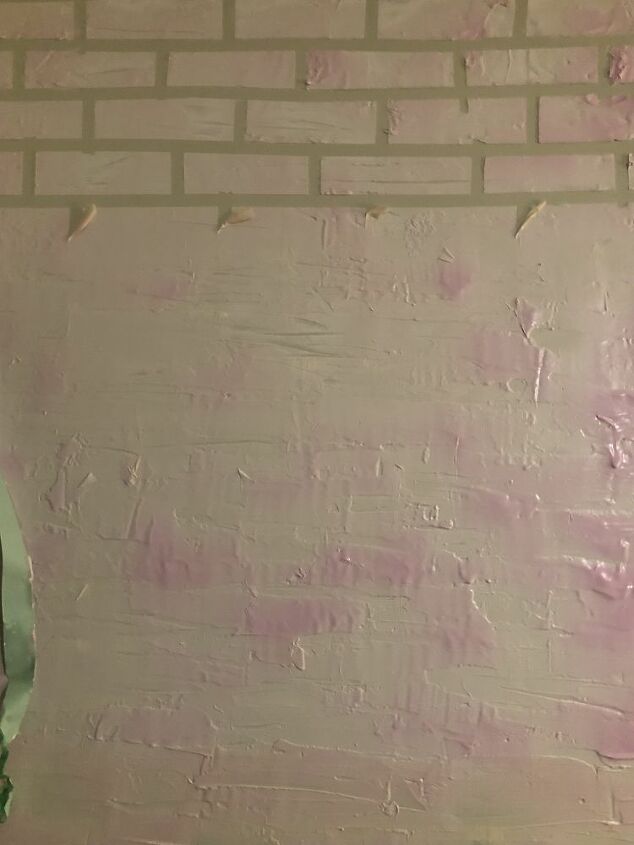
STEP 3:MESSY! Before the joint compound dries you want to remove the tape. I held a trash bag in one hand and pulled off the tape with the other and threw it in the bag.I let the joint compound dry completely overnight.

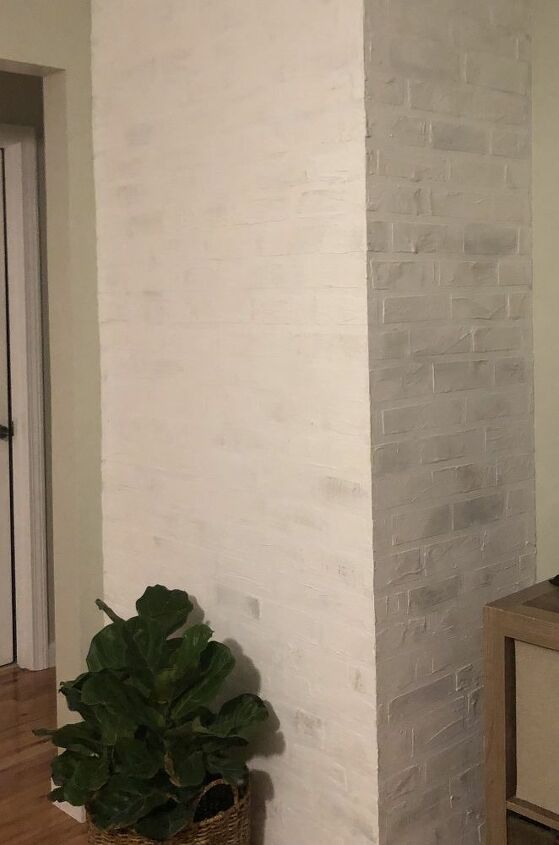
STEP 4:To add some texture to my "grout" lines I dabbed on joint compound using a piece of natural sea sponge.
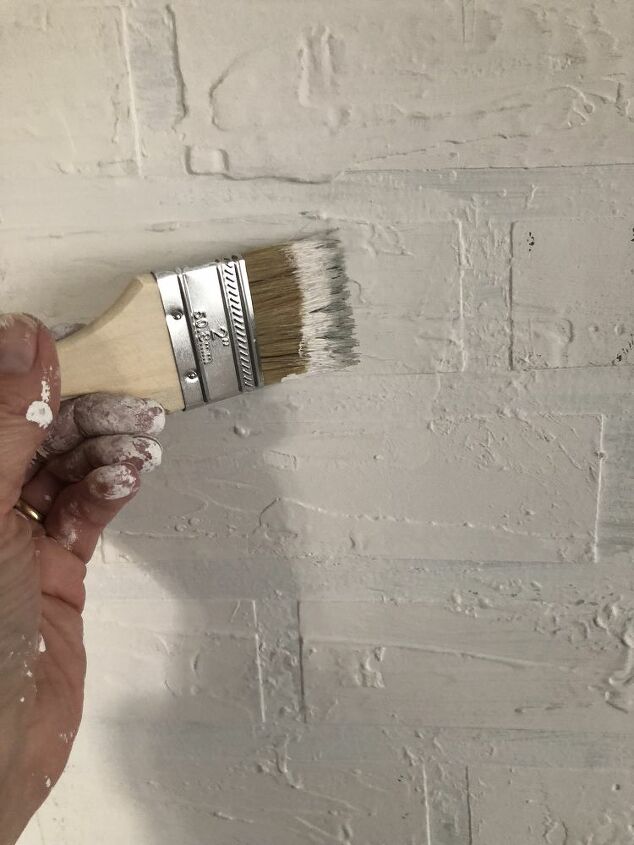
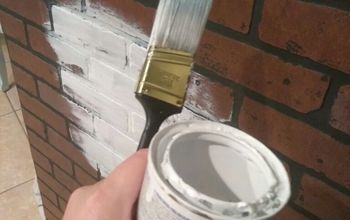
STEP 5:Paint the entire wall with a coat of flat white paint and let dry completely.
STEP 6:Add some detail to make the bricks pop. I dry brushed dark gray acrylic paint over some of the bricks. This step is important because the paint will pick up the detail of the bricks and add depth to give it a more realistic look.*It's up to you as for how much color you want to add to your bricks; feel free to add more gray if you want a darker tone on your bricks!
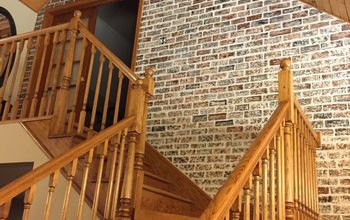
Here is the finished wall. You can see more of my projects over on my blog.
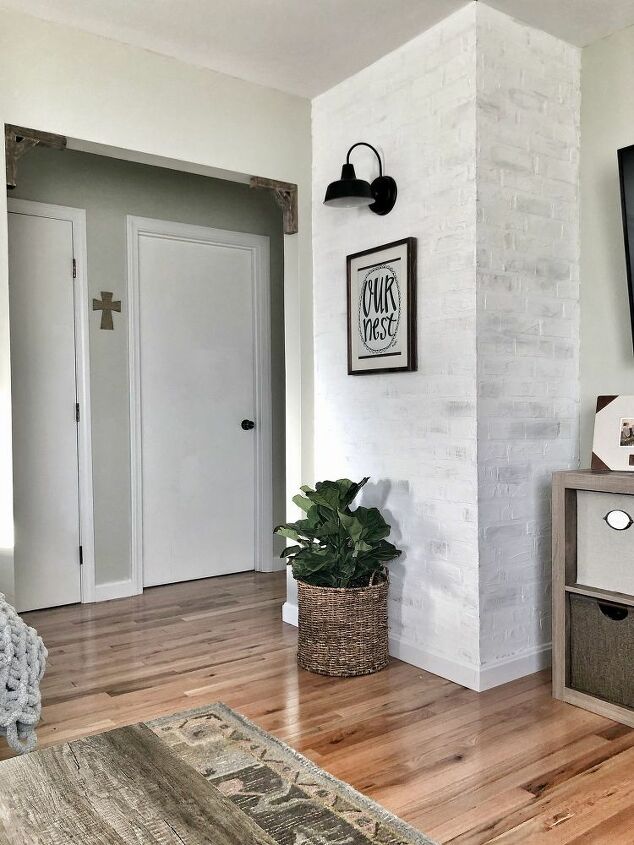
I love how this wall turned out! No one can believe that it's not really brick when they see it for the first time.


Comments
Join the conversation
-
GORGEOUS!!!!!!!!!!
-
It is beautiful!


Frequently asked questions
Have a question about this project?
This is definitely going on my project list! But I also love your floor, can you give me any details on that?
I've never had much time for DIY projects so am a novice and need a little help with the terminology. What do you mean when you say you "dry brushed" the gray paint?
Your wall color at start is white yet when you show the pulling off of tape is green. just wondering?