


Solar Lanterns for the Deck (or Fence, or ....)

Something I've been toying around with for a few months. When I saw the post by Michelle I knew I had to add some color! TY for sharing your ideas, and to the rest of the HT family for all of the inspiration
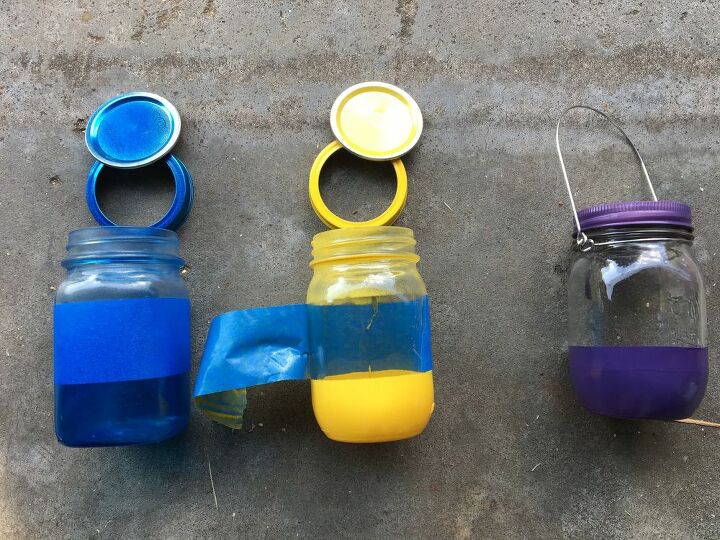
Here's a few Mason jars I wasn't using. A quick band of 2" tape around the middle before I hit them with various spray colors I had on my DIY shelf. My front yard follows a theme, while the back is a rainbow of color. I thought I'd try the same with these lights. The 3rd jar has a handle/bail attached already
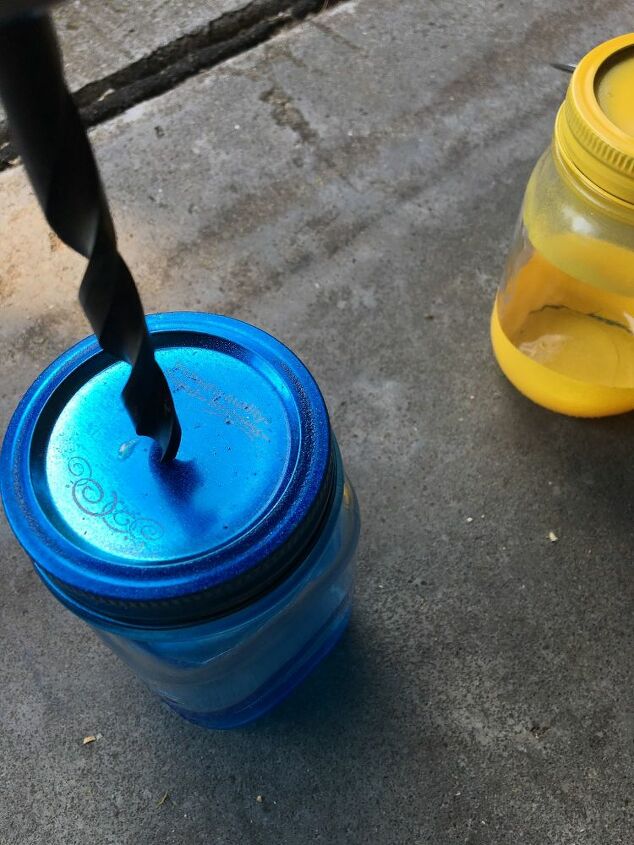
I drill a 3/8" hole in the top. It's easier to drill them assembled, but be careful around all that glass!
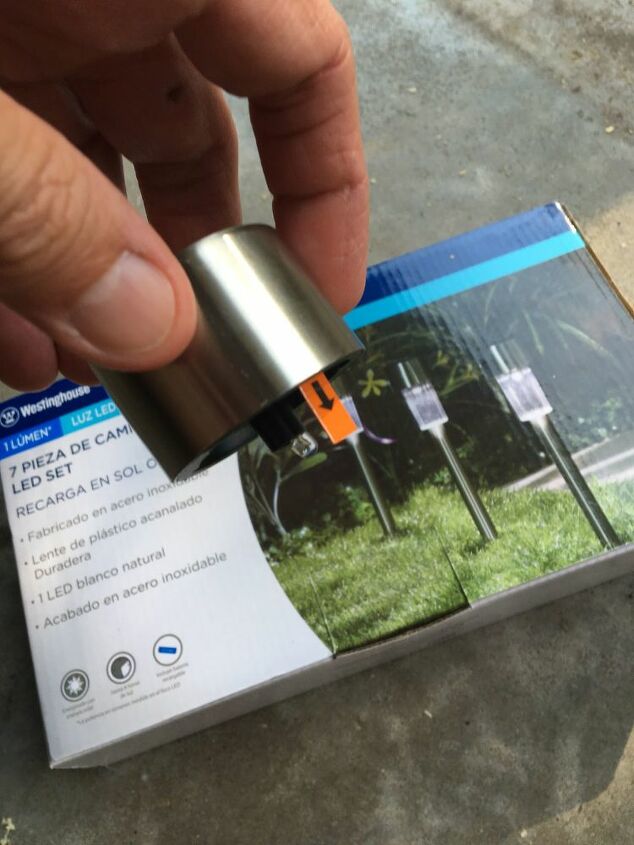
Now to my fave $1 solar lights. I only used the tops. I prefer the stainless look, but the black plastic could be painted, so who knows right? Remove the tab when you're ready to use them
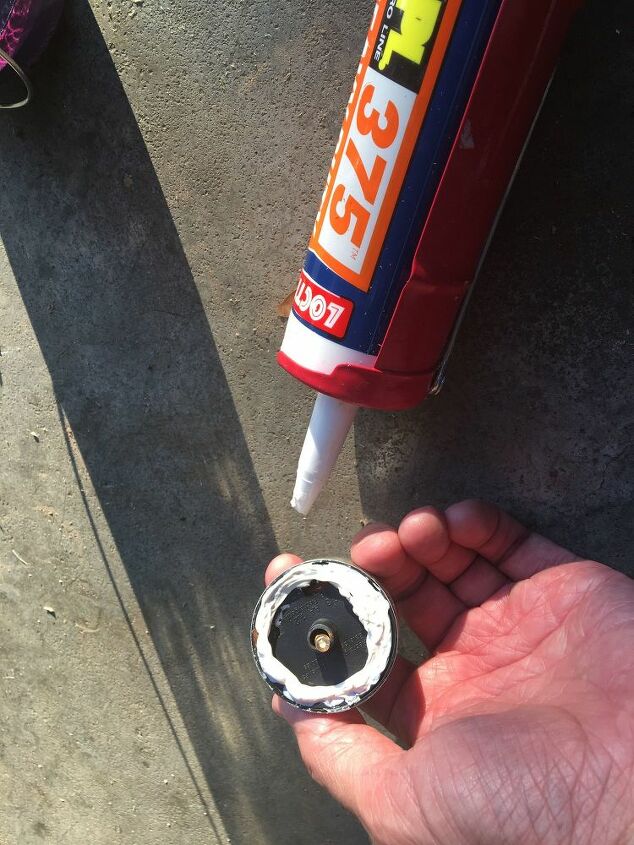
I ran a bead of Loctite 375 general purpose caulk around the bottom of the solar light. It's less messy than putting the caulk on the Mason jar lid
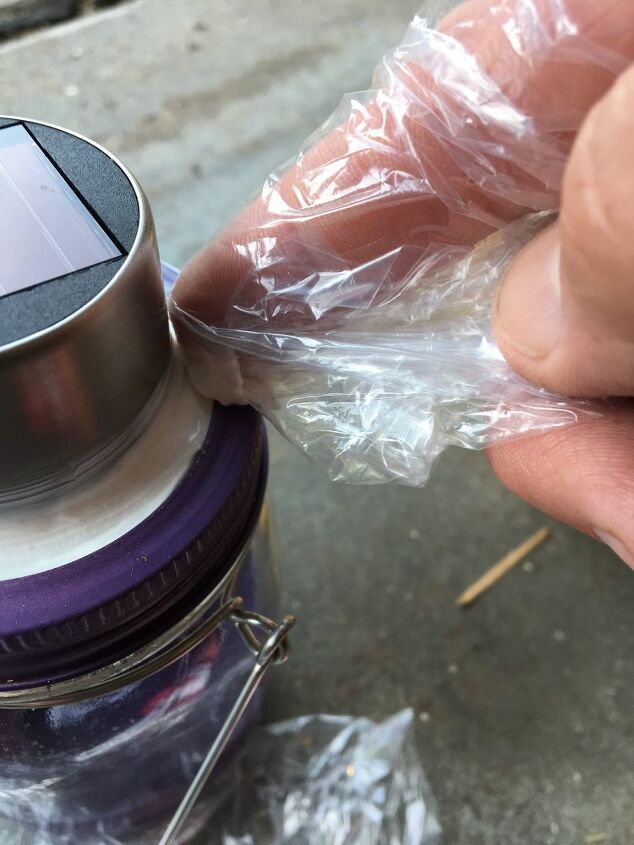
Stick the solar light LED down into the hole in the lid. If you get caulk oozing out, a sandwich bag over your finger makes for easy cleanup. It's best to keep the caulk off the rings for easier disassembly, because these will eventually leak and you'll have to remove the water inside.
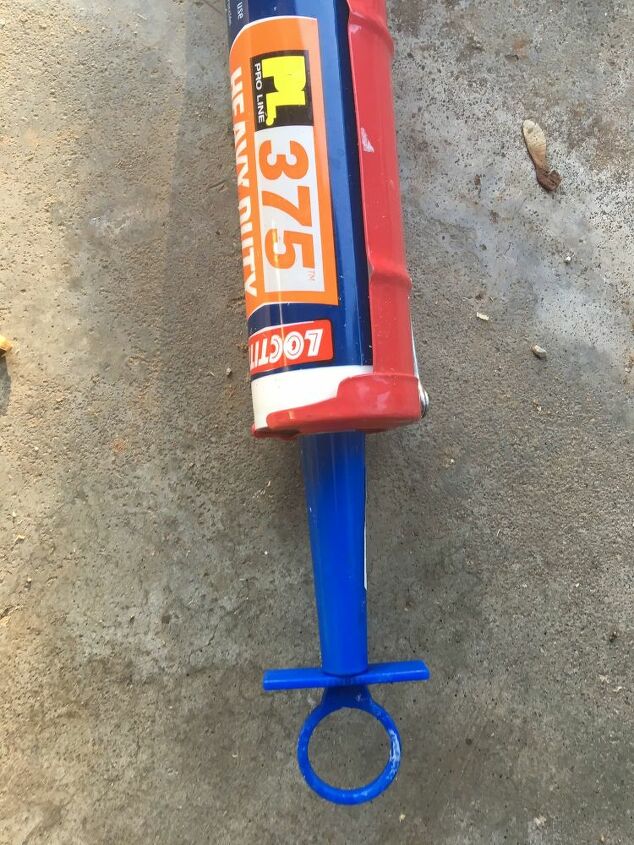
Be sure and get a few of these caulk tube plugs. They pay for themselves in both materials and headaches
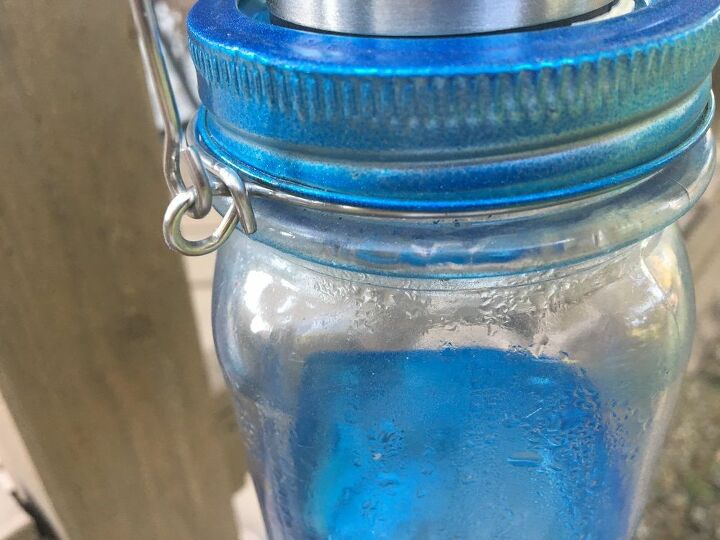
Here's a close-up of a jar with solar light and handle installed. Make sure you get the handle on right-side up (the jars hang better)
BTW the translucent/sparkle colors work better than opaque for letting light shine thru.
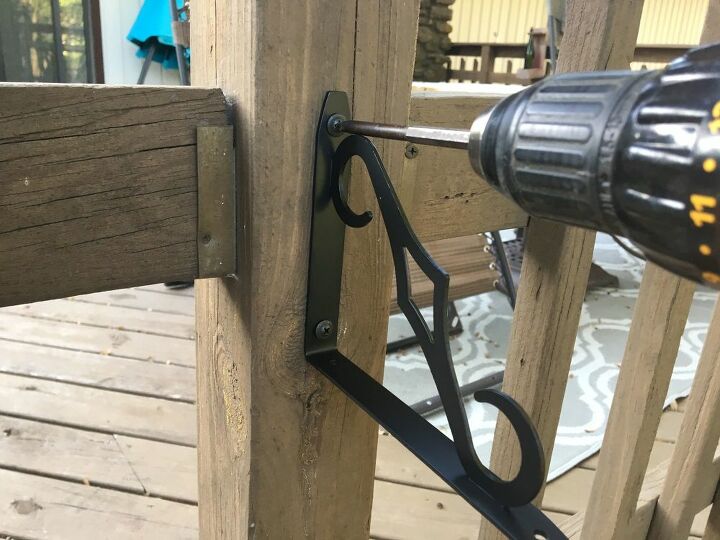
Here's a shelf bracket being attached to a 4x4 on my deck. Note the bracket is upside down. I think it looks great this way, but do whatever YOU like : ) I got a bundle of these from Amazon.
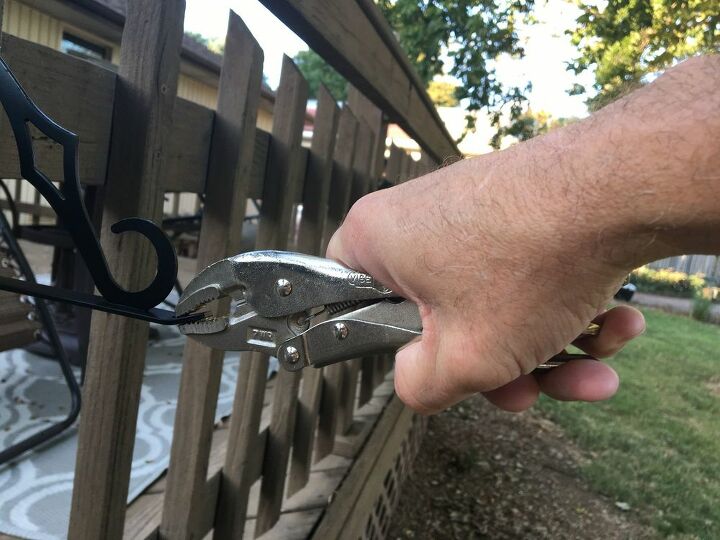
I bent the end of the shelf bracket up slightly for some cheap insurance while I'm installing my lanterns
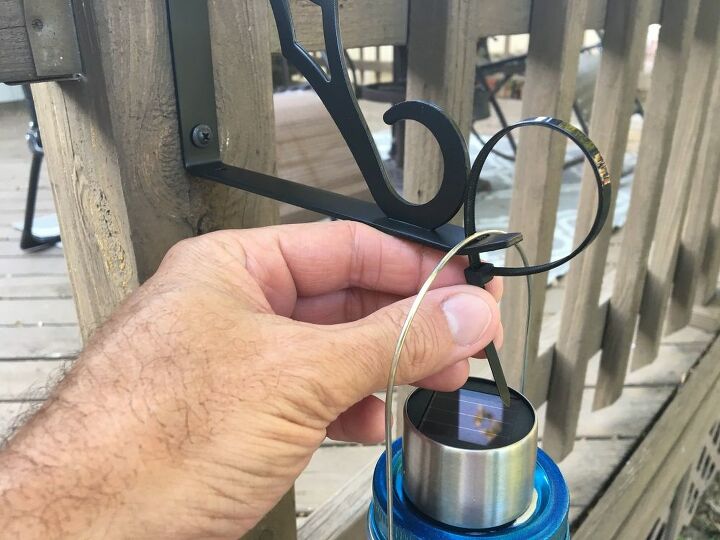
I used a zip (cable) tie to hold the lantern handle onto the shelf bracket. Cinch it down tight and then....
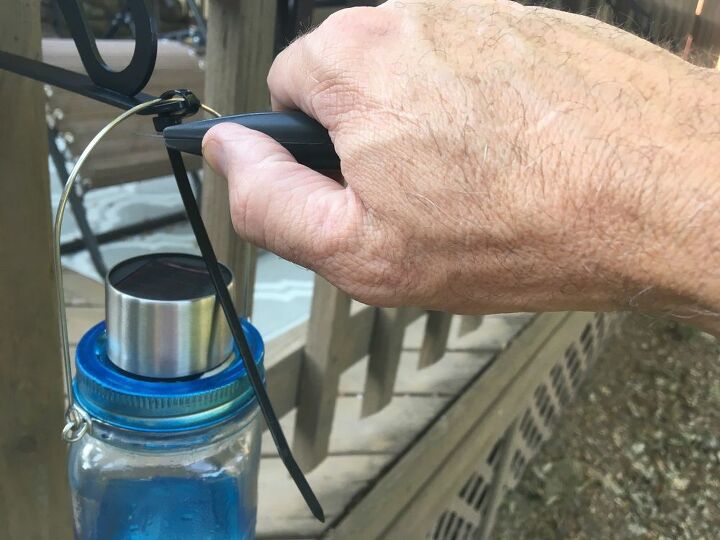
Trim the excess with a box knife. Do NOT use side cutting pliers to trim these. It's a bad habit, and the sharp edges left behind will come back to haunt you. (Note the scar on the back of my right hand, the result of an electrician that didn't trim some properly at work!)

Here are the first three lanterns. This pic was taken about 5 pm in early Nov. More to come as I free up my mason jars full of this years Salsa/Tomato crop. (Please excuse the messy deck, the leaves are really coming down right now!) Holler if you have any questions, and if you try this please comment your results! Proud to be on the Hometalk Team 


Comments
Join the conversation
-
Very cool! I’m going to try it.
-
I didn't even think of this MUCH cheaper version (doh!). I bought the mason jar solar lids for mine. I grouped 5 of them, each hanging slightly lower than the other and added a burlap bow and a faux sunflower to the top. I hung them on my patio for some nice ambient lighting. Sure wish I had thought of doing this tho! Those solar lids aren't cheap! That's why I love HT, for all the creativity! Thank you!
P.S. Mine have leaked from day one, so be advised!


Frequently asked questions
Have a question about this project?
I made these but they got water inside the jar. Can I fix that or does the water come in through the solar part
Yes, but how do you get the handle on, and where do you buy them??
The yellow one looks as though there is water/oil inside. Is that just a reflection? Do you paint the bottom of the jar too?