


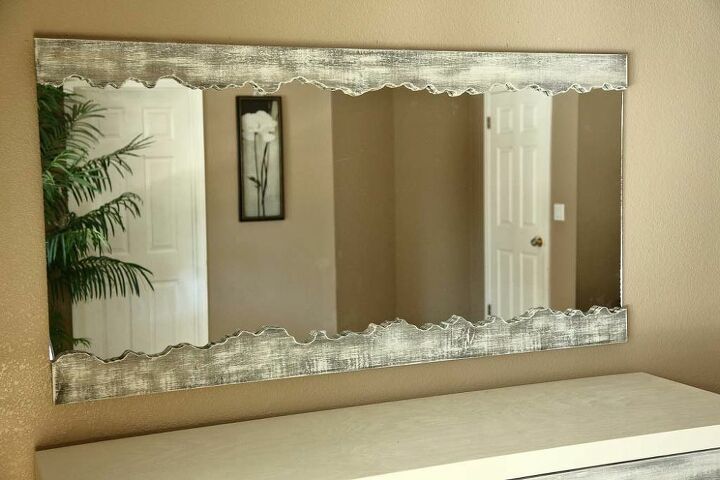
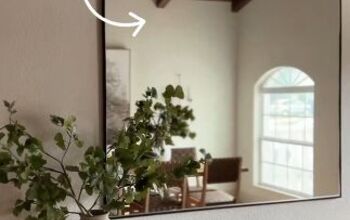
DIY Live Edge Mirror

I came across a picture on Pinterest of a live edge mirror that someone was selling on Etsy for $950. I liked the idea of having a live edge mirror above the dresser that I’ve built few weeks ago. So I decided to build one that would match the white wash effect of the dresser drawer boards.
I already had a mirror in my shed from an old sliding closet door, so I used it for this project. Besides the mirror, it cost me about $60 to make this live edge mirror. I had to purchase a full sheet of ½” plywood for the backboard, which left me with some extra material. But I’m sure I’ll use it for my next project.
Backboard for the Mirror
The first step is to cut a plywood backboard that would be attached behind the mirror. The plywood needs to be taller in height than the mirror and shorter in length than the mirror.
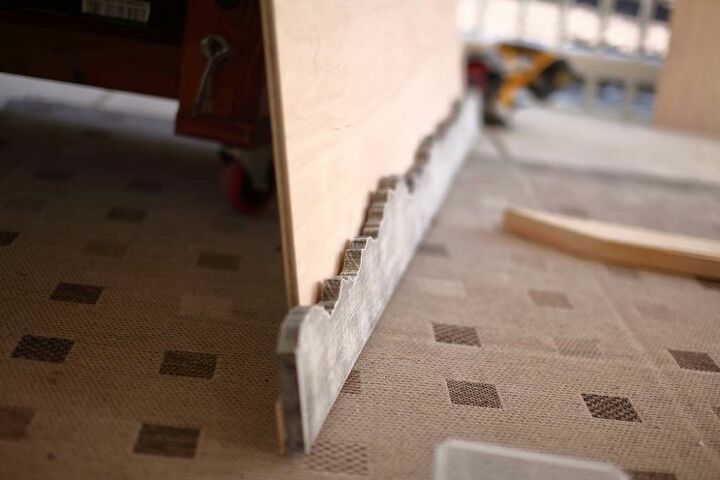
Cut Live Edge
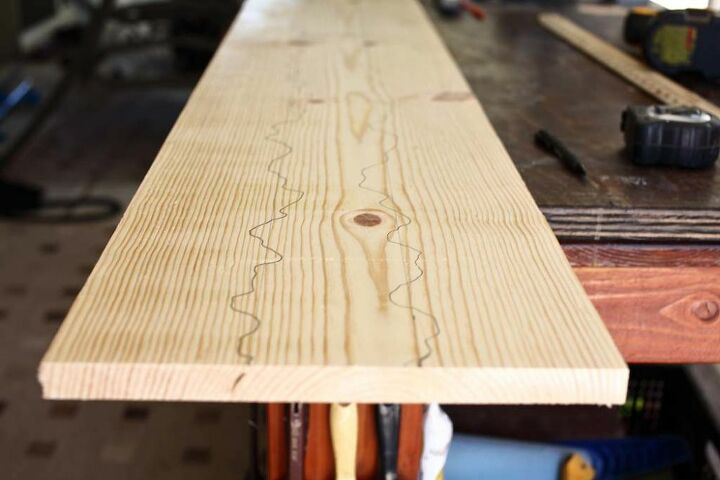
With a pencil draw two parallel live edge designs on a board so that you’ll get upper and lower boards. Make sure that the pencil lines do not overlap each other.
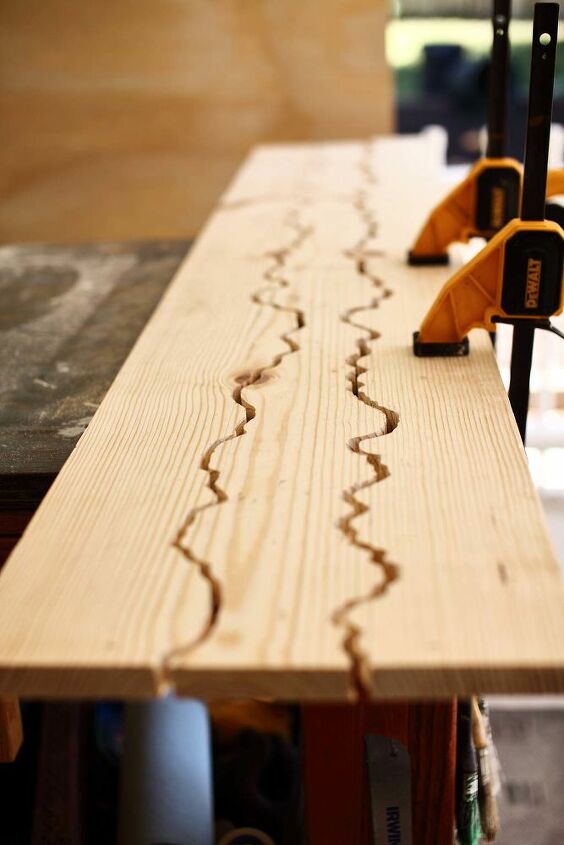
Follow the pencil lines with a jig saw.
Stain and Paint Live Edge Boards
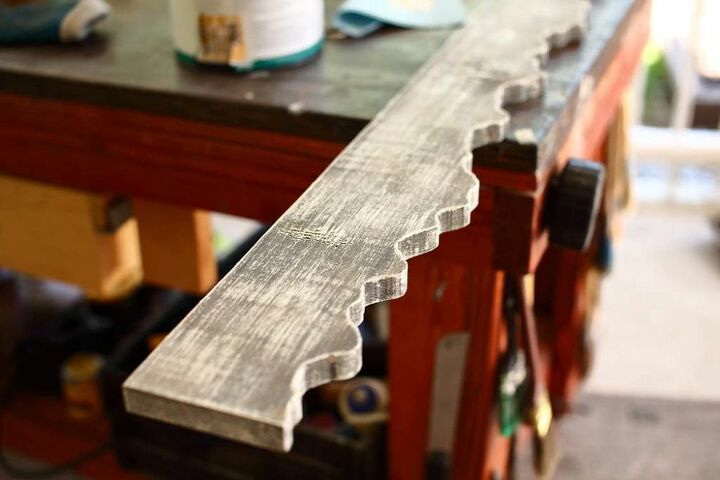
Once the live edge boards are cut, sand the boards to get rid of rough edges after jig saw cut.
Stain the boards, then with a dry brush lightly brush over the stain with plain white paint creating white wash affect you see in the picture.
Attach Bottom Live Edge Board
Sandwich the plywood between the backboard plywood strip and live edge board. You will have a gap between the live edge board and back plywood for the mirror to slide in.
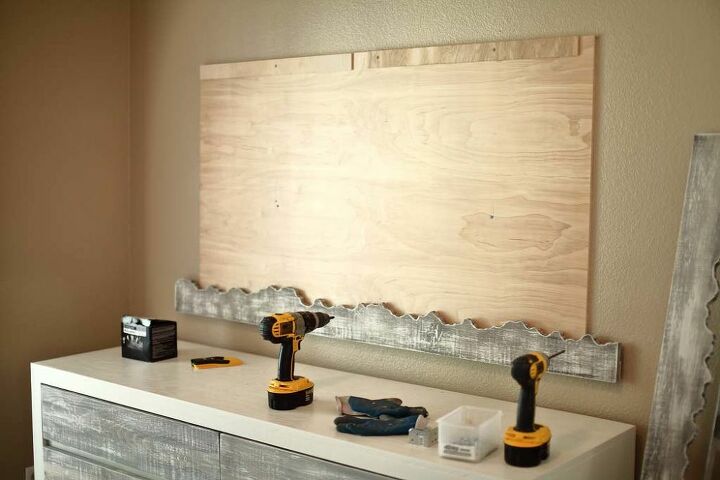
Attach Backboard to the Wall
Now it’s time to attach the backboard to the wall. First, take a Level and draw a line on the wall. Next, using Stud Finder, locate and mark the studs right above the horizontal line. The mirror is very heavy and needs to be attached to studs not just sheetrock.
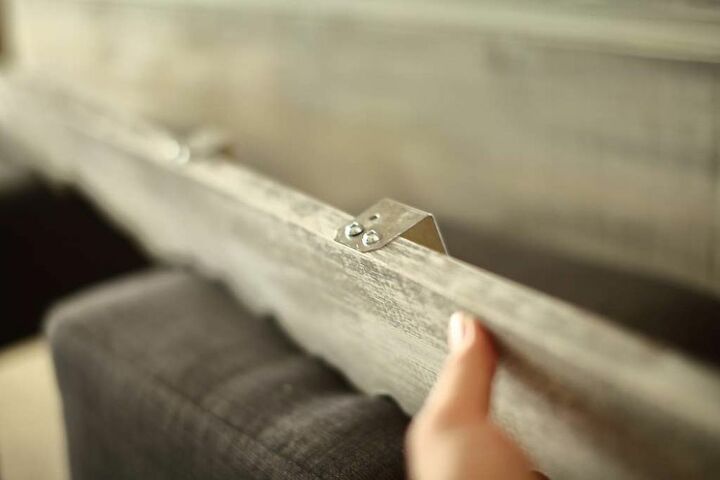
Attach Simpson Strong-Tie to Upper Live Edge Board
Take the upper live edge board and attach 1 Simpson Strong-Tie 18-gauge galvanized steel angle on the top. Make the edge of the galvanized angle flush with the front of the live edge board.
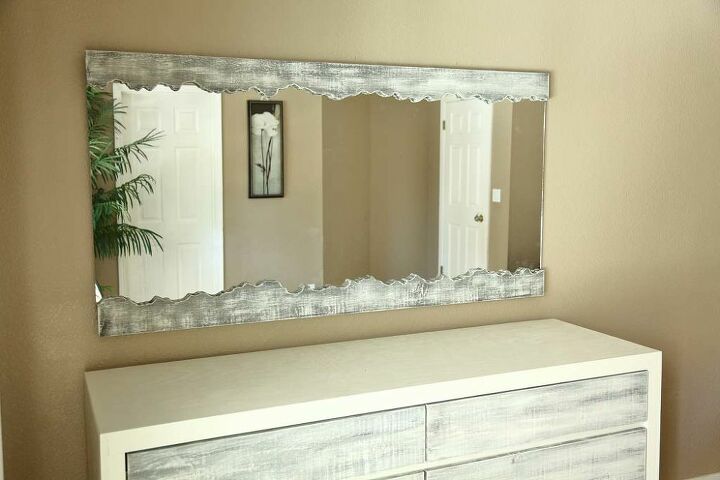
Place the Mirror and Top Live Edge in Place
And for the final step, slide in the mirror behind the bottom live edge, and then slide the top live edge behind the backboard. You're done with DIY Live Edge Mirror.
If you have any suggestions or questions, leave a comment below.
Resources for this project:


Comments
Join the conversation
-
Great job! Love it! But really, $950 on Etsy! Wow! Wonder how many have sold at that price! And I always think my prices are too high in my Etsy shop! maybe I should start charging more! LOL! 😉😯
-
I absolutely love this! The gray was fantastic and how unique with the jigsaw work!!


Frequently asked questions
Have a question about this project?
Love this! What if, instead of making 2 individual pencil/cut lines, you use 1 and use both sides of board. This way your pencil/cut lines will compliment/match?
What creates the gap between the backing board and the live edge, for the mirror to slide into?