


Vanity Set Makeover - Breast Cancer Awareness Month Tribute

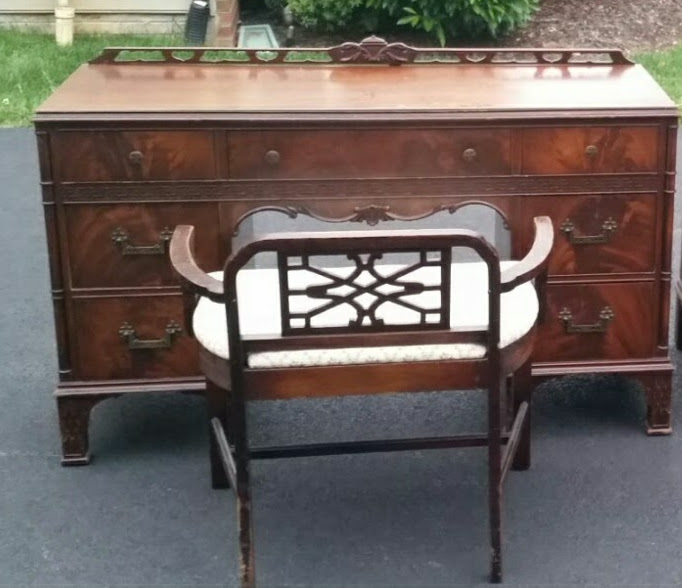
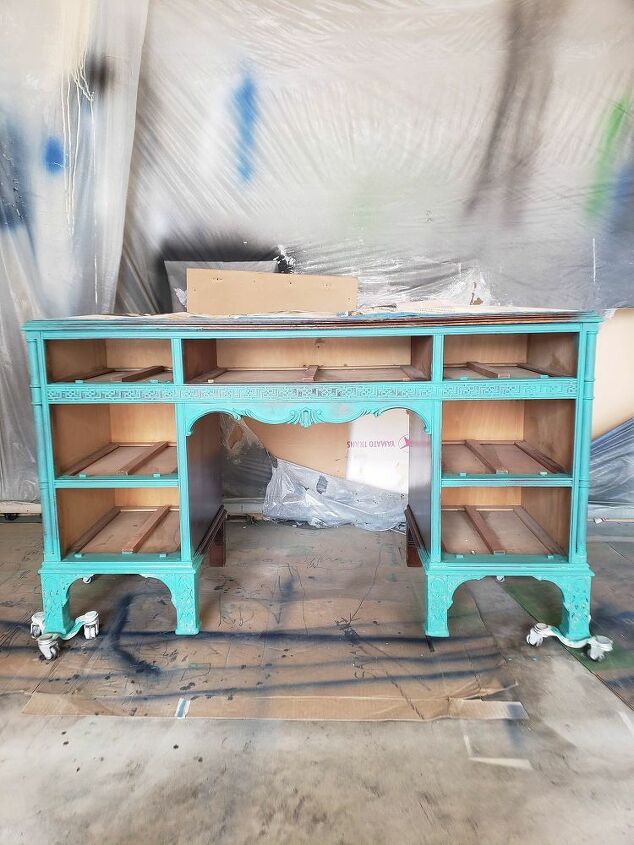
When my husband found this beautiful vanity set we knew it was something special. It did have worn down areas typical of a vanity this age and definitely some scratches and bite marks (thanks to some excited dogs I hear), but we knew it could be beautiful again, we just had to come up with a plan. Like the other pieces we rehab, the first thing to do after removing the hardware is clean. We used a 50/50 mix of denatured alcohol and water with a sponge, scrubbed then rinsed. Once it was dry we sanded the top down and scuff sanded the rest so the paint would have something to adhere to.
Tools and Materials
- sponge
- denatured alcohol
- water
- sandpaper
- paint
- paintbrush
- Saltwash
- stain
- wire brush
- Barkeeper's Friend
- fabric
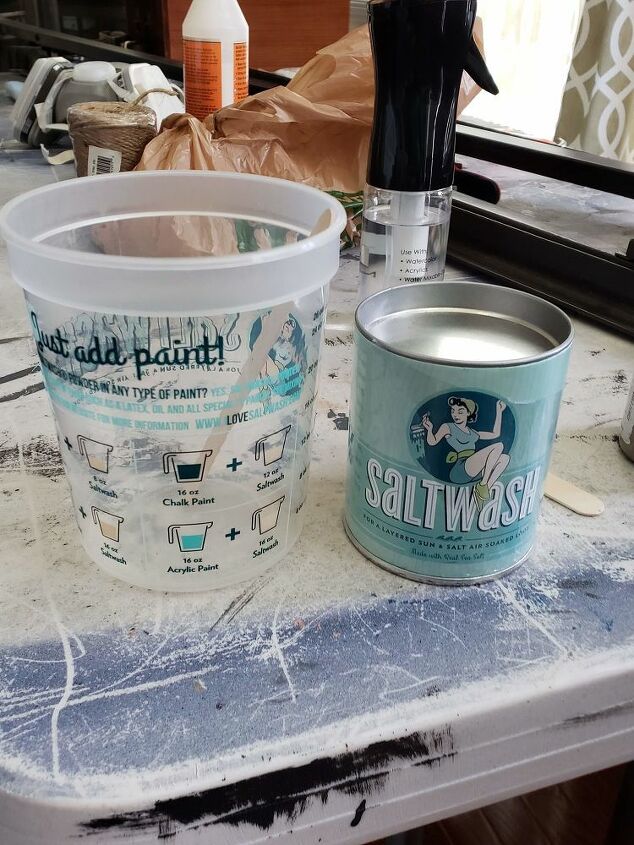
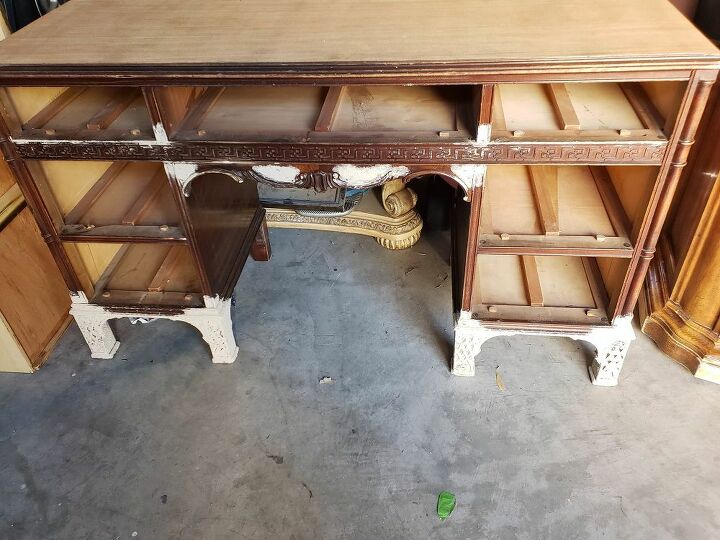
Then, taking into consideration the cosmetic flaws of the piece where dogs had chewed some of the leg and there was molding that would need to replaced, I thought this would be a good candidate for some texture and what better way to do that than with Saltwash.
We mixed some Saltwash with some chalk paint according to the directions. The Saltwash builds texture - it forms small peaks and you can sand it down once dry to have as little or as much texture as you like. I added it to the corners, on the feet and in some edges for a little extra fun.
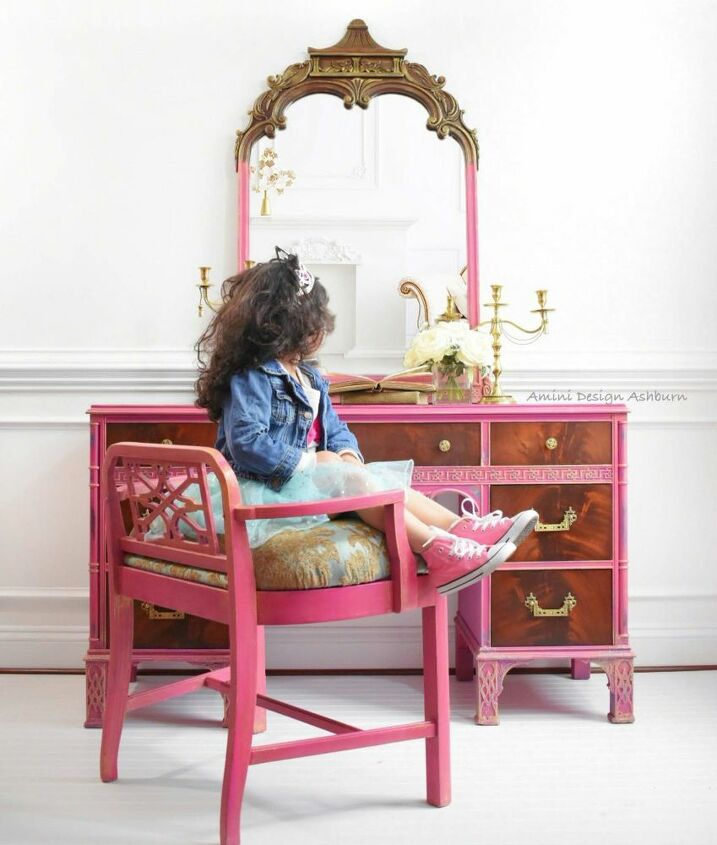
After that had dried, I applied Chalk Paint in Florence knowing that I was going to layer another color on top of this glorious blue and sand here and there so there would be areas where the blue would pop through. I love it when things in your head work out!
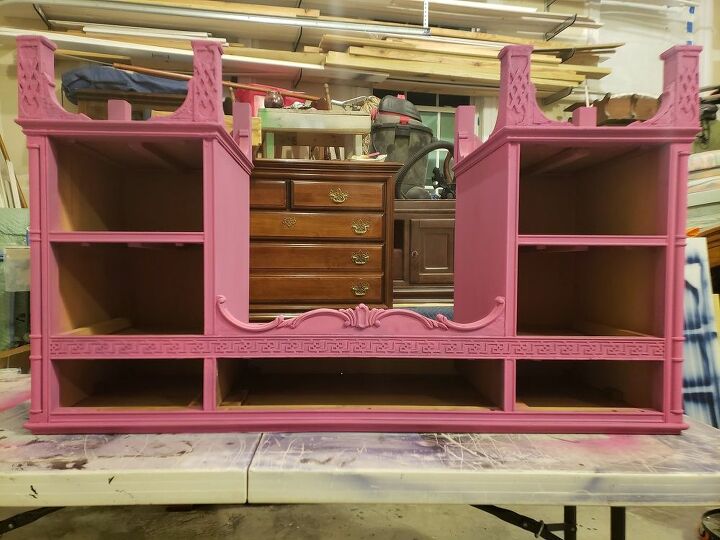
After the Florence, I applied a color called Lotus, by Wise Owl over the entire piece (except the top surface). This perfect bold pink was exactly what this vanity needed! I sanded between coats with 400 and applied my next layer. After that was dry, we distressed to reveal the different paint colors and smooth the finish. We then stained the top with antique walnut to match the beautiful drawers.
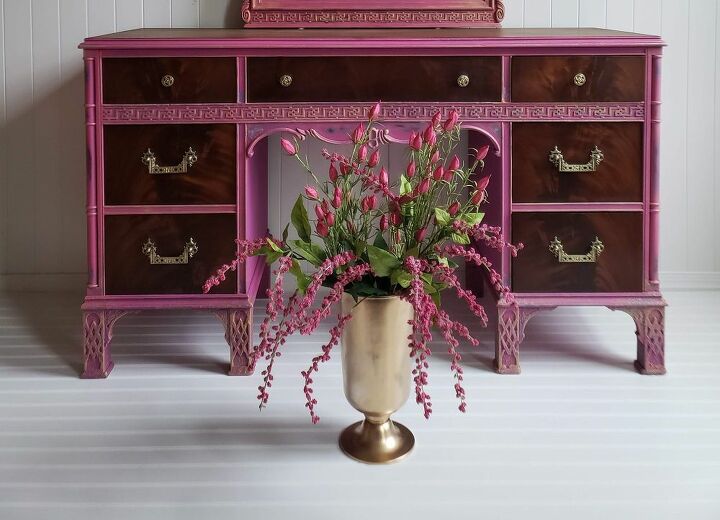
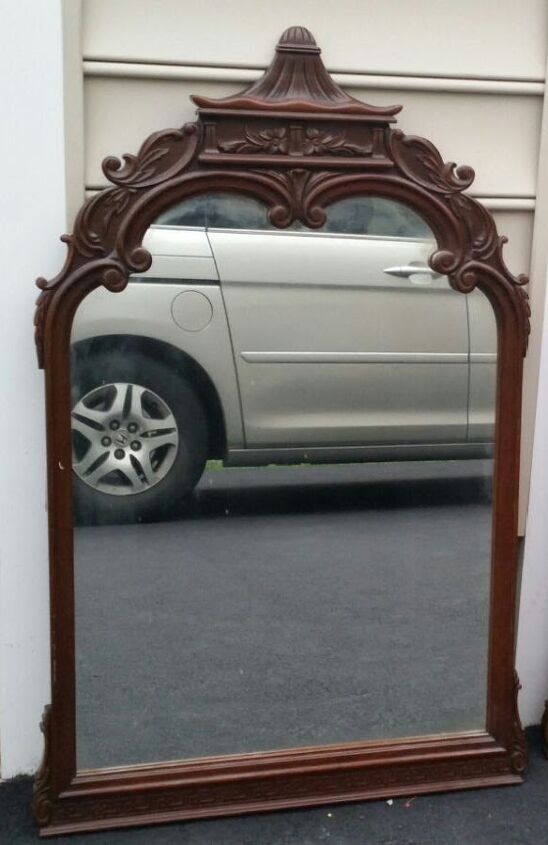
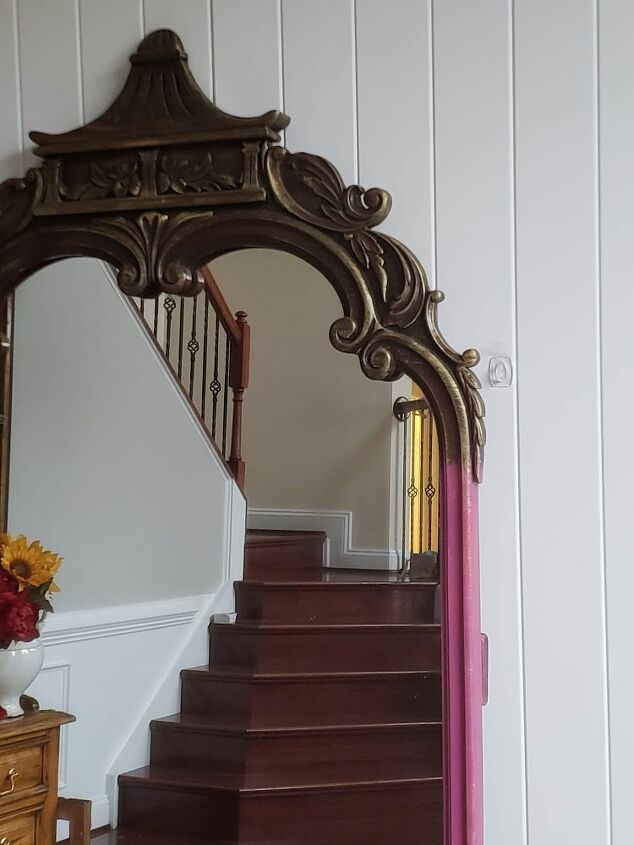
After that, I used Fusion Metallic Gold and added highlights throughout the vanity. I also decided to do something fun with the mirror. I painted the bottom 2/3 in Lotus, then dry brushed some of the gold highlights onto the Lotus and did the same with the top third over the dark mahogany stain.
Looking pretty and regal with those gold highlights! In the midst of this we scrubbed the hardware down with Barkeepers Friend and a wire brush. That stuff is amazing.
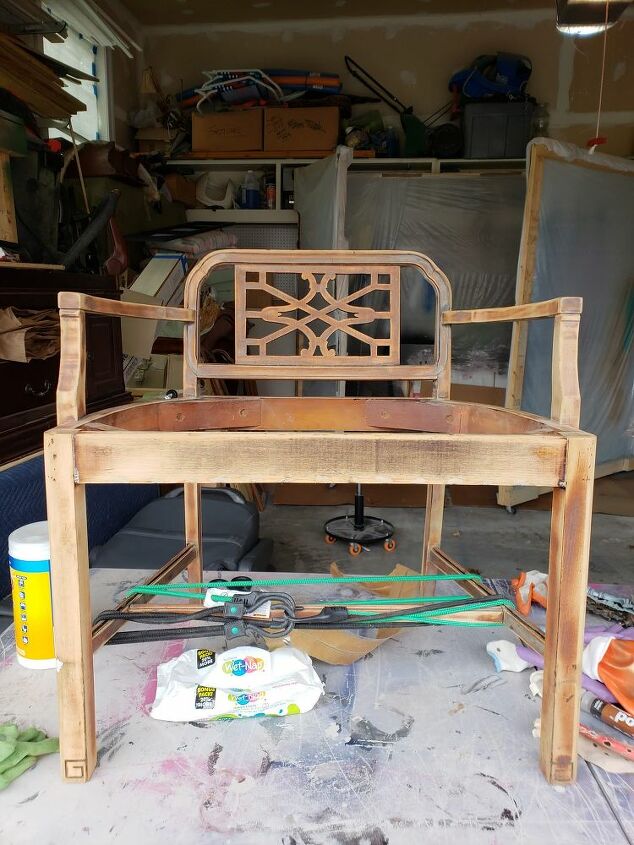
Now on to the chair! With solid wood and a beautiful design, I knew it just needed some love to shine again. We sanded it down and painted it the same fun pink, Lotus.
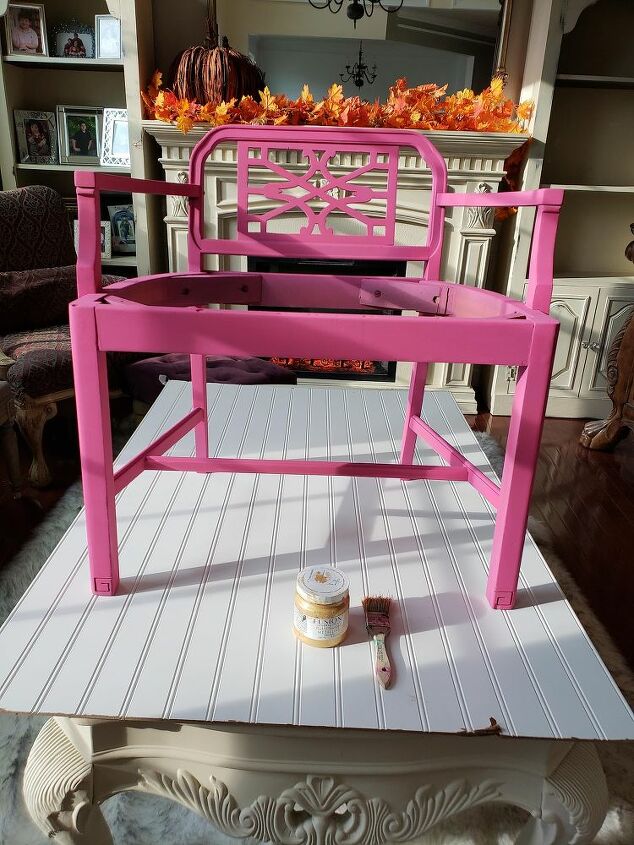
Isn't it bold! Next comes the same fun dry brushing. We started by dipping a chip brush in the lid of the paint, then tapping most of it off onto a dry paper towel and very lightly brushing onto the chair. This leaves a light highlight rather than solid coverage.
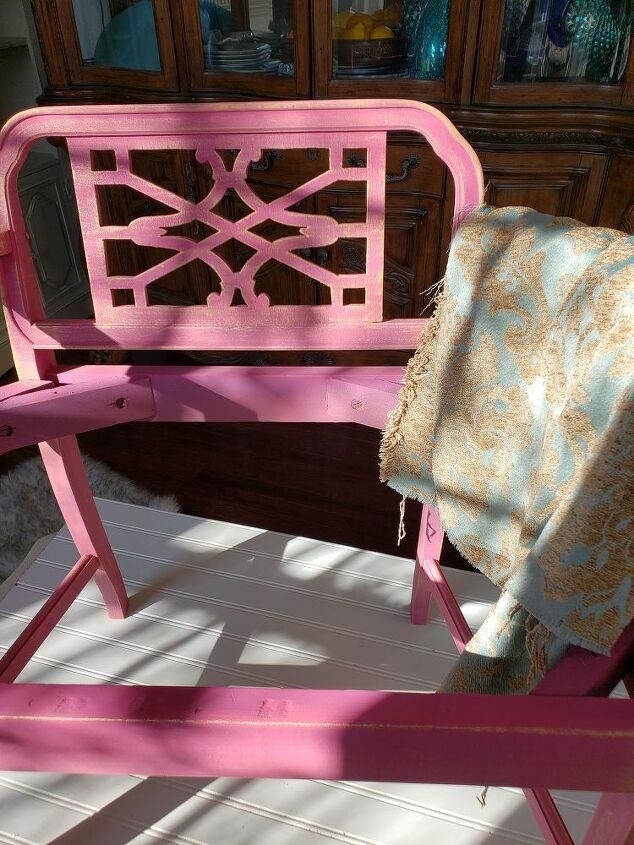
Looking good! Next it was time to reupholster. Not much to say there. My husband did that because reupholstering is not my thang!
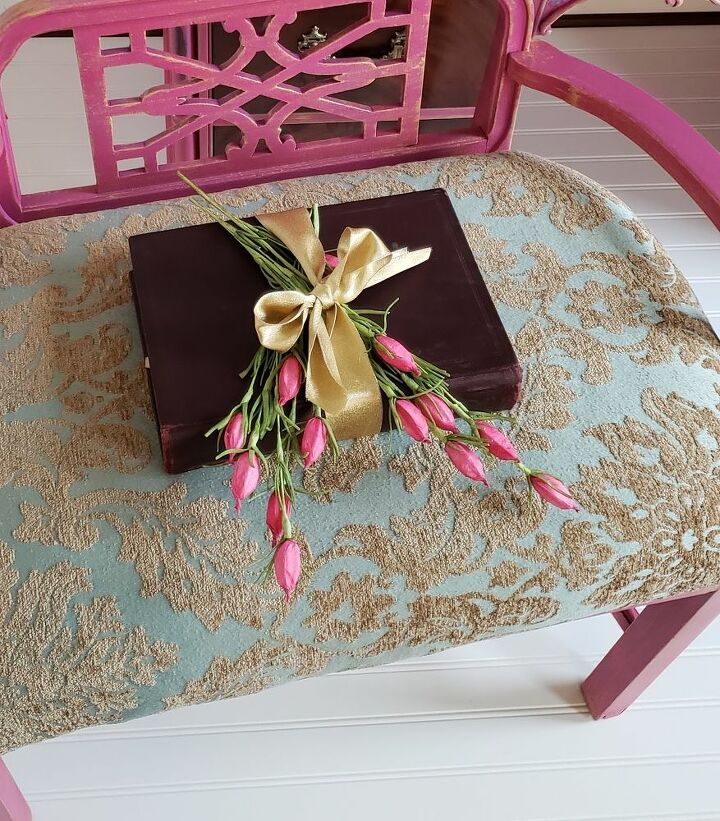
He did a great job! Love this beautiful French Blue! We sealed all painted areas with a satin top coat making sure to sand between each application with a 1000 grit sandpaper. We then reattached the hardware and the piece was done! It turned out pretty sweet.
We decided to donate 100% of the proceeds of this piece when it sells to charity in honor of my mom, a two-time breast cancer survivor, hence the color we chose to focus on, Lotus for Breast Cancer Awareness Month.
Hope you enjoyed following along, we sure had fun doing it!
Resources for this project:
See all materials


Comments
Join the conversation
-
WOW!!! BEAUTIFUL!!♥️
-
Great project. Fantastic model! :) Thanks for sharing with all of us.


Frequently asked questions
Have a question about this project?
Lovely & impressive! Great job.
Where did you find such beautiful fabric?
Gorgeous!!
? I recently chalk painted a dresser a light blue....it looks to plain! What do I do now? I have no clue...lol?
beautiful princess and the vanity