Lamb's-Ear Christmas Tree DIY

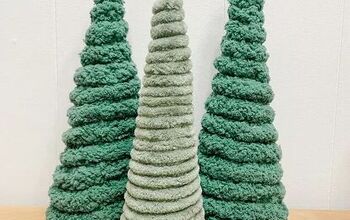
These trees are so unique. Unlike anything I've seen at the stores and so simple to put together! Using just a handful of easy to find supplies (some even straight from your backyard or local park), you can make these rustic and adorable Lamb's-Ear Christmas Trees too!
Make sure to tell me what you think!
A wood slice, a stick, some twine, lambs-ear garland (dusty miller or eucalyptus both would look cute as well! I like anything that has a flocked-look), hot glue and floral tape are all the supplies needed.
*tip*: I have 8 kids. So Mama don't have money to throw around (I also haven't slept in over 18 years but that's a whole 'nother subject). When making anything faux floral, if possible, buy the garland instead of the separate flower sprigs. It's less expensive for more of the same thing! This message brought to you by a mother that has perfected the art of penny pinching, dumpster diving and making crap from junk.
"Any way you want it
That's the way you need it
Any way you want it"
Make 'em tall, make 'em wide, make 'em any way you want!
I made these for a stage presentation that lasted 30 minutes. I was done each time in about 15 minutes. Seriously. That quick. I wouldn't lie to you, friends. I mean, who doesn't love a quick Christmas DIY?!
Start with a wood slice. You can find these at the craft store already dried and clean, or you can find them in your backyard or local park or trail for free (especially if you have a wood-burning fireplace and a husband that is crazy about picking up every downed tree within a 25 mile radius of your home for free burning wood....) Find your stick (again, either from the craft store or from the backyard) and drill a hole into your wood slice the same width as your stick. Add hot glue inside your drilled hole to hold your stick in place - make sure it's straight-ish.
Your stick height will be your tree height, so keep that in mind when picking out a stick as well as making sure you have enough lamb's-ear for your project. I've made trees as tall as 28 inches high and 1 lambs-ear garland was plenty.
Next, you will want to measure (I use that term loosely. By "measure" I mean hold up your garland and figure out approx. how long each piece needs to be)
Using wire cutters, floral scissors or hedge clippers, cut the garland pieces to size. These pieces will be hanging upside down to create a more "tree" look, so make sure to leave an end piece of a few centimeters on each sprig for attaching to the base stick.
With a dab of hot glue, adhere each sprig to the stick. I typically use 3-4 sprigs around the stick.
If you get hot glue on your fingers during this step, I give you full permission to curse like a sailor if it makes you feel better. This here is a judgement-free zone. No one knows the feeling of 3000-friggin' degree hot glue burning through the skin of your tender digits until they've actually had it happen.
Tip: Some trees I use only one tier of sprigs. Others I layer up 2-3 tiers for a fuller tree.
Once they are all glued on the stick, use the floral tape (in this case I used white floral tape to match the white stick) to secure the sprigs of lamb's-ear onto the stick.
Cover up the exposed floral tape with a line of twine secured with hot glue.
This tree was made with a backyard stick and I love how it "leans" a bit. Not perfect, but totally cute. I also used 2 layers of lambs-ear for this one. A shorter layer on top and another longer layer underneath. The floral tape is hidden under the top tier. Both layers were attached in the same method described above, but I didn't need to cover the second tier's tape with twine since you couldn't see it.
I also added a string of twine along 3-4 inches on bottom of some of the taller trees for an added layer of texture. With or without the bottom twine, they are pretty.
A pinecone hot glued on the top can be a fun addition to the rustic feel of these sweet things.
Follow along with me on IG - I'm always looking for new friends!
Enjoyed the project?
Resources for this project:
See all materials










Frequently asked questions
Have a question about this project?