


$20 Bathroom Vanity Shelf
Bathroom Organizing DIY: How To Easily Double The Storage Capacity Under Your Sink For Cheap
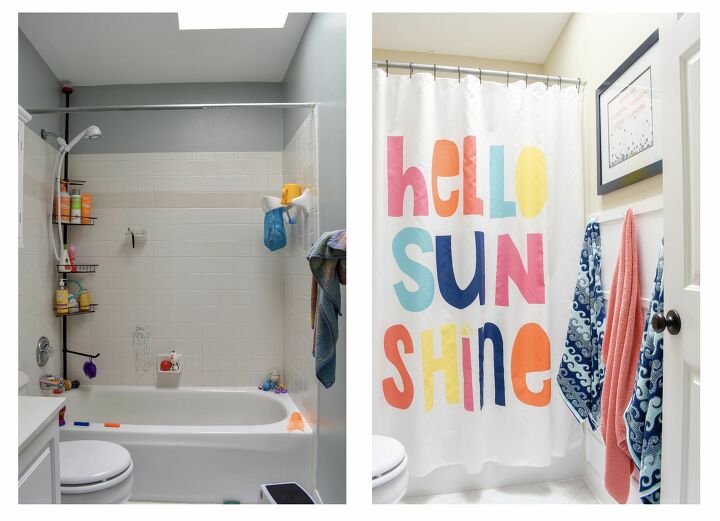
Last week, I showed you how I transformed the look of this kid’s bathroom in just 8 hours. This week, I’m showing you how I upgraded the organization in this small bathroom by installing a super easy and cheap under-sink shelf to double the storage space! This diy bathroom vanity shelf will give you twice the space under your current bathroom sink without a tun of work or money.
REQUIRED TOOLS:
table saw
jigsaw or hole saw
24” level
drill
REQUIRED SUPPLIES:
wood stripping / scrap 1x2
scrap plywood or 2x stair treads
2 1/2” wood screws
wood glue (optional)
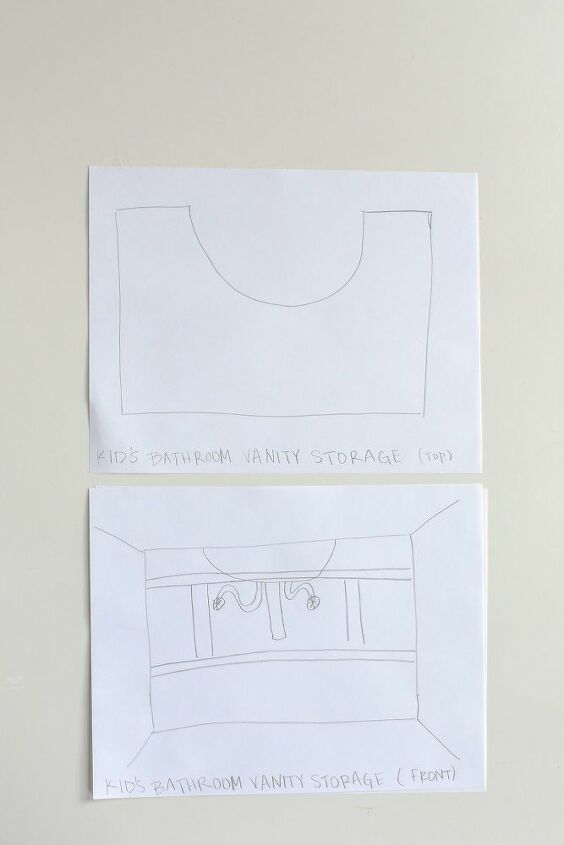
Step One - Draw Up Your Plan
Don’t fret. This isn’t as complicated as it sounds. Your plans don’t have to be professional drafts. I sketched out these plans in under a minute. And don’t worry that it needs to be complicated. It doesn’t. There’s no need to add drawers, cubbies, etc. A simple shelf works just as well as a store-bought bathroom vanity organizer once you add bins.
I just want you to have an idea of what the end result should look like and how the technicalities may play out before you begin.
It’s okay if you veer from your plans. Originally, I had included two shelves and a divider system in my drawings. Once I gathered everything I needed to store within the vanity, I realized I actually didn’t need that complicated system after all! So I changed gears slightly. It’s cool. As long as the end result is still optimized storage capacity, I was fine with changing the plan as I went.
Step Two - Figure Out What Items You Need To Store
The best bath and sink organizers are the ones that are customized for your actual items. The best way to make sure you’re going to end up with a space you can actually utilize is to put every single item that needs to be stored under your sink into a pile.
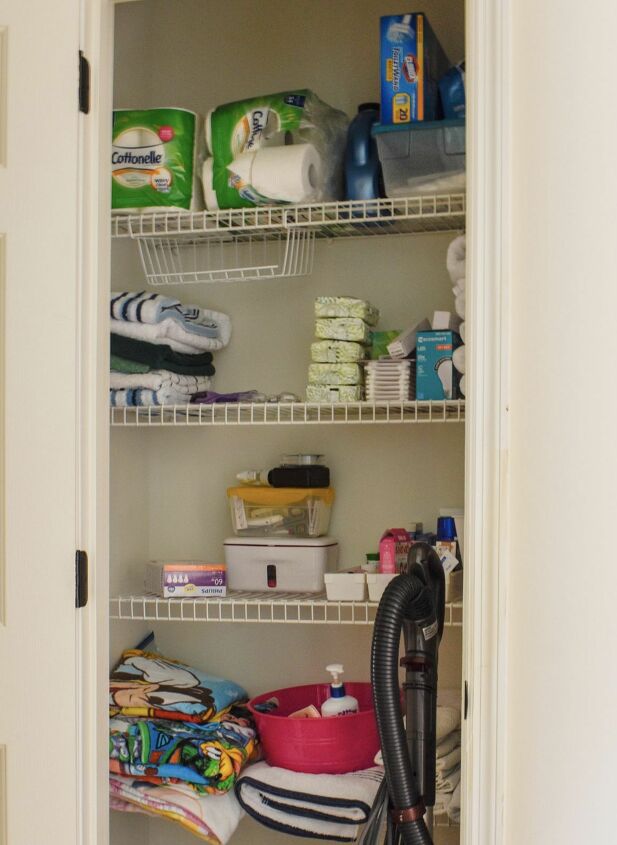
For me, that meant combining the items I’d previously stored in the bathroom vanity with the ones I’d been storing in the hallway linen closet.
Our linen closet is actually across the hall from this bathroom. When I was making decisions about what to store in this room, I wanted to take into consideration the best way to optimize the storage for our entire home - not just this bathroom.
While the daily use of this bathroom is for our daughter, we also use it as a shared guest bathroom when we have overnight company. In the past, we’ve stored all of our guest toiletries in the guest bedroom and this linen closet. Since that would require them to grab what they needed before they got into the space, it seemed like an ineffective system. After all, what’s worse than getting completely naked, jumping in the shower, and then realizing you forgot your soap? Doing that in someone else’s home and then having to do a naked towel run across the hall, right?
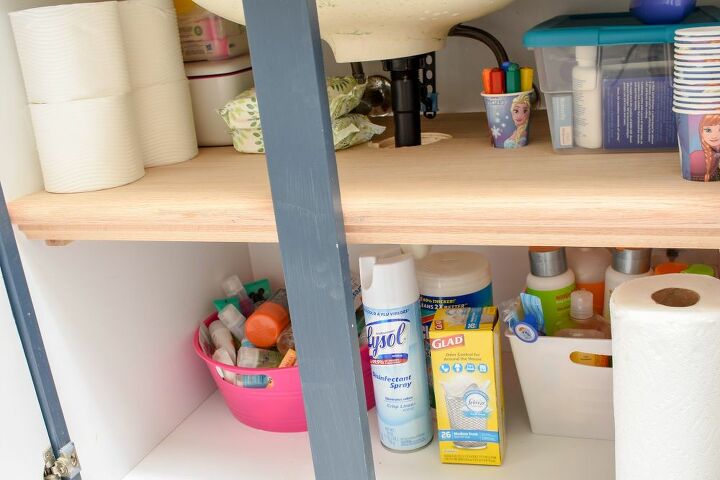
So I decided to move all of the bathroom toiletries into this space and also carve out some room for extra toilet paper and the cleaning products we use exclusively for this bathroom (Lysol, wipes, trash bags, etc). Having everything already on-hand might convince me to clean more. Smart thinking, right?
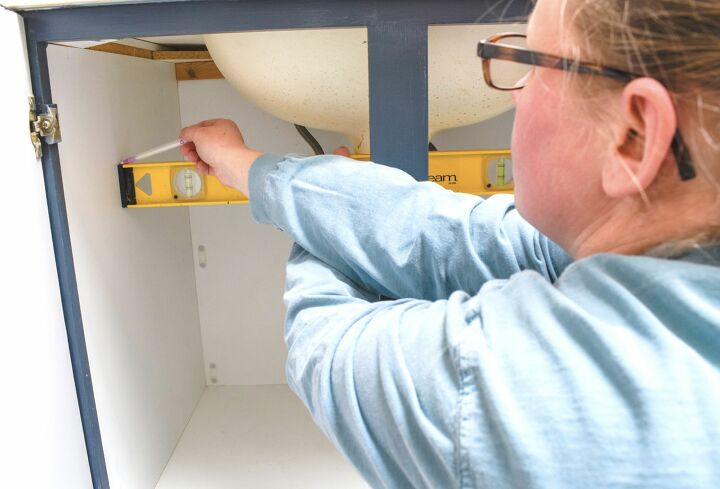
Once I’d gathered all the items I needed to store, I made some decisions about the placement of the shelf.
To do this, I grabbed the tallest item in the collection and used a level to mark the minimum height requirements of that item on the inside of the vanity. Because what’s the point of adding a system that doesn’t actually store the items you need to conceal, right?
I repeated this on both sides of the vanity interior.
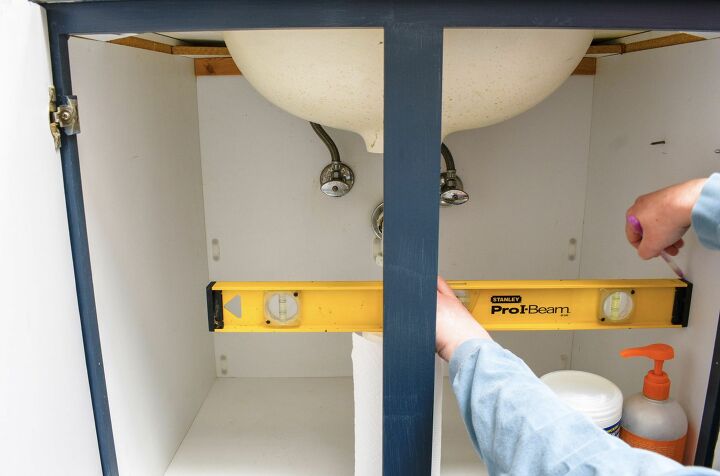
Step Three - Determine Shelf Placement
Knowing the max height of the items I needed to accommodate, I could determine where I actually wanted my shelf to be installed.
I decided to install it roughly half-way up the side of the vanity, to allow for minimum cuts around plumbing.
I used my level to mark a straight line that will guide the placement of my shelf braces along the sides of the interior of the vanity.
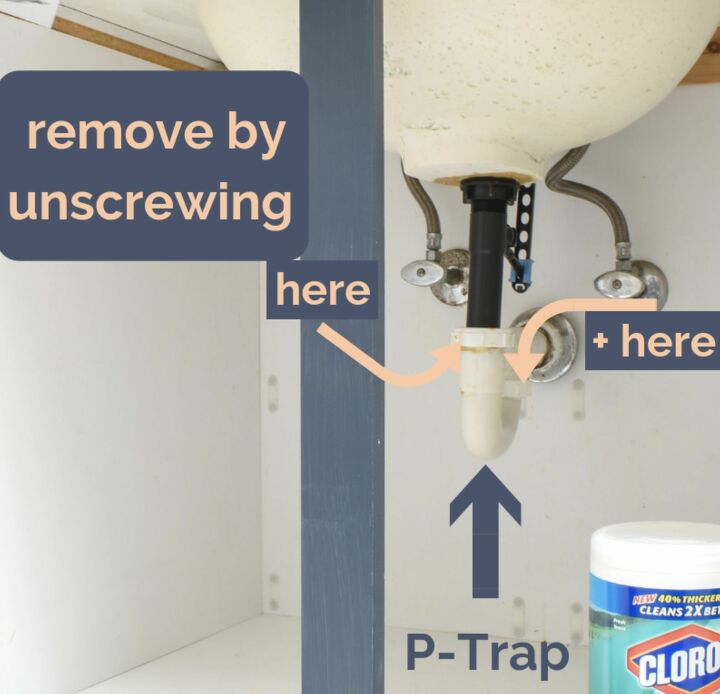
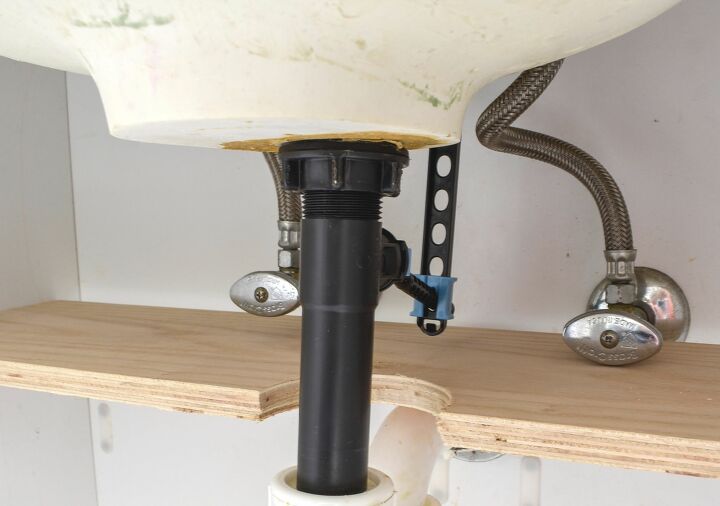
Step Four - Remove the P-Trap
If you’re not familiar with plumbing, this may sound intimidating but I promise it’s super simple. The P-Trap is the curved section of the drain’s plumbing.
Step Five - “Dry Fit” Shelf
Let’s talk about the shelving materials. You have so many options for what you can use here. You can use some scrap plywood, cut into two pieces that are each 1/2 the interior depth of the vanity. You can use two pieces of thin lumber. It really doesn’t matter what you use - you just want to make sure you have two pieces that you can fit together because one piece will not fit properly. (I used a leftover stair tread kit that I’d miscut during our ORC Foyer Project, by the way)
Before you attach any braces, you’ll want to measure the interior width of your vanity and cut your wood to size. Get it as close as possible to the actual interior width but don’t fret if it’s slightly smaller. You’re going to lay those pieces on top of braces, so they don’t have to be tight with the sides.
Once your shelf wood pieces have been cut to width, “dry fit” them in place in order to mark your placement of the plumbing cuts onto the wood.
Step Six - Cut Holes For Plumbing
The idea here is to make this hole as small as possible without creating pressure on your plumbing. I used a 5” hole saw because it’s what I had on-hand. You can absolutely use a jigsaw as well, since you’re cutting on the edges of the wood pieces and not the interior.
In fact, a jigsaw would probably have been easier.
To cut with the holesaw, since it was on the edge, I had to clamp these boards to a wider board to get the cut even.
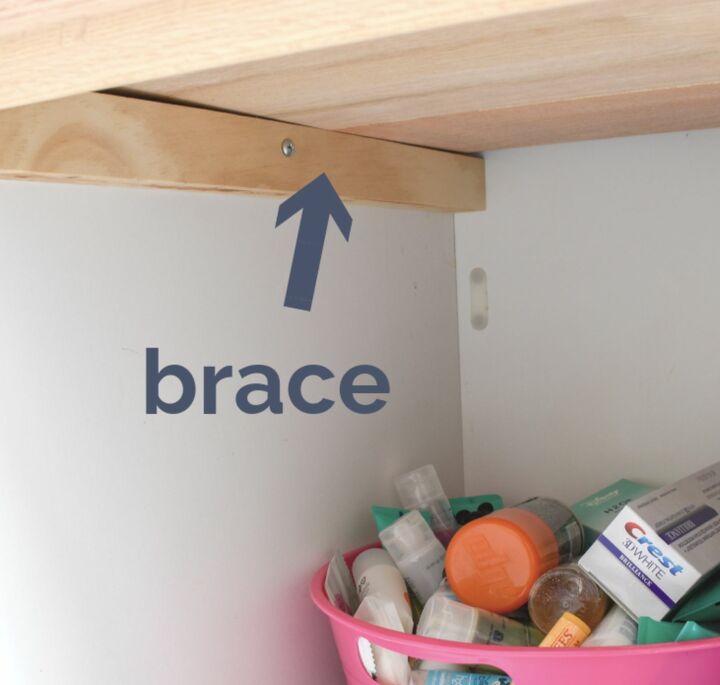
Step Seven - Install Your Shelf Braces
These are just the scrap strips of wood or 1x2s cut down to the length of the interior sides of the vanity. Since I had so much scrap leftover from the stairs, I was able to reuse the pieces of treat I’d had to trim off.
1x2” boards work just as well.
Use a drill to first create a pilot hole in the wood and vanity but be careful not to drill out the side of the vanity, if it is exposed.
Use a level to insure your braces are even, then screw into the side of the vanity. You can add wood glue, if you’re concerned your shelf will need additional stabilization. I opted out of this step.
Step Seven - Install Your Shelves
First, add the back piece of the shelf by placing it directly on top of your braces. Make sure you use the one that has the plumbing cut facing out:
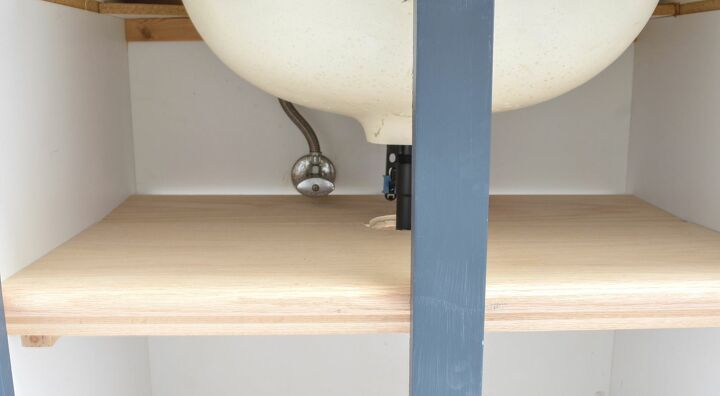
Repeat with the front piece, insuring the plumbing cut faces IN this time.
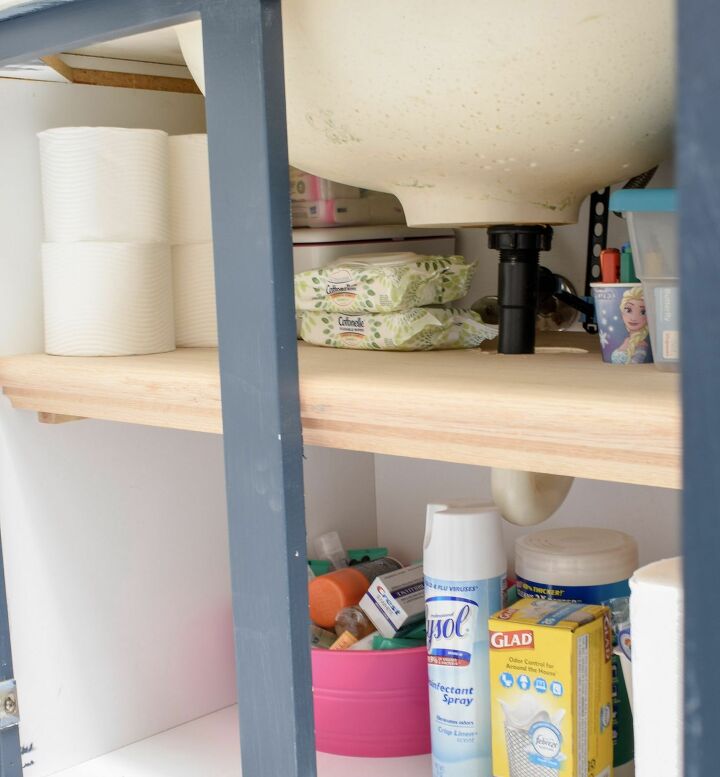
Step Eight - Finish With Paint + Stock Your Shelves
If you want a more finished look, you can paint or stain the shelf to match or contrast. I opted to just leave it raw. It looks great.
Then I added all of the items I need to store and oh my gosh look at how much extra space I have!
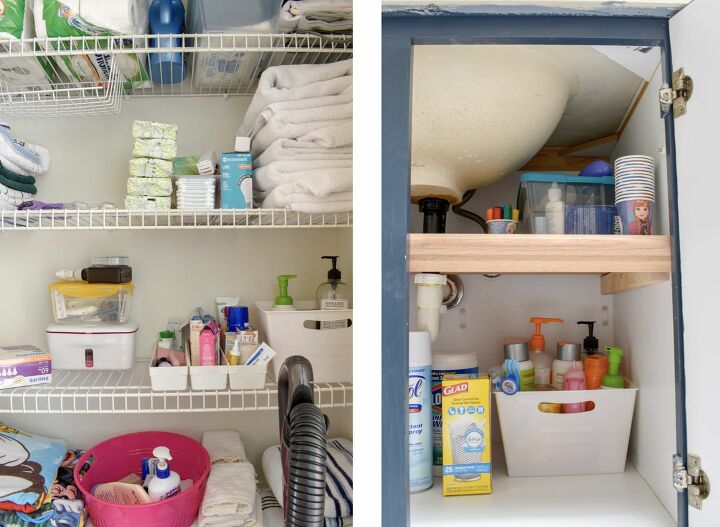
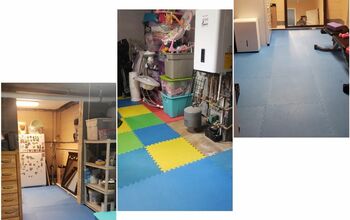
And then look at what I managed to achieve! I went from this janky storage mess of a closet to this orderly cube in under an hour. Now I can’t wait to tackle this closet. It deserves to have linens (that we’re otherwise storing in our dressers).
I feel like this one project changes the whole game!!
This shelf DIY was the final step in my Kid's Bathroom Makeover which you can see on the blog at T. Moore Home
Resources for this project:


Comments
Join the conversation
-
Sometimes comments are so funny! Be nice folks she's very happy with what she did just compliment her and get on with your day! I thought the project was brilliant! And as a current problem I am dealing with and I'm going to use some of her idea! You go girl 🥰
-
It's not a matter of whether one is 'happy with' but home protection.If you feel compelled to do this,then please ,before you put in your shelves,purchase the reinforced ,steel braided safety hoses and install them.The regular hoses will,and do burst with flooded kitchens being the result.


Frequently asked questions
Have a question about this project?
One shut-off valve handle is hard against your shelf,how are you going to shut off your water if one of those hoses bursts,(as they have been known to do)?
Why did you remove “p” trap if shelf was going above it? Also, if you ever have plumbing issues, according to pics. You can shut valves off without removing shelf.. otherwise, great idea
What about the turn off valve handle that hits the shelf board? Now it is immobile?