


DIY Shiplap Backsplash
Want a wow factor in your kitchen? Add a quick and easy DIY Shiplap Backsplash to your kitchen to transform it in minutes!
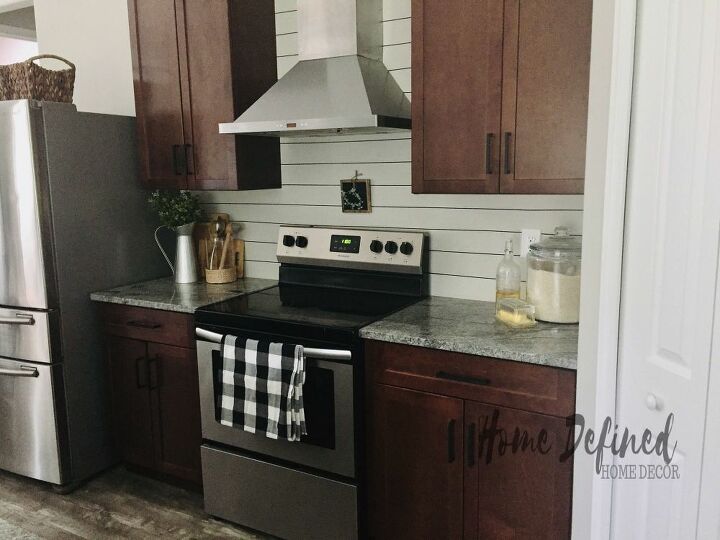
As we continue the journey to define our home we needed to decide what to do with our builder-grade kitchen. It was just so blah, but we could not agree on what to do until we came across this incidental DIY Shiplap Backsplash.
One day, we decided we would try to paint a patterned backsplash, to see how it would look prior to committing to “real” tiles.
As the prep work began for what I thought would be a paint project, we came across this awesome hack.
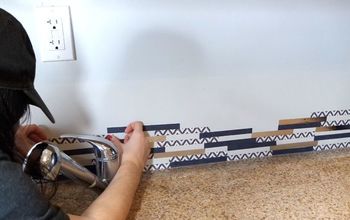
Like with any paint job you need painters tape to protect the areas you don’t want to be painted. So we purchased the thinnest tape we could find -since it was supposed to create grout lines on our painted tiles.
When we put on the black tape on our walls we immediately fell in love. We didn’t see the need to add any paint to try and figure out was what was next.
That simple, tiny, and unexpected piece of tape defined our kitchen. I now sit back and stare with awe at how beautiful my kitchen looks.
This by no means is this meant to be something permanent. This is an excellent option for renters or for people who need something temporary until they are ready for the “real” thing, like us.
This is how you can do this DIY Faux Shiplap Backsplash...
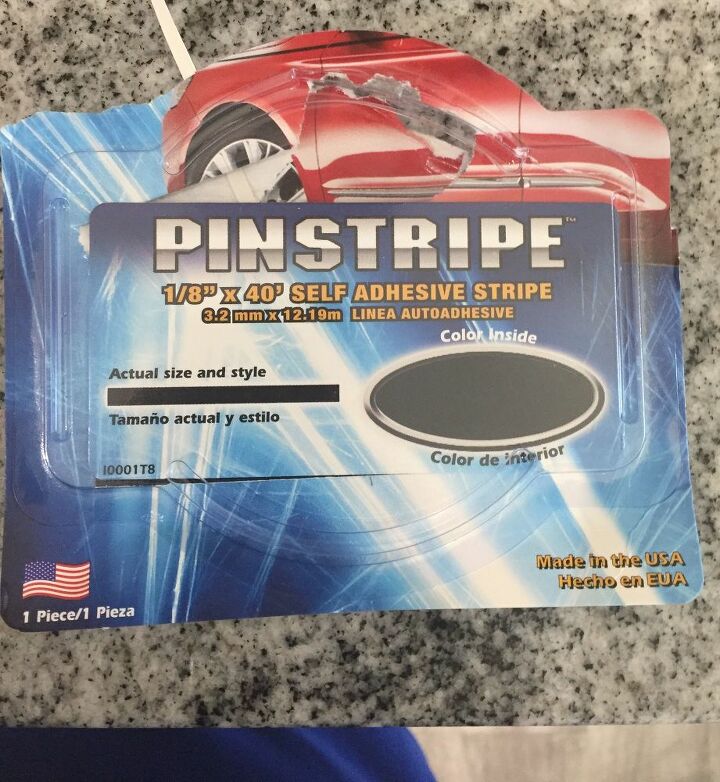
Supplies:
2-3 rolls of 1/8 black pinstripes tape for cars
Tools:
- Pencil
- Blade
- Measuring tape
Step 1:
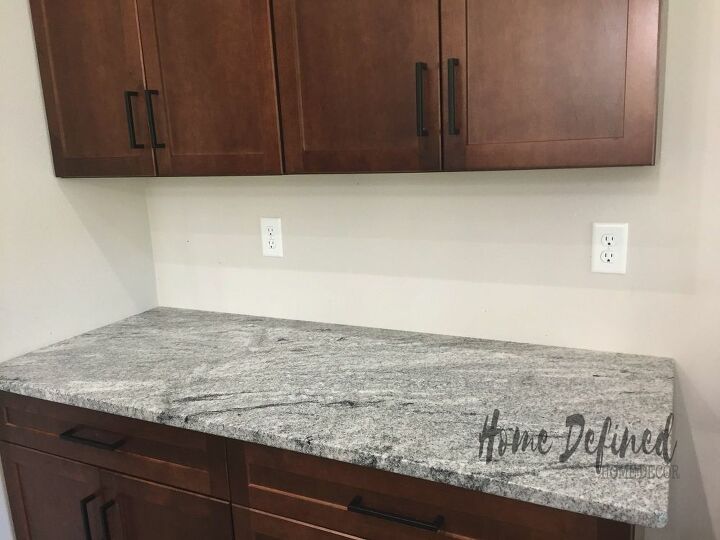
Clean and dry your wall.
Step 2:
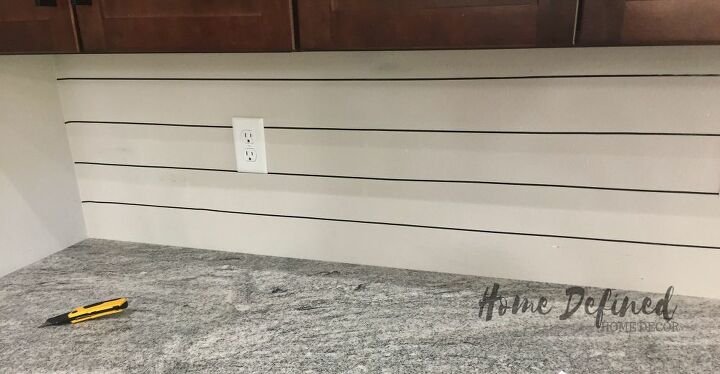
Measure and mark every 3.5 inches starting from your countertop up to your cabinets- do it on both sides.
Step 3:
Place the tape from one side to the other where you placed your mark, creating a horizontal line. Press the tape down with your fingers.
Like I mentioned before this is not something permanent, but it is durable as this tape is for car exteriors, which can withstand heat and water.
I have already tested mine by wiping my walls down with a wet soapy rag and they remained intact.
Step 4:
Sit back and enjoy your DIY Shiplap Backsplash!
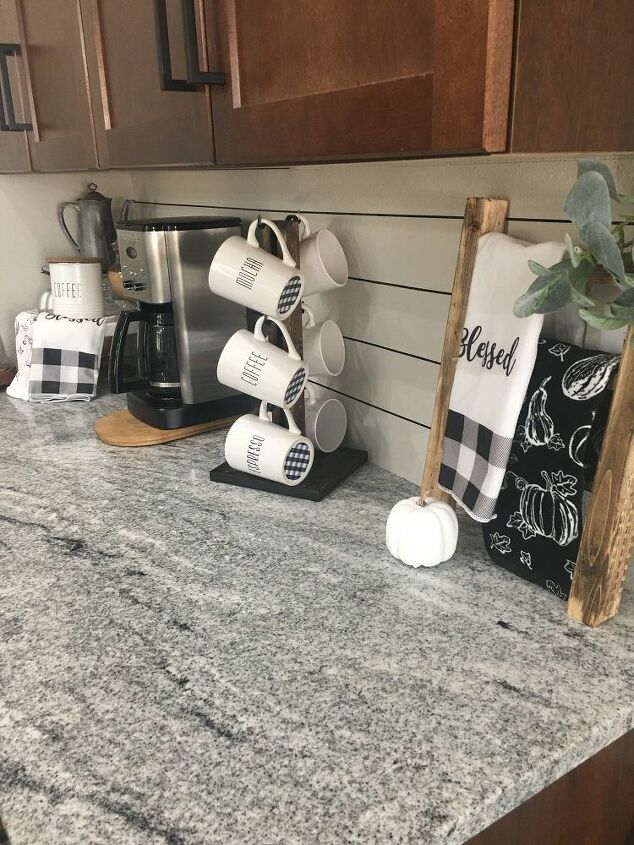
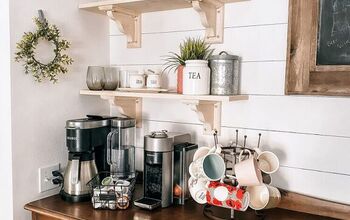
We decorated our counters and were finally inspired to define our own DIY Coffee Bar and even made a DIY Mug stand.
If you want more shiplap ideas, check out our DIY Shiplap Fireplace Wall.
Don’t forget to share!


Comments
Join the conversation
-
Simple but great!❤️
-
Absolute genius !!! I love this and I have to try it !!! Thank you for sharing !!!!!


Frequently asked questions
Have a question about this project?
Where did you get the pin stripe adhesive? It is not shown in the materials used.
When you remove this at a later time does it remove the Sheetrock texture when pulled off. I know it will remove the old paint but some tapes like the compound two way tape will also remove the texture on the walls too.
How do I end the “ship lap” on the wall where there is not a corner? Like at the end of the cabinet line but the wall continues.