


How To Make A Wood Letter Board For Free
Wood letter boards are so much fun. I wanted a BIG wood letter board to go over our faux mantel in our living room, but I didn’t want to spend a lot of money on it. I talked my idea over with Matt and we came up with something I am so happy with. This is so much better than anything I could have bought!
I needed something large to fit above the faux mantel so Matt and I went hunting in our garage to see what we had to make it happen. (TIP: Always pick up good boards when you find them cheap at Restore and yard sales. They are so nice to have on hand when a project idea comes up).
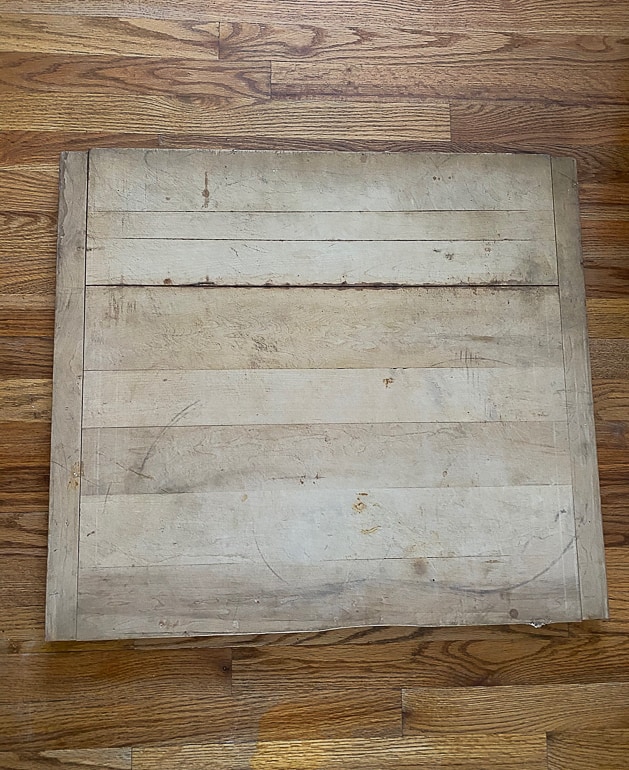
We had a butcher block cutting board in the garage that measured 28″ wide and 25″ tall. Perfect for the letter board. It needed a good sanding to clean it up, but it was a good solid base to start with.
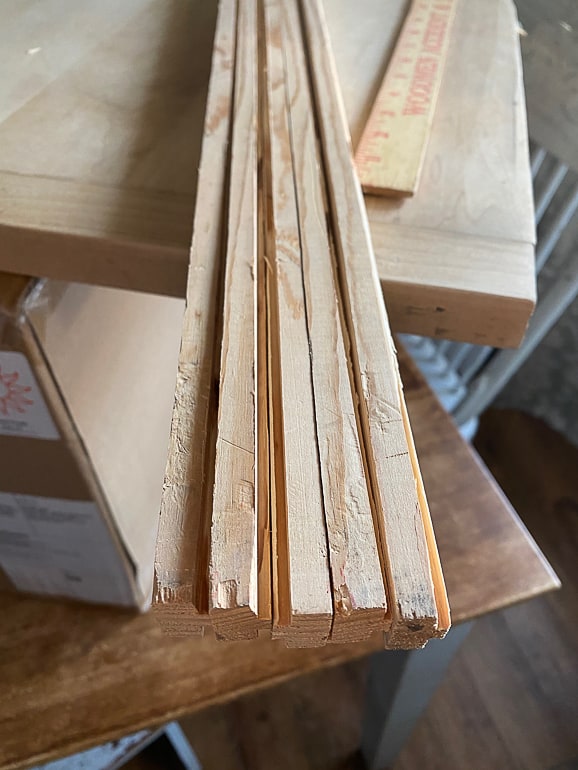
Once we had the base, I could measure what I needed for the ledges where the letters would sit. I wanted the ledges of the letter board to be 1″ on the front and come across the butcher block 24″ across. We didn’t have those exact boards in our garage, so Matt had to make them from a 1×6 we did have. He used the {aff} miter saw to cut the 1×6 down to 24″ pieces. I was able to get six “ledges”.
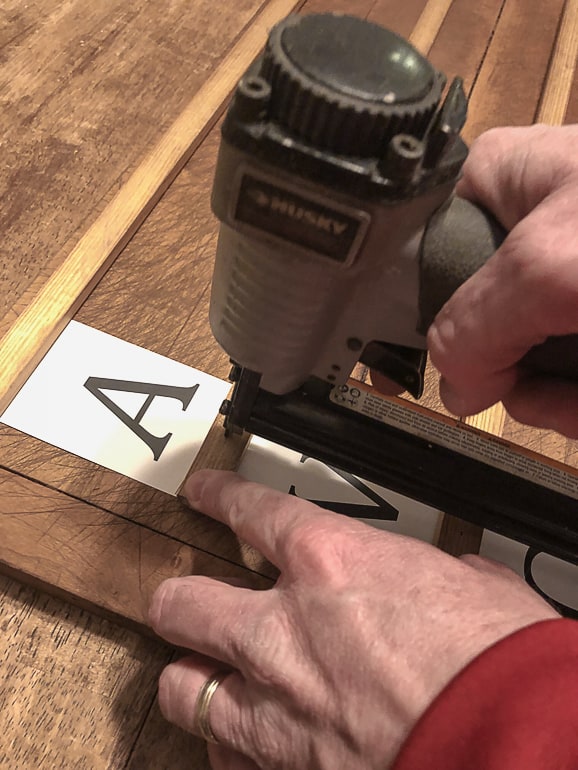
Once the 1×6 was cut into 24″ pieces, Matt used the table saw to cut them down to 1/2″ strips. Then, he used the router for the back of the 1/2″ strips. This enabled the ledges to be flush on the butcher block, but have a little opening on each end for the letters to slide in. Once all the ledges were cut and routered, Matt sanded them all so there were no splinters. Then, he applied {aff} Restor-A-Finish “Dark Walnut” to the butcher block and ledges. You can use any stain or paint you have on hand.
Matt used the nail gun to attach the ledges to the butcher block.
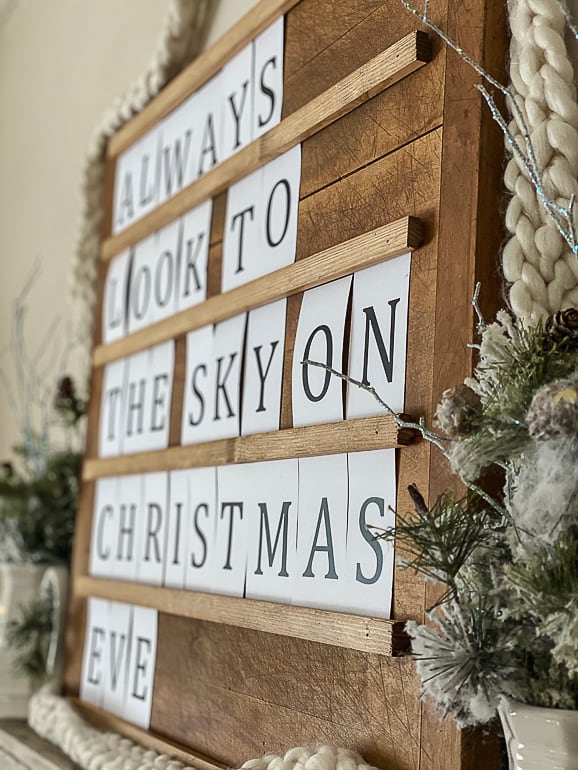
Then, I printed letters on card stock. They were FREE!
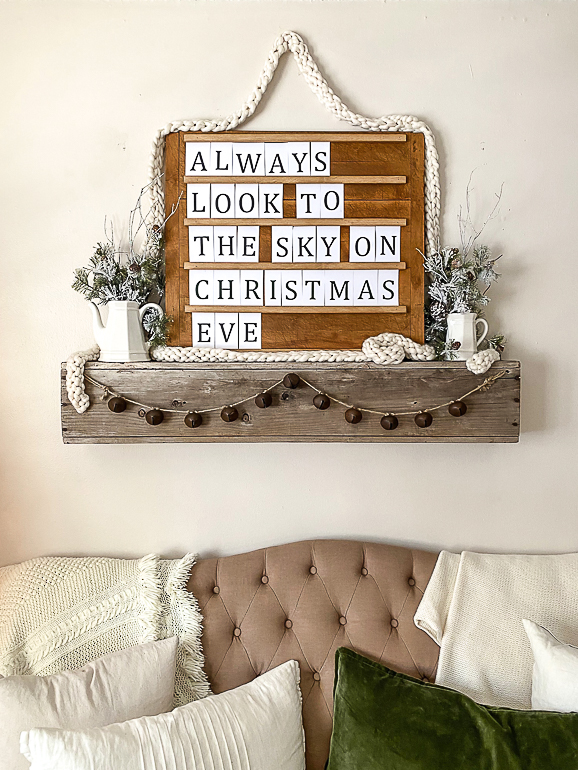
Our kids are growing up so fast and Santa doesn’t bring the magic to the season any longer. The magic comes from all of us and I always want our kids to always look to the sky on Christmas Eve and embrace the spirit of Christmas that is still so present.
To see more details about how we put this together and the other supplies we used to make our garage scraps into this beautiful letter board, head to my blog post: https://mycreativedays.porch.com/how-to-make-a-wood-letter-board-for-free/
Resources for this project:
See all materials


Comments
Join the conversation
-
great gift for adult children!! thank you


Frequently asked questions
Have a question about this project?