


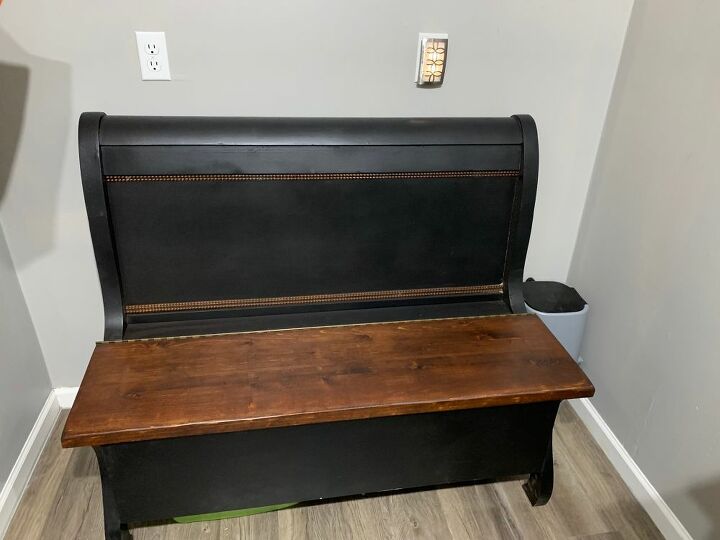
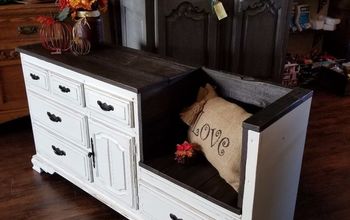
A Sleigh Bed Repurposed Into a Bench.

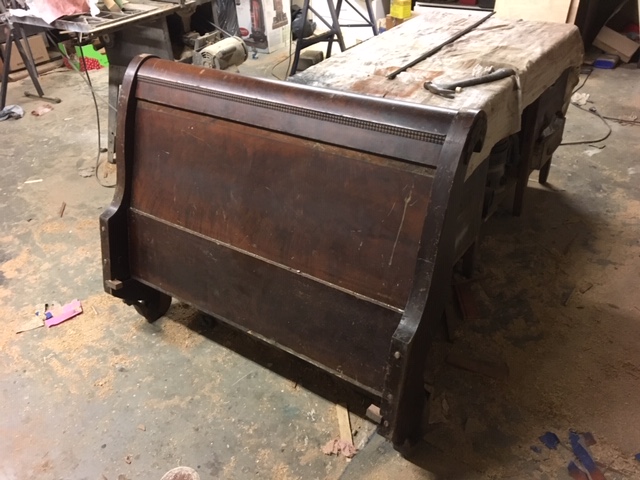
My friends at The Heritage Company, an architectural salvage/ antique store in downtown Kalamazoo did it again. Instead of passing on a lonesome sleigh style headboard, they purchased it from one of their pickers with me in mind.
It was about 42 inches wide and 39 inches high so it was likely once part of a twin bed.
I have made several benches from headboards, but many of them incorporated a matching footboard. Every bench has its own challenges (opportunities?) and usually require design decisions being made on the fly.
The driving specifications are: the finished seat height should 15 to 17 inches from the floor; and the seat depth should be 14 to 17 inches.
Every bench requires its own head scratching, so I will mention a few decisions I made with this one.
If you follow my posts, you know I prefer using materials I have on hand or that are repurposed. Almost everything I used for this bench is something I had on hand, leftover from previous a project or just part of my collection of pieces and parts.
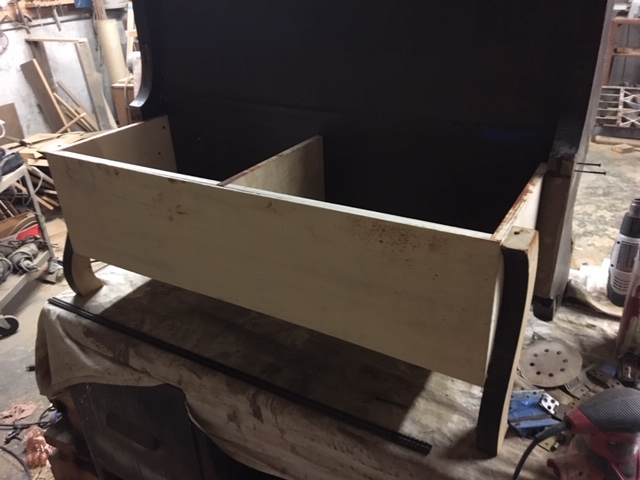
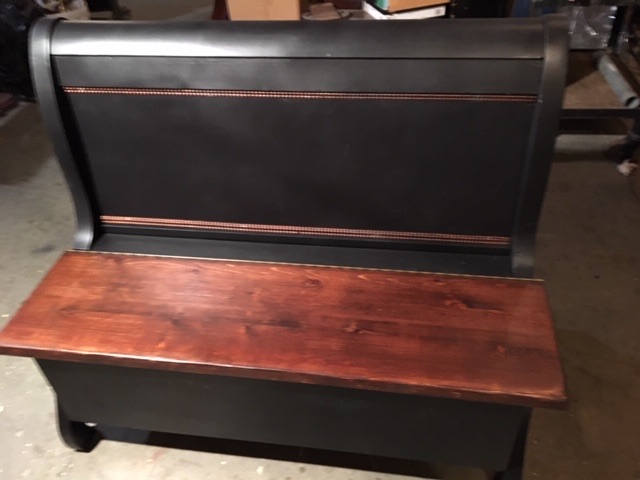
The storage box: As you can see in the photos, I decided to build the seat box from 3/4 inch plywood and I used some panels a friend gave me. Because the longest dimension of the plywood panels were only 36 inches, I opted on making the seat front out of two pieces and adding a divider. The divider adds extra support but prevents longer items from being stored in the bench. I also ended up facing the front with a 1/4” thick piece of plywood. My point? I should have purchased a larger piece of plywood for the front of the seat.
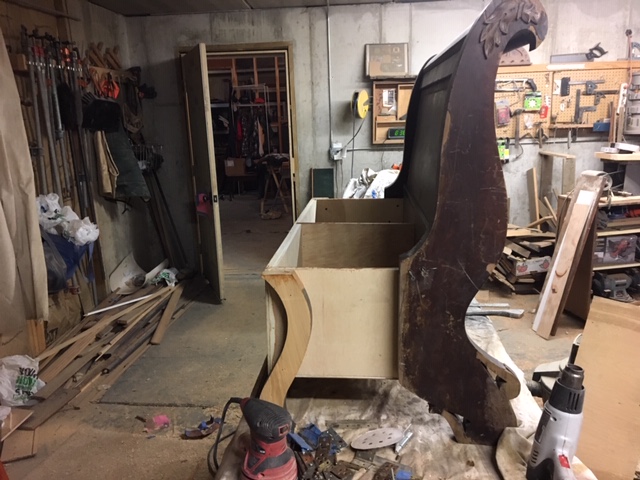
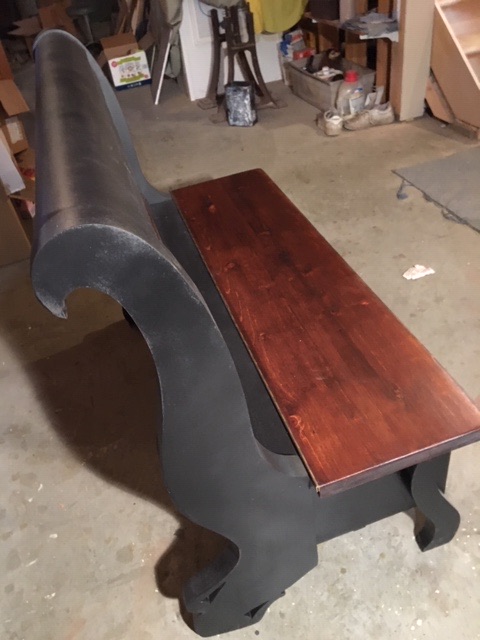
The front legs are salvaged 1 and 1/2 inch thick curved oak brackets. I think were from an old sideboard.
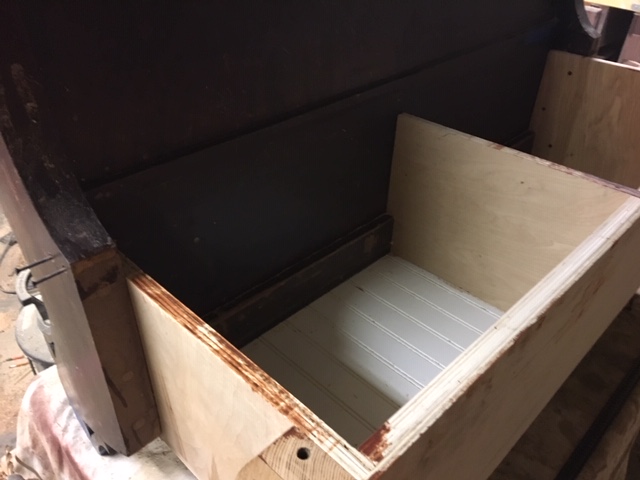
The bottom of the storage box was cut from a piece of leftover 1/4" bead board. After I nailed and glued it in place, I realized it was too flimsy. I added a strip of oak under it to provide additional support.
The seat hinge is heavy duty brass, leftover from one of my piano repurposing projects.
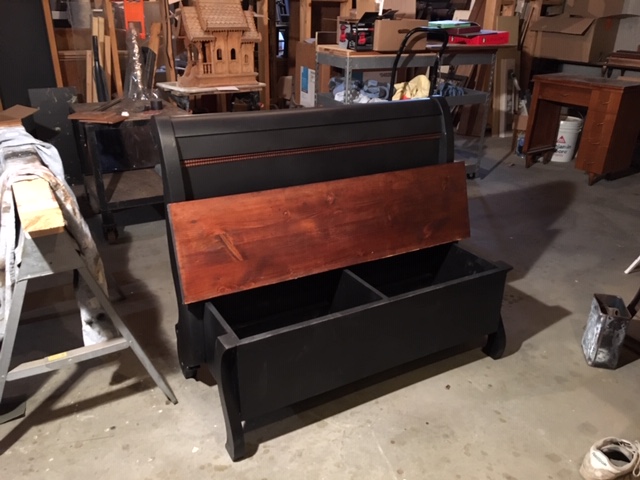
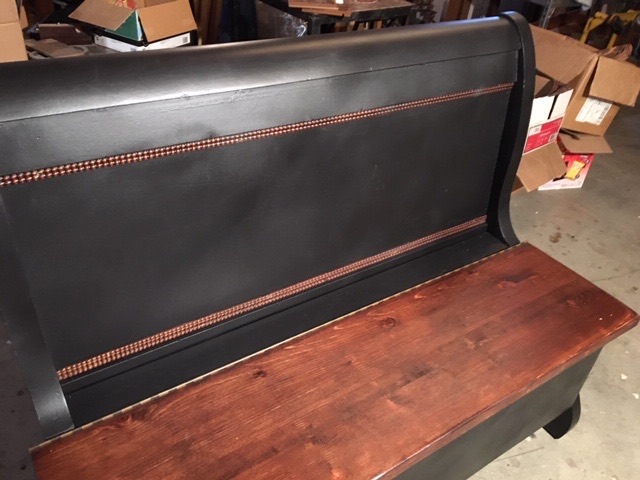
The bench seat is 1 and 1/2 inch thick pine. I think it came from a dining tabletop I cut down for use as a sofa table.
I initially stained the seat with some MinWax gunstock stain. It was way too red, so I darkened it, using alanine dye. It was finished with rub-on polyurethane varnish. I did a couple trim pieces to match.
The rest of the bench was prepared for painting by filling any defects or voids with two part auto body filler (Bondo) and sanding.
Painting was done using a technique I typically use:
- apply a coat of oil based rusty red primer using a chip brush and a small disposable foam roller;
- apply a coat of black oil base paint using a similar technique.
I don’t sand between the primer coat and the paint coat, but do sand slightly with 150 grit paper after applying both the primer and the paint. At this stage you have the option of:
- clear coating with a wipe on polyurethane varnish; or
- re-coating with a light overspray of black satin spray paint.
Method 1 yields a distressed/worn look with some of the exposed primer giving red accents.
Method 2 yields a pretty uniform finish, and since it is still pretty much black, the amount of spray painting required is greatly reduced.
For this bench I used method 2 and managed to use up a number of partially empty spray cans of paint.
Thanks for taking time to view this postings and all questions and comments are welcome.
John
UPDATE: 1/8/2020
I advertised and sold the bench on FaceBook's Marketplace to a very nice young women. Before I delivered it and at her direction I made some modification to accommodate a litter box for her cat.
Some people might respond with - "you got to be kidding me". I am a firm believer that when someone purchases or commissions a custom project, they should have it fit their needs and wants as closely as possible.
I removed the bottom from half (left side) of the bench. In hindsight, have the original divider was fortuitous.
Then I cut an opening in the side. The right side will be used to store cat supplies.
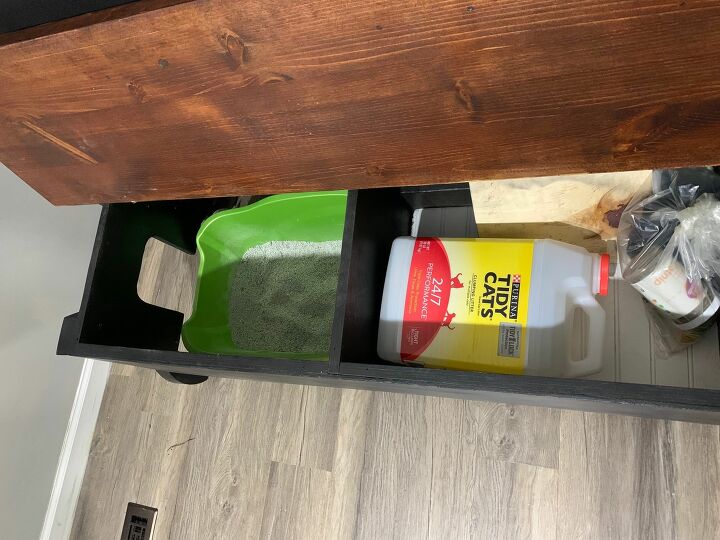
In use, the cat enters through the opening into the litter box which slides in/out/under the bench from the front.
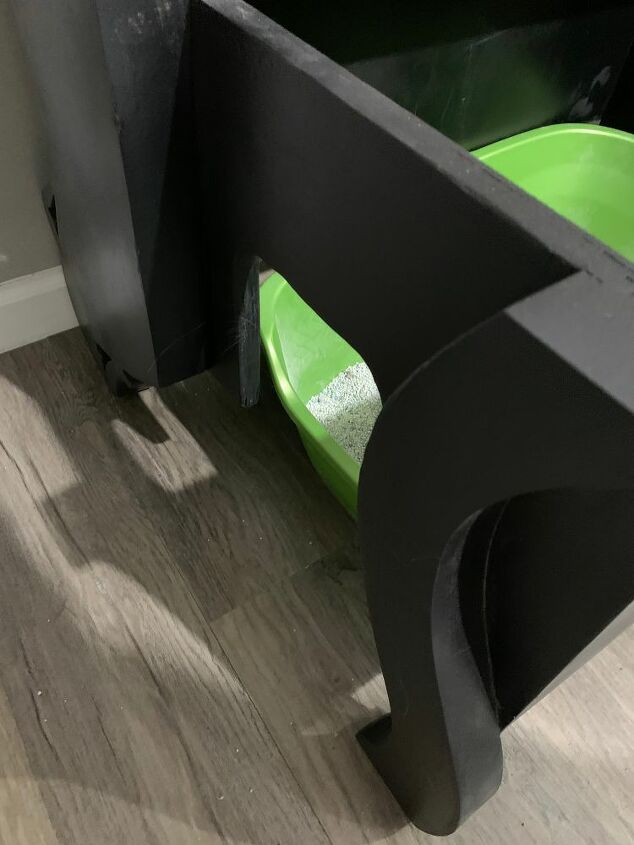
I also cut and painted s 1/4 " thick panel (not shown) that can cover the hole from the outside should the cat or it's owner decide to not have the litter box. With the bench close and the panel in place the bench appears like it hadn't been modified.
All is well.
Resources for this project:
See all materials


Comments
Join the conversation
-
Wow,!!! This is the BEST one of these I’ve seen!!
-
A lot of ingenuity and skill went into creating this and mercy....it is gorgeousssss!


Frequently asked questions
Have a question about this project?
The trim on the back of the new bench set the piece apart from any I have seen. Is this from the red paint or light stain or what?