


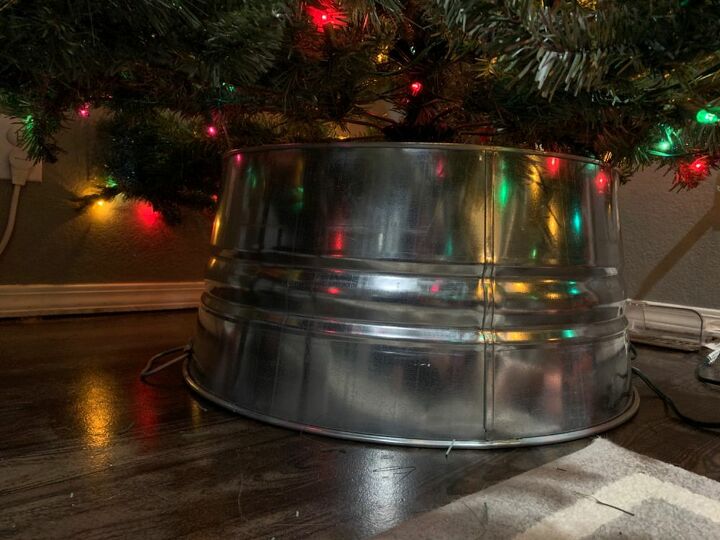
5-Minute Metal Tree Collar

I have seen galvanized tree collars for a few years and love the idea, but definitely wasn’t going to spend $60 for one! We were able to make our own for 1/3 of the cost. When I first saw the store tree collars, I thought “I can make that with a steel tub!” and got to looking up tutorials. Most of them have you cutting the entire base out, which works if that is what you want, but this is my faster, easier, less chance of getting cut version!
For this project, you only need a large steel tub, a hole saw (or alternatives mentioned below), and some tape (I used masking, but electrical or duct would also work well).
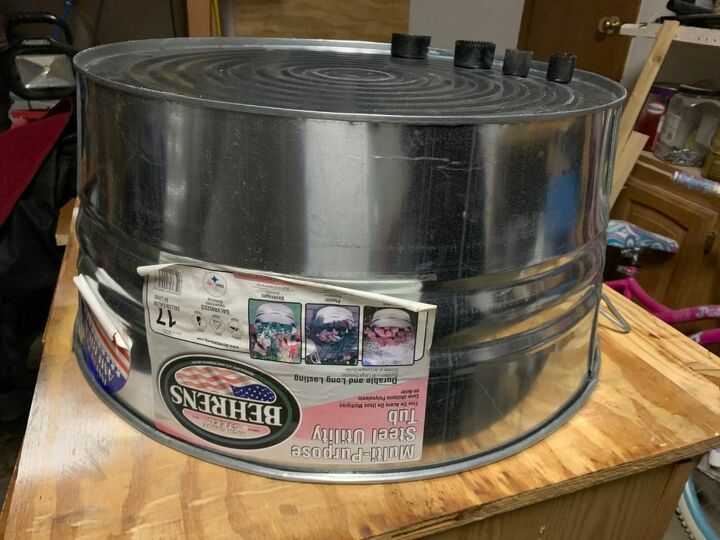
This 17 gallon steel tub from Home Depot ($21.97) was the perfect size. The gallons aren’t particularly important, but you want to make sure the diameter of the top of the bucket (which becomes the bottom of the collar) is wider than the base of your tree stand. It also should be shorter than the bottom of the base to the bottom of your first branches. (You can also use the collar to hide a small platform under the tree base and make the tree a little taller!)
If the measurements are close, I recommend test fitting the base BEFORE you cut anything so you can return the tub if necessary.
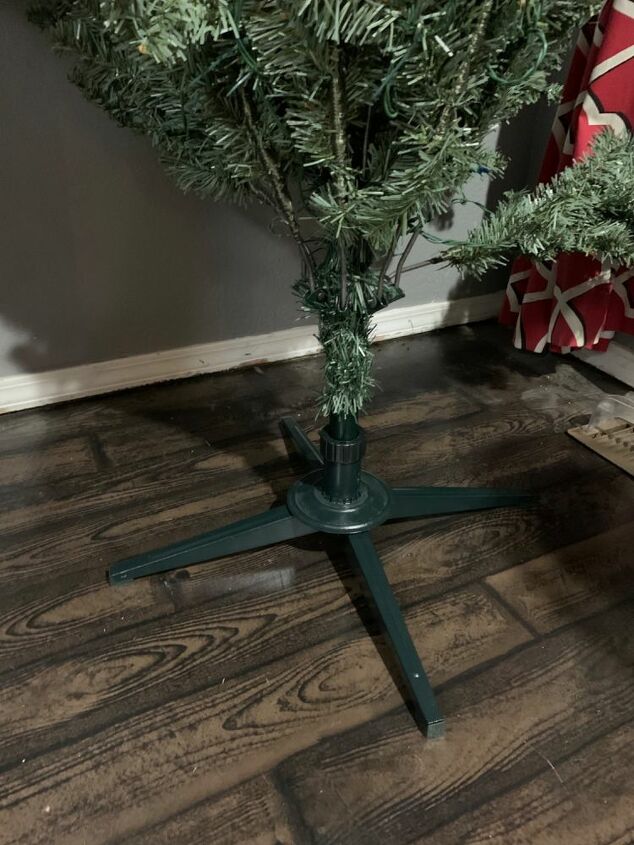
This is the base of our tree. In the past we have used a tree skirt, but the kids always seem to pull on it, and dog fur collects around the edges and is a pain to vacuum without sucking the skirt up with it.

Find the center of the tub.
This is what the bottom of ours looked like, so this step was super easy.
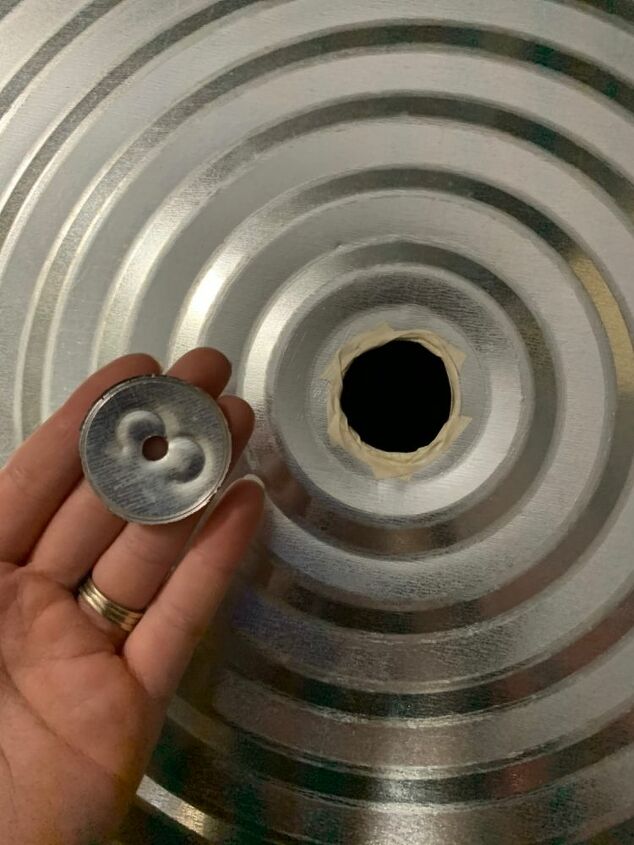
Measure the center pole that goes into the base, and using a hole saw, cut a hole slightly larger than the pole. I believe we used the 1 3/4” saw. If you don’t have a hole saw, you could certainly use a regular drill bit to start it and tin snips or a jigsaw to finish the circle. The hole saw is MUCH faster (and safer) though. (We bought our multi-size hole saw set for less than $10 and it has come in handy for several projects.)
Lightly sand the burrs off, then use some tape around the edges. The cut edge won’t be seen with the tree in place, so I wasn’t worried about how pretty it was.
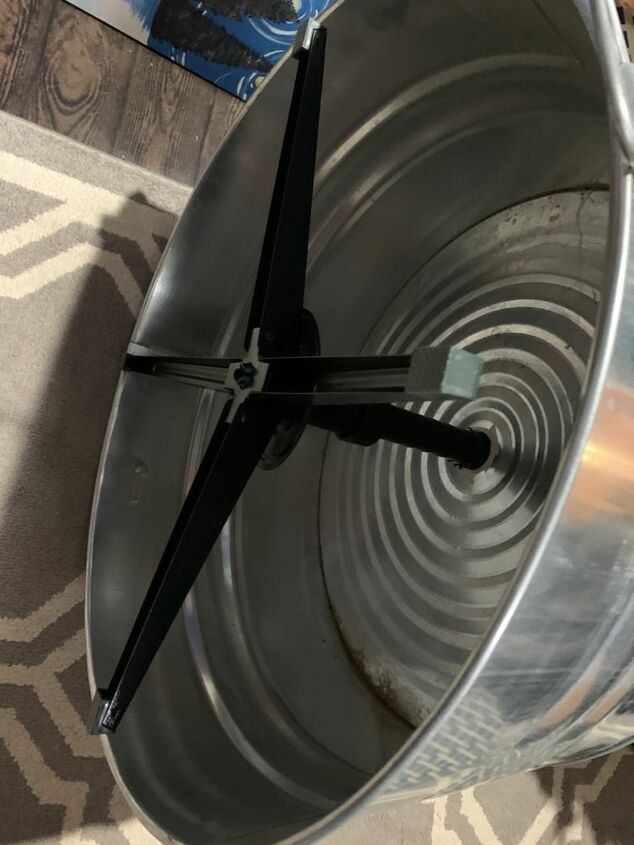
To set it up, with the bottom section of the tree laying on its side, slide the tub over the pole, attach and lock the base.
Stand it up and attach the other tree sections...

...and decorate as desired! It seriously took longer to clean up the tub than it did to cut the hole.
Also, with the hole being barely larger than the tree pole instead of the whole bottom cut out, I don’t have to worry about my kids getting fingers cut by the metal edge.
*If you prefer a more worn look, there are several tutorials online on how to “age” metal buckets”. I decided to leave mine (for now) with my silver decorations.


Comments
Join the conversation
-
I love this but would absolutely need to age that bucket. Vintage all the way for me! I have ornaments that I have purchased, at the time, from the 70s! I also have Shiny Brites from the 50s. This year I hung almost 400, not including the lights.
-
This is brilliant!!!


Frequently asked questions
Have a question about this project?
Love this idea, and had a crazy addition....... You know those little round pieces that pop out of the top of a 5 gallon paint can? This hole looks about that size... point being that if you could cut the hole that size, you could plug it up in case you need the tub during the year. Multi-purpose. Love your creation! Merry Christmas!
Looks great. Very ingenious. I don't live near a Home Depot,and have never seen tubes like this at Lowe's. I wonder how a galvanized tub from Tractor Supply would do? I guess it might just be a more rustic look.
Why couldn’t you just set the tree in the tub instead of cutting hole?