


Easy DIY Cement Christmas Ornaments
A Christmas DIY for making cement ornaments for your tree, in well under 2 hours.
Okay, so I really needed a super quick and easy project with all the craziness of the Holiday’s coming up, and I’m jam packed with upcoming projects. And this one truly is only five steps! So if there was ever a beginner cement project, it’s this one.
I had been toying around with all kinds of ideas on making cement ornaments.There’s really about a gazillion things you can do with cement at Christmas. This project was making me hungry though. Why? Because the cement looks like cookie dough. I LOVE cookie dough- any kind. I even prefer the dough to the cooked cookie.
Okay, moving on… There really wasn’t too much testing involved here and the simplicity really does make these ornaments a pleasure to make. In fact, you can make so many of these cement ornaments at the same time, that they can be used for great stocking stuffers or even host gifts too. Enjoy! And as always, if you have any questions, please ask me.

Step 1 | Mix Cement And White Pigment
If you love making things with concrete and cement, then come grab my free Pocket Guide To Concrete and Cement Crafting Mixes. I did a bunch of tests and the results were so interesting! 
First add the cement mix to the bowl. You’ll have to eye how much you need, based on how many ornaments you want to make, and what size cookie cutters you use. To give you a sense of scale, I used about 1 cup of cement and ended up with 20 ornaments.
Next add the white pigment to the dry cement mix (this is optional). I used about 2-3 rounded tablespoons of pigment for the 1 cup. Now mix the pigment in well with the dry cement.
Once it is blended evenly, add the cold water (make sure it’s cold so that you have enough time to work on this before the cement starts to set). The cement consistency should be like soft cookie dough.
Step 2 | Roll The Dough
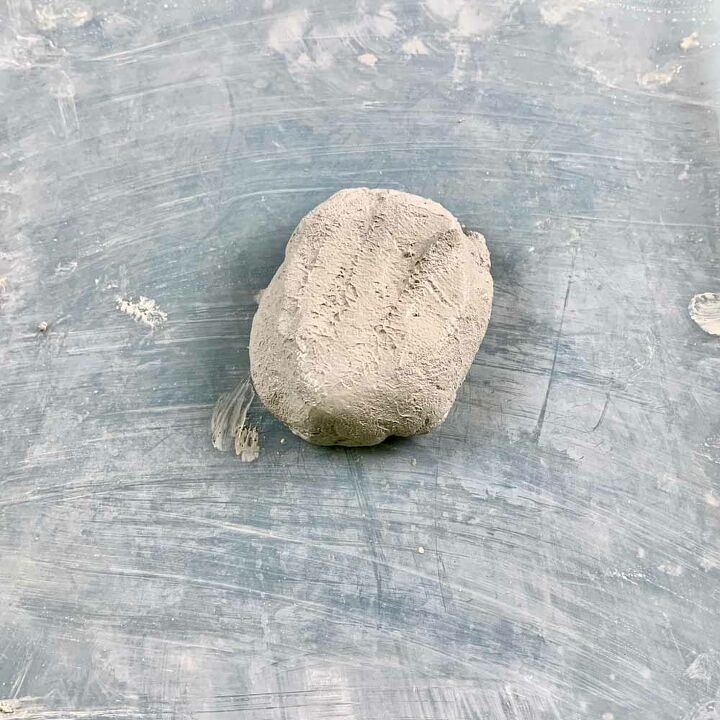
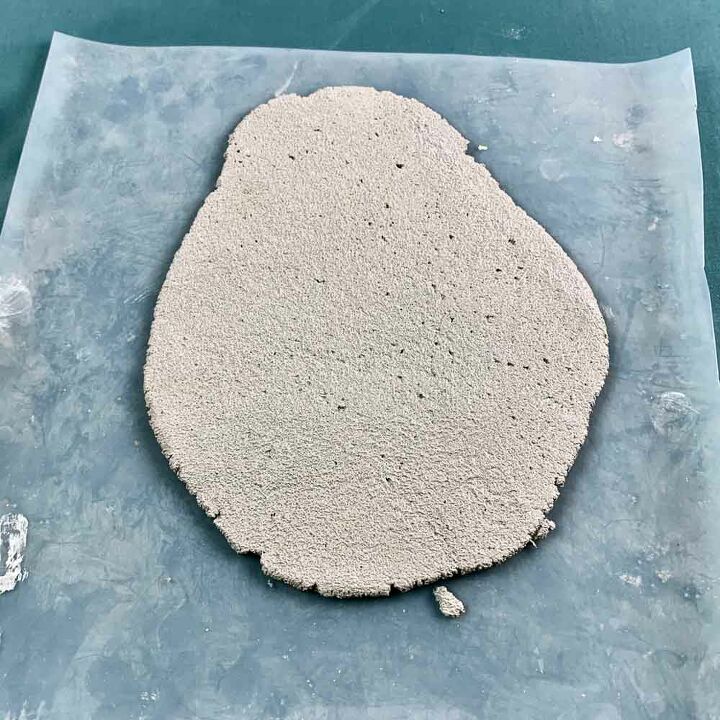
Yep, act like you are making Christmas cookies. So first form the cement into a ball and put it on your smooth, shiny worksurface. Now roll the ball to flatten it the same way you would cookies. I made the cement ornament less than ¼” thick.
You can make it thicker or thinner, but beware that the thicker you go, the more it will weigh down on the Christmas tree branches.
Step 3 | Cut The Cement Ornament
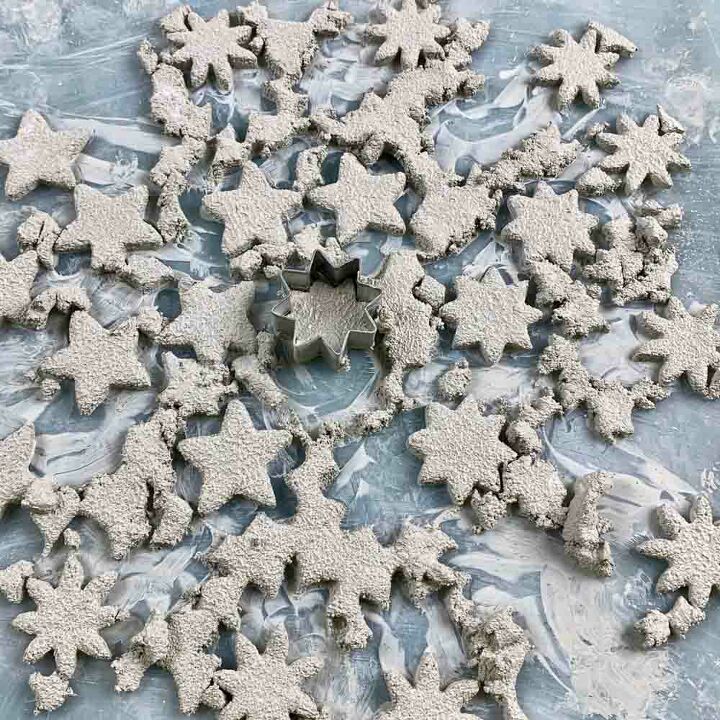
Starting from the edges, take the cutter and press it into the cement. Once you have pressed it in, keep it there and drag the cutter, with cement over to the side so that it is separated from the rest of the cement. You are doing this so they won’t stick together.
There will likely be bits and pieces that stick to some of the ornaments, so use the butter knife, craft stick or toothpick to push those pieces away. I used a work surface that was too small (12×12″) so my ornaments got a little congested.
Now take the toothpick and cut off the tapered end. Use the blunt end of the toothpick and push it through the top, center of the ornament. Since you are wrapping these with wire, you really don’t need to go toward the top very much, you really can create the hole to be more centered.
Let these cure for about an hour, though you can probably demold them in about 45 minutes- depending upon temperature/ humidity conditions, but if you want one side shiny, let them sit for over an hour to let the bottoms meld to get shiny and smooth.
Step 4 | Finish The Edges
Sand the cement burrs off the edges and in the corners. You also may want to rinse them off (not in a sink) to remove the powdery cement dust.
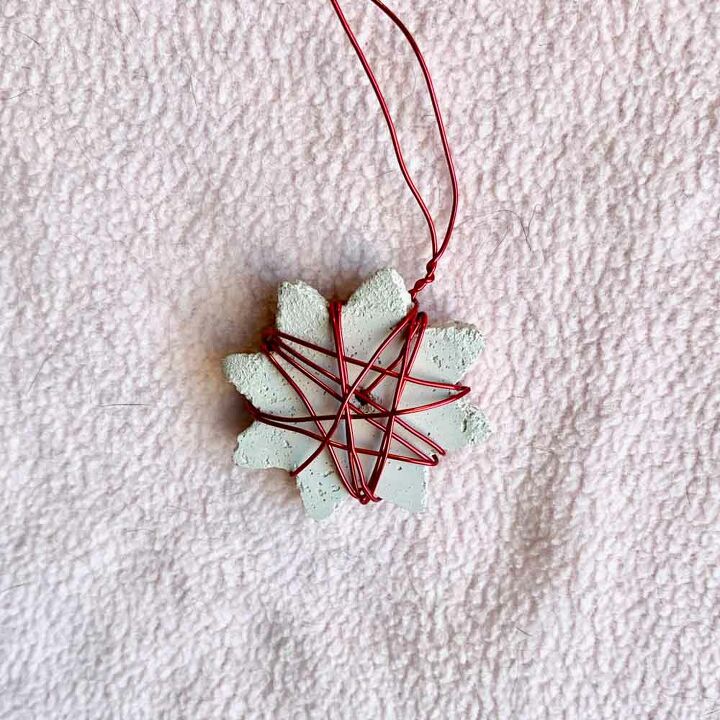
Step 5 | Secure The Wire To The DIY Cement Ornament
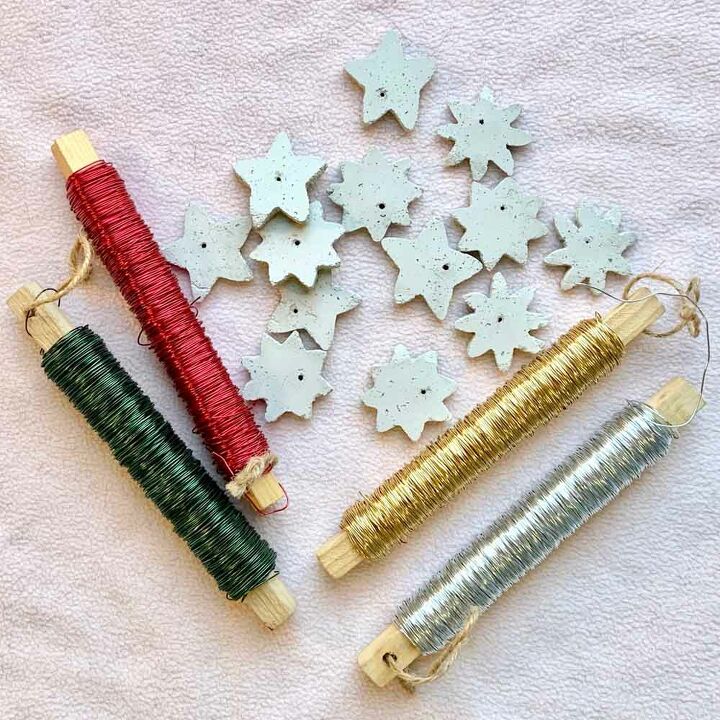
Start wrapping the wire around your white cement ornament.
First stick the wire through the white cement ornament and leave a short tail about 4″ long. This will be the length needed for hanging it on your Christmas tree.
If you love this tutorial and love making things with cement, then you should also check out my other Christmas decor and concrete/cement projects.
Next, start wrapping it around your white cement ornament.
After wrapping, make sure you finish by meeting back up with the wire at the top where the hole is. Now just make a few tight twists where the two wires meet the ornament and then a few loose twists and then curve the end into a hook shape.
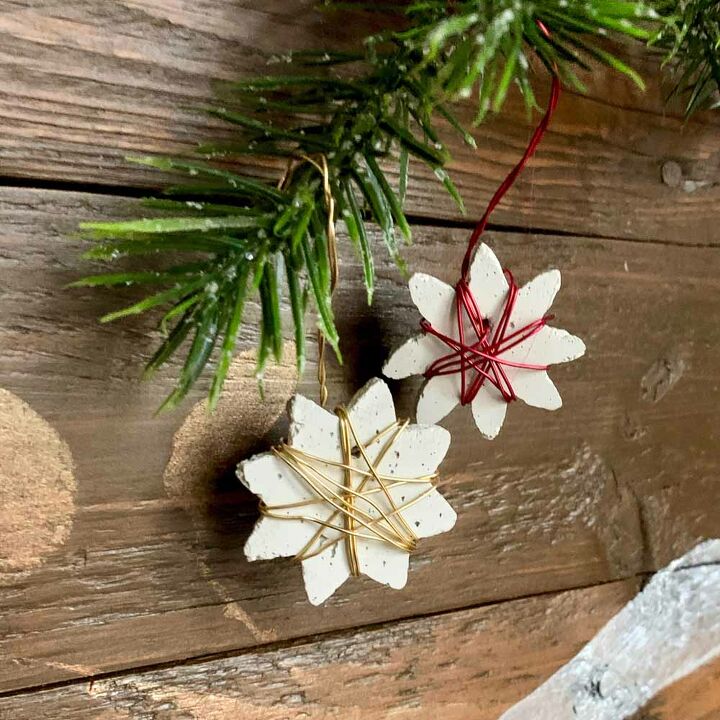
And now you can hang that cute little white cement ornament on the tree!
Resources for this project:
See all materials


Comments
Join the conversation
-
Gorgeous!
-
Thank you


Frequently asked questions
Have a question about this project?
Can you brush essential oil on the back and make it a fragrance ornament, and paint the fronts ?