How to Hydro Dip Ornaments to Create Keepsakes

For the past few months, I’ve been watching people on Instagram hydro dip items. I wanted to give it a try with something inexpensive. I’m not ready to try hydro dip some leather Nikes or a guitar shell but how about Christmas ornaments? I went out an bought tons of ornaments partially because I’m a klutz and broke a large quantity of my glass ornaments. Literally, I was holding an ornament admiring its beauty and just dropped it. I know people will ask and yes, plastic ones do work, but, I don’t think that they are quite as stunning as the glass ones but a good dupe. I had the idea of this as a fun cookie exchange activity. I would have all the ornaments hydro dipped ahead of time and then the guests get to embellish them with ribbons, paint pens or glitter glue. Then long after the cookies are gone, years from now, the guests will remember the cookie exchange when they see the handmade ornament. Or maybe a teen activity... Who do you think would enjoy this?
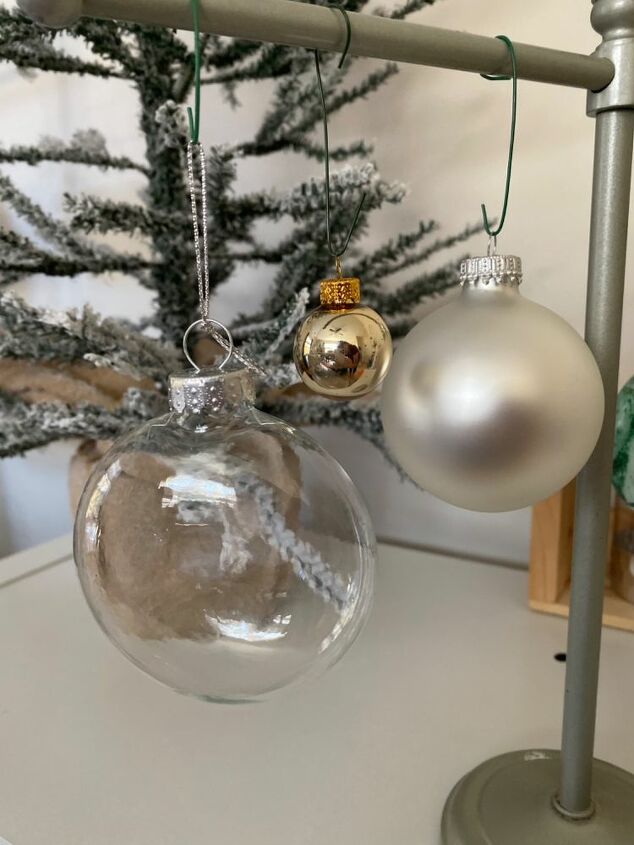
Here is a before shot of some of my ornaments. They are pretty but plain.
My cat, Shiloh, is always ready to help me with any project like tinting the clear ornaments with acrylic ink.
Supervising, to make sure it is evenly coated. I have done clear ornaments with watered down craft paint and so I wanted to compare acrylic inks to that. In my opinion, the inks will produce an opaque color.
After my ornaments were ready for dipping. I used some plastic containers about two-thirds full of water. The container should be slightly larger than your ornaments but not so large that you waste paint. It should be deep enough to completely submerge your ornament.
Next, spray a color onto to the surface. You can stop at one or use more colors.
So, I added two more colors here, a copper and then a teal or dark aqua. This will create an ornament with a beach feel.
Quickly plunge your ornament into and out of the water.
Before moving to the next color combo, I pour off the leftover paint into a bucket. I have a huge bag of kitty litter and I just add that and dispose of it like old paint. I guess different areas have rules on how to properly dispose of old paint.
I found a garment drying rack to be the easiest place to dry my ornaments.
This red and green one was my favorite!
I did a HometalkTV segment on the process, follow the link below for more details on hydro dipping ornaments.
https://www.hometalk.com/tv/craft/470/dip-your-ornaments-in-water-for-this-trick
If you’ve seen the ceramic tile ornaments floating around the internet, they work too. I used Posca Paints and Stickles glitter glue.
I think they would make a beautiful centerpiece placed in a clear glass bowl.
I found some of this paper garland in the Target Dollar Spot last year and it makes the perfect wreath for a place setting showcasing the handmade ornaments.
I added some ribbon to the tops and I think it added the perfect touch.
Who would you do this with? My 20 year old daughter spent an hour dipping all my leftover ornaments. I haven’t seen her so happy in a long time. Her creative juices were really flowing.
If when you dip your ornament there isn’t enough color, you can easily jazz them up with alcohol inks but most of mine came out perfect the first time. The one on the left was embellished with alcohol inks.
Would you try this? I think it is an especially fun activity that teens and tweens would enjoy.
I’m interested in trying hydro dipping film. I saw someone hydro dip leather Nikes and made just the swoosh, toe kick and maybe heel neon smiley faces. I would love to try that. Is anyone interested in seeing a tutorial on hydro dipping with films? I will probably use some inexpensive tennis shoes because, well, a lot could go wrong... right? 
I also hydro dipped some glitter covered ornaments. I kind of like them... what do you think?
And just for fun, I hydro dipped an outlet cover but I’ve used up my picture allotment for this tutorial. If you are interested is seeing what it looks like, let me know and I’ll post a pic in the comments.
Enjoyed the project?
Resources for this project:
See all materialsComments
Join the conversation
-
 Ruth Gilbert
on Dec 28, 2019
I will be using this idea with my event for a Red Hat group in Aug. I really love to keep everyone busy and talking. Of course I will experiment first, maybe several times before turning the Ladies loose with paints! Thanks for the inspiration!

-
-
 Mary Coakley
on Dec 17, 2021
Your ornaments are so pretty they have general appeal.will try them
-













Frequently asked questions
Have a question about this project?
When I tried this the ornaments came out with a gloppy(?) look with the paint, not smooth at all. Is there something I'm doing wrong? Thank you!!
They're beautiful. I'm a little confused though. I'm not a craft person at all so not familiar with the "tools of the trade." You mentioned acrylic craft paint but you also said you sprayed the different colors of paint on top of the water. Does that mean there is craft spray paint? Can you give us the brand of the paint you used? Thanks.
do you have to paint the inside of the ornament, or do you prepaint the outside? Do you have to do this process at all?