


Two Designer Christmas Tree Decorating Tricks

Learn two DIY tricks to create that designer look on your Christmas tree this year using paper snowflakes and ribbon but without the cost!
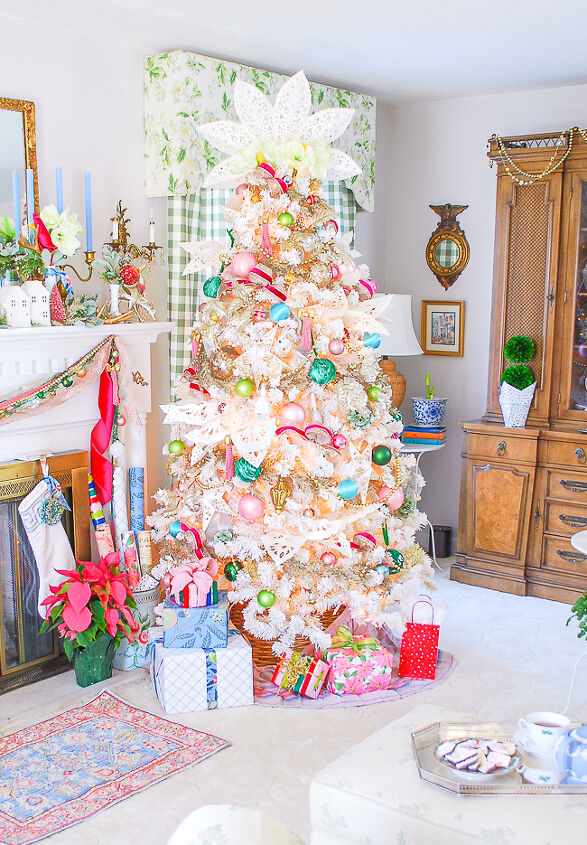
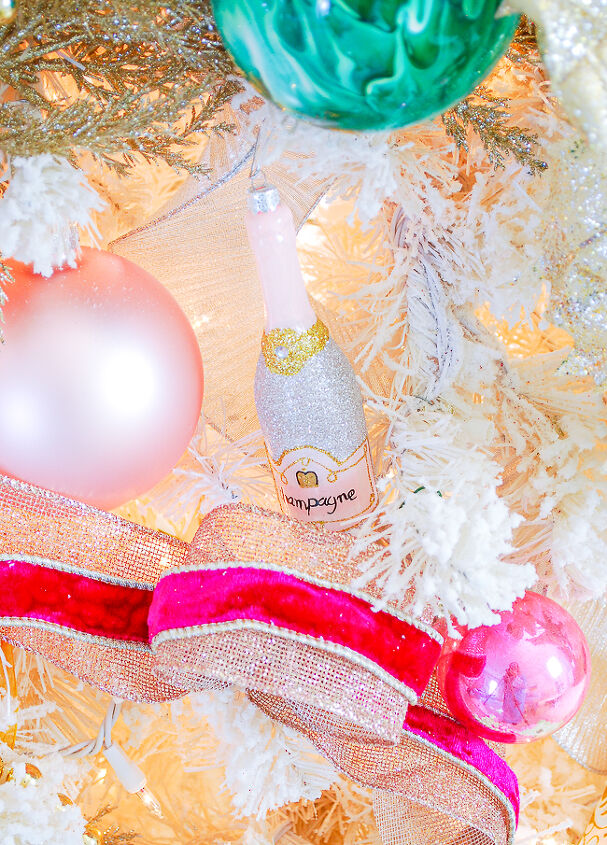
My Christmas decor this year is colorful and bright with oodles of pink. This is the first year I've decorated a faux white tree, and it was so much fun. I've even nicknamed my tree the chic and pink tree.
A well decorated Christmas tree involves layers - lots and lots of layers. The first layer, of course, are the lights. Next comes your garlands and any woven ribbon. These are really your foundation layers.
The second layer are the tree picks made from branches, florals, etc. that add sculptural interest to the tree. This is one of the most important elements designers use on their trees to really kick up the decoration.
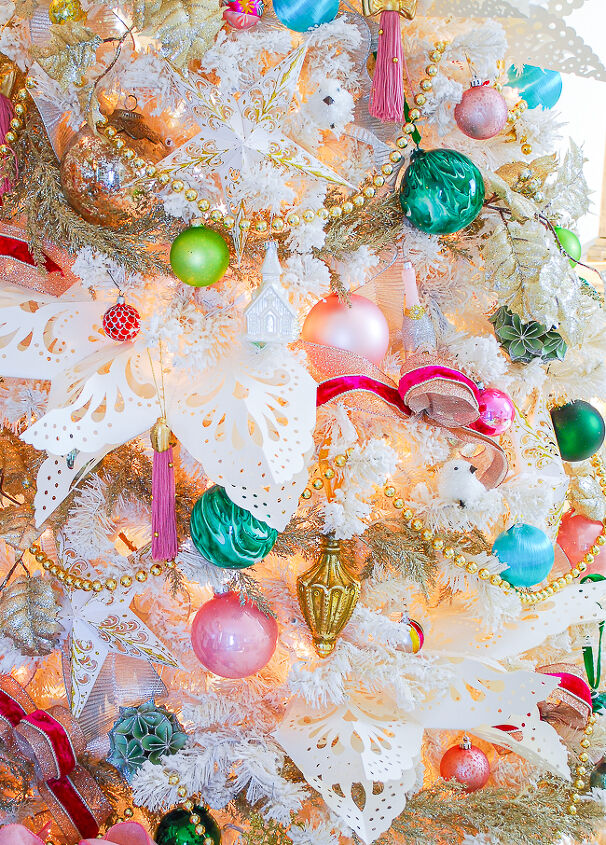
For my chic and pink tree these elements are the gold holly branches and these giant white paper snowflakes. The snowflakes catch the light and add that sculptural element to my Christmas tree that literally makes the tree look like it is exploding snowflakes! How fun is that!
To Make the Snowflake Picks:
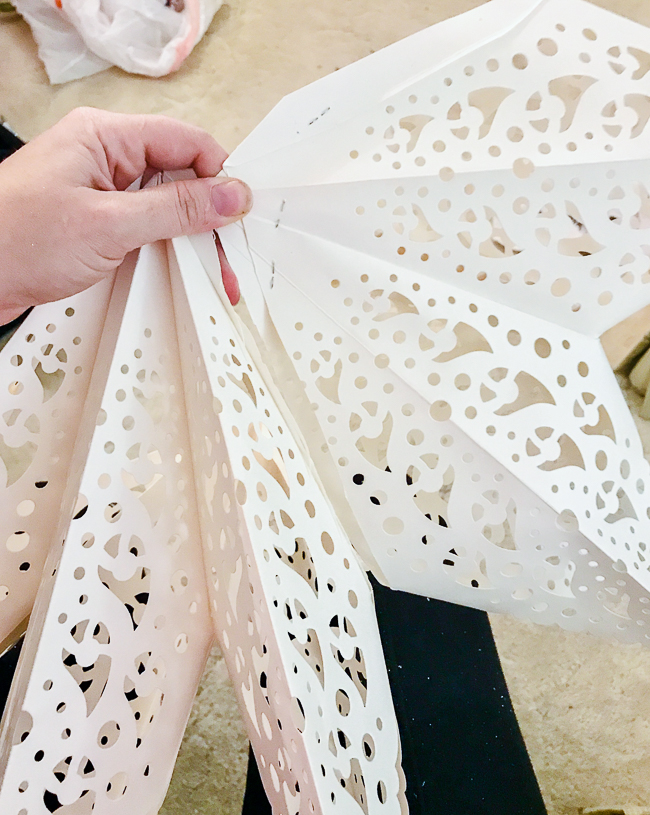
- Unfurl paper snowflakes and identify the number of points.
- Cut in between the seams of the points, leaving two or three points together.
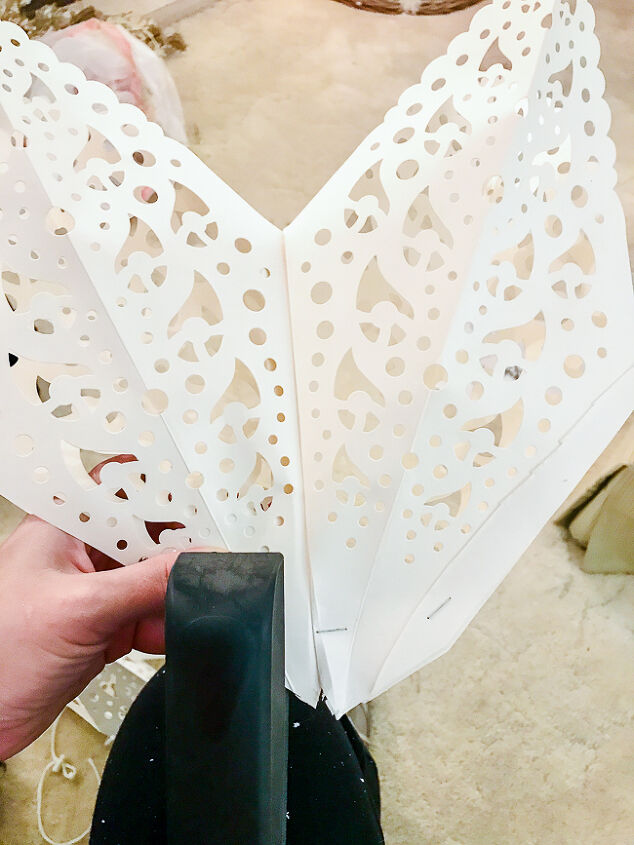
- Then staple the ends of the snowflake together, so that it holds its shape.
- Stick the stapled end between branches at an angle.
To decorate my 7 foot tree it took two large paper snowflakes.
The third main layer is all of the ornaments. Use a variety of shapes and sizes to add visual interest.
Finally, the last layer is your ribbon embellishments. To save on cost, forgo rolls and rolls of ribbon garland by making ribbon knot poufs.
To Make Ribbon Knot Poufs:
- Cut two foot long sections of ribbon. Angle or dovetail the ends.
- Pinch the middle of the ribbon section into a pouf.
- Wrap covered floral wire around that pinch to secure.
- Shape the pouf and curl or wave each tail.
- Stick the floral wire between branches or secure it on to a branch.
- Position ribbon knot poufs about every 2 - 3 feet apart around your Christmas tree.
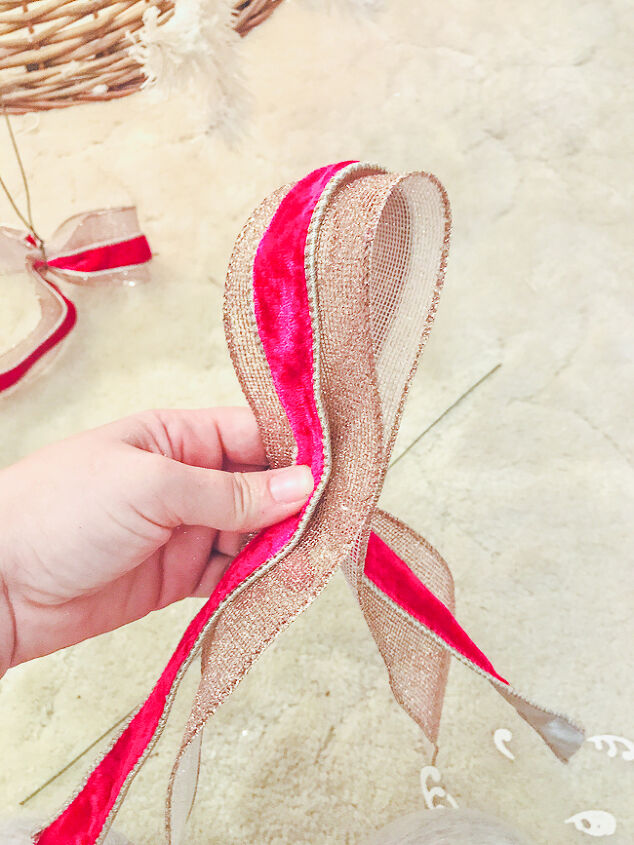

These ribbon poufs give you that expensive ribbon garland look with out the price tag.
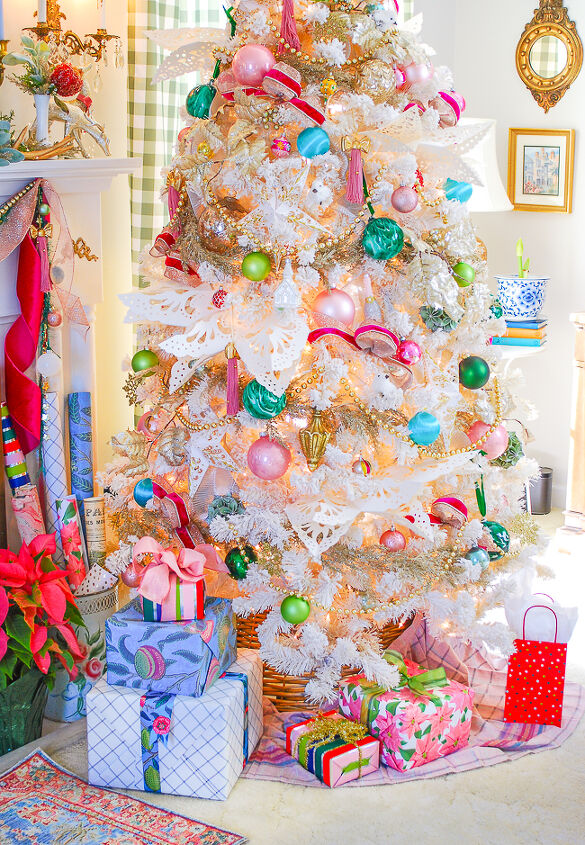
Just look how glorious this chic and pink white Christmas tree turned out!
These two DIY tricks: paper snowflake picks and ribbon knot poufs, will help you create that designer look on your Christmas tree but without the cost!
You can see all the photos of my white Christmas tree with shopping sources over on my blog - Pender & Peony.
Merry Christmas!
Resources for this project:
See all materials


Comments
Join the conversation
-
Stunning. Thank you for sharing!
-
Absolutely gorgeous...well done. You have definitely given me some inspiration. Thank you for sharing. Enjoy your Christmas. 🙂


Frequently asked questions
Have a question about this project?