


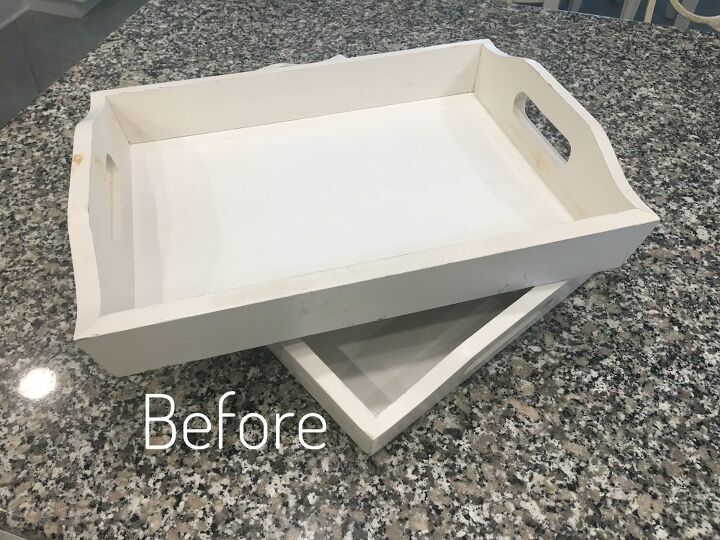
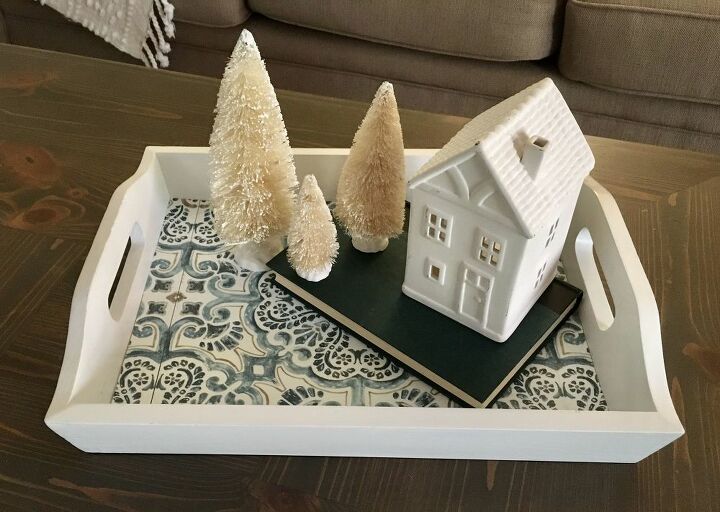
Thrift Store Tray Transforms From Ordinary to Extraordinary

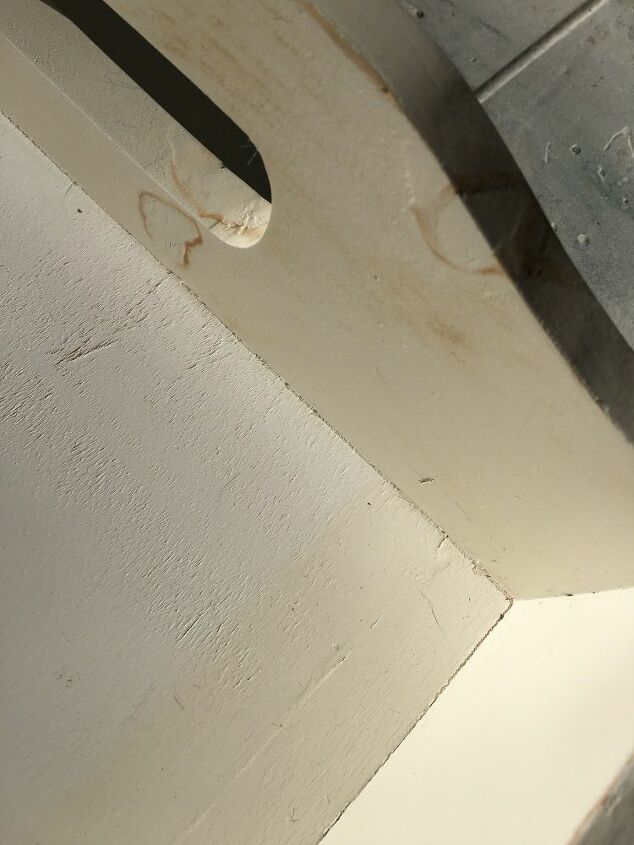
On one of my recent "treasure hunting expeditions", I found a set of trays at one of our local thrift stores for only $4.95. They were in great shape except for some paint bleed through. My mind started racing with ideas of how to give these simple trays some pizzazz.
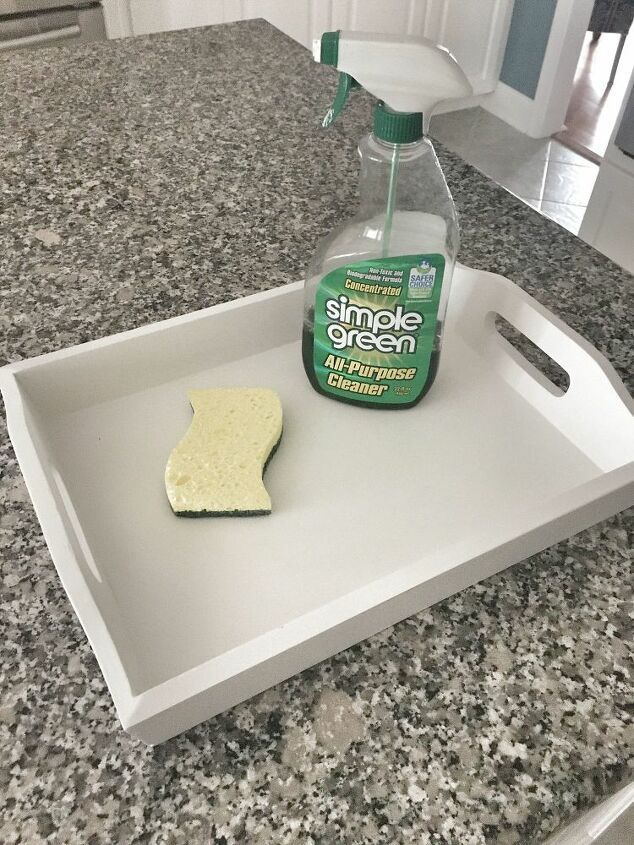
The first thing I had to do was clean the trays. I used a product called Simple Green. After I sprayed the surface, I used a damp sponge to wipe away the cleaner. I rinsed my sponge and wiped them down one more time to make sure I wasn't leaving any dirt or residue behind.
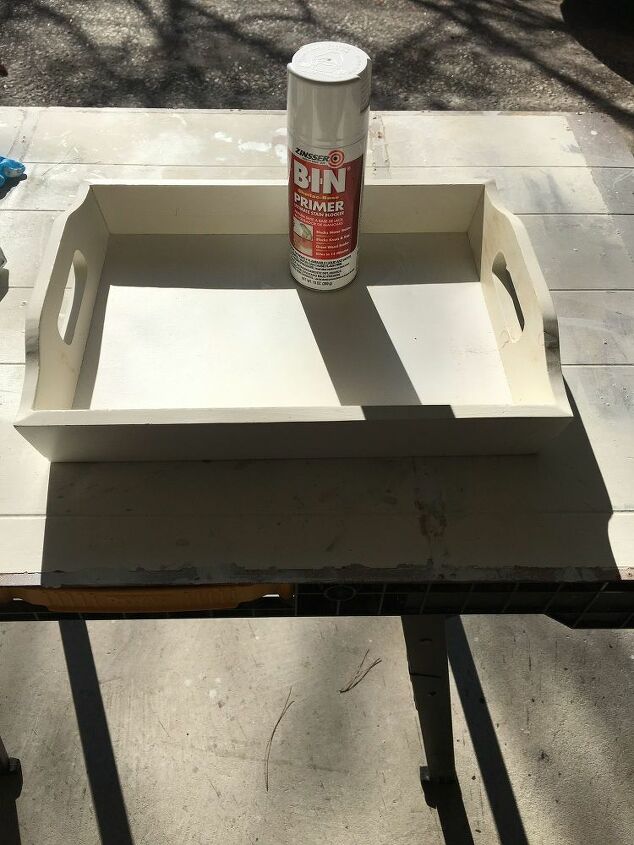
Then I had to take care of the paint bleed through. To tackle this problem, I used Zinsser Bin primer with shellac. You can find this in a spray or in a quart size can at your local hardware store. I chose the spray since there wasn't a large surface to cover. I let it dry about an hour in between coats. The spray primer tends to have a rough texture after it dries so I lightly sanded the trays using 220 grit sandpaper. This also takes care of any primer runs which may occur.
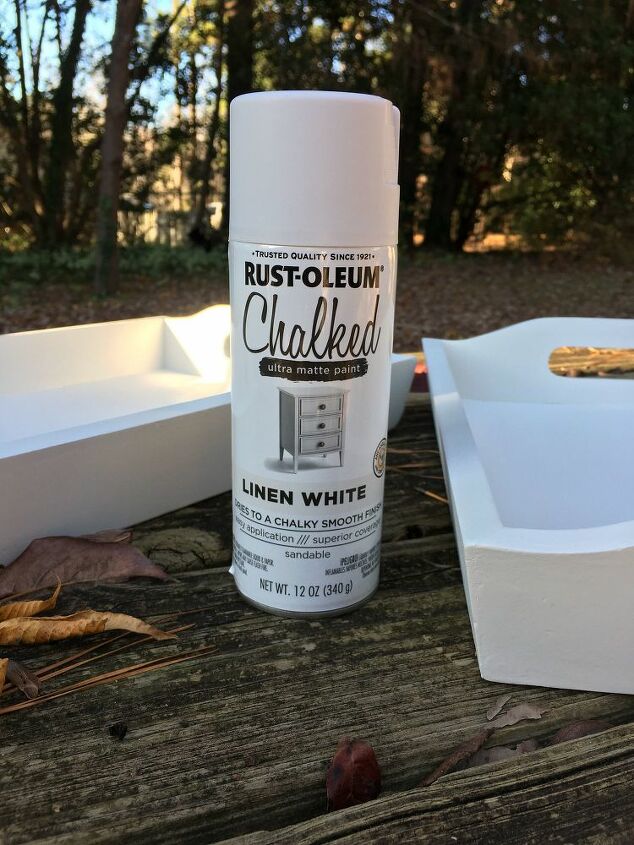
Next, it was time to paint. I chose to use Rust-O-Leum spray chalk paint in Linen White. I applied 3 coats for full coverage. I checked in between coats to make sure I had no paint runs. Once again you can sand them away with 220 grit sandpaper.
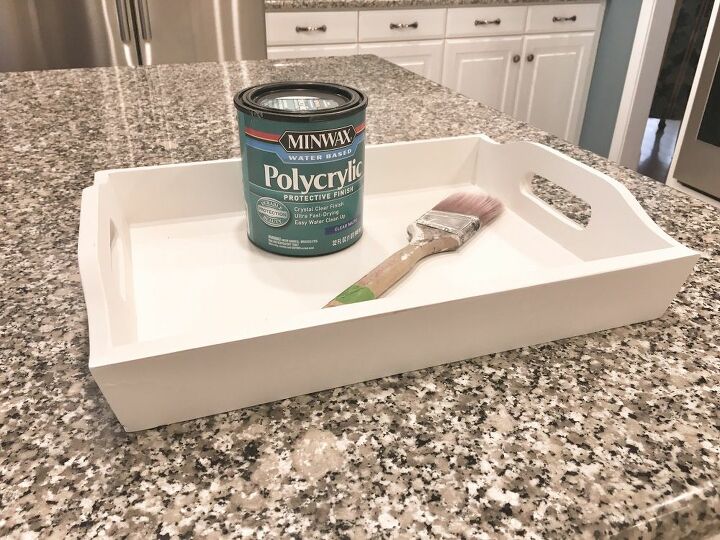
After the paint was thoroughly dry, I sealed the tray using Minwax Polycrylic in Matte Finish. I applied 2 thin layers with a brush waiting about an hour in between coats. (You can also use a sponge brush applicator.) I placed my brush in a plastic baggie between applying coats so the bristles would not dry or harden.
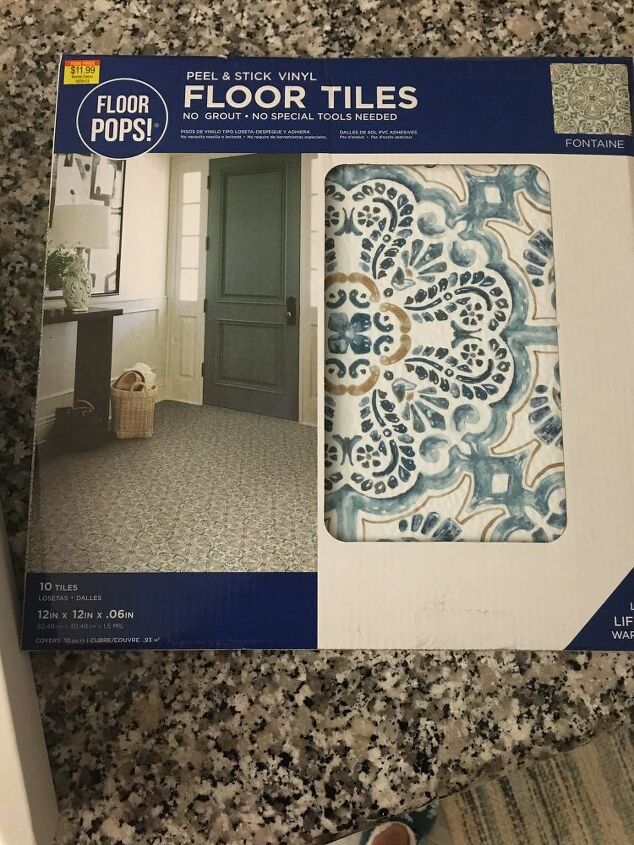
I love tiled trays and have searched for the perfect tile. I decided on not using porcelain or ceramic tile for 3 reasons. It would make the tray heavy, I would have to cut tiles and grout them, and cost. I have seen stick on tile in hardware stores but there was only one sheet per package and it was pricey. One day when I was shopping in Hobby Lobby, I found this beautiful vinyl stick on tile. There are 10 (12 x 12) sheets in the package for only $11.99! (This is one of their products you cannot use the 40% off coupon.)
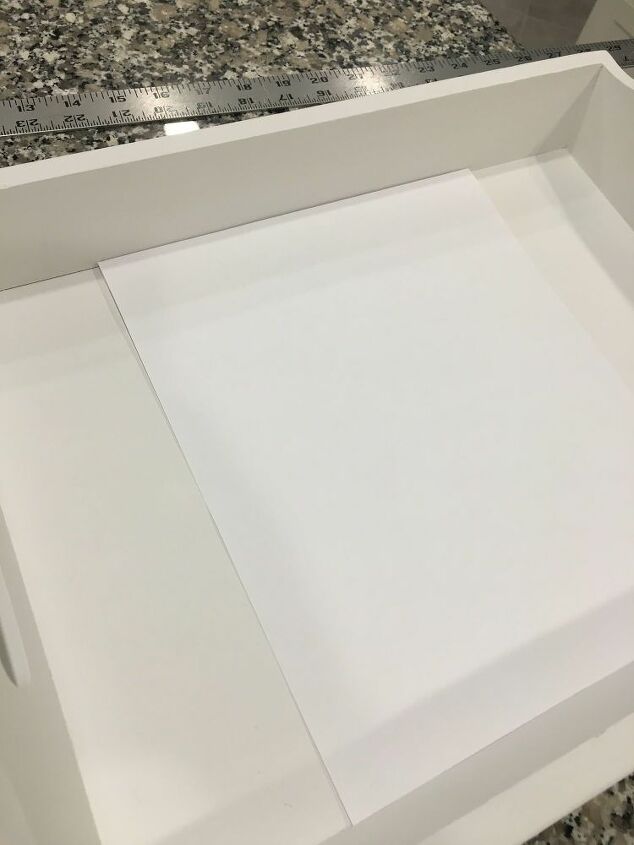
The tray bottom measured about 14" by 10 1/2" so I only needed 2 pieces of tile. I had to cut the middle tile on two sides to be centered and fit in the tray. Since the mouth of the tray was wider at the top, I laid a piece of copier paper in the bottom of the tray and folded it to fit. This was a guide for cutting the proper size.
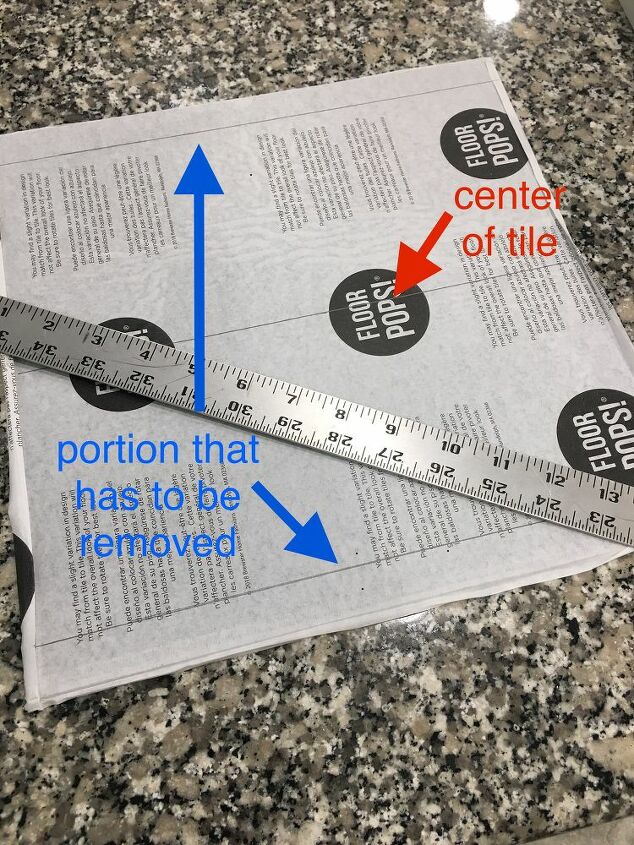
I used a yard stick to measure and mark the center of the tile and drew a pencil line across the back. I then found the center of the copier paper. I lined up both centers and marked how much I had to remove on both sides. Using a straight edge and Exacto Knife, I scored the cutting line until it was cut all the way through. (This was the center tile for the bottom of the tray.)
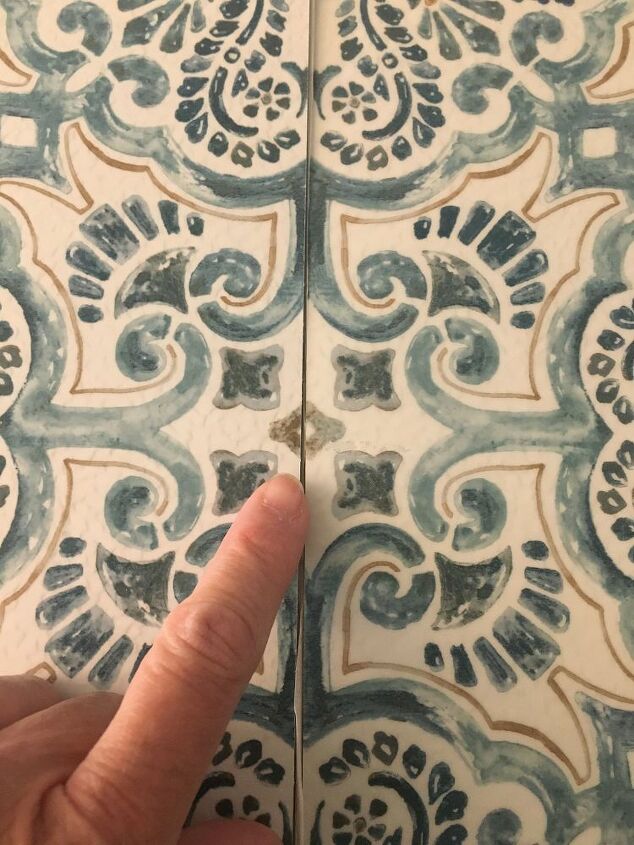
Then I had to cut a small portion of another tile to go on each side of my center tile. I had to match up the pattern and was able to use only one tile cutting from each side. Both pieces also had to be trimmed on the top and bottom to fill the tray.
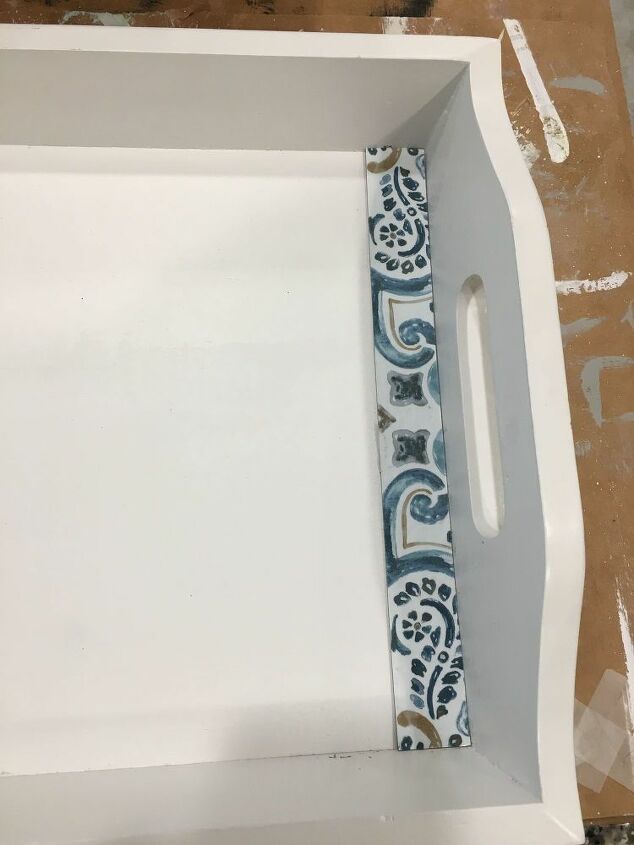
Before peeling off the backing paper, I laid the pieces in the tray to make sure they fit. I did have to trim a little bit on a couple pieces. I then peeled the backing off of one of the side pieces first and placed it in the tray. I made sure it was straight and fit into the corners. Next, I laid the center piece and then the other side piece.
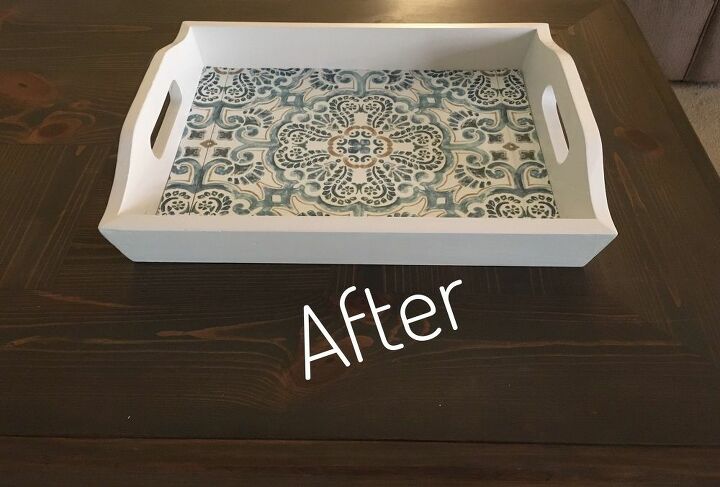
I LOVE the way this turned out! It is exactly the look I was going for. I have different plans for the other tray so check back later to see what I have in store for it.
Resources for this project:
See all materials


Comments
Join the conversation
-
I love it !!! I have a tray similar to yours and I have some stick on tiles may have to give this a try ...thanks for sharing ...Great Job
-
Looks great+


Frequently asked questions
Have a question about this project?
Does it need a sealer of some kind ?
I love the relative simplicity of the project. I might even tackle it myself, as I have a few packets of stick on wall tiles that I haven't used. Just need to go to Bunnings (large hardware chain), to find a tray. Is there any particular reason you use the Rust-O-Leum chalk paint? Or was it just preference for appearance? And why did you use the Mini-Wax. Thanks. Gabrielle (from Sydney, Australia).