


Hexagon Shelf/Planter

6 Materials
$20
1 Hour
Medium
Okay! I know it’s been way too long since my last post! It’s crafty season, I had a winter festival that was a total flop earlier this month and have started working on projects for my wedding that is approaching rapidly! This is the first wedding DIY I “completed”, I say it that way because this was the mock up, I still have a dozen or so still to finish.... I have 3 or 4 other projects going right now all in different stages, that I plan on also sharing. Anyone else have that DIY ADD, that makes you start a new project while you wait on paint to dry, or glue to set, or whatever causes the wait within the DIY, then you find yourself overwhelmed and running out of space to finish your many chaotic ramblings? No? That’s just me?! Okay...moving on! I’m trying not to disclosed too many details of how this little guy will be used on my big day! But afterwards I’m planning on using them as photo and plant ledges on the big blank wall in the master bedroom! Or you could use it as a planter if you add a bottom! Oh the possibilities!
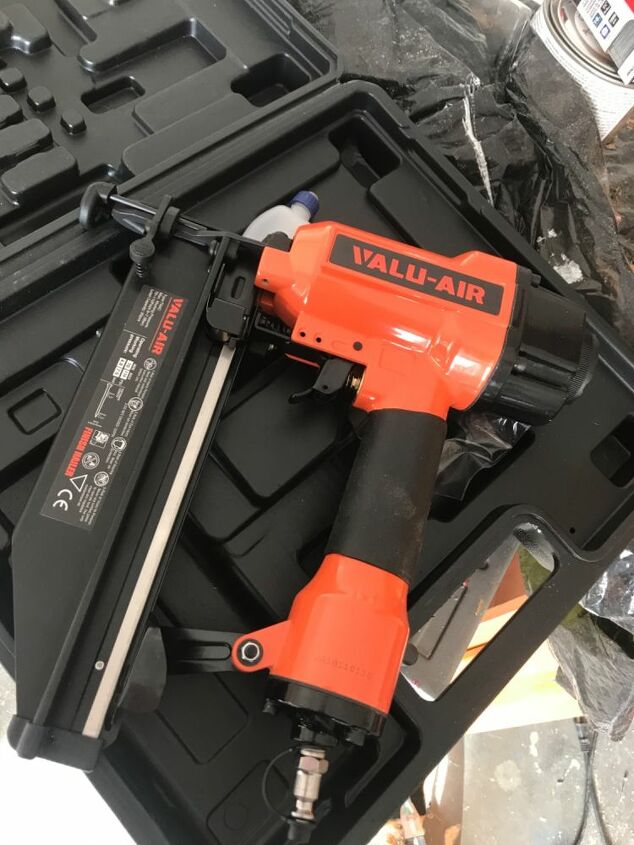
I want to start off by saying thanks to my friends at Hometalk for this little guy! Literally a lifesaver with this project, my old faithful electric brad nailer kicked the bucket, and this guy puts it to shame anyway! Can hold up to a 2 inch 16 gauge Brad, and is so light weight! I’m in love! Haha! Okay! On to wha you will need for this build!
- 1x pine lumber, I used 1x4 but if you want a deeper shelf or taller planter choose your desired width
- miter saw
- wood glue
- Brad nailer or a hammer and nails would work, or screw(that’s how I was going to do it until I got this nail gun!)
- wood stain of choice
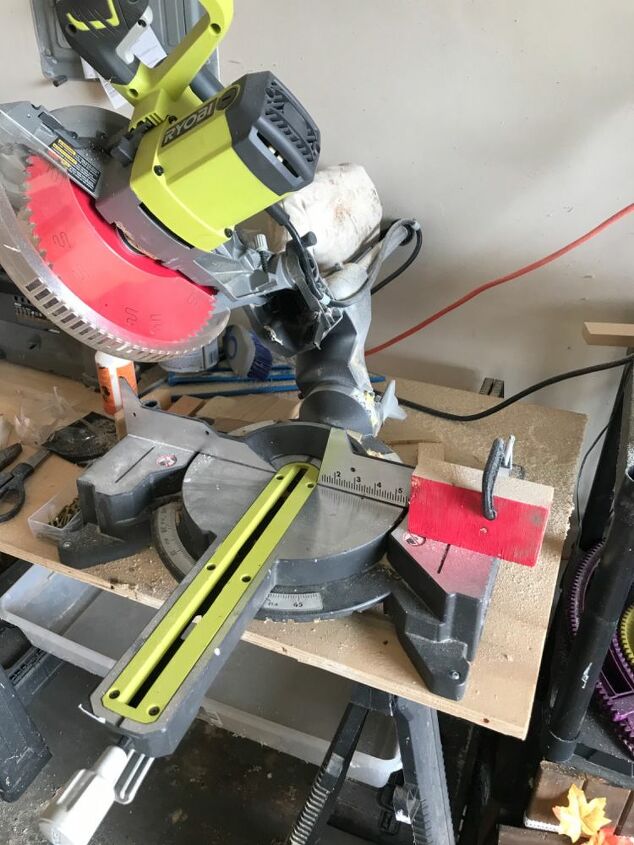
I cut each side at 6 inches, I set up a stop block to avoid having to measure each cut! Huge time saver! I used a spare block of wood and clamped it to the saw where I wanted each length to stop. I set the bevel at 30 degrees, you want the bevels opposite so there is a short and long side, flip the board over each time you cut to make it easy!
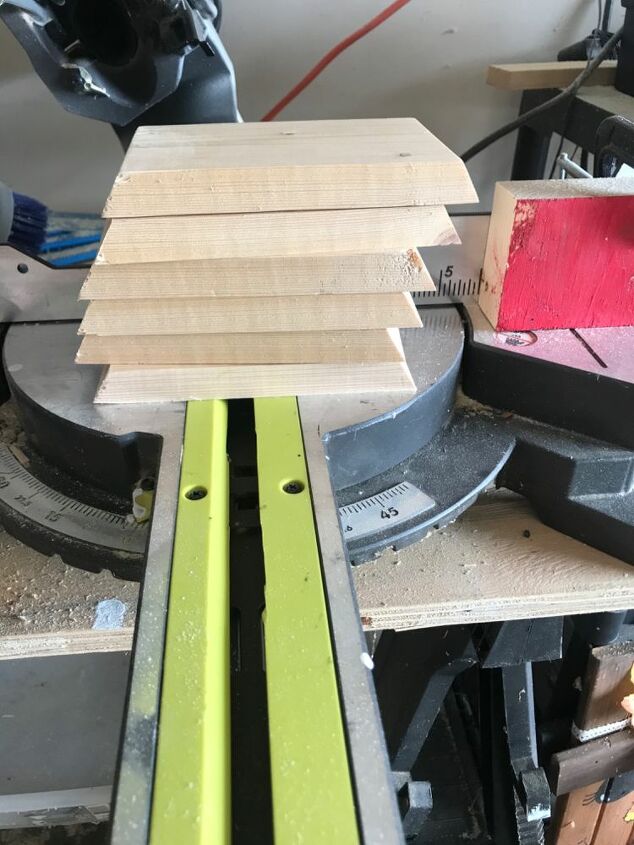
This is what they should look like, the long side is 6 inches! You will need 6 per hexagon... haha! Geometry, one of those subjects I never thought I would use!
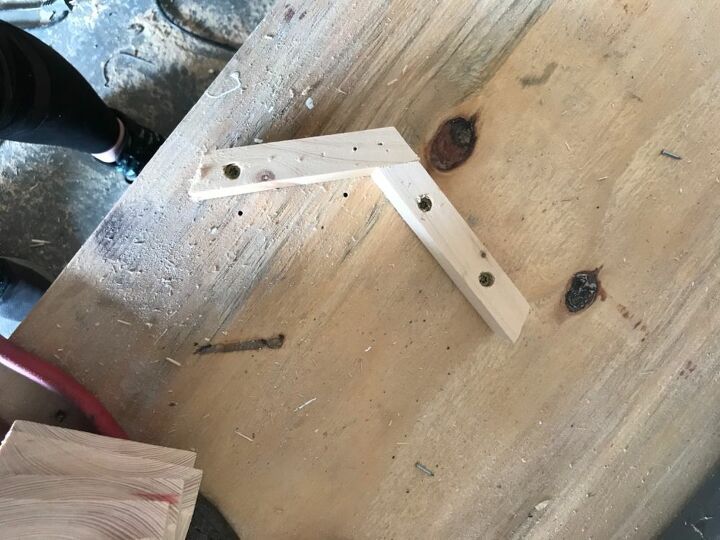
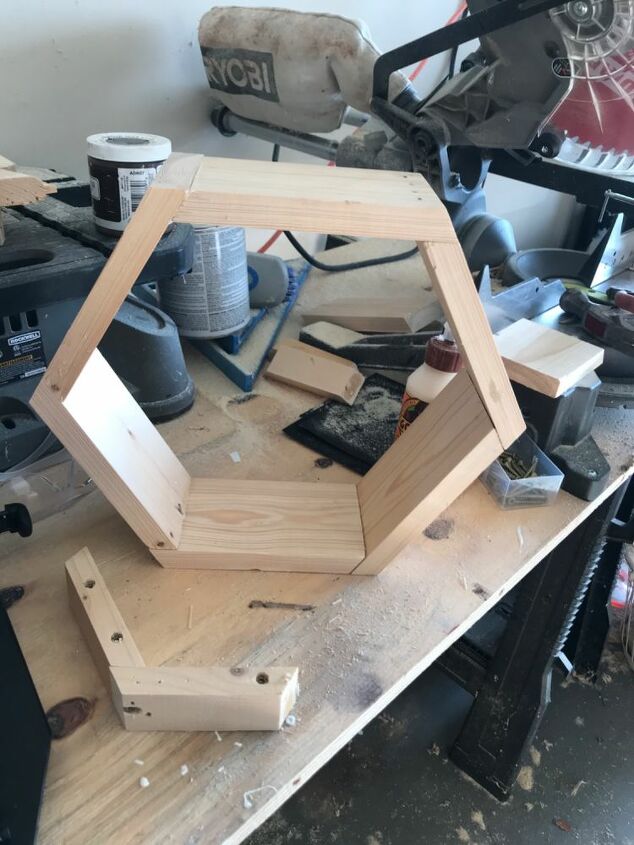
I cut a scrap piece of 1x2 to make myself a little jig to help hold everything together while I glued and nailed everything together!
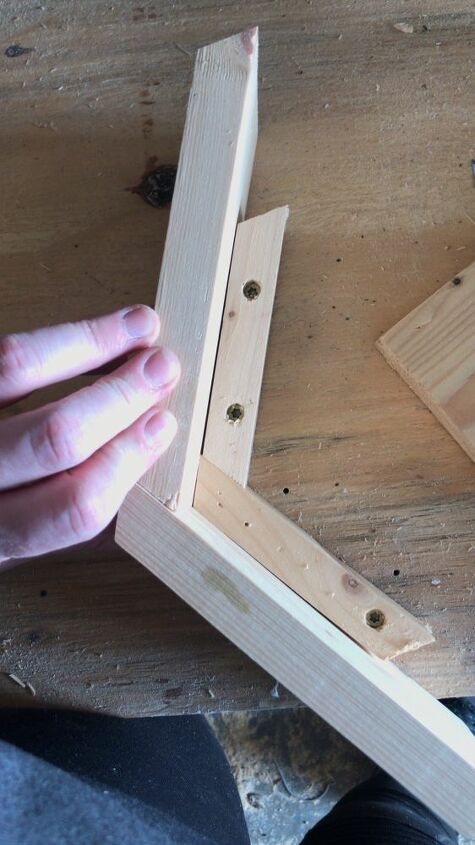
So nice! Like having an extra set of hands!!!
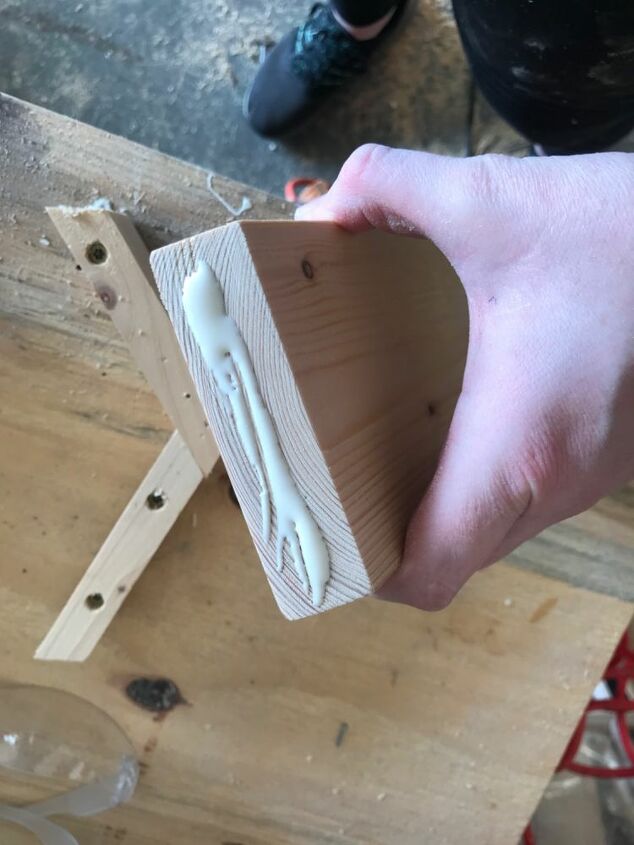
I used wood glue and nails! I put a generous amount of each piece before I butt them together.
I lined up my angles this way to add a little more visual interest, and to make assembly much easier, honestly. If you know me at all, you know I avoid angled cuts at all cost! So these are very ambitious for me! And having to make multiples of these.... shew! At lease the end result will be worth it!
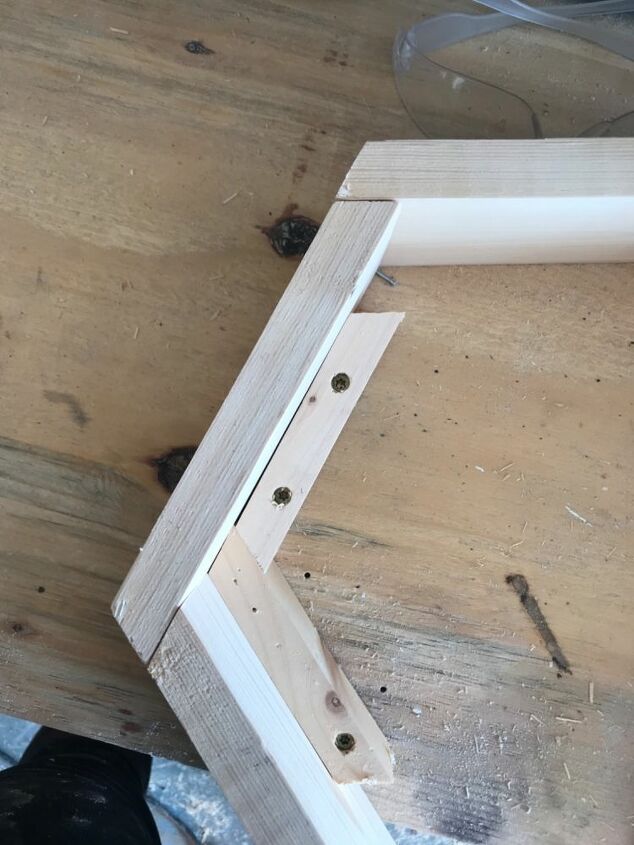
Nailed end! Spacing and alignment is less than perfect, but my wedding is in a barn... so it kinda works!
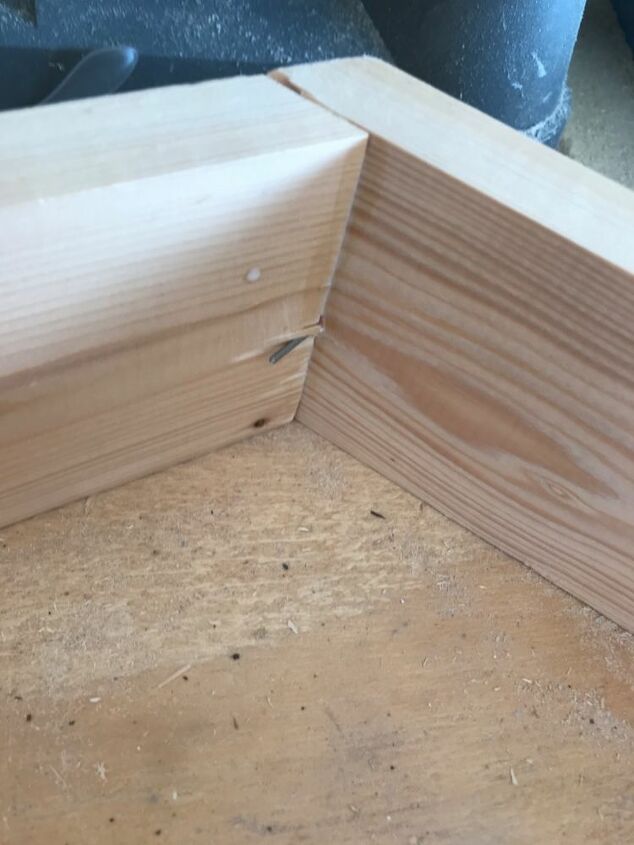
Yikes!!!! Gotta share my fails too, we are all human after all! I ended up cutting this nail off with a pair or a tin snips and after it was stained you can’t even notice!
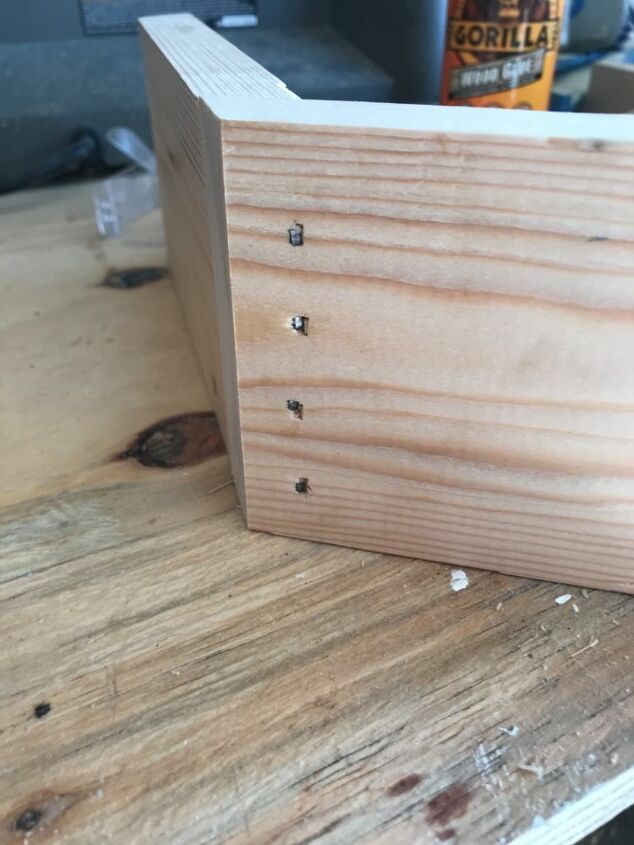
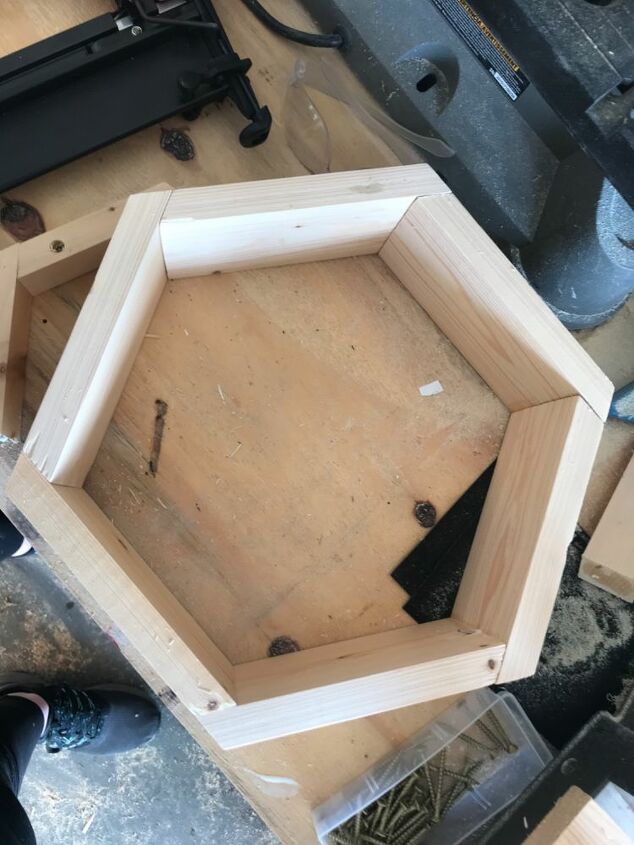
Y’all! I’m obsessed! It stands on its own! The angles aren’t perfect, probably part due to the fact this was a scrap board that was slightly warped, but was a good trial for the real deal! And I probably will still use it, honestly!
Here she is laying down! These would be cute in a garden too! Add a bottom and little legs! Oh my the ideas I have for the wedding leftovers!
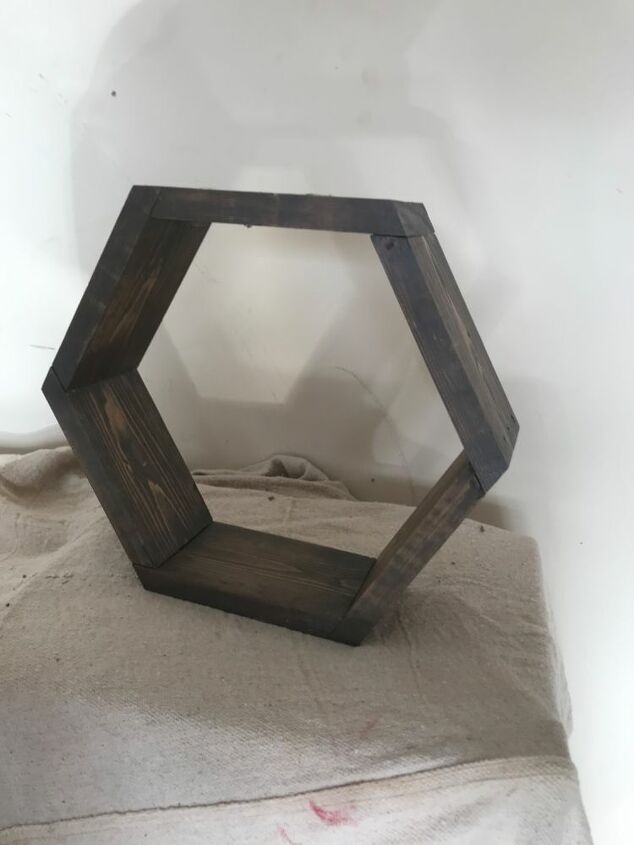
And the stain! I used briarsmoke by varathayne. I may also use weathered grey and Carrington to add some variety, I haven’t decided yet! What do y’all think? How will you use them in your home? Stay tuned for more wedding DIYs! Though, I will say, I’m going to leave you hanging a little bit as to how some of these items will be used so my wedding still has a little bit of a surprise factor! You know?! Hehe! Would love your wood working tips and trick too! I’m learning as I go and I know I have a lot to learn! Thanks for stopping by!
Resources for this project:
See all materials


Any price and availability information displayed on [relevant Amazon Site(s), as applicable] at the time of purchase will apply to the purchase of this product.
Hometalk may collect a small share of sales from the links on this page.More info
Comments
Join the conversation
3 of 7 comments
-
Great idea!

-
The moment that I see a huge power tool, I'm tapping out. ...nice end result, tho.


Frequently asked questions
Have a question about this project?