


DIY Laptop Tray
19 Materials
$15
4 Hours
Easy
Here's how I made some personalised DIY laptop trays for me and family members.Full tutorial here, including how to make additional copies quicker: https://thecarpentersdaughter.co.uk/woodworking/diy-lap-desk/
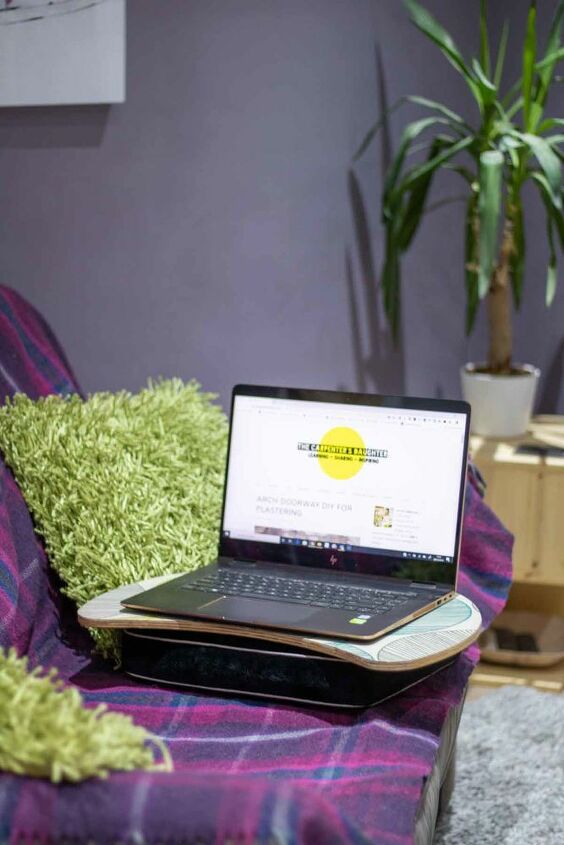
Here's my personalised DIY laptop tray (AKA lap desk tray). It's made of 12mm plywood, decorated with a flat and smooth wallpaper of my choice and sealed with hardcoat mod podge.For the base, I sewed some velcro on to a ready made super comfy memory foam cushion.
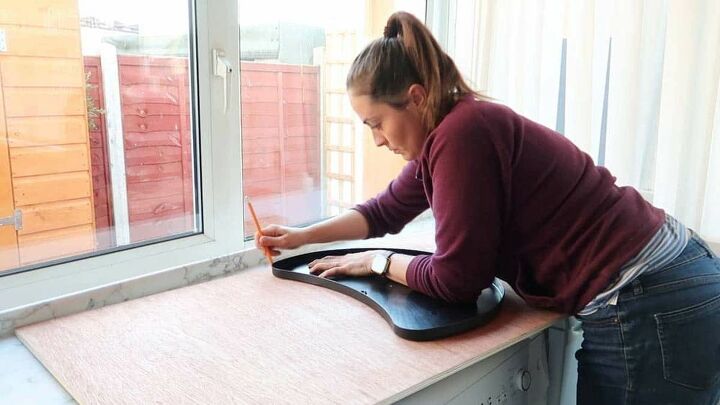
First, I drew around a shape I liked for my lap desk. Above, I'm cheating by copying my old IKEA Byllan one, but you can create any shape you like.
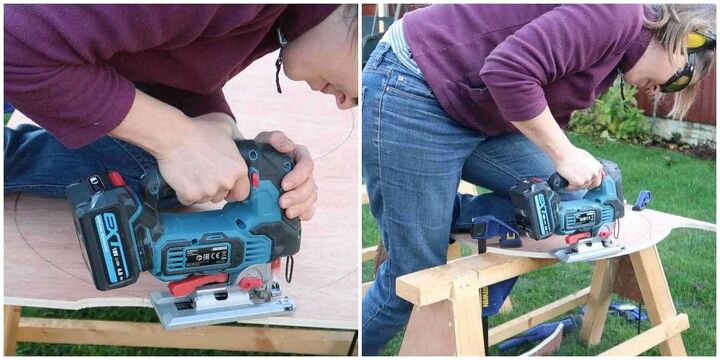
Then I cut it as carefully and slowly as possible with my jigsaw. You should wear eye and ear protection for this.
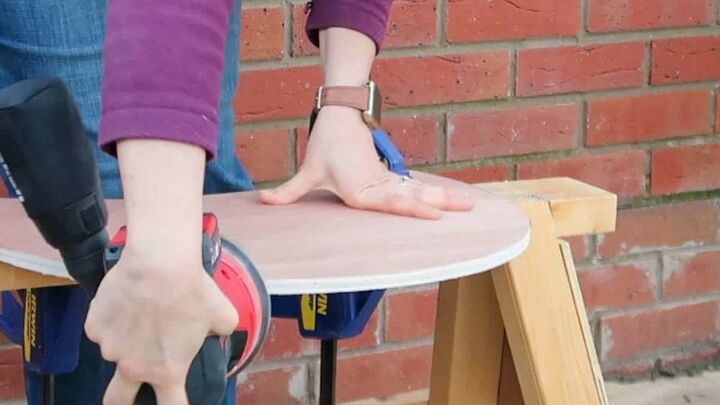
Now sand your cut shape until you're happy with it. Note, I've also clamped it on a sawhorse to prevent it from moving about while I work.
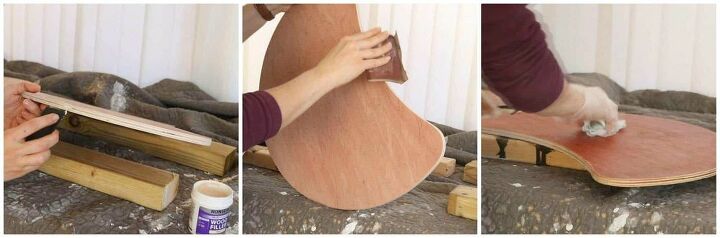
If needed, now's the time to fill any chips or dents in the wood and leave to dry. Remember, when wallpapering, you want to cover a sound surface, otherwise it is likely to damage over time.Then sand over again and treat the side you're not covering with a Danish oil. For this, I applied with a lint free cloth and left to dry.
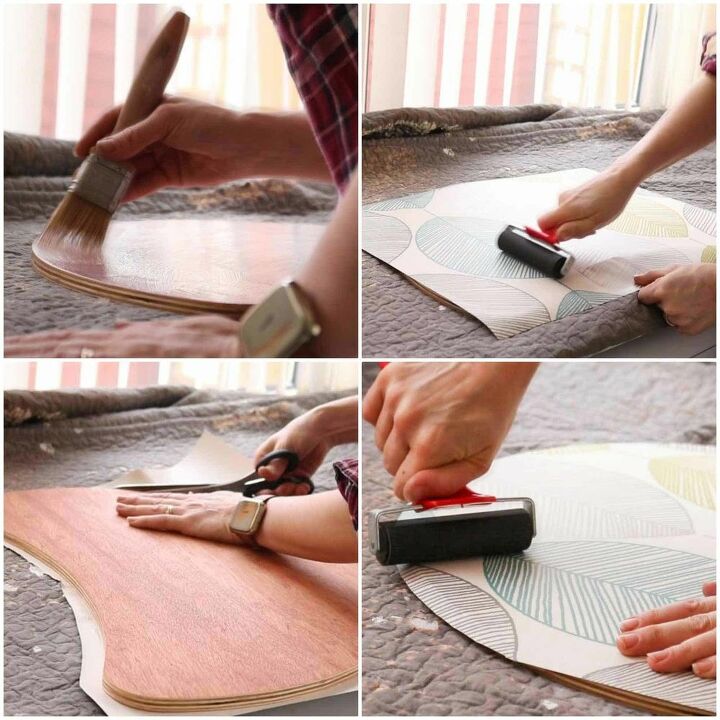
After cutting out my wallpaper, I brushed over the non-Danish oiled side of my wood with mod-podge hard coat.Then covered with my wallpaper, cut any excess off and pressed down everywhere with the brayer and left to dry for an hour.
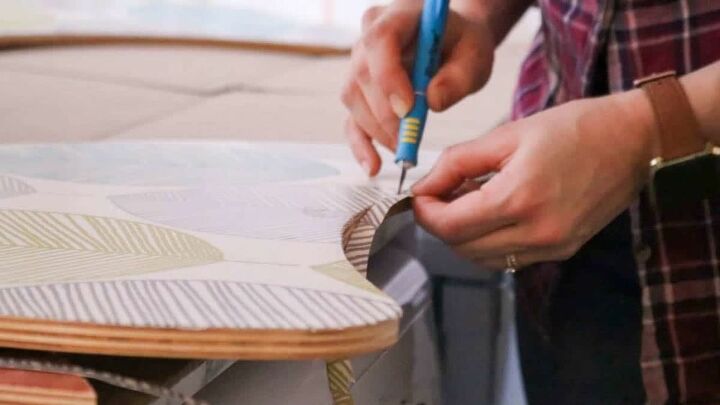
Now carefully remove as much excess of the wallpaper as possible with a scalpel.Then very gently using a hand sander, sand downwards only along the edge to remove the final bit of excess left behind.
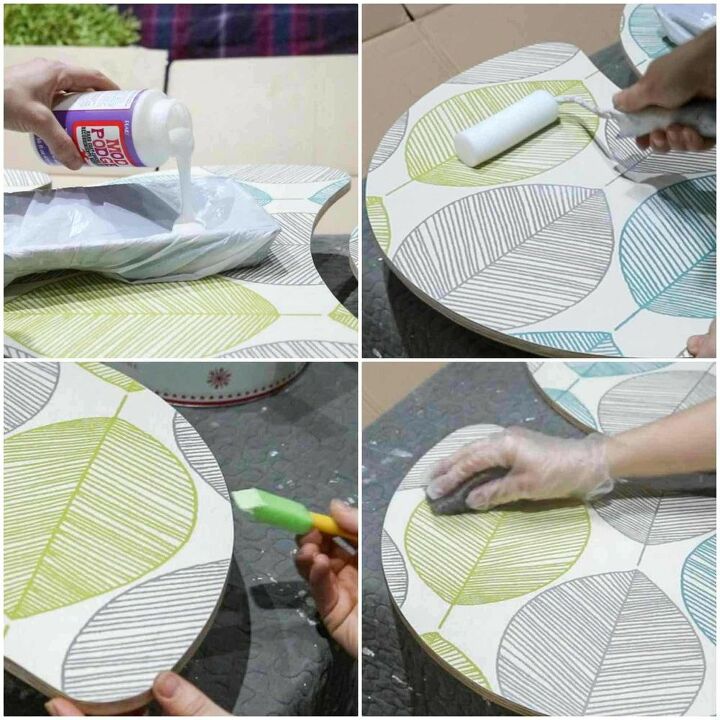
To seal, apply a thin coat of the mod podge hard coat with a foam roller all over the wallpaper and sides.Leave to dry for 20 minutes, then gently buff with ultra fine wire wool - this takes about 30 seconds, but you must wear gloves to prevent splinters.Repeat about 5 times.
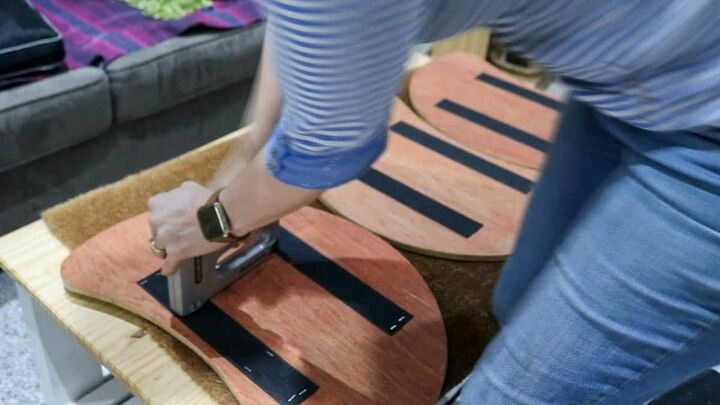
Staple gun two strips of large velcro to the base. You MUST ensure the staples are small enough so they don't go straight through the plywood.I tested with an off cut first.
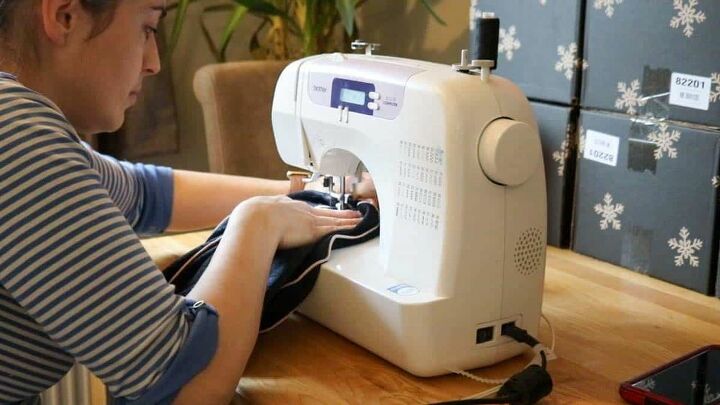
Then sew the matching velcro strips to the cushion and you're done!
{
"id": "6007580",
"alt": "",
"title": "",
"video_link": "https://www.youtube.com/embed/hXFmSvMsf0g",
"youtube_video_id": "hXFmSvMsf0g"
}
{
"width": 634,
"height": 357,
"showRelated": true
}
Resources for this project:
See all materials


Any price and availability information displayed on [relevant Amazon Site(s), as applicable] at the time of purchase will apply to the purchase of this product.
Hometalk may collect a small share of sales from the links on this page.More info

Want more details about this and other DIY projects? Check out my blog post!
Comments
Join the conversation
2 of 10 comments
-
You have done good information on this article and You have written well on above topic and also thanks for sharing with us.
-
good i like this..


Frequently asked questions
Have a question about this project?