


How to Flip an Outdated Dresser Into Whimsical Fabric With Paint!
3 Materials
$186
4 Hours
Medium
I was riding my bike to the nearby trails when I came across this antique dresser sitting on the curb. Hmmm... I was in the market for a dresser to store craft and sewing supplies, so I delayed my ride to check the dresser out!
The drawers were SO deep and super flat, which makes them easy to transform. And the dresser was a sturdy as a rock. Plus... free! All super good candidates I say!
SOLD! Ok, maybe more like good find + free = mine!
Once I got the dresser home, I placed it inside my sewing / guest room, dreaming up a design that would marry the rest of the room and the given task at hand...
And that's when it hit me. If the dresser is to store fabric, why not paint the dresser to look like fabric?!
So I did... and here's how it turned out!
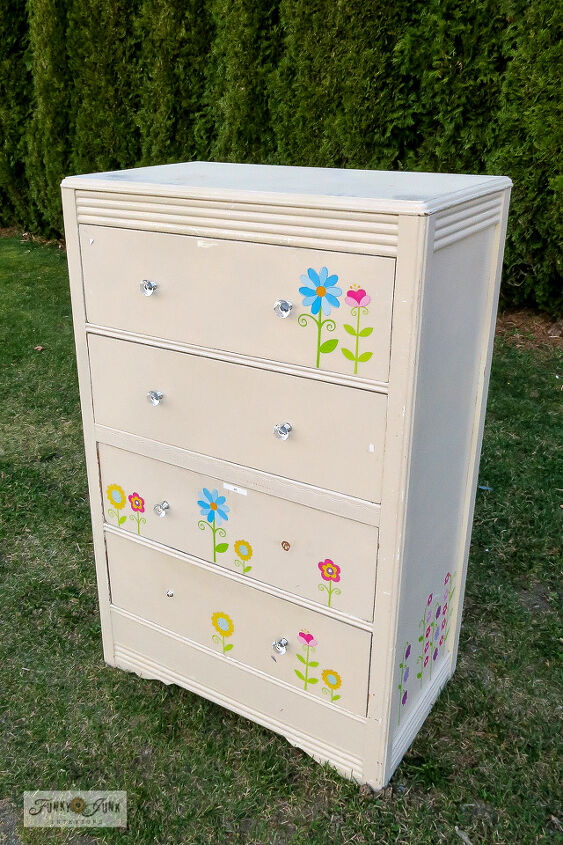
Upon first glance, this was previously a little girl's dresser that was no longer desired.
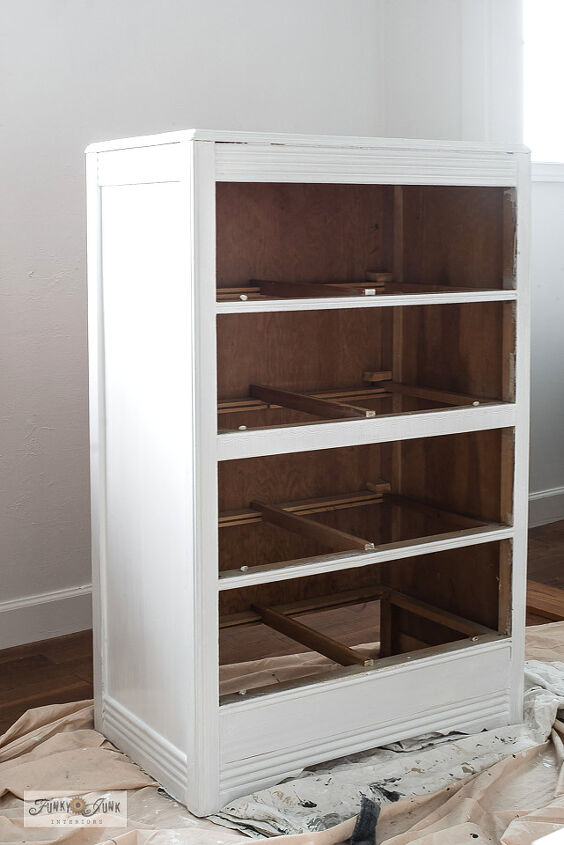
Once I got the dresser home, the decals were removed, then it was washed down, then lightly sanded with a palm sander to prep the surface for new paint.
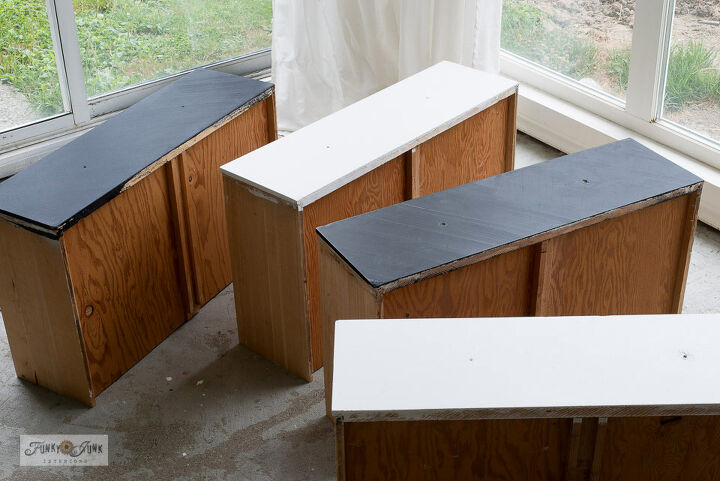
Every other drawer was painted by rotating black, then white.
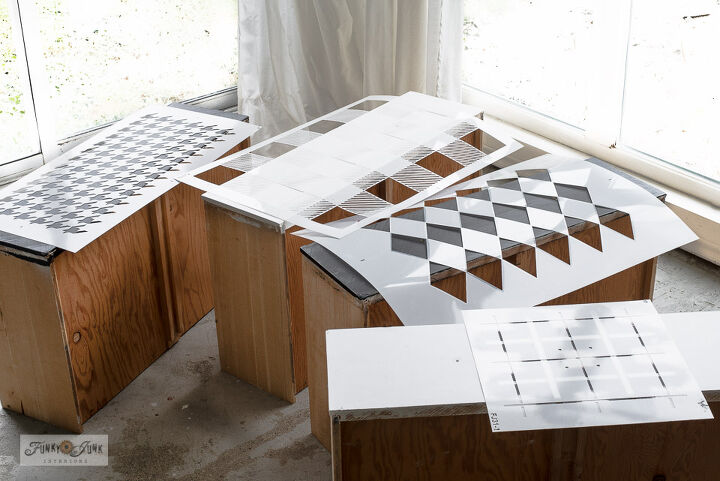
A different patterned stencil was placed on each drawer front. Fun, right?!
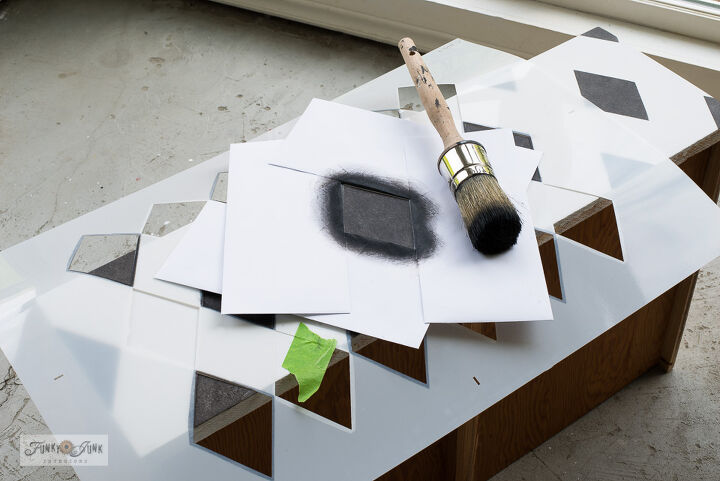
How to stencil patterns:
- I first stenciled every other diamond rotating in black and taupe.
- Once diamonds were complete, a second sheet of thin lines was stenciled on top in a slightly darker taupe.
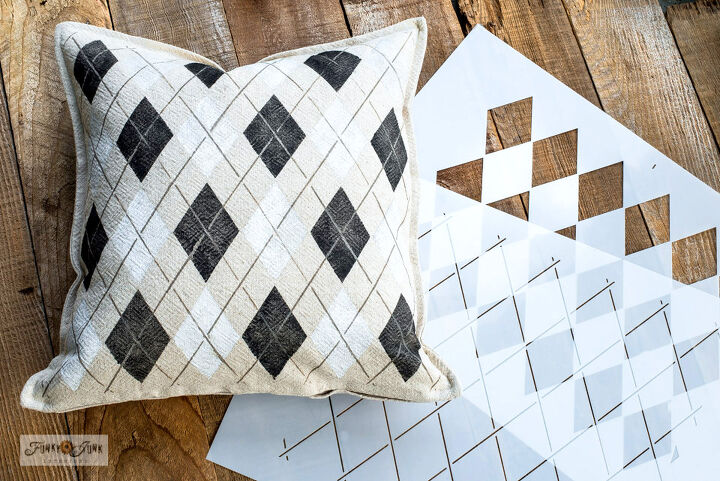
Here is what finished Argyle and the 2-part stencil looks like. Such a beautiful effect!
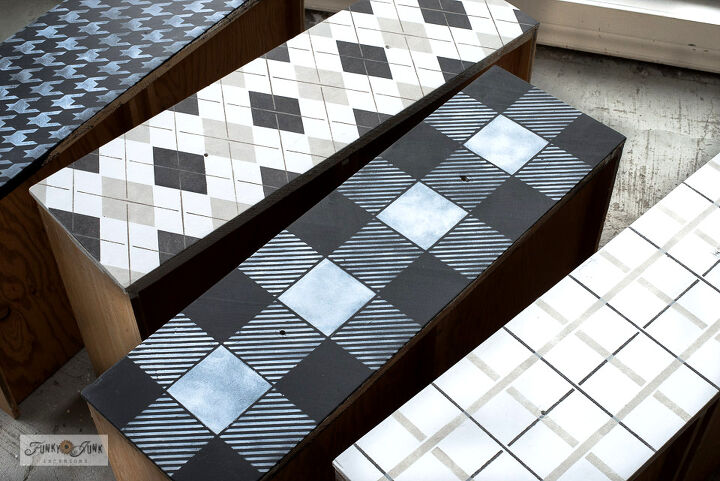
Isn't that painted fabric fun?!
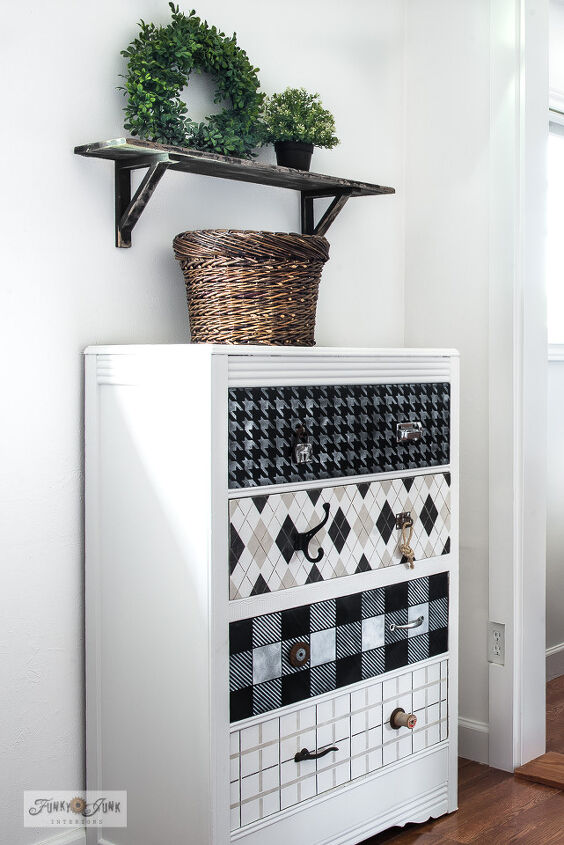
And here is how the dresser turned out!
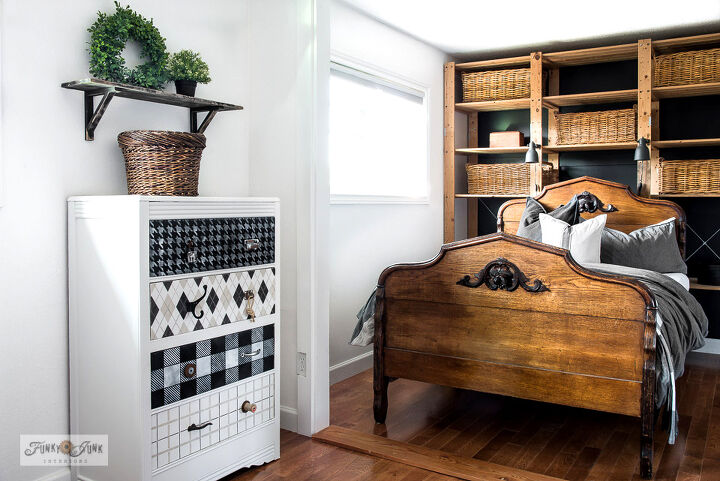
The dresser is SO cool to look at, and boy does it pack a big punch where storage is concerned!
Resources for this project:


Any price and availability information displayed on [relevant Amazon Site(s), as applicable] at the time of purchase will apply to the purchase of this product.
Hometalk may collect a small share of sales from the links on this page.More info

Want more details about this and other DIY projects? Check out my blog post!
Comments
Join the conversation
3 of 79 comments
-
Very whimsical, love it !
-
Very cool!! love the stencils you found. Amazing what a little paint and creativity can do.


Frequently asked questions
Have a question about this project?
I LOVE THE MISMATCHED DRAW PULLS!!!! Just completed the whole creative process!!! Congrats!!
I just love this! I have a old dresser and now I have some ideas to work with!
I have an old dresser that is glossy black. It has some minor damage on the front corner edges. The drawers overlap about 1/4" over the frame. I love your design. Would this work with real fabric, maybe with Modge Podge to hold it on with a sealer over it. I am not much of a DIYer. I would love some suggestions, I have never used stencils.