


I Painted My Couch!

I think you guys are really going to like this project. I painted my couch and it has been featured all over the internet and over 250K views on YouTube. I knew I’d own a pink couch one day and with the cost of re-upholstering this baby, I didn’t think my dream would ever come true, but it did. I made my dream come true. If you’re dreaming about owning a different colored sofa (maybe yellow, blue or green?) I’m here to give you that extra boost of inspiration.
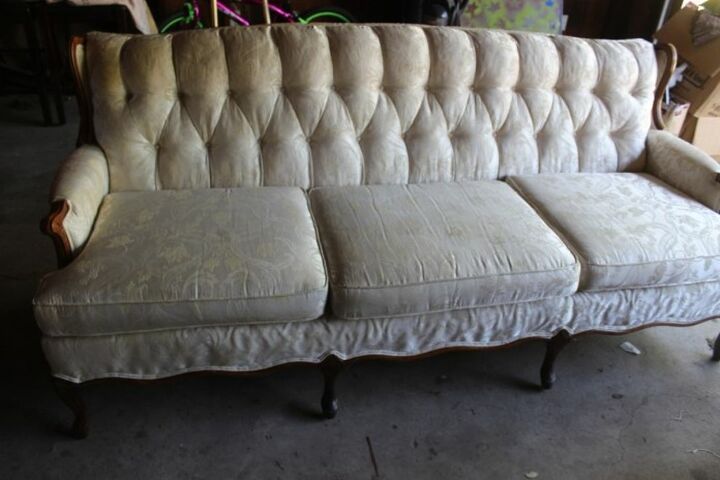
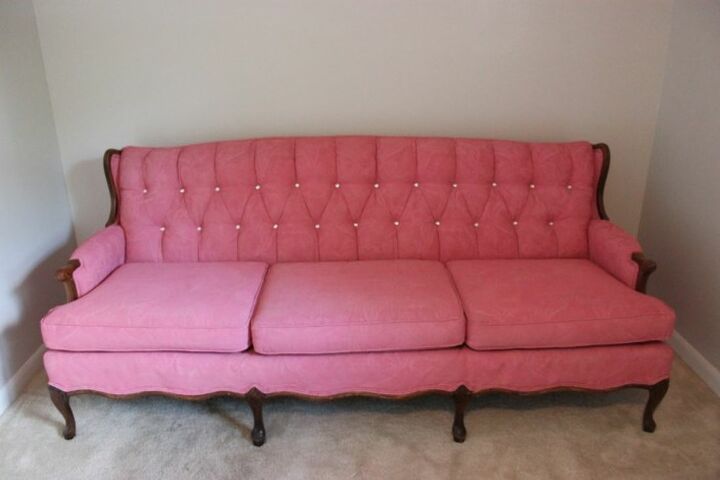
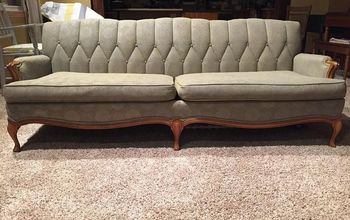
Here is a picture of my couch BEFORE! I really had my heart set on a pink couch from IKEA, but when I went to buy it, they were unfortunately out of stock and it had been discontinued. I found this couch on eBay for $150! It’s a vintage French provincial style sofa with a damask fabric on a solid wood frame. For $150 I couldn’t turn it down. I fell in love with the vintage frame and the measurements were exactly what I was looking for. I bought it asap knowing 1)it wasn’t going to last very long at that price and 2) I could change out the white upholstery. I try not to look at something as it is but look at it things as what it could be. I got some quotes on a pricing to change out the upholstery and it was going to cost over $1k!
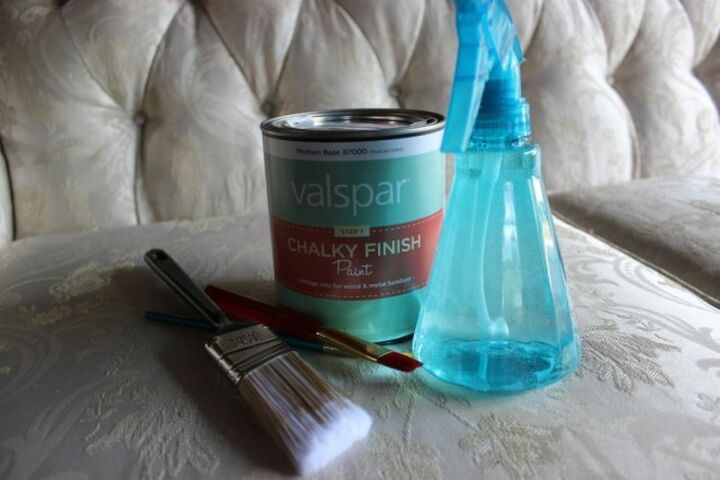
I gave up on that idea because that wasn’t happening. The desire for a pink couch had turned into a need and I wasn’t giving up. After researching several alternative methods, I headed to Lowe’s.I got this chalky paint from Lowe’s. It only comes in select colors, so I obviously got the pink. (This was before I knew you could DIY chalky paint)
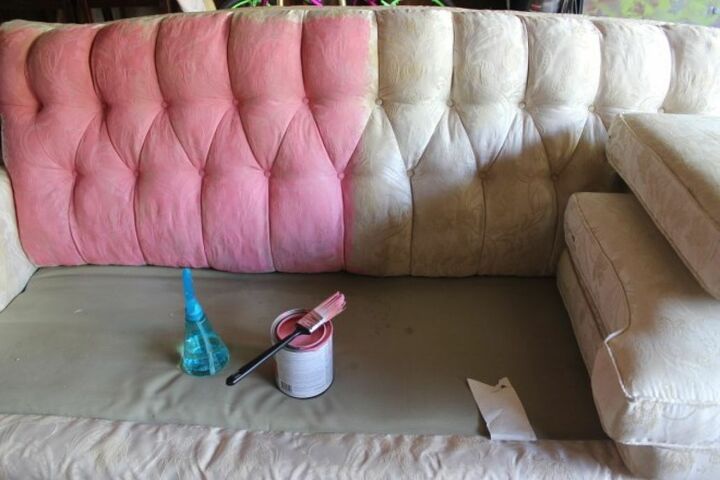
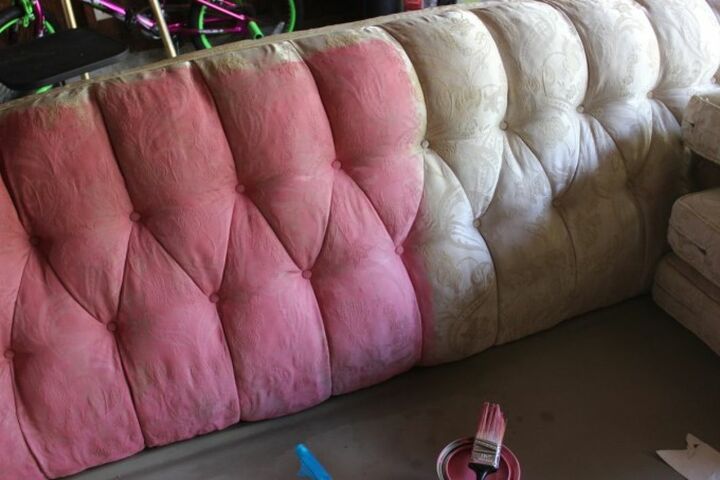
It would be a wise idea to shampoo your furniture with a carpet cleaner prior to paint-dying it. I didn’t have a carpet cleaner on-hand though. I started at the back of the couch just so I could get the hang of it. I used a spray bottle and sprayed down the sofa in sections, ensuring it was extremely wet. Then, I used the chalk paint, working in sections, dying the fabric. Chalk paint when diluted with water, soaks through the upholstery and dyes the fabric. I worked in sections making sure to get the fabric extremely wet and diluting the paint before I applied the paint.{If I could go back in time I would’ve used a round waxing brush and used circular motions applying the paint because my paintbrush didn’t work very well and it took SEVERAL coats and swirling circular motions with that brush to get deep into the fabric crevices.}
After the paint dried I re-wet it and mixed more water with the paint and applied again. I repeated that process and it took me 4 coats of paint and 2 days to finish this project.

After the last coat of paint was dry, I sanded the cushions lightly with fine grit sandpaper to smooth out the surface. Sanding lightly made the cushions feel soft again. This is another reason it’s important to use more water than you think you need. If you don’t use enough water, your cushions will become hard and crunchy.{if you’re painting on leather or vinyl you don’t need to sand}
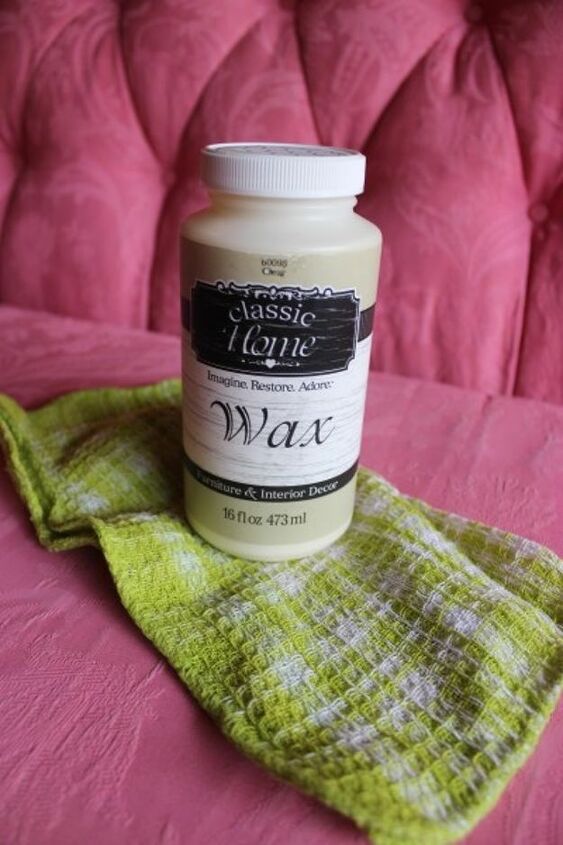
After sanding, I wiped away all the dust and then applied a wax coating to seal the paint. The wax coating is supposed to enhance and protect the furniture so you can clean it. I applied to wax with a rag and worked it into the pores of the paint. Think about it like lotion for your skin. The wax won’t change the color of the paint, but it’s supposed to enhance it.
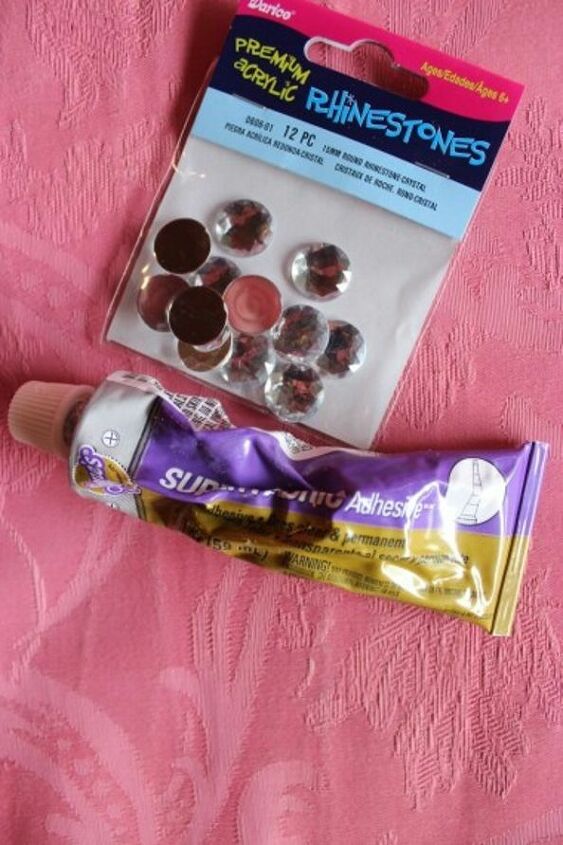
I was loving how this was coming together, but I had to go that extra step. I measured the buttons in the tufting and bought some rhinestones the same size. I applied the rhinestones onto the tufting with fabric glue for an extra pop of glam.
I couldn’t have been happier with how this couch turned out. It makes me happy every time I look at it. I have several FAQ’s and follow up posts about this project because I had so many questions. But the number one piece of advice I can give you is to ensure that you use enough water. You can’t use too much water for this project. Allow the paint to seep into the cushion and dye the fabric. You’re not really painting your couch; you’re dying the fabric. I hope that this post has inspired you to create something beautiful today!
Here is my YouTube video that walks you through each step. Make sure you check out my other videos because I have additional tips as well as a DIY chalky paint recipe!YouTube channel is youtube.com/LaciJaneDIY
Comments
Join the conversation
-
This is stunning, I'm going to try this on my sleigh couch! They wanted almost 2K to re-upholster!!!!
-
Your project is FAB! What a perfect color for this old girl couch! (Now a young glam gal!) Lucky you - well done!


Frequently asked questions
Have a question about this project?
It’s beautiful!!!
how can I get my dark grey loveseat a lighter color like your pink or even teal??
How do I print off a copy of the recipe/instructions card, you included in your video, for painting the sofa? I’ve tried screenshotIng but it cuts off the bottom half with the instructions. Thanks, Ann
Is this a couch that is just for show or can you actually sit on it without getting the paint rub off on your clothes. Either way it is beautiful. Thanks.