


Before and After Front Entry
4 Materials
$5000
4 Weeks
Advanced
Hi I'm Liz from Simple Decorating Tips, a DIY & decorating blog. I love sharing tips and projects I've been working on. This is our new house, showing you the front entry redo.

We bought a late mid-century house that lacked character, but sits on a wonderful double lot, (on the edge of town) that borders 2 ponds. It’s a sweet location and the house being an empty slate, (in my mind) was a bonus.Be sure to pop over to my blog: Simple Decorating Tips, to see everything I've posted on this house renovation! In this post, I’ll show you the before and after pics of the entry. I so love, love, love to take a space that isn’t the prettiest or functioning the best and turn it into just the opposite. That is so much more fun for me than just starting from scratch and building a new structure. I think it’s this crazy mix of puzzle-solving, frugal-ness, and ability to visualize going on in my head.My hope in sharing this with you, is not in any way to brag about what I have. We love our home, and are so thankful for it, but I also know there are plenty more gorgeous homes out there than mine… This isn’t about ‘mine is better than yours’.No, not bragging… my goal is to offer encouragement and inspiration to you on your projects. To give you some simple decorating tips I’ve learned along the way. I am hoping to help you realize that with a little vision and basic design rules applied, an ugly space and/or poorly functioning space can be turned around into a lovely space that functions well.
So, here goes… the front entry before:
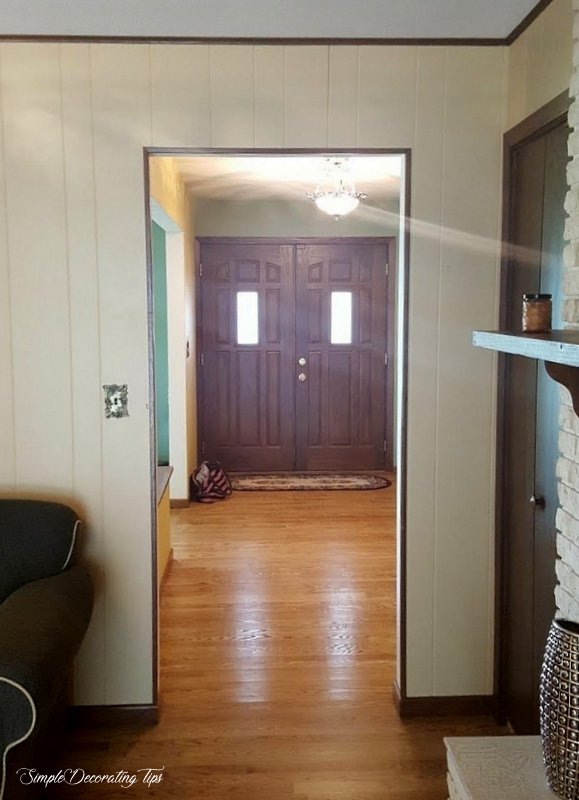
This before picture was taken from what is now our dining room looking towards the front entry. At the time of the picture though, it was a sort of family room. There was a wall with just this small doorway leading to the front room and entry hall.The entry was dark, the double doors didn’t work well, and the space felt completely nondescript.LOL, I just remembered looking at that before picture, how there was nothing that was centered or symmetrical in this house. That lack of symmetry was driving me nuts too. Even that entry light was off-center from the entry door! Moving the wiring for it and pretty much every other light in the house renovation was a must.
First thing we did in the fall when we bought the house (working hard to get the outside stuff done before winter chased my guys in) was to replace the front door:
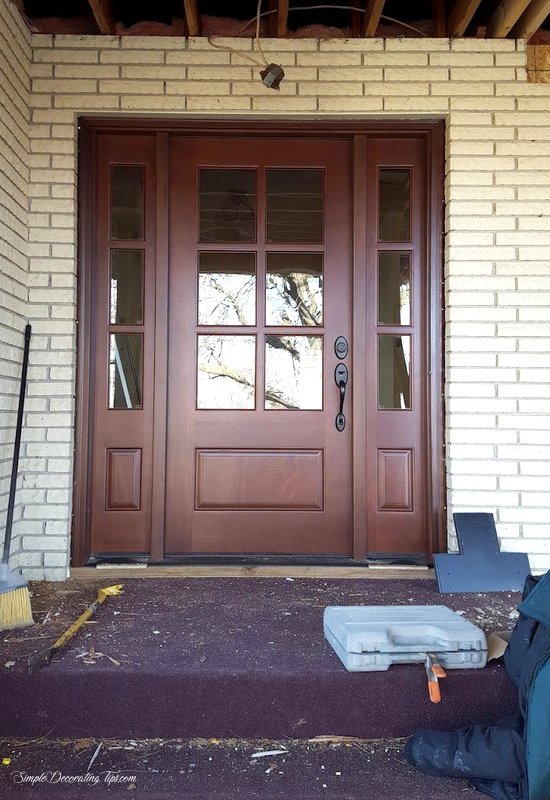
I gotta say, I love this new door!! As I was searching for front doors, I kept in mind that the entry needed more light, (plus, looking from inside out the front door is a beautiful view of the pond). I also wanted an inviting welcome with a traditional-colonial-revival-farmhouse feel. I’m not one that much goes for the doors you frequently see on display, with the busy leaded glass inserts. I like just simple handsome beauty. I found this front door here. After shopping doors and comparing high quality with low quality I was very pleased with this high quality solid mahogany door at this price!
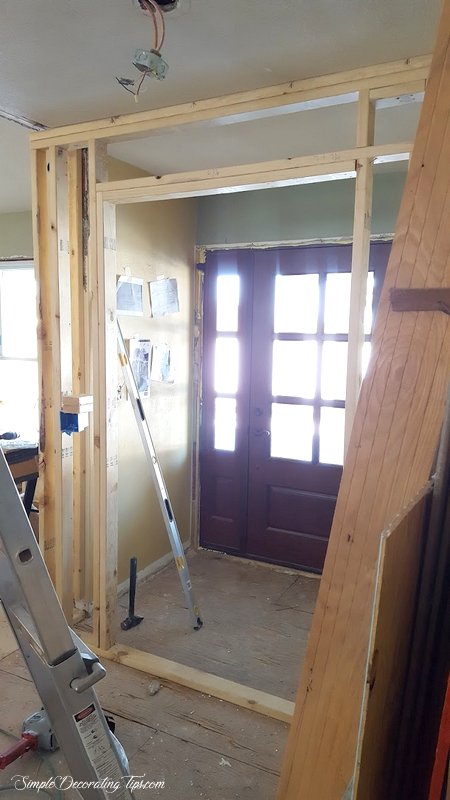
Next we started to remove the walls:
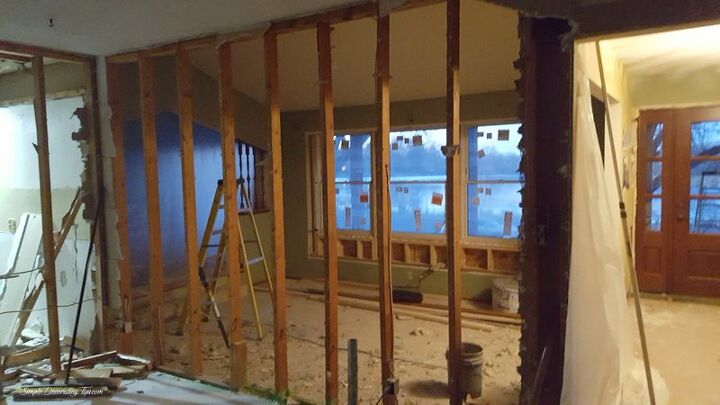
‘We’ is actually my trusty handymen… I did the design plans, ordering and purchasing, coordinating between the contractors, and all the stuff a general contractor would do, as well as all the painting, (except ceilings) but I did not grab a hammer and bang down walls… we left that to our carpenters.The above picture is still taken in what would be our dining room, looking towards the front room and entry (the fireplace I talked about is just to the right of where I was standing when I took that picture) I’m looking towards the living room, (it’s still sunken at the time of this picture)From a different angle, this picture below was taken from standing in the front entry looking back towards the dining room, (now the fireplace I redid would be to the left):
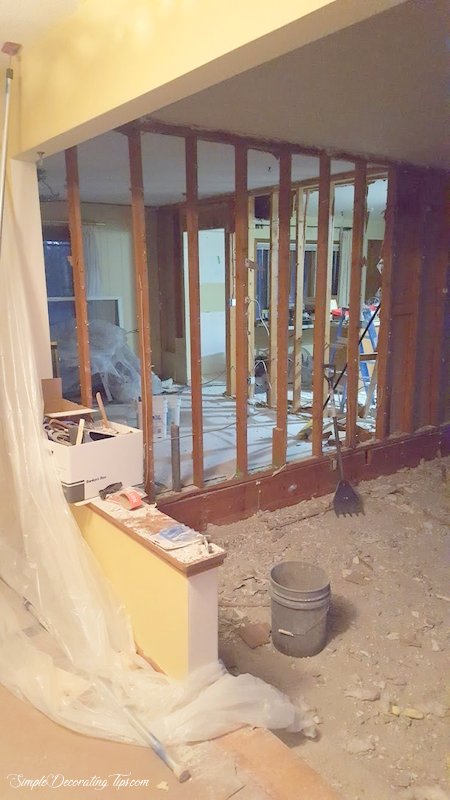
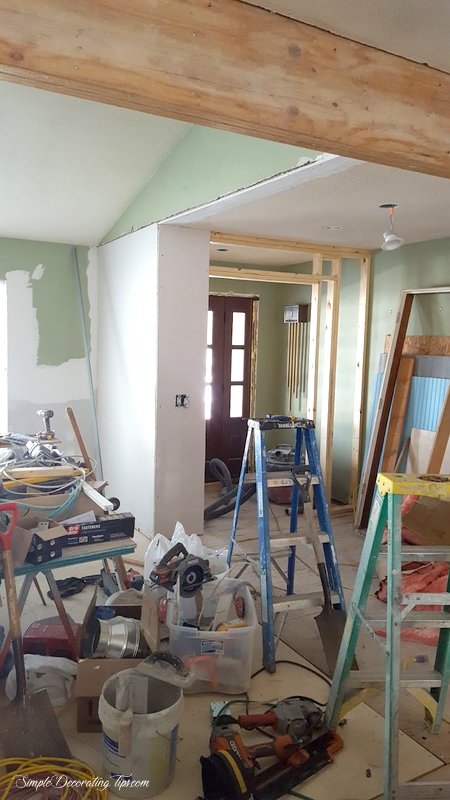
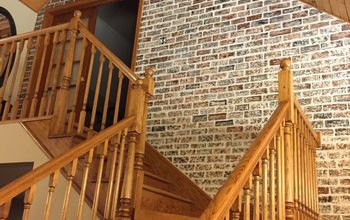
You can see the knee wall with a step down into the living room. All that was ripped out, including the sunken living room floor! That will be a fun one to show you!After the dust settled and all the walls were out, it was time to build a wall.Yup! I felt this entry space needed to be defined. We kept that one little original wall between it and the living room, then added just a wee bit to it, so that the entry was a comfortable 4′ 6″ deep x the already 6′ 9″ width. (This size is pretty much minimal for one to comfortably open the door and greet a guest) Finally, we added a wall across the front of the entry, with a wide doorway that opens to the main part of the house:
Well, barely a wall across it…It has a wide doorway perfectly lined up, (centered and symmetrical!) with the front door and side lights. It has basically just a small amount of wall space on each side of the doorway that still does an amazing job of defining this space as a ‘separate room’, as compared to the previously undefined ‘entry’ that didn’t feel like anything more than the end of the hall flowing into the side hall. With all the wall removal that we did trying to open up the main floor, it may have seemed silly to build a new wall in a slightly different spot across the entry to try to close it off a bit from the main floor, but I think it’s important to have a defined entry if your floor plan will allow it. It makes the entry feel special, and it also makes the entry into the living space feel special too.
**Warning** Design sermon coming up:
In my ‘design head’ the front entry, the entry for guests, is the initial and unique welcome for your guests. I think it should feel like a warm hug beckoning them to come in. Filling the guest with a comfortable self-secure feeling. It is then from there the entrance opens up into the main floor, which then is an open and broader space. I think a defined, single story entry accomplishes this feeling best. Though grand, a double story entry can feel overwhelmingly spacious and make the visitor feel insignificantly insecure in a vast space, instead of that warm personal welcome of a single story entry. Okay, so maybe that is getting a little too ‘design-y’ on you, but there is a lot to be said about how a space is perceived and the feelings it creates inside the person experiencing it. In the picture below, where that big laminated beam is, that is where the wall between the living room and old family room, (now dining room) was. That, now removed wall, was a supporting wall, so it needed to be replaced with a structural laminated beam that was properly supported. Yikes! You can’t just willy-nilly tear out walls in your house because you want an open feel… you must first find out if that wall is a structurally supporting wall and make the proper allowances for replacing that support!So below, you can see that when they framed up the wall dividing the front entry from the front hall, there is a perfect little transom over the open door:
We could have just sheet-rocked over that opening and called it good. But instead we created a stationary transom with some lovely pressed specialty glass.I had seen this particular glass on something many years ago, and loved the style of it. It’s a classic quatrefoil style, and enormously difficult to find! I tried every local glass distributor and retailer I could find within a couple hundred miles… online and on the phone, including the large metro area of Minneapolis and St. Paul, I just came up empty. If it’s somewhere local, I just couldn’t find it!Finally I found it at a single online store and after measuring and re-measuring several times, I ordered it and had it shipped to me.Whew! Carefully packed in a shipping crate it did arrive safely in one piece.Our carpenter created a simple frame in the opening, sandwiching the glass between the frame on each side of the opening. It is a totally subtle design, but adds so much to what could have been just a boring doorway. The doorway is cased, (ie: trimmed all the way around it on both sides) as a traditional doorway would be.
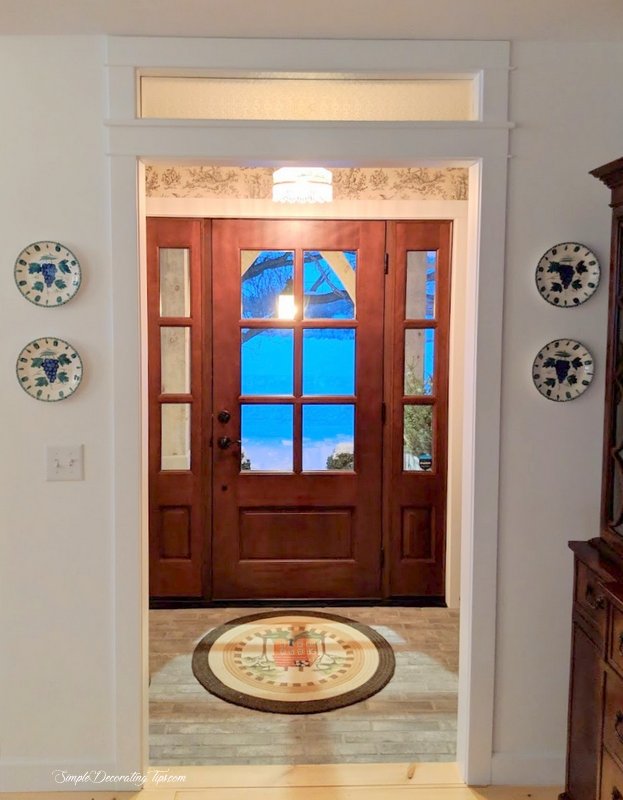
The front entry is done, and I love that little bit of extra lighting the transom lets through it. I also love the settled feel a symmetrical space offers.In the picture below, you can see the barn beam, (which is covering the laminated support beam… I’ll post on that soon… it’s a fun secret I’ll let ya in on):

Now the entry is a warm, inviting, defined space.
The new door is a strong statement from the inside and out.
Besides the feeling an entry gives the incomer, the space needs to serve a purpose as well.
This is our front entry for guests, my husband and I use the back entry when we come home, so our coats and shoes are back in the mudroom. Therefore, we basically only needed to allow the function of the space to accommodate our guests. That does relieve a lot of pressure… everyday coat and shoe storage for a family, or even just the two of us feels mammoth at times. I’d hate to have to have all that storage allotted for in this area!The vintage coat tree is just the right size to work for the needs at hand and it fit in the corner of the entry just perfect. It’s nice that it offers hooks for guest’s coats plus has a little bench if someone needs to sit down to put on their shoes.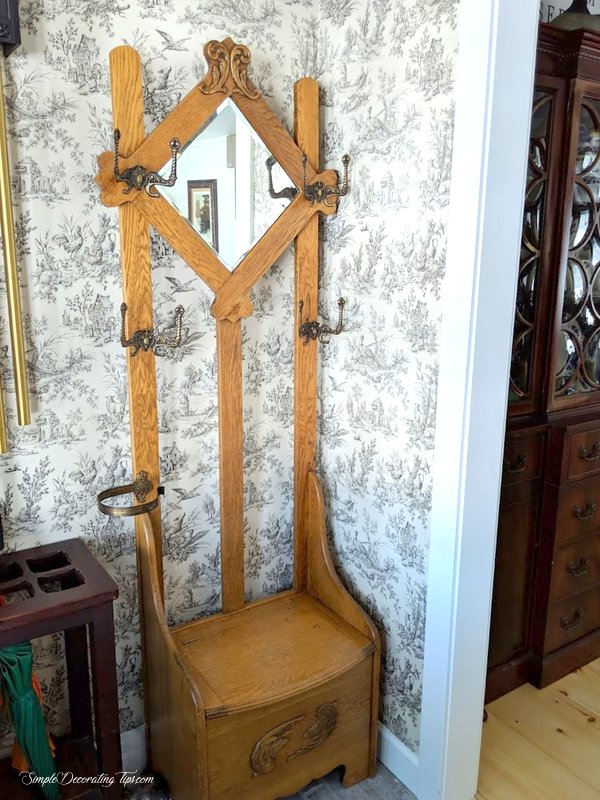
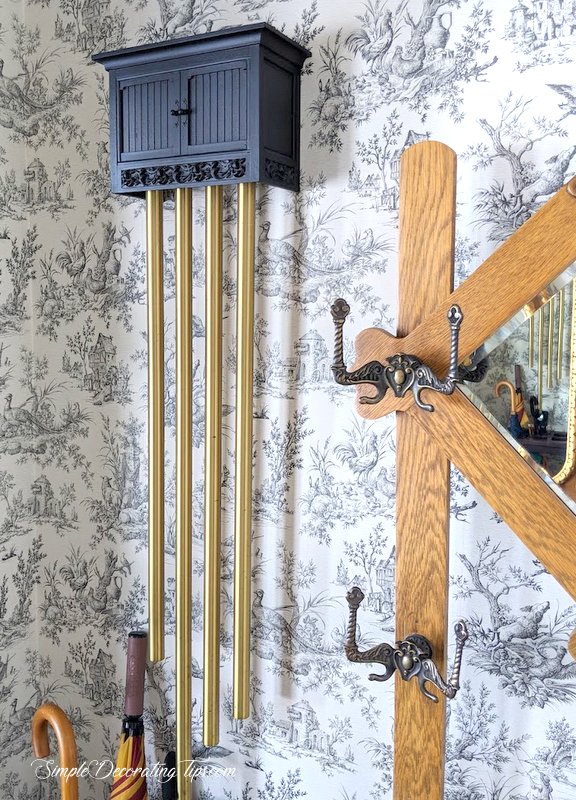
We kept the original doorbell pipe style chimes. They make a beautiful sound when the doorbell rings, and this is quite an expensive unit.Here is a renovation tip: It’s easy to get carried away in a renovation project, trying to instill one’s own style by getting rid of the previous owner’s taste, unfortunately at the expense of wrecking quality pieces! Take care to notice quality as you’re going along… preserve it… either re-use it or take care to get it to a good home where it will be appreciated. I did update the faux oak cover by spray-painting it a satin black color. (I love that spray paints that are designed to paint over plastics are now readily available!
The umbrella stand below the pipes of the doorbell chime is a special piece. I found it at a fun flea market we like to go to when we’re in Maine.
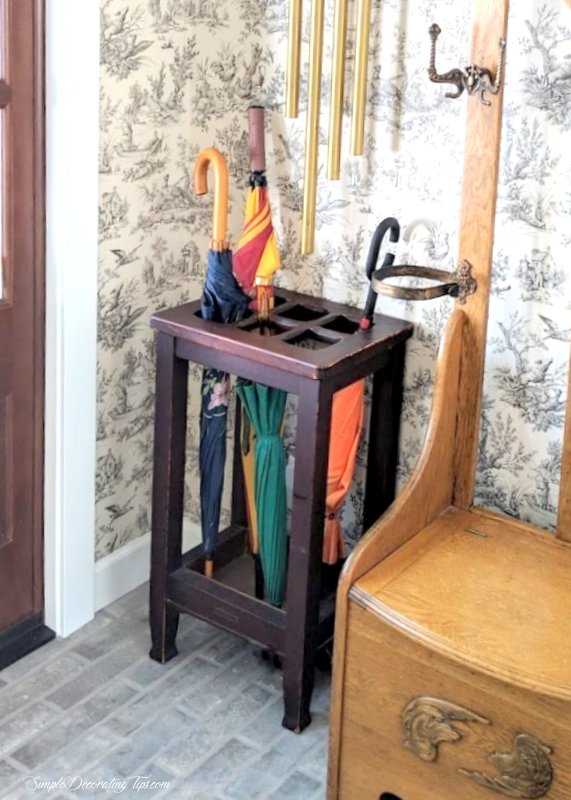
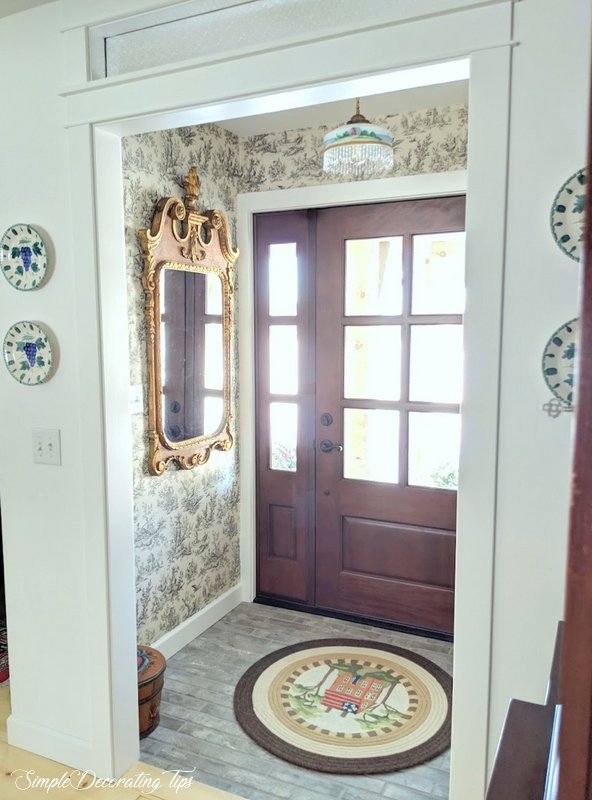
The original brass tag on the bottom front clearly marks it as a Doten-Dunton Desk Co. umbrella stand. Fun to do research on found pieces like this.Another great find…I snagged this large mirror at a garage sale. When I saw it in the corner of their garage sitting on the floor, I loved it, but didn’t know anything about it. At $10 I figured it was worth the risk and a little research!
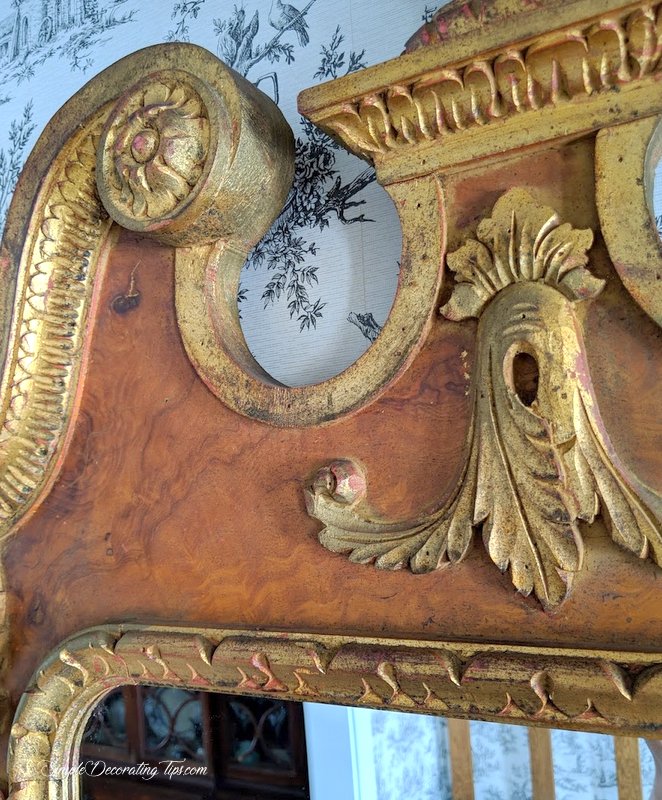
Research showed me this $10 find is a circa 1960’s Italian Federal gilt-wood framed mirror valued in 2018 at $750. That was a good buy! And so lovely! Treasure hunting at garage sales is sooo fun, isn’t it?! What treasures have you discovered?In keeping with ‘the warm welcoming hug’ I want the entry to give our guests, this room, (albeit a teeny-tiny room) has a classic country themed toile wallpaper. See below for a great resource for buying vintage wallpaper.
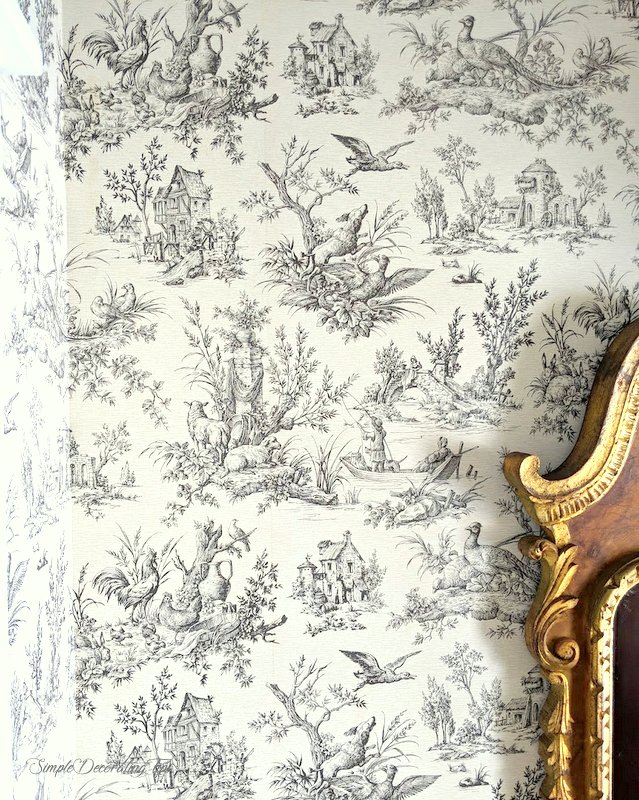
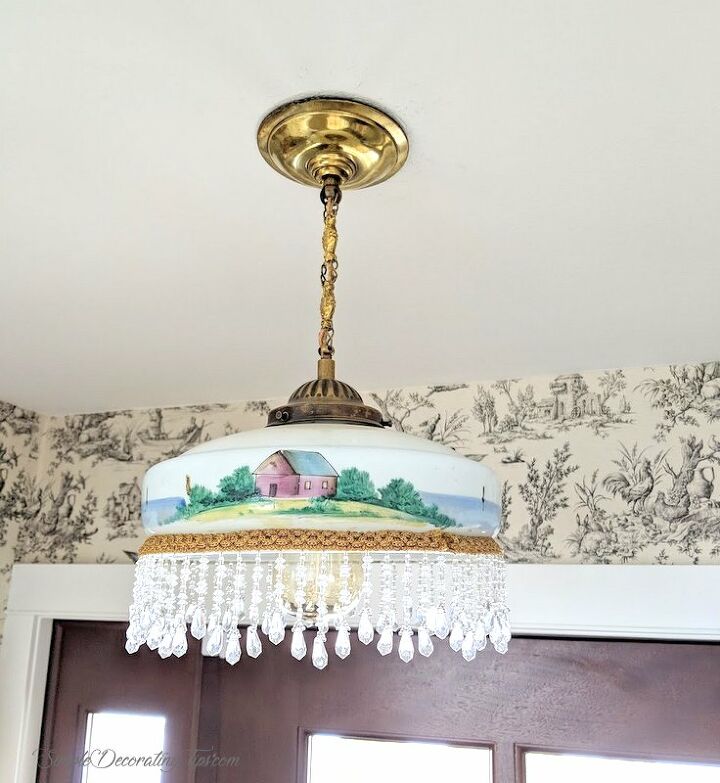
Here is where I found this vintage toile wallpaper! I wrote about the vintage and new light fixtures I used throughout the house, and how I mixed them. Here is where you can find that post.
For the floor in the entry, I selected a brick-look.
The rest of the main rooms of the house have this wide plank pine floor. Though very different, the two rustic styles work great next to each other.A couple weeks ago, when I shared my tip on getting sticky residue off wood floor, I explained how I welcomed dents and bangs… but water soaking in the wood… uh… no. The durability of a waterproof floor in the entry is a must up here in NW Wisconsin. We have snowy boots all winter, so to be able to have a safe spot for the snow to melt, like on this tiled floor, is great.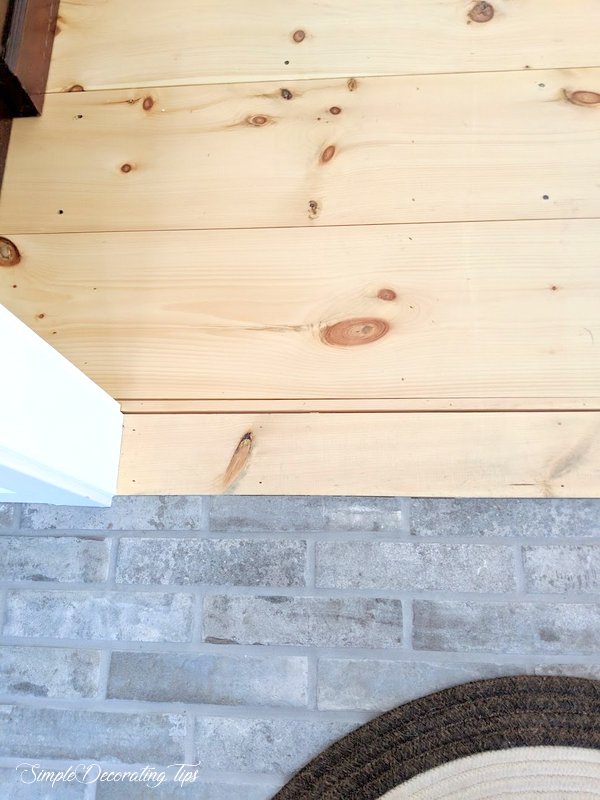
Here is the link for this tumbled aged-looking brick tile floor. (affiliate) It is a super sturdy porcelain tile, yep, I know, it looks totally like brick, but it is a tile, so it installs easy like a tile. The tile comes glazed in a matte finish (so no sealing necessary) and is not at all slippery, plus I love the classic worn look of it!
Resources for this project:
See all materials


Any price and availability information displayed on [relevant Amazon Site(s), as applicable] at the time of purchase will apply to the purchase of this product.
Hometalk may collect a small share of sales from the links on this page.More info

Want more details about this and other DIY projects? Check out my blog post!
Comments
Join the conversation
2 of 31 comments
-
I checked out her blog "WOW". She has some great ideas, I would suggest everyone go there. But to answer your question, she bought it as is on Etsy.
-
This is lovely. And that is my favorite scripture above the china cabinet.


Frequently asked questions
Have a question about this project?
What about the sunken floor... how did you fill it in?
Where did you buy your mahogany front door? It is perfect.