


DIY Entryway Wall Organizer

by
Pam Hoepner
12 Materials
$75
1 Day
Medium
Wish your front entryway was more organized for you and guests? I’m a professional organizer and here’s how we made a functional & stylish DIY entryway wall organizer for our own home.
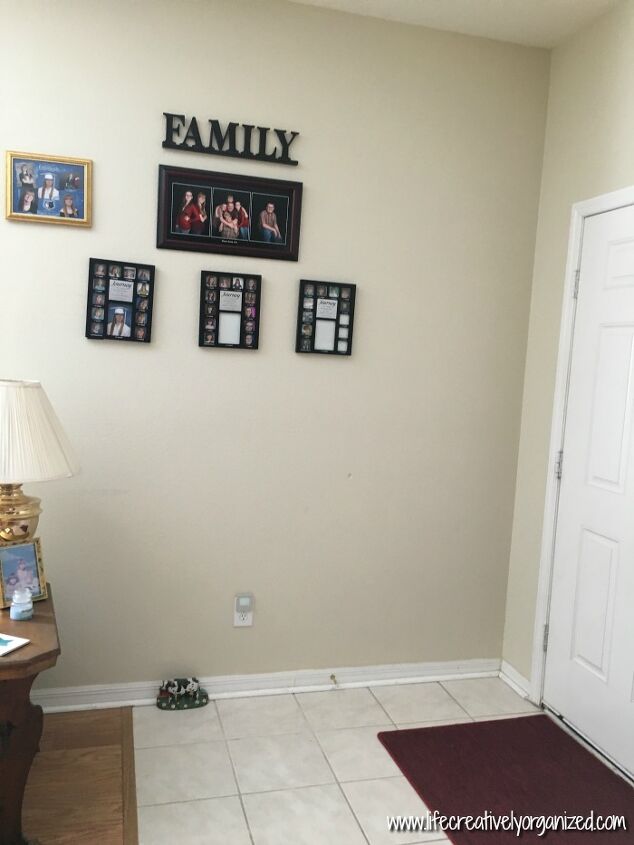
Our problem was when guests came in the front door. We have double front doors and no real “entryway.” The “entryway” is basically a 5′ x 7′ layout of tiles that opens straight into our formal living room and dining room. I didn’t want to take up any seating by using the chairs or sofa in the living room, where guests would sit. We couldn't add anything too wide on the wall because it would get hit when someone opened the door. So, we always had to either pile coats and purses on the (not so big) piano bench or in the breakfast nook, both of which were awkward!
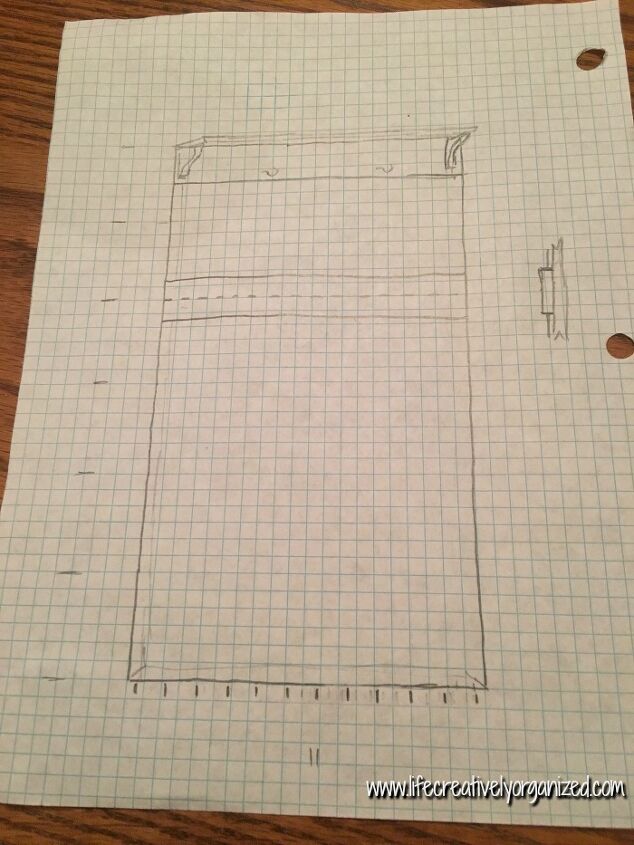
So, my husband got to work and sketched out his own design, based on one we saw online. His design ended up being 72" tall and 39" wide, made of beadboard with a shelf at the top and 5 hanging hooks. He followed the size of the floor tiles (12″ square) so it would fit nicely in our space. And since we were moving in a year, we wanted it to be portable, so we could take it down. This is his drawing.
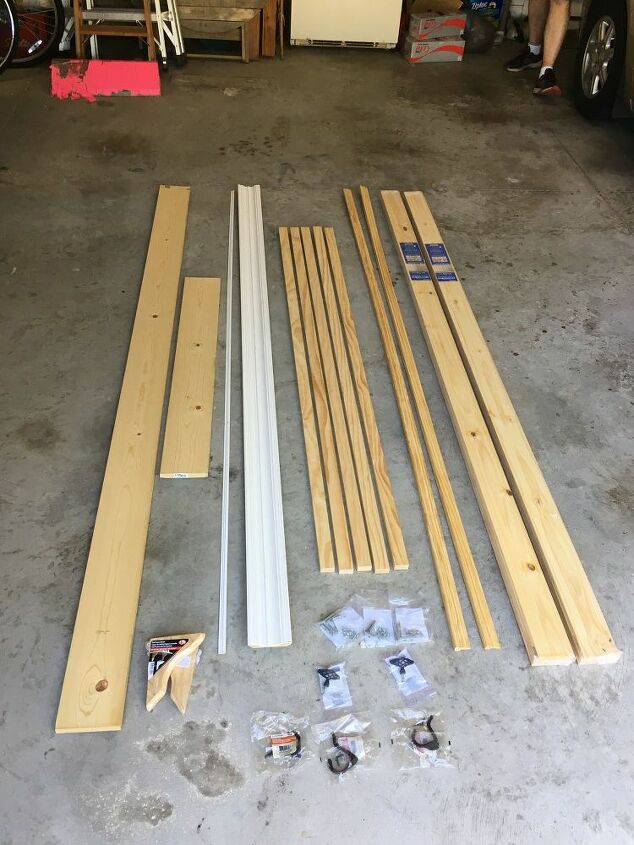
Here are the cut wood pieces. *You can print out the materials and cut lists and view all of the steps at my website. The full materials list is at the bottom of this post. And here is his cut list:
- 1) 1”x6”x8’ pine board: cut into 2 39” pieces + 1 3”x1 ½ “
- 2) 1 piece 1”x6”x4’ pine board: cut 1 39” piece
- 3) 1 8’ piece of 1” shelf trim: cut to fit around edge of shelf with mitered edges
- 4) 5 1”x2”x6’ pine boards: Leave 2 full and cut other 3 in half (to make 6 36” pieces)
- 5) 1 piece crown molding: to fit between shelf brackets (37”)
- 6) 2 8’ pieces of cap trim: cut 2 17 ½” pieces, 2 41” pieces mitered on the bottom, and 1 39” piece mitered on both ends)
- 7) 2 packs 8’ bead board planks (6 pieces/pack): cut 9 17 ½ “ pieces and 9 40” pieces.
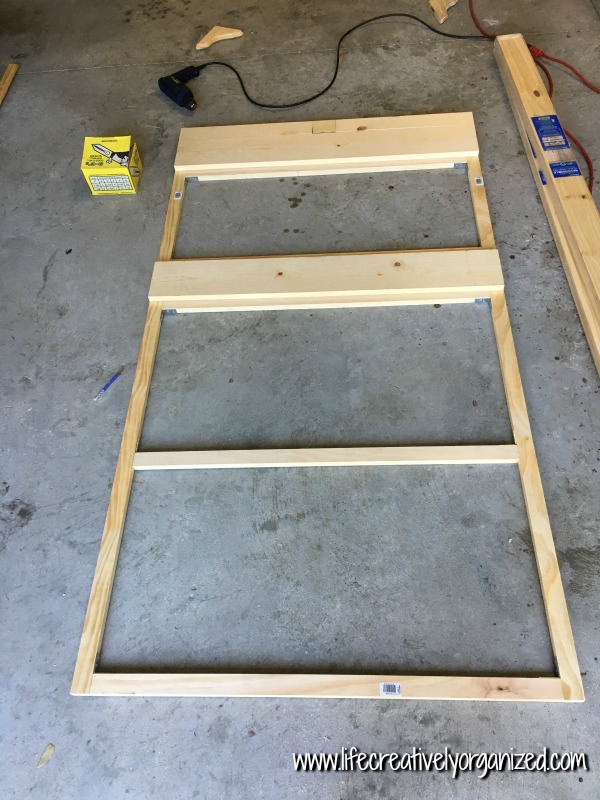
He built the frame using L brackets.
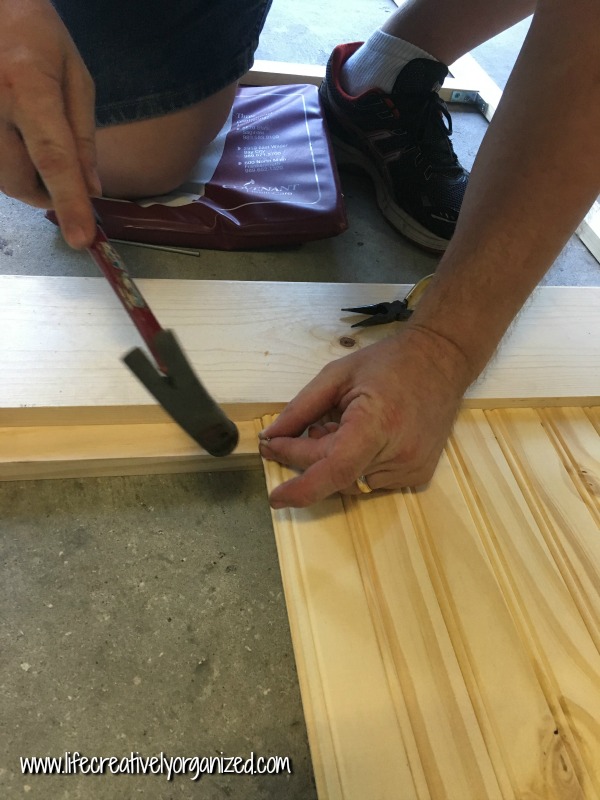
He nailed in the beadboard pieces. Once the beadboard was all in place, he added trim all around the perimeter to give it a finished look.
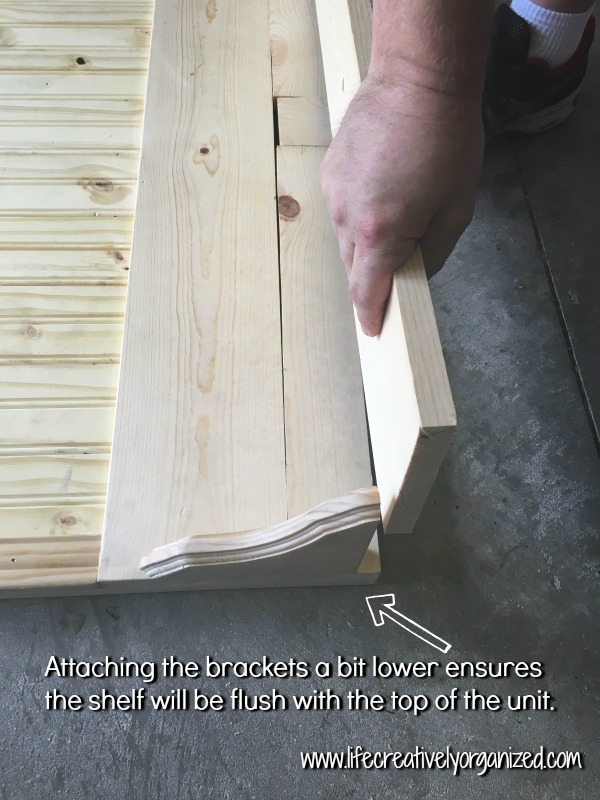
To build the shelf, he added two wooden shelf brackets first. They actually hang from a screw so they were easy to install on the board. Then he attached the actual pine board shelf to the brackets by screwing it down from the top. He then added a piece of crown molding underneath the shelf and trim around the top to give it a finished look.
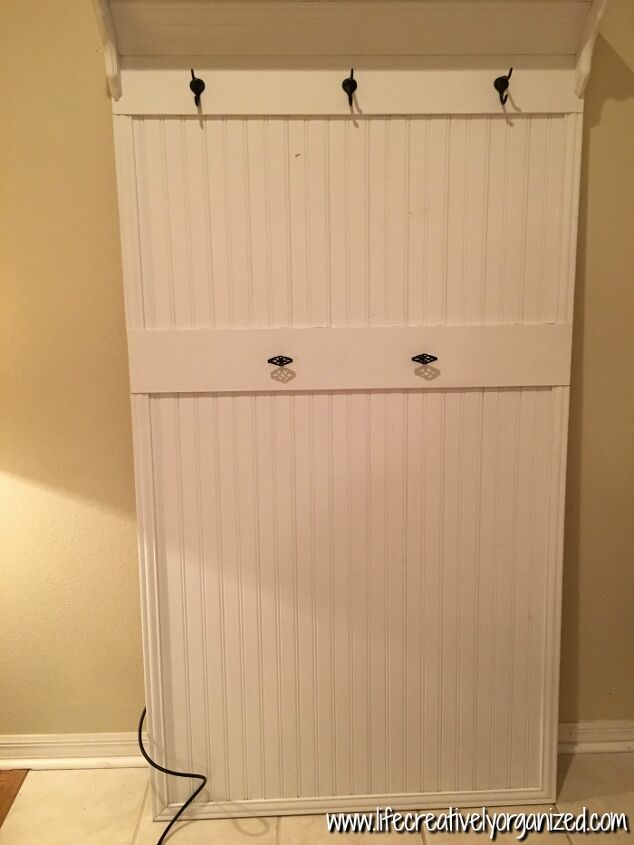
We painted it white, and I picked out (affiliate link) 2 decorative black drawer pulls and 3 black coat hooks to add lots of room for holding guests’ coats, umbrellas, and purses.
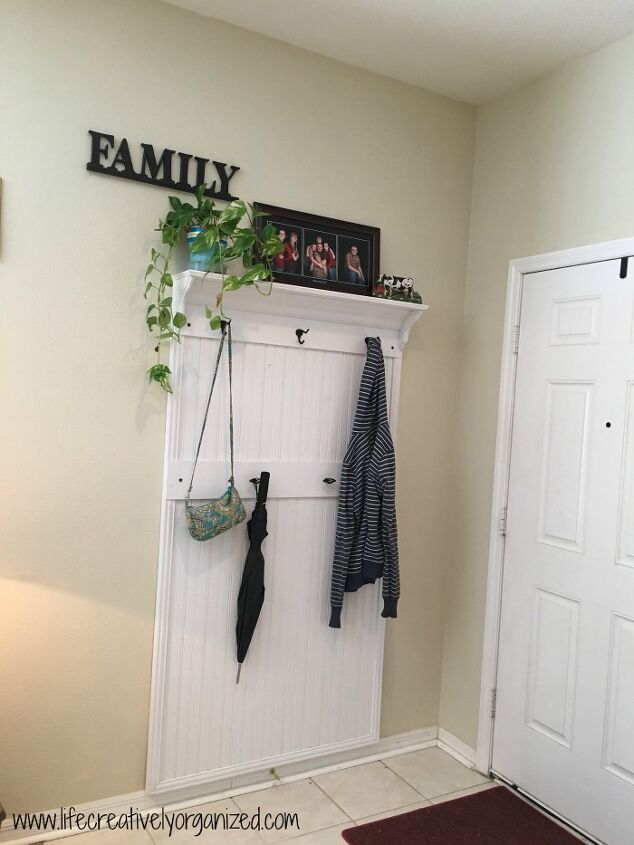
Here is the finished entryway wall organizer. I think he did a great job and I really like the shelf on the top! :) Since we wanted to be able to remove it down the road, we attached it to the wall (which was drywall over concrete block) just above the baseboard with 4 x 1/4” anchor bolts. That way, we'd only need to fill and paint 4 anchor holes.
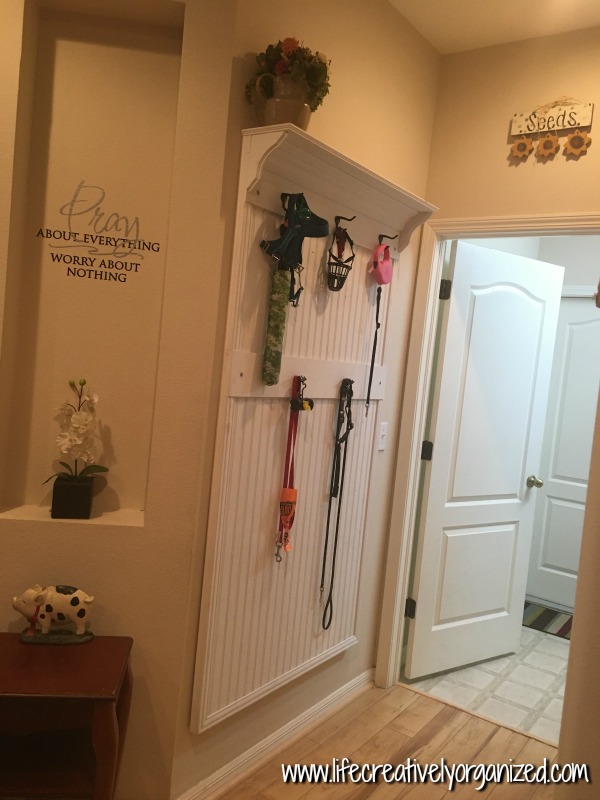
We did move last year, and brought our wall organizer with us. It works great in the big empty space near our garage door!
Resources for this project:
See all materials


Any price and availability information displayed on [relevant Amazon Site(s), as applicable] at the time of purchase will apply to the purchase of this product.
Hometalk may collect a small share of sales from the links on this page.More info
Want more details about this and other DIY projects? Check out my blog post!
Comments
Join the conversation
3 of 90 comments
-
I have the same problem in our unit however I solved it by purchasing an old hall stand and have it against the wall like yours. It has a small bevilled circular mirror, space for umbrellas, hooks for hats and a seat with storage under. It’s timber and I can’t decide if I should paint it white
-
You could put a door knob on it...and tell people it's a magic door that 'only you' can go through. Great job, btw!


Frequently asked questions
Have a question about this project?
Why did you choose to cover up the outlet behind the boards
I have the perfect wall space for your project. I have oak baseboards. I love the white you used. Do you think it would work?
Any pics or ideas on a front closet with rickety louvered doors? Willing to take them off.